Airfix 1/72 F4F-4 Wildcat
| KIT #: | A02070 |
| PRICE: | $10.99 SRP |
| DECALS: | Two options |
| REVIEWER: | Scott Van Aken |
| NOTES: | New tool kit |
| HISTORY |
 When the US Navy went to war, the most modern aircraft
it had was the F4F-3 Wildcat. This aircraft was initially the loser to the
Brewster F2A, which was the US Navy's first all metal, retractable landing gear
fighter. This plane was in service for several years prior to the introduction
of the improved F4F and gave its pilots experience on that type of aircraft.
When the US Navy went to war, the most modern aircraft
it had was the F4F-3 Wildcat. This aircraft was initially the loser to the
Brewster F2A, which was the US Navy's first all metal, retractable landing gear
fighter. This plane was in service for several years prior to the introduction
of the improved F4F and gave its pilots experience on that type of aircraft.
It was the Wildcat that was the main fighter type on board US carriers during the first year or so of the war and even when replaced by the Hellcat and later Corsair, continued to provide quality service on smaller deck carriers in the anti-submarine, convoy protection, and ground support roles. Eventually Wildcat production was turned over to General Motors which continued to improve the type. It was also used quite effectively by the Royal Navy, who never really did have a proper 'made for sea' fighter their designs being two seat 'fighter/recon' aircraft, so relied on US designs to give single seat fighter protection.
| THE KIT |
Airfix
continues the 'replacement' policy of Hornby, though in this case it replaces an
'FM-2' with an earlier Wildcat version. The kit is of the -4 variant which
entered Navy service in early 1942, along side and eventually supplanting the
earlier, fixed wing -3. The benefits of the F4F-4 were a folding wing and
increased armament to six guns. This is amply represented by Airfix in that you
are provided with two
 sets of wings. One for folded wings and one for straight
wings. This undoubtedly accounts for the higher price of what is a Series 2 kit.
sets of wings. One for folded wings and one for straight
wings. This undoubtedly accounts for the higher price of what is a Series 2 kit.
So let's take a look at what we get. There is a solid cockpit floor that has a rear bulkhead on which a seat is attached. A control stick fits in front of it. There are decals for the side consoles and the instrument panel. This latter item has rudder pedals molded onto it and this whole assembly fits into a rear wheel well bulkhead.
This bulkhead has the chain mechanism for retracting the landing gear molded in place. It also contains a pair of wing spar stubs that thread through the fuselage halves. Despite having a solid floor, the two lower fuselage windows are included. If one wishes to purchase a stand, one opens holes in the lower fuselage halves.
The landing gear on a Wildcat is more complex than what you'll find on later planes. Airfix had done a nice job of reproducing this complexity and more than a full page is devoted to this assembly. There is a nicely done engine with a half row in the back that doubles as the forward wheel well bulkhead and a full row in the front. There is a one-piece engine cowling with the small intake scoops already molded on the inside. One would have hoped for the engine accessory section to be molded onto the forward well bulkhead piece, but this will have to be handled by aftermarket.
A one-piece horizontal stabilizer slots into the fin and then
one glues the rudder over it to hold it in place. As mentioned, there are two
different wing options. One is extended and the other folded. There are separate
ailerons for these as on the folded option, the aileron control rods are
disconnected and so the ailerons are spring loaded outboard. I'm not sure just
how sturdy the wing attachment point is for the folded option. The instructions
show the wing attached at a hinge in the inner stub section and on a cover, the
latter of which did not occur on the real plane. There are a pair of jury struts
to attach from t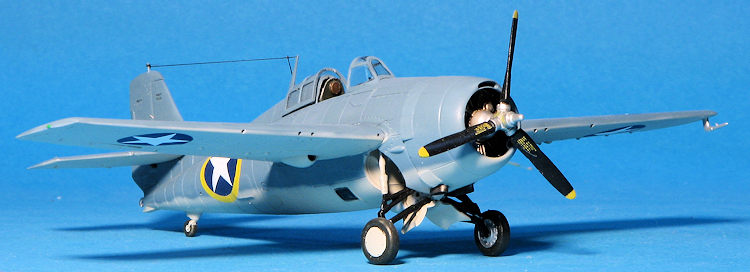 he wing tip to a mounting on the forward edge of the tailplane.
I do not recall ever seeing these items on the plane before so did a google and
sure enough, they are there, though not as large as those on the kit. This may
well be the first time this feature has been depicted on the kit. I'm sure I'll
hear if it is not.
he wing tip to a mounting on the forward edge of the tailplane.
I do not recall ever seeing these items on the plane before so did a google and
sure enough, they are there, though not as large as those on the kit. This may
well be the first time this feature has been depicted on the kit. I'm sure I'll
hear if it is not.
The kit includes two canopy options; one open and a single piece closed version. There is a pilot figure so there is no belt detail on the seat itself. You can also have the tail hook extended or retracted. Unless landing, it will be retracted. The prop looks a bit odd, but nothing I can really put my finger on so it may well be just fine.
Instructions are well drawn and, other than the color and markings diagram, offer only Humbrol paint numbers. Fortunately, we all have a large wall chart that will cross reference these for us. The two markings options are in the early war 'Matt US Dark Grey' over 'Matt US Gull Grey'. There are other paints that have the proper USN blue-grey and USN light grey should this be your wish. The box art option is for Marion Carl's plane with VMF-223 on Guadalcanal in 1942. The second is the pre-June 1942 scheme with the red dots to the insignia and the red and white rudder stripes. This plane is only listed as being with VF-6 on the USS Enterprise.
| CONSTRUCTION |
I thought I'd give this one a go as I've done several Hasegawa Wildcats and it would be interesting to see how this one compares. The first choice I had to make was folded or fixed wings. I am not a big fan of folded wings so decided to build this one with the wings extended. Since the kit comes with both wing types, it immediately cut the mass of the kit by about 20%. I glued the chosen wings, noting that on one wing half, the area on the outside of the aileron was short shot. This is not the first time I have run across this sort of thing in new Airfix kits.
I then assembled the cockpit floor, rear bulkhead and seat. These were then
primered and then painted with Vallejo Bronze Green, which may be too dark, but
certainly isn't the standard US Interior Green. I also assembled the engine and
painted it with Alcl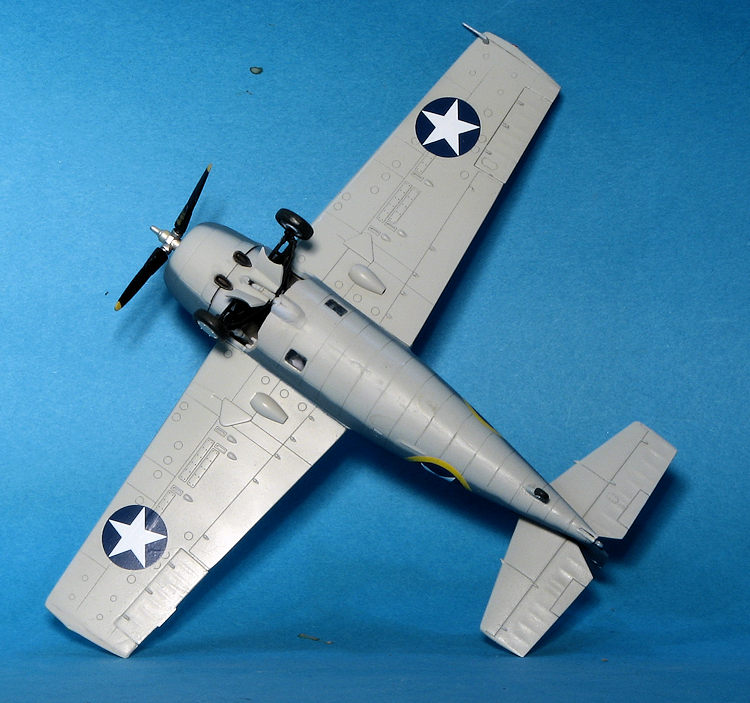 ad II Aluminum with the inside of the cowling in Steel. Then
the instrument panel was installed as was the forward bulkhead. This contains
the detailing for the wheel well. This part of the aircraft is in light grey,
for which I uses FS 16440.
ad II Aluminum with the inside of the cowling in Steel. Then
the instrument panel was installed as was the forward bulkhead. This contains
the detailing for the wheel well. This part of the aircraft is in light grey,
for which I uses FS 16440.
One will be tempted to test fit the cockpit assembly, but don't do it. The little spars on the forward bulkhead piece fit VERY tightly and when I did this, I could not remove the cockpit from the fuselage half. It is important for this to be uninstalled until after one assembles and attaches the landing gear. I glued in the lower windows and started assembling the landing gear.
I had issues with mold mismatch on the gear parts, which made the bits not fit particularly well. I found the assembly of the landing gear to be quite fiddly. Once it had been painted (mostly black), the assembly was installed onto the forward bulkhead and lower fuselage. Since the interior was already in place, it was a bit of work to get everything in place. I then attached the other fuselage half. It was a tight fit as well and I had to use super glue in several areas while squeezing the fuselage halves together. To make matters worse, I found out after the fuselage was together that I forgot a piece! This causes the gear to sit at a more forward angle.
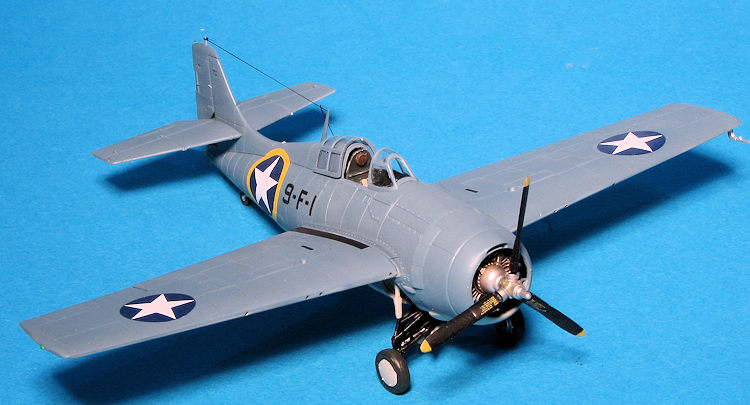
Once the fuselage was cleaned up, the engine was assembled and attached, followed by the cowling. The horizontal stabilizer is such a tight fit that I did not need to glue it. Then it was time for the rudder. This fit well, though the forward section of the upper rudder is a tad too long. Thanks to the soft plastic, cleaning this up is quite easy. As I'd already decided on the fixed wing version, the ailerons were glued in place. Then the wings were attached. The fit here is superb. The radio mast was also glued on after the attachment hole was enlarged enough to get the part to fit.
I then masked the windscreen and canopy, attaching the windscreen with clear paint. I also tacked on the canopy, but since it is wider than the closed version (to fit over the fuselage), there will be a spot that needs touchup. The fuselage windows were masked, the cowling and gear stuffed with tissue and it was off to the paint shop.
| COLORS & MARKINGS |
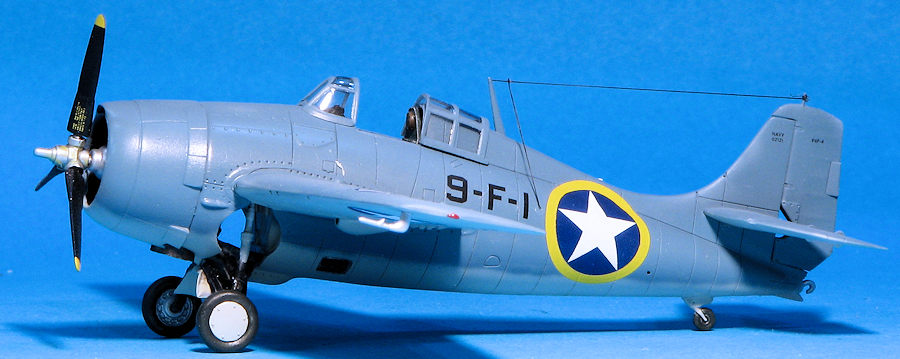
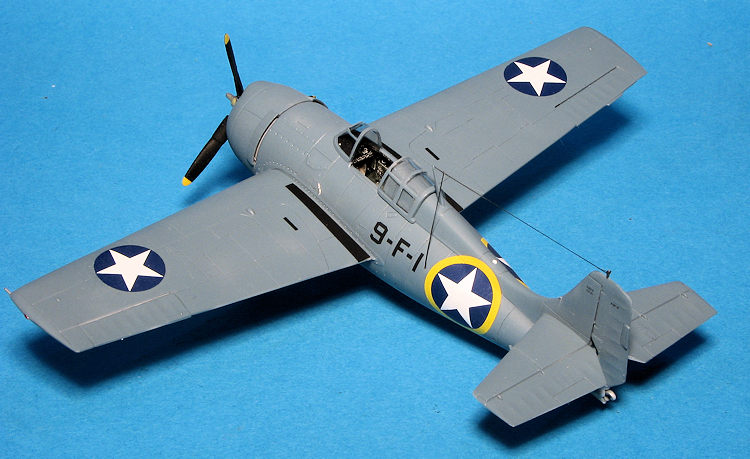
The vast majority of F4F-4s were painted in blue-grey uppers with light grey undersides. Those that survived and were overhauled were given the tricolor scheme, but by then, most Wildcats in the fleet were the four gun FM-1s. Painting is simple enough. The underside was painted light gull grey, along with the outer wheel hubs and the gear doors. I then masked some of the underside bits and painted the rest of the airframe with blue-grey. I used Model Master enamels for this.
The underside was first, followed by some masking to prevent issues with
overspray and the upper shade was freehand painted. I had already chosen a
markings option that had a straight upper/lower dema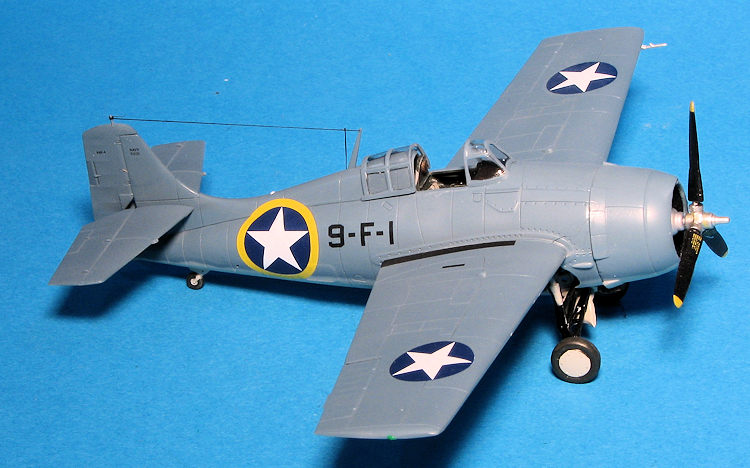 rcation line so it is
important that the lower wings/stabs be properly masked. At this point I should
point out that I wanted to do a desert air force Martlet, but all the early
Martlets were more of an F3F-3/3A than the folding wing and up gunned F4F-4. In
fact, there is no Martlet equivalent of the F4F-4 as the similar airframes
purchased as Martlet IV has the single row R 1820 engine. Airfix lists a Martlet
IV for release this year and it will be interesting to see if they include the
proper engine/cowling. I'm betting they will.
rcation line so it is
important that the lower wings/stabs be properly masked. At this point I should
point out that I wanted to do a desert air force Martlet, but all the early
Martlets were more of an F3F-3/3A than the folding wing and up gunned F4F-4. In
fact, there is no Martlet equivalent of the F4F-4 as the similar airframes
purchased as Martlet IV has the single row R 1820 engine. Airfix lists a Martlet
IV for release this year and it will be interesting to see if they include the
proper engine/cowling. I'm betting they will.
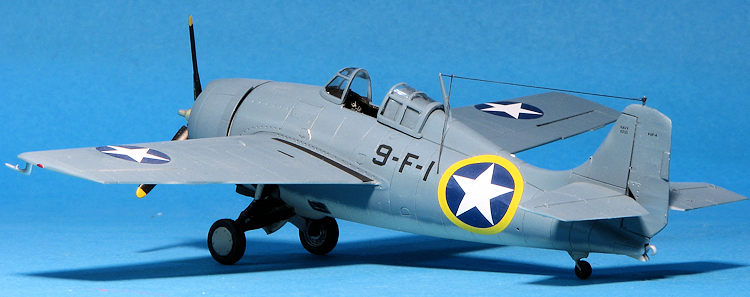
Once all the paint was dry, I gave the airframe a coat or two of clear gloss acrylic and it was on to the decals. I've not done an Operation Torch plane in many years, so scrounged up Superscale sheet 72-821 which had the aircraft of Cdr. John Raby of VF-9 aboard the USS Ranger. Though the decals were printed in 2004, it is always wise to start off with something that can be replaced by the kit decals so I started with the wing walk markings. Those proved successful so I added the rest. Two posers. One is that each set of markings has four small white rectangles, the purpose of which is unknown. The other is that only four insignia are provided for each marking option. There should be six and there is plenty of room on the sheet for the others.
After those were on, there were a few more bits to add. This included the exhaust, wheels, pitot tube and prop. The prop that came with my kit was not properly formed as the blades jut forward about 10-15 degrees and look very odd. Thankfully, the soft plastic allows them to be bent back a bit to where it looks more normal. The airframe was then given a coat of clear semi-matte to seal in the decals. I then removed the masking, popped off the canopy and painted under it. The formation lights were painted and I used EZ line for the antenna. This was a bit tricky as installing the feed wire without it pulling down on the main antenna took quite a bit of fussing. Eventually it was installed and that was that.
| CONCLUSIONS |
 I was
initially surprised at the SRP of the kit, but once I realized that you get two
complete wings, the reason for it not being $8 became evident. Were I a more
brash reviewer, I'd say 'dump all your other 1/72 F4Fs as this one is the best'.
However, I'm not and will say that while this is certainly the best F4F-4 yet
modeled in this scale, it is also a bit fiddly to build when it comes to the
main landing gear and as you can see, it is easy to leave bits off. I like the
folded wing option despite it not being something I'd do and am glad Airfix
included it. I wouldn't go tossing your Hasegawa kits as of yet as they still
build into very nice models and are easier to build. Same goes for the Academy
kit, despite the shape glitch around the cockpit (the opening sides are curved
and should be straight).
I was
initially surprised at the SRP of the kit, but once I realized that you get two
complete wings, the reason for it not being $8 became evident. Were I a more
brash reviewer, I'd say 'dump all your other 1/72 F4Fs as this one is the best'.
However, I'm not and will say that while this is certainly the best F4F-4 yet
modeled in this scale, it is also a bit fiddly to build when it comes to the
main landing gear and as you can see, it is easy to leave bits off. I like the
folded wing option despite it not being something I'd do and am glad Airfix
included it. I wouldn't go tossing your Hasegawa kits as of yet as they still
build into very nice models and are easier to build. Same goes for the Academy
kit, despite the shape glitch around the cockpit (the opening sides are curved
and should be straight).
9 September 2016
If you would like your product reviewed fairly and fairly quickly, please contact the editor or see other details in the Note to Contributors.