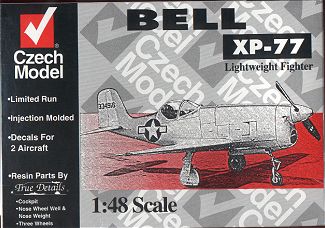
CzechModel 1/48 XP-77
Kit # :4803
Price: $19.99 MSRP
Media: Injected plastic with resin parts
Date of Review:27 December 1998
Review and Photos by: Scott Van Aken
 If you
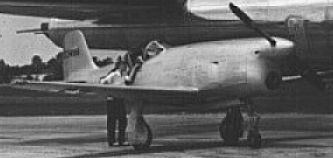
want to talk about pocket rockets circa 1942, then the XP-77 has to be it.
Designed to be a point defense fighter using non-strategic materials,
the XP-77 was designed around the 520 HP Ranger XV-770-7 twelve cycinder,
inline, air cooled engine. It was built of resin-bonded Sitka spruce.
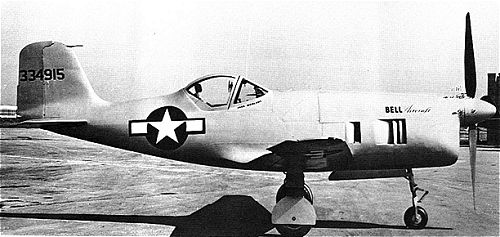
While six aircraft were initially ordered, only two were built: 43-34915
and 43-34916. By the time of the first flight on 1 April 1944, the
need to conserve strategic materials was no longer relevant. Also not
needed was a lightweight point defense fighter.
If you
want to talk about pocket rockets circa 1942, then the XP-77 has to be it.
Designed to be a point defense fighter using non-strategic materials,
the XP-77 was designed around the 520 HP Ranger XV-770-7 twelve cycinder,
inline, air cooled engine. It was built of resin-bonded Sitka spruce.
While six aircraft were initially ordered, only two were built: 43-34915
and 43-34916. By the time of the first flight on 1 April 1944, the
need to conserve strategic materials was no longer relevant. Also not
needed was a lightweight point defense fighter.
Despite this, testing went on at a slow rate. General handling was satisfactory, but the aircraft was found to be to slow (max speed 328 mph) and with too poor a rate of climb to be a viable interceptor. One of the two aircraft, 43-34916 was lost on 2 Oct 1944 while in an inverted spin, the pilot successfully leaving the stricken aircraft. 915 survived the war and was displayed in Wood City, NY for a time. It's eventual fate is unknown, and the aircraft disappeared into obscurity.
Along comes Czech Model with the first example of this tiny aircraft
 in 1/48. This
is a typical Czech low pressure kit with resin bits by True Detail and canopies
by Falcon. Sounds like an LTD kit doesn't it. Well, not only
does it look like an LTD kit, it is brought to you by the same people
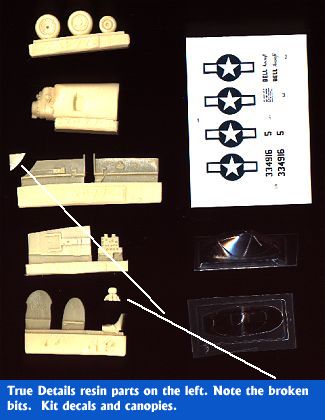
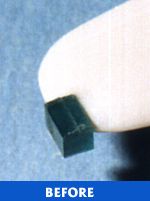
who gave you LTD; MMD or Squadron. However, it does have neat resin
bits. As you can see from the image on the right, a couple of mine were
broken. You get a full interior, new wheels and a nice combination
engine front and front wheel well. Hopefully this mass of resin is
enough to prevent tail sitting as the XP-77 landing gear were pretty close
to each other. You can also see the canopies and the decals (to quote the
box top "Decals for two aircraft". Yeah, by changing the last digit
of the serial number! Oddly enough, the resin parts look nothing like
the kit parts they replace, which makes one wonder which is more correct!!
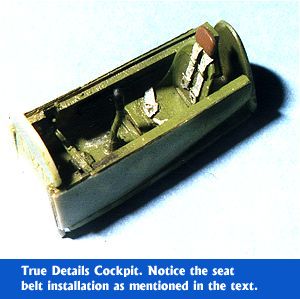
Also, in places, the resin parts are a bit crude. For example,
it is obvious that the seat belts were made by putting in a piece of cloth
and then supergluing Waldron buckles on top of the belts. The belts
were then superglued to the seat as the blobs of superglue are evident in
the resin parts. Pretty shoddy!!
in 1/48. This
is a typical Czech low pressure kit with resin bits by True Detail and canopies
by Falcon. Sounds like an LTD kit doesn't it. Well, not only
does it look like an LTD kit, it is brought to you by the same people
who gave you LTD; MMD or Squadron. However, it does have neat resin
bits. As you can see from the image on the right, a couple of mine were
broken. You get a full interior, new wheels and a nice combination
engine front and front wheel well. Hopefully this mass of resin is
enough to prevent tail sitting as the XP-77 landing gear were pretty close
to each other. You can also see the canopies and the decals (to quote the
box top "Decals for two aircraft". Yeah, by changing the last digit
of the serial number! Oddly enough, the resin parts look nothing like
the kit parts they replace, which makes one wonder which is more correct!!
Also, in places, the resin parts are a bit crude. For example,
it is obvious that the seat belts were made by putting in a piece of cloth
and then supergluing Waldron buckles on top of the belts. The belts
were then superglued to the seat as the blobs of superglue are evident in
the resin parts. Pretty shoddy!!
 This also
brings up the question of whether anyone actually builds these kits
once they add in the parts and before they hit the market. From the struggles
I had with the resin cockpit, I would say NO! Well, enough whining
from me, now on to the kit itself.
This also
brings up the question of whether anyone actually builds these kits
once they add in the parts and before they hit the market. From the struggles
I had with the resin cockpit, I would say NO! Well, enough whining
from me, now on to the kit itself.
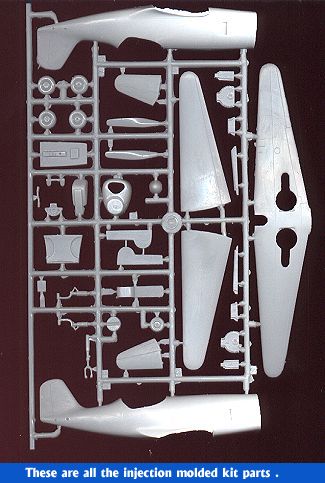
As you can see from the image on the left, the kit is in standard grey plastic with large gates and a bit of flash on all parts. What you cannot see are the rather large posts on the other side of the larger parts like the wing and fuselage inner surfaces. Nothing horrible, but something that needs sanded down prior to construction.
Thanks to the True Details resin parts, nearly a quarter of the kit plastic can be discarded. It makes me wonder what the non-augmented it would be like as the rather large intake would have zilch behind it! Anyway, you can see that there is a blanking plate/wheel well to put under the fuselage center section. The main gear wells are woefully too shallow, but are acceptable.
The first step was to build the interior. If you try to build it as
it looks like it should, it will be much too wide to fit. In addition, the
rear cockpit bulkhead that is supposed to blank off the rear sits too low
to be able to do that. This means that you need to make a proper rear
bulkhead from card.
 Now, since
you have had to 'squish' the cockpit to fit, the front bulkhead is too wide
to fit and requires some trimming. Oddly enough, the new instrument
panel fits perfectly!! The interior was painted chromate green using Testors
Model Master paints. It looked way too yellow so the parts were
resprayed with Aeromaster Mitusbishi interior green and when dry, the Testors
was misted over it. Much better!
Now, since
you have had to 'squish' the cockpit to fit, the front bulkhead is too wide
to fit and requires some trimming. Oddly enough, the new instrument
panel fits perfectly!! The interior was painted chromate green using Testors
Model Master paints. It looked way too yellow so the parts were
resprayed with Aeromaster Mitusbishi interior green and when dry, the Testors
was misted over it. Much better!
While all that was drying, the wings were constructed. After removing
the molding lugs, the wings were sanded. Test fitting showed the upper wings
to be warped up while the lower wing was flat. Hmmm. There is also
a center section to be fit. Well the center section was glued into
the lower wing and some fiddling and dry fitting of the upper wing was done
to ensure proper placement. Next the wings were glued on the outer sections
first, then clamped.
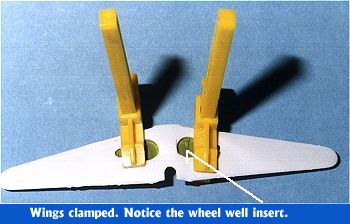 When that
was dry, the inner sections were glued and clamped.
When that
was dry, the inner sections were glued and clamped.
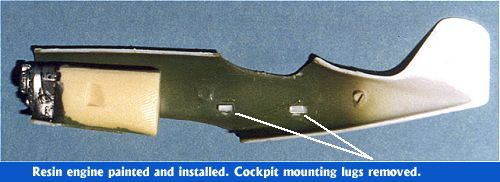
Next, several attempts were made to get the interior to fit into the fuselage. It seems the best way is to remove the mounting lugs from the fuselage, shave a bit off the sides of the resin cockpit sides, and insert it after the fuselage has been glued together. So that is the route I took. First the engine/nose wheel well was glued in place with superglue. This mass of resin should be enough to get the XP-77 to sit on it's nose gear. Just to make sure, I added a bit of lead weight!!. Once that was dry, the fuselage was glued together and the nose cap put on. Naturally, a bit of filler was needed, but nothing major. Since the aircraft is mostly wood, there are few panel lines to lose.
Next, the wings were finished, a bit of filler being required here and there. Then they were dry fit to the fuselage. A bit of creative carving and shaping was required to get a decent fit. Actually, this kit was going together will minimal fuss for a short run kit. There must be some major disaster lurking in the future!. Then one of the two canopies was slowly trimmed and dry fit repeatedly to assure a good fit. As I suspected, the canopy opening is longer than the canopy, but there is sufficient 'extra' to allow one to trim the canopy to a decent fit.
You are probably wondering why the interior hasn't been installed by now. Well, it is the instrument panel. There are quite a few spaces for instruments on the panel and no built-in detailing on it. Since it sits up in plain view, it needs Reheat Instrument decals; a lot of them. I had none on hand. It is also impossible to install the panel after the cockpit has been installed, so I was at a momentary stopping point. After installing the decals, the instrument panel was superglued to the cockpit and the cockpit was superglued into the fuselage.
 Next the
wings were glued to the underside of the fuselage. There is quite a
big step between the wings and the wing root, so again, filler was used to
smooth that out. The tailplanes went on with little real problem. I
did have to drill out and enlarge the fuselage attachment points as well
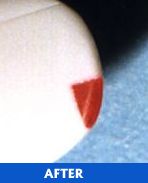
as do some cleanup of the tailplane to ensure a good fit. During this process,
the wing tip lights were cut out and replaced with colored plastic from swizzle
sticks and sanded to shape. While the various
Next the
wings were glued to the underside of the fuselage. There is quite a
big step between the wings and the wing root, so again, filler was used to
smooth that out. The tailplanes went on with little real problem. I
did have to drill out and enlarge the fuselage attachment points as well
as do some cleanup of the tailplane to ensure a good fit. During this process,
the wing tip lights were cut out and replaced with colored plastic from swizzle
sticks and sanded to shape. While the various
 coats of filler were being
applied and smoothed, the canopy was masked using leftover bits of EZ-Mask.
Then it was carefully cut apart into windscreen and canopy. At this
point, I wasn't sure exactly how the canopy opened.
coats of filler were being
applied and smoothed, the canopy was masked using leftover bits of EZ-Mask.
Then it was carefully cut apart into windscreen and canopy. At this
point, I wasn't sure exactly how the canopy opened.
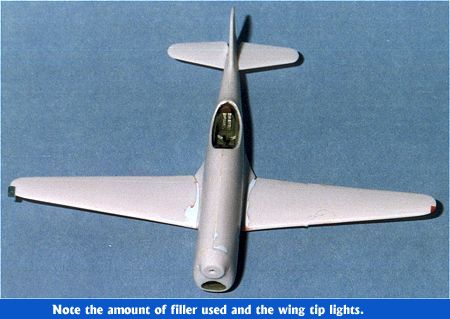
Then it was time for the landing gear. This required quite several e-mails and an episode of WINGS later, I discovered that the canopy rotated back behind the pilot, leaving only the windscreen visible. That made things rather easy, but explaining that to others would be rather tricky. No matter.As you can see in the photo below, the canopy is not visible when open. On to other parts. Just on either side of the nose gear well are three exhaust outlets that are flush with the fuselage.
Those were drilled out and after the windscreen was firmly attached
and blended in, the aircraft was really ready to begin the painting process.
Since this was to be painted silver, the first coat was gloss white
to provide a base coat for the silver paint. Once that was done, Testor's
Aluminum Metallizer was sprayed on it. When dry, the entire airframe was
overcoated with Future clear gloss. a bit of cleanup.
 It
was then painted silver and the oleo was wrapped with Bare Metal Foil. The
wheels were then cut off and blocks, cleaned up, painted and glued to the
struts. The True Details wheels are a huge improvement over the standard
kit items. When complete, the aircraft is a bit wobbly, but not dangerously
so. Next the gear doors were attended to. Czech Model kindly inscribes
L or R on the gear doors. Fine for kids, but something that has to
be filled and sanded before painting.
It
was then painted silver and the oleo was wrapped with Bare Metal Foil. The
wheels were then cut off and blocks, cleaned up, painted and glued to the
struts. The True Details wheels are a huge improvement over the standard
kit items. When complete, the aircraft is a bit wobbly, but not dangerously
so. Next the gear doors were attended to. Czech Model kindly inscribes
L or R on the gear doors. Fine for kids, but something that has to
be filled and sanded before painting.
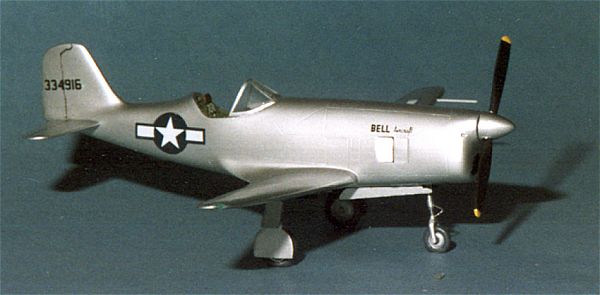
While awaiting the drying of the paint on the gear doors, I decided to attach the decals. These are probably Propagteam and are really thin. They are also not exactly the same size as needed according to the accompanying box art photo, but pretty close. The fit is absolutely superb and no setting solution is needed. They are also quite tenacious so require some oral lubricant (spit) under them to allow them to be slid into place. Since one only gets basic markings plus the Bell logos, decaling takes about half an hour. Once the decals were dry, the aircraft was wiped down with water and dried.
The prop blades were painted flat black with yellow tips and the spinner
aluminum. There are no prop decals and none are really needed. After
attaching the blades to the spinner, it was then dry fitted to the aircraft.
 Now
the XP-77 prop is a bit longer than most two bladed props, but the one in
the kit was so long that it would have easily smacked the ground. I
took off about 2 scale feet from each end to get it to fit according to the
plans, and then shaped the ends close to what shows in the images. Thinking back
on it, it wouldn't be a bad idea to remove a bit less than I did.
Now
the XP-77 prop is a bit longer than most two bladed props, but the one in
the kit was so long that it would have easily smacked the ground. I
took off about 2 scale feet from each end to get it to fit according to the
plans, and then shaped the ends close to what shows in the images. Thinking back
on it, it wouldn't be a bad idea to remove a bit less than I did.
Final steps were to attach the gear doors, place some matte aluminum Bare Metal Foil around the exhaust area, cut a nose gear strut oleo brace from some spare sheet metal, attach a pitot tube from brass tubing, and then put on a clear overcoat. The aircraft itself was rather clean so no weathering was done to it as befits a prototype.
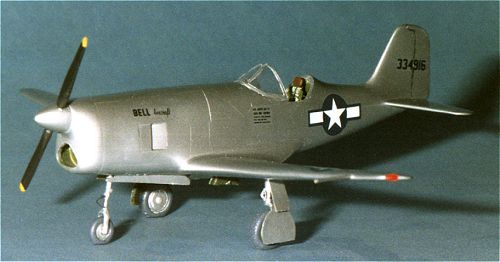
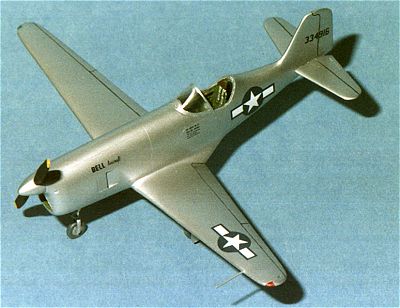
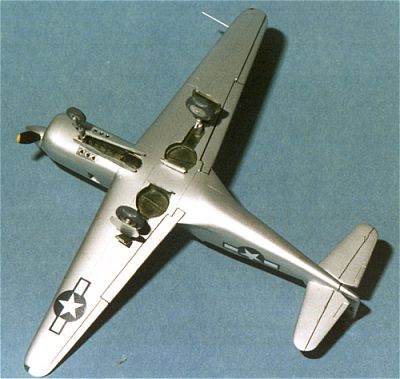
In the end, I had a really nice representation of a rather nifty little aircraft. One that takes up almost no room in the display case and really looks neat next to larger 1/48 aircraft (like P-51s ! ).
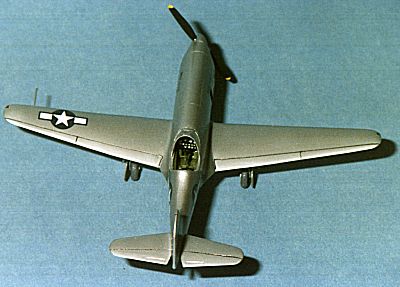
Top and bottom views of the finished kit. |
 |
REFERENCES:
Bell Aircraft Since 1935 by A.J. Pelletier
Putnam, 1992
War Planes of the Second World War, Fighters, Volume Four by William Green
Doubleday, 1964.
Copyright ModelingMadness.com. All rights reserved. No reproduction in part
or in whole without express permission from the editor.
Back to Reviews Page 2016