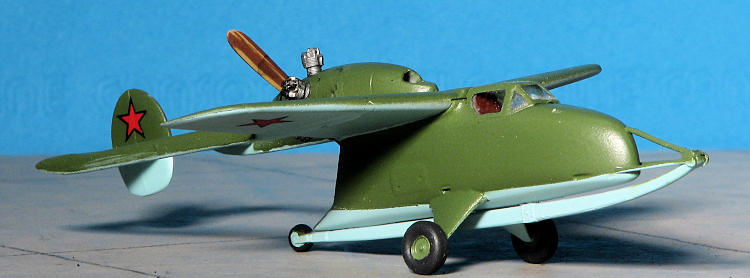
AMP 1/72 Moskalev SAM-23 battle plane
|
KIT #: |
7202 |
|
PRICE: |
$16.45 |
|
DECALS: |
One option |
|
REVIEWER: |
Scott
Van Aken |
|
NOTES: |
New Tool Kit |
 The Internet is pretty well mum on information
regarding this plane. I did find the Moskalev was a relatively proficient
designer who really didn't have any major production success with his aircraft.
This particular design is apparently a low powered attack aircraft where the
trailing wheel was some sort of terrain following mechanism that possibly was
connected to the flight control surfaces. It may also have been designed to
carry a bomb for very low level insertion, but that seems rather implausible.
This trailing wheel served as a tail wheel when the plane was on the ground.
The Internet is pretty well mum on information
regarding this plane. I did find the Moskalev was a relatively proficient
designer who really didn't have any major production success with his aircraft.
This particular design is apparently a low powered attack aircraft where the
trailing wheel was some sort of terrain following mechanism that possibly was
connected to the flight control surfaces. It may also have been designed to
carry a bomb for very low level insertion, but that seems rather implausible.
This trailing wheel served as a tail wheel when the plane was on the ground.
Whatever the purpose the aircraft was a pre-war design
that was not put into service. In fact, I'm not sure if it actually flew as I've
not been able to find a photo of the plane so any information would be
appreciated.
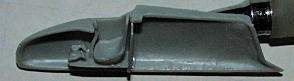
The
small zip bag contains two grey sprues, a clear canopy and decals. Molding on
the sprues is actually quite good with a teeny amount of flash on three braces,
no sink areas and nicely done engraved panel lines. The cockpit accommodations
include a
 seat, control stick, rudder pedals and a floor. There is also an
instrument panel with nicely detailed instruments and a rear bulkhead. The
engine cylinders are separate and fit into depressions on the rear of the stub
fuselage.
seat, control stick, rudder pedals and a floor. There is also an
instrument panel with nicely detailed instruments and a rear bulkhead. The
engine cylinders are separate and fit into depressions on the rear of the stub
fuselage.
Probably the only tricky parts will be the alignment
of the three rods that make up the forward skid attachment point and the
alignment of the single central fin/rudder. Both this latter part and the area
for the main gear lets have their placement engraved so that you can easily find
it. The kit comes with a small sheet that is basically insignia. The aircraft
itself is dark green over light blue. AMT reference numbers are provided. The
instructions are wholly in Russian but thanks to the well drawn construction
steps, that is not a barrier to completing the kit.
The first thing I did was to remove the major parts of the kit and clean up the
attachment points. These invade the actual parts so need to be carefully sanded
smooth. Next the engine
 cowling was cemented as were the upper and lower wings.
The fit is fair, though the trailing edges of the wings are rather thick. The
cockpit rear bulkhead was cemented in place along with the floor. To this was
attached the rudder pedals and the control stick. This latter item is far too
tall so once the seat is glued in, that will be plucked out and trimmed.
cowling was cemented as were the upper and lower wings.
The fit is fair, though the trailing edges of the wings are rather thick. The
cockpit rear bulkhead was cemented in place along with the floor. To this was
attached the rudder pedals and the control stick. This latter item is far too
tall so once the seat is glued in, that will be plucked out and trimmed.
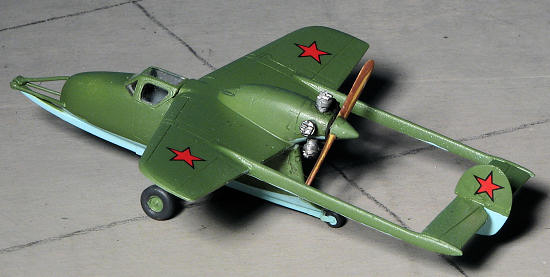
Meanwhile, I attended to the tail section. Now this is a boom type airplane and
booms are notorious for being difficult to work with. First I made the
attachment holes in the wing larger with a motor tool. I did the same to the
sockets on the ends of the booms for the tail plane. Test fitting the booms to
the wing showed that the booms were undersize by about 20% or so. This will
require some sanding on the root join once everything is cemented and dry.
However, that is later and to get a good fit, I decided to glue the horizontal
stab and booms together first. This was done. I also glued the motor pod to the
upper wing. It was set aside to dry.
 Back at the cockpit, I trimmed the
control stick to where it wasn't so tall, painted the interior grey and did some
detail work before cementing the fuselage halves together. The seam was filled
with super glue and then sanded smooth. Thinking that it might b
Back at the cockpit, I trimmed the
control stick to where it wasn't so tall, painted the interior grey and did some
detail work before cementing the fuselage halves together. The seam was filled
with super glue and then sanded smooth. Thinking that it might b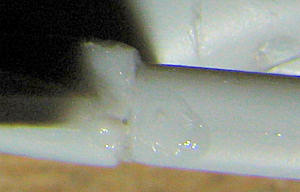 e easier to
clean up the boom join, I glued the booms to the wing assembly first.
e easier to
clean up the boom join, I glued the booms to the wing assembly first.
The fuselage halves had the small landing gear legs attached and I also glued on
the long tail wheel skid. This has a hole in the lower fuselage where it is
attached. Thanks to the soft plastic, it was quickly broken off and more
sturdily glued. I also glued on and masked th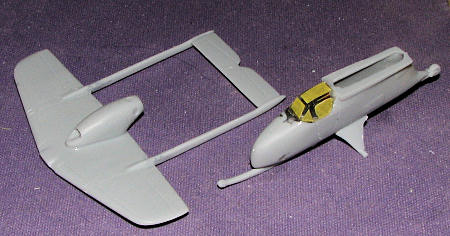 e canopy. As I thought, little can be seen
through it so I don't feel bad about not installing the instrument panel. The
boom/wing join was ground down using a motor tool and gaps were filled with
Tamiya filler. It took a bit to get this cleaned up and looking fairly good but
was worth it. I now had the two major sections and those were joined after
sanding a bit on the wing root section of the fuselage as that turned out to be
a bit wide.
e canopy. As I thought, little can be seen
through it so I don't feel bad about not installing the instrument panel. The
boom/wing join was ground down using a motor tool and gaps were filled with
Tamiya filler. It took a bit to get this cleaned up and looking fairly good but
was worth it. I now had the two major sections and those were joined after
sanding a bit on the wing root section of the fuselage as that turned out to be
a bit wide.
Next were the braces for the lower section. These are quite thin so care is
needed in removing them and cleaning them up. The upper piece has a flat section
and that was glued in first. Then the flat piece was sanded down flush with the
sides of the forward pivot point. The two side pieces were then cleaned up and
while one succeeded in being attached, the other disappeared when picked up in
the tweezers. Some work with stretched sprue was done for the rod and the flat
circular piece on the end and that was eventually glued on. It is always
something, isn't it?
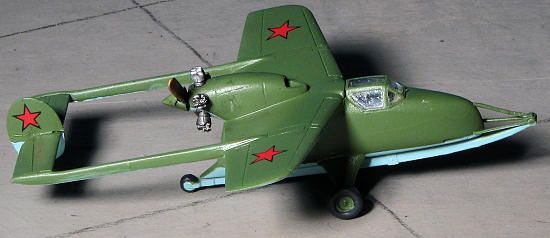
At this time, painting seemed like a good idea. The aircraft is AMT-7 light blue
on the underside and AMT-4 green upper. The underside was first done and when
dried, masked and the upper side was spraye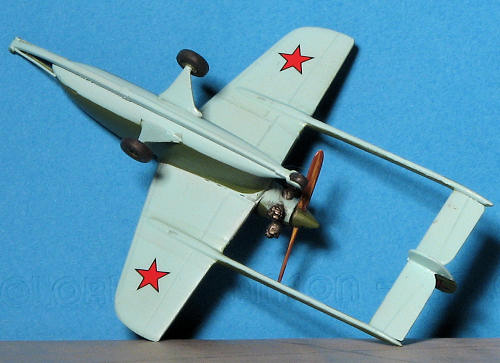 d. I have to say that the ColourCoats
paint I used went on quite well. I then started attaching more bits, such as the
fin/rudder piece. This required the attachment hole in the upper portion of the
horizontal stab to be enlarged.
d. I have to say that the ColourCoats
paint I used went on quite well. I then started attaching more bits, such as the
fin/rudder piece. This required the attachment hole in the upper portion of the
horizontal stab to be enlarged.
Once that was done, I resprayed the upper surface. Then I got ready to attach
the lower portion of the fin. This had to be sanded more flat on the attachment
area. The section was glued and as I moved the fin section towards the underside
of the tail plane to attach it, an invisible hand reached out of the seventh (or
was it the eighth) dimension and snatched the part away. Oaths and incantations
were insufficient to cause the part to reappear so I had little choice but to
resort to plastic card to make another.
A bit more painting to fix things and the masking was removed from the body.
There were some seepages, but fortunately, the ColouCoats paint brushes
beautifully and one really cannot see any hue change. Since the paint is semi
gloss anyway, I decided to attach the decals. AMP provides six stars and states
that they go on the upper and lower wings and the fin. Well, most Soviet combat
planes didn't have upper wing stars, but I put them on anyway. The decals are
quite matte and seemed to be non-plussed by setting solution. In other words, it
neither helped nor hindered.
With all that dry, I had a few more things to attach. I first
drilled out the wheels so they'd fit on the axles and then they and the tail
wheel were painted. The wheels were gl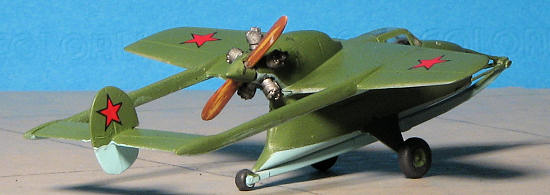 ued
on while I prepared the five separate engine cylinders. Test fitting showed
them to be too large so once again, I headed for the drill bits to open up
the attachment holes. For most of this drilling stuff I used bits larger
than the #60 you get with the standard drill twist set. Highly recommend
getting a set that goes from #59 to #1 as you'll find them invaluable time
and time again.
ued
on while I prepared the five separate engine cylinders. Test fitting showed
them to be too large so once again, I headed for the drill bits to open up
the attachment holes. For most of this drilling stuff I used bits larger
than the #60 you get with the standard drill twist set. Highly recommend
getting a set that goes from #59 to #1 as you'll find them invaluable time
and time again.
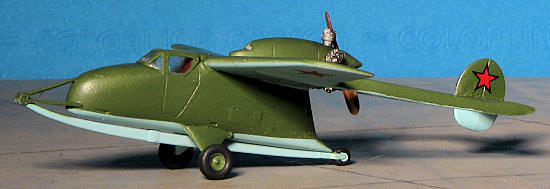
With the cylinders and wheels installed, the last thing to handle was
the prop. This was (poorly) painted and the spinner attached. Then the
inevitable touch up painting was done and the whole deal given a coat of
matte clear. For a final bit, I thinned some Citadel black paint and dabbed
this on the engine cylinders.
Not an easy build, despite the small number of parts. But then, it is really
what one expects from short run kits and this one was no exception. There is an
excellent chance that this aircraft never existed beyond the dreams of the
designer, but it is interesting none-the-less and adds some spark to anyone's 'whiffer'
collection.
April 2011
Copyright ModelingMadness.com. All rights reserved. No reproduction in part or in whole without express permission from the editor.
If you would like your product reviewed fairly and quickly, please
contact
the editor or see other details in the
Note to
Contributors.
Back to the Main Page
Back to the Review
Index Page 2024