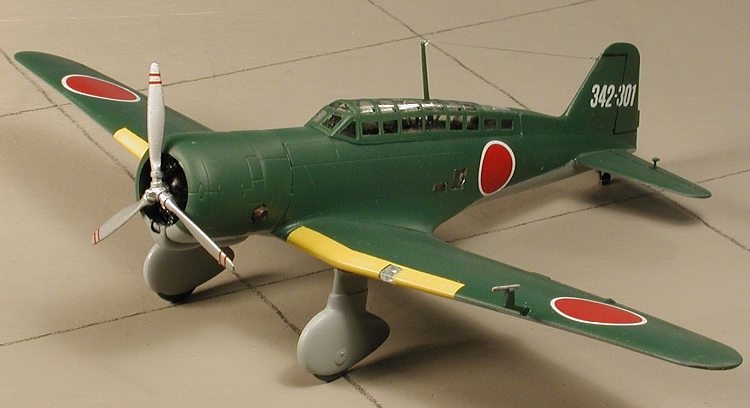
LS 1/72 C5M2 'Babs'
|
KIT # |
A 206 |
|
PRICE: |
$3.50 (in 1984) |
|
DECALS: |
Two Aircraft |
|
REVIEW : |
|
|
NOTES: |
|
HISTORY & KIT |
To read about the background of this aircraft and see images of what's in the kit, go here.
|
CONSTRUCTION |
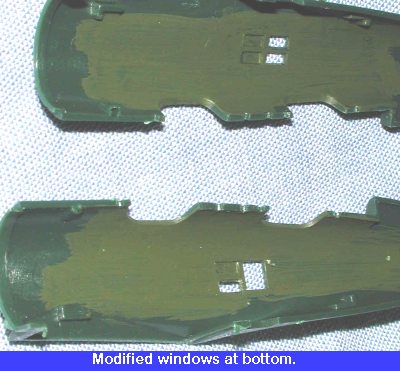 First step was to build the interior. This is really a
very basic one consisting of a floor and two seats with a control stick. The
fuselage has several openings in the side for the observer windows. To allow
for multiple versions using the same basic airframe, LS only provide the
aft two already opened up. Any additional windows will have to be opened up by
the builder. This means using a new, sharp, pointed blade hobby knife to get
best results. On this kit, the back windows needed to be merged into one and one
of the forward windows opened. As you can see from the image, it isn't too
difficult to do!
First step was to build the interior. This is really a
very basic one consisting of a floor and two seats with a control stick. The
fuselage has several openings in the side for the observer windows. To allow
for multiple versions using the same basic airframe, LS only provide the
aft two already opened up. Any additional windows will have to be opened up by
the builder. This means using a new, sharp, pointed blade hobby knife to get
best results. On this kit, the back windows needed to be merged into one and one
of the forward windows opened. As you can see from the image, it isn't too
difficult to do!
Then the interior bits were given a nice coat of Mitsubishi Interior green as befits one of their products! Once the bits were painted, it was time to install the windows. These are thick and distorted for the side windows. Some trimming is needed on the larger panels to get them to fit, but it isn't that tough to get them in. The biggest problem I had is that the parts are very, very small and my ham fists had some trouble in that regard.
Next, the instrument panel was glued in place to the right side as was the interior. There is another small square window that goes in the bottom of the plane. This was carefully glued in place. The left side was taped in place to make sure that everything was properly aligned and in place. Once I was sure that all was good, the fuselage halves were glued together .
While that was drying, there were a number of subassemblies that could be done. One was the drop tank, which is quite similar to that carried by the A6M2. Another is the fairing between the fuselage and the engine and the engine cowling. These parts are split into left and right halves and fit very well indeed with no problems at all. Face it, this is turning into one sweet building kit.
 At
this time I also glued the upper and lower wing sections. Being a low winged
aircraft, the bottom section is full span. When dry, the landing light was glued
in place. This is a bit larger than the wing, but all you need to do is sand it
down and then polish it out again. A simple procedure. The fixed landing gear is
next. The spats are designed so that the wheel only fits one way, which is a big
help. The wheels themselves have huge ejector pin marks on them, but since they
are mostly covered by the spats you won't see them. The wheels were installed in
the spat halves without painting them first. It is such that it can be easily
done after the rest is painted. The spats and wing had any small seams or holes
filled and then sanded smooth. The worst area was around the underfuselage
window, but it was nothing compared some more recent kits.
At
this time I also glued the upper and lower wing sections. Being a low winged
aircraft, the bottom section is full span. When dry, the landing light was glued
in place. This is a bit larger than the wing, but all you need to do is sand it
down and then polish it out again. A simple procedure. The fixed landing gear is
next. The spats are designed so that the wheel only fits one way, which is a big
help. The wheels themselves have huge ejector pin marks on them, but since they
are mostly covered by the spats you won't see them. The wheels were installed in
the spat halves without painting them first. It is such that it can be easily
done after the rest is painted. The spats and wing had any small seams or holes
filled and then sanded smooth. The worst area was around the underfuselage
window, but it was nothing compared some more recent kits.
Back at the fuselage, it had the seams sanded down and any filling needed done, but there really wasn't much. Most problems were eliminated by just sanding. The next step was the attachment of the wing. This went quite well with no real problems and only a tiny gap on one wing/fuselage join. The aft wing gap can be left as that is also the trailing edge of the flap. Then the tail planes were installed. They are idiot proof with different length tabs so you won't get them mixed up.
 Once the cowling and fairing were dry, the fairing was
glued to the front of the fuselage. Fit is excellent. The two piece engine was
glued together and then inserted into the cowling. This engine isn't really
that much like a real one, but will serve the purpose. Those who want a
more convincing engine would be better served by acquiring one of the
aftermarket versions from Aeroclub or Engines 'n Things. After the engine was
installed the cowling glued in place.
Once the cowling and fairing were dry, the fairing was
glued to the front of the fuselage. Fit is excellent. The two piece engine was
glued together and then inserted into the cowling. This engine isn't really
that much like a real one, but will serve the purpose. Those who want a
more convincing engine would be better served by acquiring one of the
aftermarket versions from Aeroclub or Engines 'n Things. After the engine was
installed the cowling glued in place.
I now had a pretty complete airframe, one that was coming along rather nicely. Next steps were to install a number of small 'fiddly bits'. The first of these are the two intake scoops that fit under the engine. The forward one fits into a groove in the cowling. Mine was also slightly short shot in the front, but was trimmed to look pretty good. As I mentioned in the preview, this is the same engine as used with the A6M2 so you could rob the whole assembly from a Hasegawa kit if you felt the need.
 Next bits go in the cockpit greenhouse area. There is an
odd little turreted thingie that fits in front of the pilot (a gunsight?). Next
back is a triangular roll-over bar and then an ADF loop antenna. The next slot
is for the long wire mast and in the far back a machine gun. This is another
rather bland molding that could stand to be replaced. Once all are installed,
the upper cockpit area was painted flat black. Now I don't know that it was
supposed to be or not, as I have no references on this plane at all, but it
makes sense that it might have been.
Next bits go in the cockpit greenhouse area. There is an
odd little turreted thingie that fits in front of the pilot (a gunsight?). Next
back is a triangular roll-over bar and then an ADF loop antenna. The next slot
is for the long wire mast and in the far back a machine gun. This is another
rather bland molding that could stand to be replaced. Once all are installed,
the upper cockpit area was painted flat black. Now I don't know that it was
supposed to be or not, as I have no references on this plane at all, but it
makes sense that it might have been.
Once that was painted, the lower part of the antenna was painted flat black and the canopy, which had already been laboriously masked, was glued in place. I used some clamps to hold it in place while the glue dried. As a bit of a warning, the clear plastic is rather thin and is very brittle, so you need to be especially careful about how much stress you put on it. I discovered this about LS kits many years ago with a Judy dive bomber! When it was dry, the landing gear spats were pushed into the slots in the underwing, the engine masked with tissue, the other clear parts masked, and it was off to get some makeup!
|
PAINT |
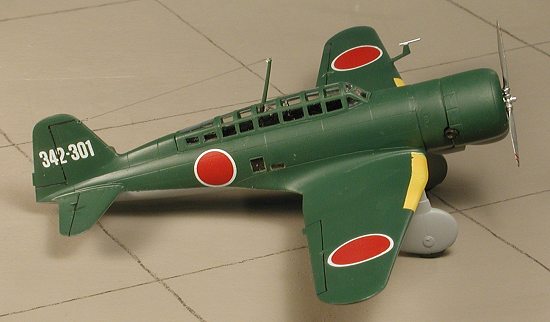
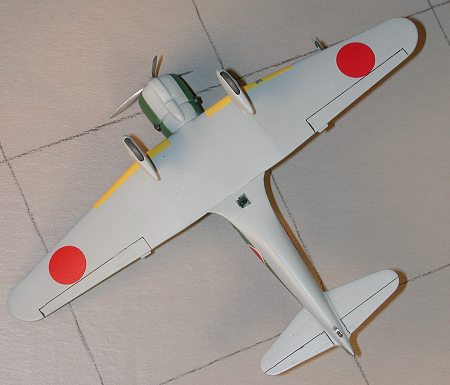 The colors suggested in the kit are dark green and light grey.
Grabbing what little was left of my Aeromaster JNAF acrylics, the underside and
the drop tank were painted in JNAF grey. Now, I'm not so sure that the color
used is the right shade. There is much evidence to suggest that early war
Mitsubishi JNAF grey was pretty darn close to RLM 02 and more of a medium
green/grey. This information comes via Model Art books which have color photos
of Zero artifacts, and from J-aircraft .com. However, there is precious little
info on the C5M2 and if that color was used, though it would make sense as the
C5M is also an early war Mitsubishi aircraft. Flying in the face of all that
evidence, I doggedly used the lighter grey!
The colors suggested in the kit are dark green and light grey.
Grabbing what little was left of my Aeromaster JNAF acrylics, the underside and
the drop tank were painted in JNAF grey. Now, I'm not so sure that the color
used is the right shade. There is much evidence to suggest that early war
Mitsubishi JNAF grey was pretty darn close to RLM 02 and more of a medium
green/grey. This information comes via Model Art books which have color photos
of Zero artifacts, and from J-aircraft .com. However, there is precious little
info on the C5M2 and if that color was used, though it would make sense as the
C5M is also an early war Mitsubishi aircraft. Flying in the face of all that
evidence, I doggedly used the lighter grey!
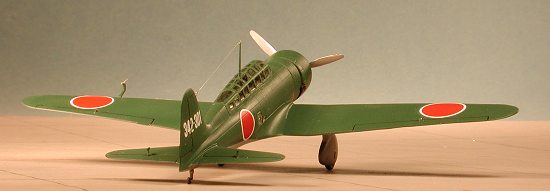
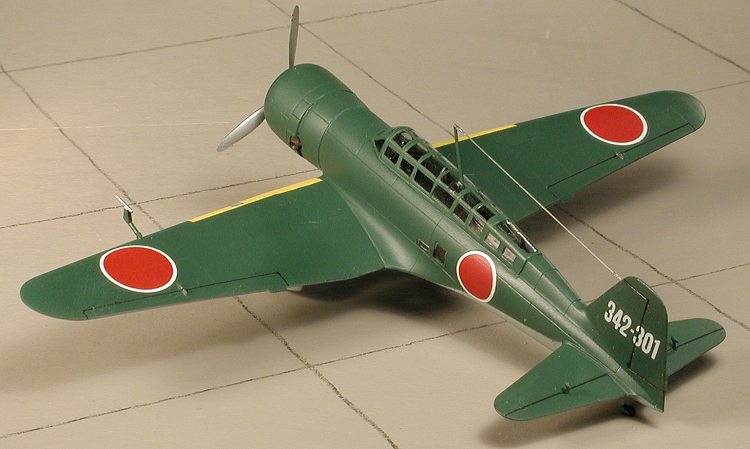
Once dry, the areas I wanted to keep light grey were masked and some additional bits were glued onto the airframe. There is the pitot tube on the wing and a couple of mass balances on the upper side of the elevators that need glued in place. These things are teeny to the max and I'm just grateful that they didn't disappear into the carpet as teeny things are wont to do. Then the rest of the airframe painted with Mitsubishi Japanese Naval Dark Green. After the usual touchups, the kit was retuned to the work bench to have some more 'stuff' added on before getting the clear glosscoat.
|
DECALS & MORE CONSTRUCTION |
That 'stuff' was the tailwheel. The kit was then taken back to
the paint area and had the glosscoat applied. Then it was decal time. The yellow
wing leading edges were the first ones. These were applied and for some reason,
they don't fit well at all. I can only imagine that LS did what they thought was
best, but it just didn't do it. I really should have painted these things on, so
learning for my error, the kit was carefully masked and went back for some
paint. This consisted of a white undercoat and then the yellow. I should know
better than to try to use kit leading edge decals as rarely have they been
successful.
A nice coat of semi-matte
was next and once that had dried, some touchup painting of the tail wheel and
pitot tube was done. The exhausts were glued in place after a bit of carving was
done to get them to fit properly. A thin application of Rustall was then put on
them. The already aluminum painted prop then had some thin red decal stripes
applied. A bit of Solvaset was used on them as well. Then it was time to remove
the myriad of masks on the canopy and fuselage windows. There was some leakage
on a couple of panes, but the old standby, a sharpened tooth pick, took care of
those problems. Last step was an antenna wire made of stretched clear sprue and
attached with superglue. I decided not to install the belly tank as I wanted a
pretty clean plane.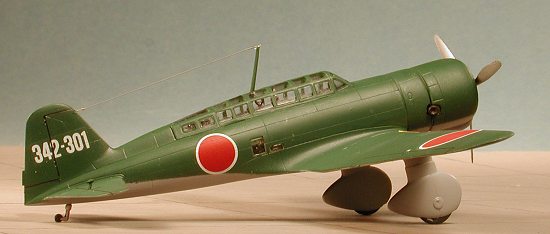 The other decals,
however, went on rather well. Surprisingly, while they stick well, they have
some trouble conforming to the engraved lines. A double dose of Solvaset didn't
seem to make much of a dent in them so I applied some Champ and a couple of
applications saw them give a little.
The other decals,
however, went on rather well. Surprisingly, while they stick well, they have
some trouble conforming to the engraved lines. A double dose of Solvaset didn't
seem to make much of a dent in them so I applied some Champ and a couple of
applications saw them give a little.
|
CONCLUSIONS |
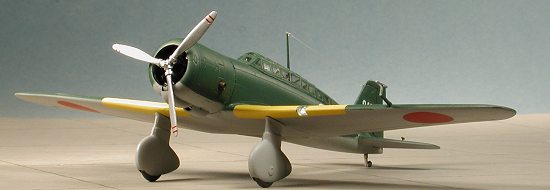
I was looking for a relatively simple and easy to build kit after some of the last batch of kits. I found it with this kit. I know that Arii has reissued this kit as the local hobby shop has them, but they are priced at $9.50 (!). I'm sure you can find it cheaper than that and you won't be sorry with the results.
|
REFERENCES |
Japanese Aircraft of the Pacific War by Rene J Francillon
Copyright ModelingMadness.com. All rights reserved.
Review kit courtesy of me and my wallet!
If you would like your product reviewed fairly and fairly quickly, please contact the editor or see other details in the Note to Contributors.
Back to Reviews Page 2020