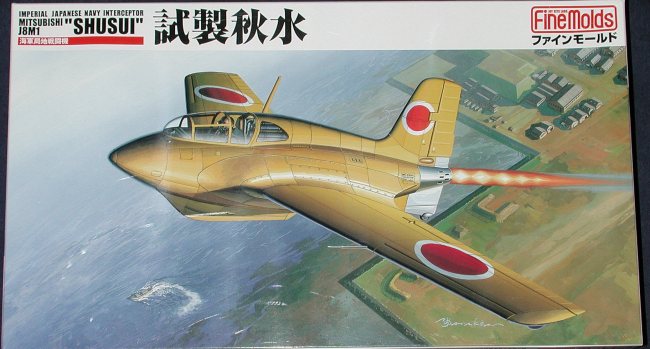
Fine Molds 1/48 J8M1 Shusui
|
KIT # |
FB 6 |
|
PRICE: |
¥2400 |
|
DECALS: |
One aircraft |
|
REVIEW BY: |
|
|
NOTES: |
|
HISTORY & KIT |
As has become the norm for me, I'll leave it to the preview to provide all the needed info about the kit.
|
CONSTRUCTION |
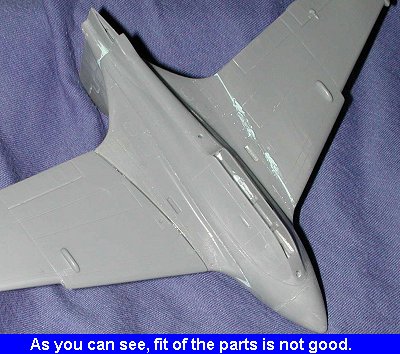
If you recall from the preview, I ended up stating that the kit should be a snap to build. The sound you hear in the background is me, munching on those words. This kit is a case of 'looks great in the box, doesn't build as it looks'. Not to say that it is a bad kit and is a total pain to build. That isn't the case at all. It is just that you need to treat it like a well done short run kit. And frankly, that is what these early Fine Mold kits were.
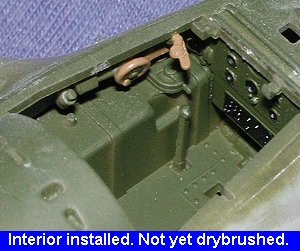 Shall we start with the interior? Very well. The first
thing I did was to go over the kit instructions and glue together all the
interior bits that were to be painted the same color. That included most of
them. There are a number of very fine bits that fit in the cockpit. These are
rather small and can easily be lost. The instructions are quite a help in
determining the proper placement of most of them, though there will be a bit or
two that you'll have to glue in place based on a best guess. Once all the parts
to be painted Mitsubishi Interior Green were assembled, the cockpit and
surrounding interior were painted in that color using my slowly diminishing
Aeromaster Acrylic paint. When dry, some of the parts that needed other colors,
like black or wood were hand painted.
Shall we start with the interior? Very well. The first
thing I did was to go over the kit instructions and glue together all the
interior bits that were to be painted the same color. That included most of
them. There are a number of very fine bits that fit in the cockpit. These are
rather small and can easily be lost. The instructions are quite a help in
determining the proper placement of most of them, though there will be a bit or
two that you'll have to glue in place based on a best guess. Once all the parts
to be painted Mitsubishi Interior Green were assembled, the cockpit and
surrounding interior were painted in that color using my slowly diminishing
Aeromaster Acrylic paint. When dry, some of the parts that needed other colors,
like black or wood were hand painted.
 The interior was then placed into the lower fuselage and the
fuselage halves glued together. No need for nose weight on this kit. The seat,
back plate, control stick and some mysterious looking bottles were left off until near the end
of construction. When I glued together the fuselage halves, I also glued
the wings, tail section and the small tail wheel assembly. Fit of these rated
from OK to not the best, especially the tail section.
The interior was then placed into the lower fuselage and the
fuselage halves glued together. No need for nose weight on this kit. The seat,
back plate, control stick and some mysterious looking bottles were left off until near the end
of construction. When I glued together the fuselage halves, I also glued
the wings, tail section and the small tail wheel assembly. Fit of these rated
from OK to not the best, especially the tail section.
I then glued the tail section to the upper fuselage. Yikes! Talk about Gap City. Not a good fit at all. With a sigh, I broke out the filler and slathered it on the offending gaps. Not only that, but the tail was slightly smaller in diameter than the back of the fuselage so filler was needed to fair that in. After the first coat of filler, the right wing was glued on. Gaps here as well. I guess you notice a trend. Nothing that can't be fixed by filler, but a pain, nonetheless. After several sessions with the Acryl-Blue filler, the main parts of the aircraft were complete.
The next step was to finish off the cockpit. This involved attaching a pipe that ran behind the seat, then the three bottles. Fit was rather good here. The bottles were painted flat black with an aluminum valve section. Then the seat with the armor plating was installed. I should say that I tried to install it. The opening in the floor for the tab on the plate was smaller than the tab on the plate. I trimmed it a bit and the seat fit well.
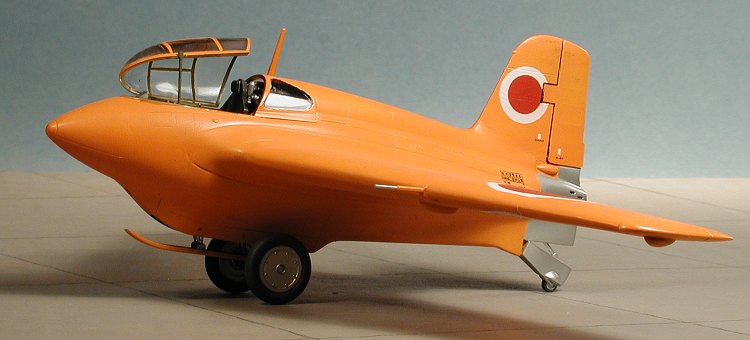
 Next the canopy sections were installed. The aft section fit
quite well and was glued in place. Once dry the transparencies were masked off.
The forward part was masked using Tamiya tape. The radio mast hole was blocked
with a small section of tape from the inside and the canopy tacked in place for
painting.
Next the canopy sections were installed. The aft section fit
quite well and was glued in place. Once dry the transparencies were masked off.
The forward part was masked using Tamiya tape. The radio mast hole was blocked
with a small section of tape from the inside and the canopy tacked in place for
painting.
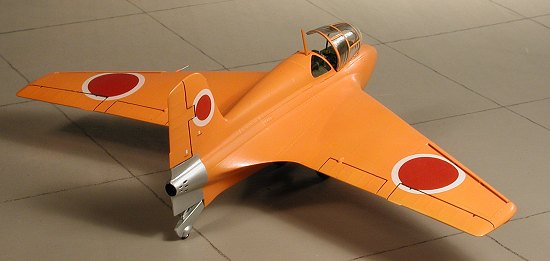
This kit has separate leading edge slots, which is much more realistic than a few indentations. These were glued in place. Fit here was fair, but not perfect. However, these late war aircraft were usually lacking in proper quality assurance and fit so I don't think it will be a problem. The tail wheel segment and pitot tube were glued in place and the kit was ready for paint.
|
PAINT |
 First step was to
paint the canopy section with interior green. That way, when the canopy is
opened, you can see the interior green part on the underside. This color was
also used inside the skid well and the upper surface of the skid. The
instructions are not too sure what color this area should be and gives the
option of interior green or silver.
First step was to
paint the canopy section with interior green. That way, when the canopy is
opened, you can see the interior green part on the underside. This color was
also used inside the skid well and the upper surface of the skid. The
instructions are not too sure what color this area should be and gives the
option of interior green or silver.
Then the kit was given an overall gloss white coat using Testors Gloss White enamel. This is because orange is a bit transparent so you need a solid light color underneath. Once that was dry, the back area was sprayed with Alclad II Aluminum. This stuff is really great. It went on with one coat and was dry in a very short time. I gave it overnight to fully cure just as a precaution.
When dry, the area I wanted to keep as aluminum was masked off. Any overspray outside that area was repainted white. Another day or two of curing and it was ready for the main paint.
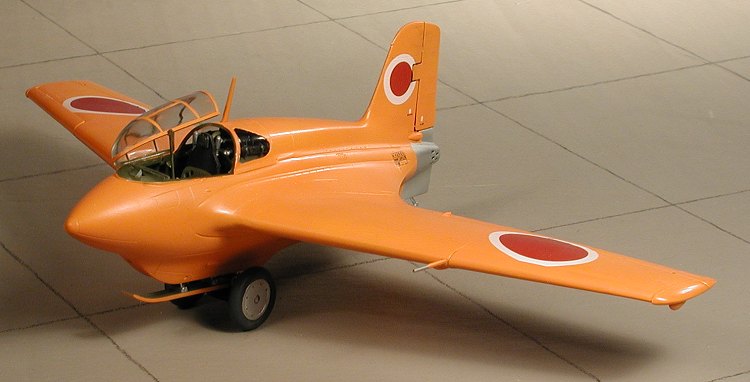
For the orange paint, I made up a concoction using Humbrol gloss orange with some Testors gloss white added to it. I think that the raw orange color is just TOO much and that it needed to be toned down. Like I did with the Eduard X-1 kit. This orange was then thinned about 50-50 and sprayed on in several thin coats. That went on with little trouble and after a few sessions, I had a lovely orange rocket plane! The model then returned to the construction area to have more 'stuff' attached to it.
|
CONSTRUCTION CONTINUES |
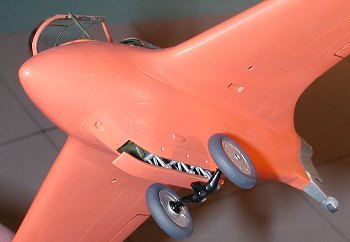 First thing I did
was to construct the small wheeled dolly. This is basically a gloss black axle
assembly with aluminum wheels attached. The mechanism that extends and retracts
the skid is made of three articulating assemblies. Each of these is made of two
parts. They are quite fragile and I managed to break a couple of them while
gluing them together. They were then painted aluminum. There is a small
attachment piece that fits into the skid and later is what hooks the skid to the
dolly. WHen the dolly was dry, it was glued to the bottom of the skid (there are
some small nubbins for alignment) and the two connection pieces are glued from
the dolly to the attachment on the inside of the skid.
The skid well itself was touched up and the three retraction/extention
assemblies were glued into the well. When dry, the skid with dolly was glued to
them. I used superglue for a number of these bits and it holds quite well.
First thing I did
was to construct the small wheeled dolly. This is basically a gloss black axle
assembly with aluminum wheels attached. The mechanism that extends and retracts
the skid is made of three articulating assemblies. Each of these is made of two
parts. They are quite fragile and I managed to break a couple of them while
gluing them together. They were then painted aluminum. There is a small
attachment piece that fits into the skid and later is what hooks the skid to the
dolly. WHen the dolly was dry, it was glued to the bottom of the skid (there are
some small nubbins for alignment) and the two connection pieces are glued from
the dolly to the attachment on the inside of the skid.
The skid well itself was touched up and the three retraction/extention
assemblies were glued into the well. When dry, the skid with dolly was glued to
them. I used superglue for a number of these bits and it holds quite well.
|
DECALS |
 Now that I had it
on its wheels so to speak, I applied the decals. With no chance of any
aftermarket decals, I used what came in the kit and was not disappointed as they
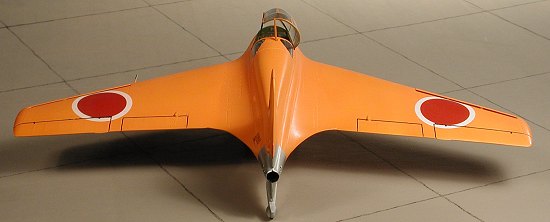
worked well. The hinomaru has separate white and red parts. The white circles
are not opaque enough to handle the orange paint, which is not surprising. They
fit quite well without the need for any setting solvents. The red centers were
then put on as were the few stencils applied. The roundels seem to have an
overly large white surround to them, but from what few pics I have seen, this is
the way they were. The kit was then wiped with clear water when the decals were
dry. This removes any glue residue. Then the kit was given a misting of clear
acrylic matte to tone down the glossy orange to a more acceptable level.
Now that I had it
on its wheels so to speak, I applied the decals. With no chance of any
aftermarket decals, I used what came in the kit and was not disappointed as they
worked well. The hinomaru has separate white and red parts. The white circles
are not opaque enough to handle the orange paint, which is not surprising. They
fit quite well without the need for any setting solvents. The red centers were
then put on as were the few stencils applied. The roundels seem to have an
overly large white surround to them, but from what few pics I have seen, this is
the way they were. The kit was then wiped with clear water when the decals were
dry. This removes any glue residue. Then the kit was given a misting of clear
acrylic matte to tone down the glossy orange to a more acceptable level.
The canopy was unmasked and naturally, there was a bit of bleed-under on the forwardmost section. A bit of work with a toothpick took care of the excess paint. Any glitches in the paint were touched up and the final bits added. These consisted of the radio mast and the canopy brace. The canopy sits on this brace when open. Were the kit to be built canopy closed, this brace would fold down across the upper section of the 'dash'. This is just like in many cars with the hood brace. No need to paint any formation lights as the Shusui didn't have any!
|
CONCLUSIONS |
 As I mentioned in the beginning of this review, if
you treat the kit as a short run model, you won't be disappointed with the
results. Overall, I found the kit to be a pleasant construction experience. Most
of the parts fit fairly well, and what didn't could be taken care of with some
trimming or filler. Unless you are an assembler, you won't have any trouble with
this kit either. It will put a small amount of stress on your modeling skills
but will reward you with a very nice and interesting model to add to your
collection. Recommended for all but the beginners.
As I mentioned in the beginning of this review, if
you treat the kit as a short run model, you won't be disappointed with the
results. Overall, I found the kit to be a pleasant construction experience. Most
of the parts fit fairly well, and what didn't could be taken care of with some
trimming or filler. Unless you are an assembler, you won't have any trouble with
this kit either. It will put a small amount of stress on your modeling skills
but will reward you with a very nice and interesting model to add to your
collection. Recommended for all but the beginners.
|
REFERENCES |
Japanese Aircraft of the Pacific War by Rene J Francillon, Putnam, 1979
Review copy courtesy of me and my wallet!
March 2001
Copyright ModelingMadness.com. All rights reserved. No reproduction in part or in whole without express permission from the editor.
If you would like your product reviewed fairly and quickly, please contact the editor or see other details in the Note to Contributors.