| KIT #: | A01005 |
| PRICE: | $6.99 SRP |
| DECALS: | One option |
| REVIEWER: | Scott Van Aken |
| NOTES: | New tool kit |
| HISTORY |
The A6M2
 While the Navy was testing the first two
prototypes, they suggested that the third be fitted with the 700 kW (940 hp)
Nakajima Sakae 12 engine instead. Mitsubishi had its own engine of this
class in the form of the Kinsei, so they were somewhat reluctant to use the
Sakae. Nevertheless, when the first A6M2 was completed in January 1940, the
Sakae's extra power pushed the performance of the Zero well past the
original specifications.
While the Navy was testing the first two
prototypes, they suggested that the third be fitted with the 700 kW (940 hp)
Nakajima Sakae 12 engine instead. Mitsubishi had its own engine of this
class in the form of the Kinsei, so they were somewhat reluctant to use the
Sakae. Nevertheless, when the first A6M2 was completed in January 1940, the
Sakae's extra power pushed the performance of the Zero well past the
original specifications.
The new version was so promising that the Navy had 15 built and shipped to China before they had completed testing. They arrived in Manchuria in July 1940, and first saw combat over Chungking in August. There they proved to be completely untouchable by the Polikarpov I-16s and I-153s that had been such a problem for the A5Ms currently in service. In one encounter, 13 Zeros shot down 27 I-15s and I-16s in under three minutes without loss. After hearing of these reports the Navy immediately ordered the A6M2 into production as the Type 0 Carrier Fighter, Model 11. Reports of the Zero's performance filtered back to the US slowly. There they were dismissed by most military officials, who felt it was impossible for the Japanese to build such an aircraft.
 After the delivery of only 65 aircraft by November
1940, a further change was worked into the production lines, which introduced
folding wingtips to allow them to fit on aircraft carriers. The resulting Model
21 would become one of the most produced versions early in the war. When the
lines switched to updated models, 740 Model 21s had been completed by
Mitsubishi, and another 800 by Nakajima. Two other versions of the Model 21 were
built in small numbers, the Nakajima-built A6M2-N "Rufe" floatplane (based on
the Model 11 with a slightly modified tail), and the A6M2-K two-seat trainer of
which a total of 508 were built by Hitachi and the Sasebo Naval Air Arsenal.
Such was the war situation, that many A6M2 aircraft were still being used as
defensive fighters on various islands and back in Japan when replaced by newer
versions.
After the delivery of only 65 aircraft by November
1940, a further change was worked into the production lines, which introduced
folding wingtips to allow them to fit on aircraft carriers. The resulting Model
21 would become one of the most produced versions early in the war. When the
lines switched to updated models, 740 Model 21s had been completed by
Mitsubishi, and another 800 by Nakajima. Two other versions of the Model 21 were
built in small numbers, the Nakajima-built A6M2-N "Rufe" floatplane (based on
the Model 11 with a slightly modified tail), and the A6M2-K two-seat trainer of
which a total of 508 were built by Hitachi and the Sasebo Naval Air Arsenal.
Such was the war situation, that many A6M2 aircraft were still being used as
defensive fighters on various islands and back in Japan when replaced by newer
versions.
| THE KIT |
Not something you would think would be needed, thanks to the very nice Hasegawa Zeros and the new Tamiya kit, but those are getting more and more pricey, hence Hornby felt that a new tool needed to be added to the catalog to replace the truly ancient original took Zero from the 60s. This has the now standard large engraved detail with the usual option to have the gear molded up. For this you will need to buy the display stand from Hornby as it does not come with the kit.
 Cockpit is nicely done with a decal for the
instrument panel. A single piece canopy sits atop it. The kit also comes with an
additional option and that is to model it with the wing tips folded. For this
one will need to saw off the extant wing tip, but the mounting holes are already
molded in place,
invisible until you cut off the wing tip, making this an easy option. The kit
provides a drop tank with its faired in mount. Fortunately, one needs to open a
hole for this tank so the model can be built with a smooth underside.
Personally, I like options and bristle when a kit is designed with all these
holes opened up already. The engine and cowling are well molded. My prop was
badly bent in shipment but thanks to the semi-soft plastic, was easily
straightened out.
Cockpit is nicely done with a decal for the
instrument panel. A single piece canopy sits atop it. The kit also comes with an
additional option and that is to model it with the wing tips folded. For this
one will need to saw off the extant wing tip, but the mounting holes are already
molded in place,
invisible until you cut off the wing tip, making this an easy option. The kit
provides a drop tank with its faired in mount. Fortunately, one needs to open a
hole for this tank so the model can be built with a smooth underside.
Personally, I like options and bristle when a kit is designed with all these
holes opened up already. The engine and cowling are well molded. My prop was
badly bent in shipment but thanks to the semi-soft plastic, was easily
straightened out.
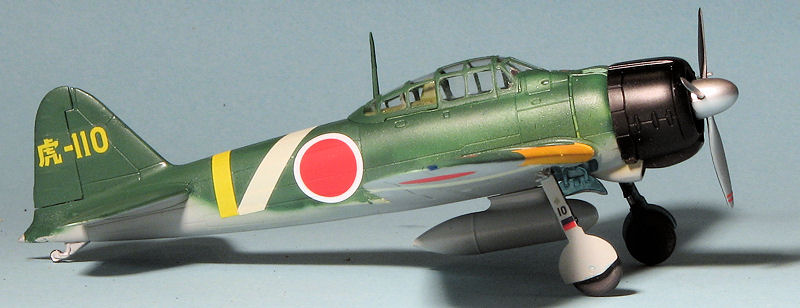
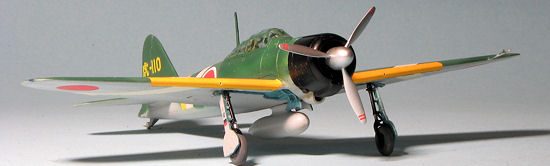
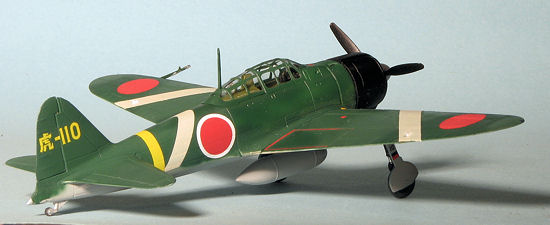
Since this is a series one kit, there is only one markings option. That is for the box art plane from the 201st Kokutai based at Tobera in New Britain. The decals are very nicely printed and include the wing leading edge ID band. Considering where it was based, I would expect that this plane was actually pretty worn so you may wish to keep that in mind.
| CONSTRUCTION |
Things start off rather normally on this one. I first
broke the control column trying to remove it from the sprue. This is a recurring
issue with the new Airfix kits as it happens as often as not, despite the fact
that I try very hard to be careful and actually saw them off with a very fine
toothed razor saw. So I glued all the various interior bits together before
painting them with Mitsubishi Interior Green from the Colorcoats line. The
instrument panel takes a trio of decals and I have to say it is quite adequate
for this scale.
 There is also a bit of sidewall detail. For the seat, I cut some
1mm masking tape to put in there. All the interior bits were dry-brushed with
white to bring out some detail.
There is also a bit of sidewall detail. For the seat, I cut some
1mm masking tape to put in there. All the interior bits were dry-brushed with
white to bring out some detail.
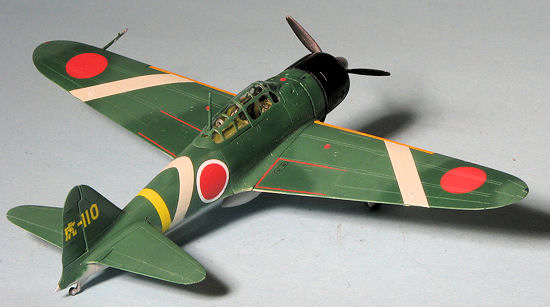
Meanwhile, I cemented the wings together. To do the folded wing option, the tips will need to be cut off the upper wing sections. I did not do this as I was building several of these kits from other companies and wanted them to be outfitted about the same. I did cut out the large rectangular fuel tank mount in the lower wing. Thankfully the plastic is relatively soft so this was not a major issue. The tank was also cemented together. Unlike the tank from other companies, this one has a pair of raised bands around the forward and aft section.
The interior was then installed in one fuselage half
and the halves cemented together. No issues here and a pretty good fit. I then
cemented the lower wing in place. I found there was a gap at the lower rear
wing/fuselage join. This is also where the poorest fit
 was on the fuselage
halves so some filler was needed. None required on the upper wing roots. While
the filler was out, I took care of the largish gaps on the lower outer wing
panels by the tips as well. The tail planes were cemented at this time and
aligned.
was on the fuselage
halves so some filler was needed. None required on the upper wing roots. While
the filler was out, I took care of the largish gaps on the lower outer wing
panels by the tips as well. The tail planes were cemented at this time and
aligned.
Meanwhile, I painted the engine cylinders black and removed these parts from the sprue. One is encased in a circular sprue that makes it very difficult to cut away. You end up destroying any detail on the top of these cylinders as the sprue attachment points are quite large. The other bank only had three of these big attachment points. I then did some preliminary painting as I was doing another plane in a similar scheme. I painted the leading edges of the wings white then when dry, sprayed a yellow.
The next item that was added was the upper forward fuselage section. This piece also contains the breeches for the nose machine guns. It is a very tight fit so be sure to remove any sprue attachment points from the gun breech piece. Since Airfix does not include the direction finder antenna, I installed one that was not used from the Hasegawa Zero kit.
I then installed the antenna mast, placing the canopy over it while it dried to be sure it was in the right spot. It was then painted the exterior color and the canopy masked. The Airfix canopy is not really accurate. For some reason, all those square corners for each pane were rounded off considerably. I am hoping someone will do a better canopy to fit this kit. The canopy was then cemented in place and I headed for the paint shop
| COLORS & MARKINGS |
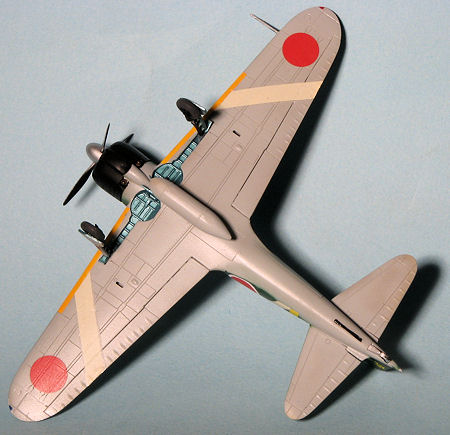
First the underside was painted using Colorcoats
Mitsubishi Navy Grey. I also used this shade for the outside of the gear doors
and the drop tank. When dry, the tailplanes were masked off and the upper
surfaces painted Mitsubishi Navy Green, again using Colorcoats paint. The wheel
wells were brush painted with the same brand's Aotake which was also applied to
the gear doors. Now for this kit, I planned on using the additional markings
from a Hasegawa kit and this indicated that there were areas of the aircraft
that were in a lighter shade of Navy Green. This is indicated as a 3:2 mix of
standard Navy Green and Tan so I gave it a go using Ameiro as the Tan. The
result was a 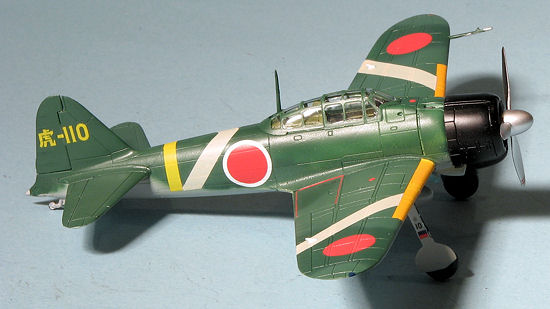 somewhat subdued, but noticeable change in color as the Mitsubishi
Navy Green is pretty dark stuff. When dry, the masking came off the wing leading
edges and the underside of the tailplanes and airframe was gloss coated.
somewhat subdued, but noticeable change in color as the Mitsubishi
Navy Green is pretty dark stuff. When dry, the masking came off the wing leading
edges and the underside of the tailplanes and airframe was gloss coated.
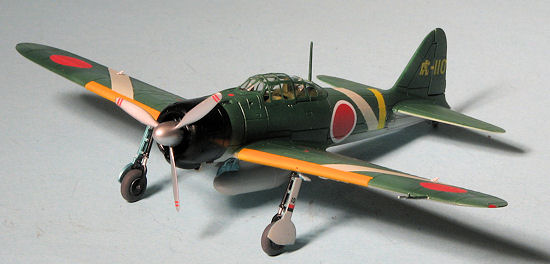
I then attached the main landing gear assemblies after building them up. These are pretty fiddly and had to be lightly clamped together while they dried. Meanwhile, I attached the small outer gear doors. As happened with both the Tamiya and Hasegawa kit, these fell into a small pool of cement, ruining the finish of the wing. Once the main gear were sturdy enough to handle, they were inserted in the wells. These are a really flimsy fit and they moved all over the place while the glue set. Even then they were quite 'wiggly' and so I put some super glue at their base to stiffen things up.
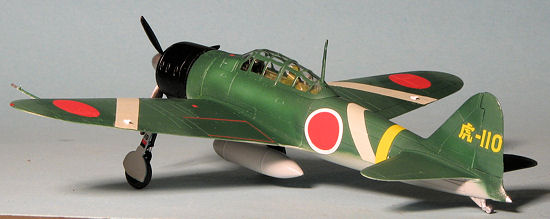
For decals, I decided to use the second option left over from the Hasegawa kit I had recently built. This was despite knowing how brittle and unwilling to conform to panel lines the decals were. They fit well and without any real trauma as I used hot water to apply them. However, they refused to snuggle into panel lines and thanks to their somewhat transparency, you can see brighter lines under them where the panel lines go. I also punched out the holes for the aileron hinges. For insignia and other common markings, I used the Airfix decals. These are splendid and were everything the Hasegawa decals were not, though to my eyes the red in the hinomaru is too bright.
| FINAL CONSTRUCTION |
For this it meant building up and painting the prop.
I used Alclad II on the face and spinner with Tamiya black on the back of the
blades. The aileron hinges were painted white as they are to go where the wing
stripes are located. When dry, they were glued in place. As typically happens to
me, the small bits had breakage issues. This happened with the pitot tube and
one of the inner gear door braces. Soft plastic is fine for cutting larger
pieces from the sprue, but w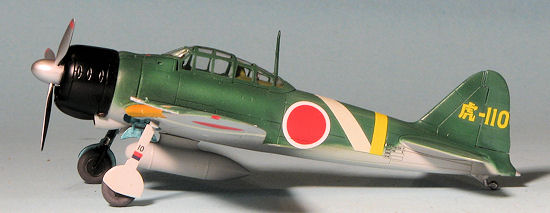 hen it comes to the smaller ones, it means they
break. I have yet to build a new Airfix kit without breaking at least one small
part.
hen it comes to the smaller ones, it means they
break. I have yet to build a new Airfix kit without breaking at least one small
part.
I do like that the inner gear doors and their struts are one piece as they mount by the strut and this is a good engineering job. The pilot is, believe it or not, a butt join as Airfix does not provide a hole in the wing for it. At least mine did not have one. I also painted the tail wheel strut aluminum with a black tire and glued it in place. Again, there are no receptacles for the two pins on the bottom of the gear and these are simply butt joined in the tail gear well. The tail hook was painted black as was the area around the exhaust. Touch up painting was done and it was all given a matte clear coat. Last things to be added were the engine cowling and the prop. The prop shaft is too short and not as large as the opening it fits into on the prop, making for a loose assembly that really needs to be super glued in place and held while the glue dries.
| CONCLUSIONS |
Let me start this by saying that the Airfix Zero is a very good kit for the money. It has acceptable interior detailing and the outside detail is quite good as well. It also has some interesting engineering, such as allowing for the ability to fold the wing tips and having the inner gear door actuating arms being part of the inner door. The fit is also generally very good. Airfix's decals are excellent and though the markings option is somewhat uninspiring, it is one that has not been offered before.
However, it misses details that are provided on other
kits. For instance, there are no upper wing formation lights. No marked out
areas for wing tip lights. The ADF antenna is missing from the interior and
there are no lower
 aileron mass
balances. I found the butt join pitot and tail wheel assembly to be something
not expected in a modern kit, and the sloppy and somewhat weak landing gear were
an irritant as was the easily broken small parts. Finally, the rounded edges of
the canopy panes was an odd choice as the real plane's canopy was not designed
that way.
aileron mass
balances. I found the butt join pitot and tail wheel assembly to be something
not expected in a modern kit, and the sloppy and somewhat weak landing gear were
an irritant as was the easily broken small parts. Finally, the rounded edges of
the canopy panes was an odd choice as the real plane's canopy was not designed
that way.
So, having built the three main players in the 1/72 A6M2 arena, how do they stack up? Far and away the best is the new Tamiya kit. It has gobs of detail, though some of it is quite petite and building can be fussy. The Hasegawa kit has greater external accuracy than the Airfix kit, but a rather bland and Spartan interior. It is also easily 3 times as expensive. Hasegawa's harder plastic is superior as one does not break fine parts. So I would have to rate the Airfix kit as a close third to the Hasegawa kit, based mostly on price differences and the fact that the Airfix kit has better interior sidewall detail and does include the inner gear door actuating arms.
Bottom line is that if you want a nice early Zero, do not want to spend a lot, and are not all that concerned about absolute accuracy, then the Airfix kit is for you.
| REFERENCES |
http://en.wikipedia.org/wiki/Mitsubishi_A6M2
October 2012
Thanks to my personal magnanimity for the review kit.
If you would like your product reviewed fairly and fairly quickly, please contact the editor or see other details in the Note to Contributors.