Fujimi 1/72 C6N1 'Myrt'
|
KIT # |
72008 |
|
PRICE: |
$29.95 SRP (at the time) |
|
DECALS: |
Several aircraft |
|
REVIEW : |
|
|
NOTES: |
|
|
HISTORY |
The Japanese have always had a need for long range reconnaissance and this was particularly true of the Navy. Though carrier commanders had been using bombers for this task, it just wasn't as good as a dedicated recce bird. So a proposal was put out for a carrier-borne reconnaissance aircraft with a max range of 2,500 nautical miles and a maximum speed of 350 knots. That would make it long ranged enough to do a credible job and fast enough to get away from enemy fighters.
 To obtain these specs required a very sleek design, yet it had
to be able to fit on the standard carrier elevator. This was a daunting task for
the designers. They couldn't make it too long or too heavy and it had to be able
to have a slow enough landing speed to be able to land on a carrier.
To obtain these specs required a very sleek design, yet it had
to be able to fit on the standard carrier elevator. This was a daunting task for
the designers. They couldn't make it too long or too heavy and it had to be able
to have a slow enough landing speed to be able to land on a carrier.
The resulting design was powered by an 1,800 hp Homare engine and first flew in May of 1943. It was a pleasant handling aircraft, but the troublesome Homare engine kept speed down to 345 knots (around 400 mph). Despite the inability to meet the required specs, it was much better than the Judy which was being used at the time so it was put into production. Improvements were made throughout the production history of the plane and it was developed into several other variants including a night fighter.
First used in the Marianas campaign of mid-1944, it was flown with a drop tank that increased range to over 3,000 miles. It was able to successfully shadow the US Fleet and its speed made it practically immune to interception.
|
THE KIT |
Fujimi has this love/hate relationship with modelers. You either
like them or you hate them and it all depends on which kits you buy. Some of
their later releases like the A-7, A-4 and Brit Phantoms in 1/72 are still the
finest kits of the type around in that scale, despite being over a decade old.
Others, like this particular kit, have been chastised for poor fit and high
prices. The price thing is mostly due to the US importer, MRC, who have always
really jacked up prices on the kits it imports. The late lamented Military
Anyway, it is a
'typical' WW2 Japanese kit from Fujimi. Everything is there, but the interior
detail is a bit weak, offering decals in place of engraved detailing on the side
consoles. There is detail on the instrument panels, though the decal will undoubtedly
be used as it is easier than painting it. Detailing is finely engraved panel
lines. No obvious sink marks though there are ejector pin marks on the inside of
the gear doors and on the wheels. The wheels are slightly 'flattened', which is
a nice touch. The only option is the drop tank.
The decals offer five different options, four of
them from the 762nd Kokutai and one from the 801st Kokutai. Since JNAF units at
this time of the war had very boring markings (just tail number differences) you
could undoubtedly do a 132nd, 343rd, or 653rd Kokutai plane if you had a picture
of one. There seems to be enough numbers to let you do so. The decals are again
very typical in that they are thick and will work rather well as long as you
keep the decal solvent away from them! There is also a 'Grade Up Metal Parts' in
with the kit. This is a small piece of tubing and a thin wire to make a pitot
tube!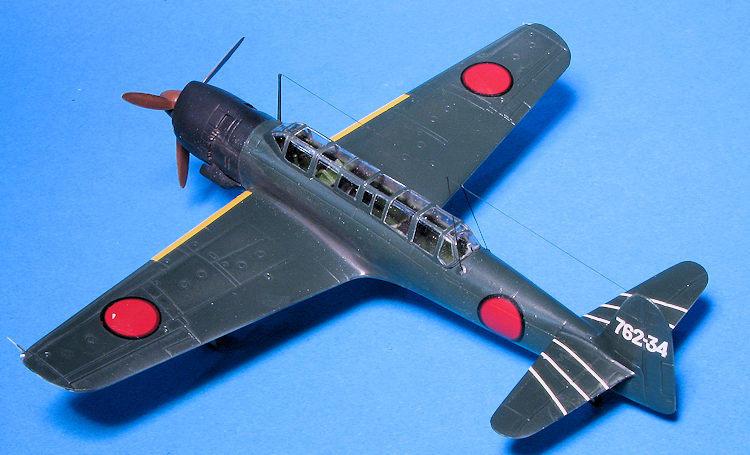 Modeling Preview really dumped on this kit for the fit problems they
encountered while building it. This was only exacerbated by the high cost of the
kit. Guess I'll find out if they were right.
Modeling Preview really dumped on this kit for the fit problems they
encountered while building it. This was only exacerbated by the high cost of the
kit. Guess I'll find out if they were right.
|
CONSTRUCTION |
This is a pretty basic kit, but one that
has promise if you are into adding detailing, especially the cockpit. I started
this one by gluing the drop tank halves together, then gluing the wing upper and
lower halves. The cockpit got the pilot's seat and control stick while the rear
seats fit atop the wing on tall pedestals. The in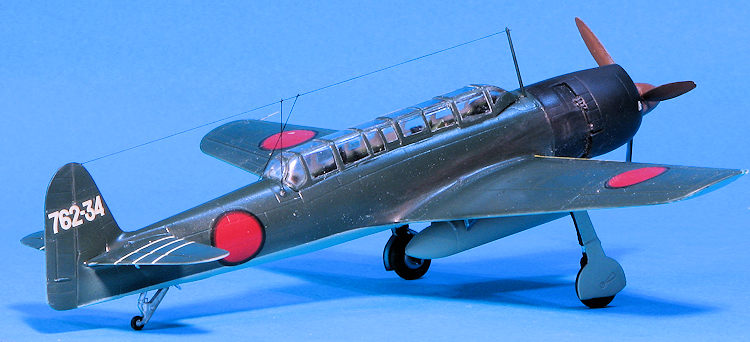 structions show a forward lower
window, but this isn't on the kit. Instead there is a tall rectangular block and
no indication in the instructions that this needs to be removed. I left it.
Interior parts and sidewall were painted FS 34102 IAW the instructions. Engine
and inside cowling were painted steel.
structions show a forward lower
window, but this isn't on the kit. Instead there is a tall rectangular block and
no indication in the instructions that this needs to be removed. I left it.
Interior parts and sidewall were painted FS 34102 IAW the instructions. Engine
and inside cowling were painted steel.
I then put the decals on the instrument panel and side consoles. These were all oversize to some degree, though I found that when I used Mr Mark Softer on the instrument panel, the dials matched up with the depressions in the plastic panel so that was neat. I used an Eduard seat belt set for the front seat, but did not have enough for the back seats so just used strips of tape for those.
Fitting the interior into the fuselage required me to cut cut away at several of the alignment pieces. Without doing this, the interior would be too far forward. Even then, getting the fuselage halves together around these was a bit of a chore. I had already assembled the wings, so glued those in place. Fit is fairly good, but not perfect. Same for the tailplanes.
 Next to be attacked with glue was the cowling. There are two
side halves and a forward section to this. The engine gets the prop shaft
inserted prior to trapping it between the two cowling sides. There is a piece on
one half that keep this shaft in place so one only needs to attach the prop at
the end of the build. The fit of the cowling itself is only fair as is the fit
of the cowling to the forward fuselage. I recommend doing this before the
cowling glue dries as it makes it easier to move things around for the best fit.
Next to be attacked with glue was the cowling. There are two
side halves and a forward section to this. The engine gets the prop shaft
inserted prior to trapping it between the two cowling sides. There is a piece on
one half that keep this shaft in place so one only needs to attach the prop at
the end of the build. The fit of the cowling itself is only fair as is the fit
of the cowling to the forward fuselage. I recommend doing this before the
cowling glue dries as it makes it easier to move things around for the best fit.
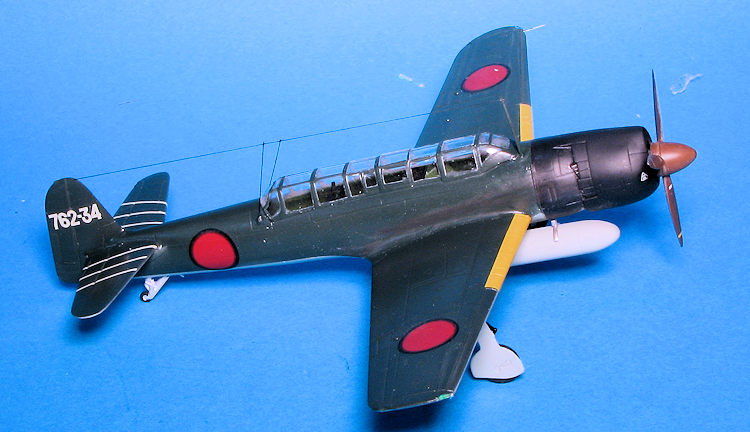
I then installed the tail hook. This has no positive locators so I first attached the forward end of it and as it was drying, pushed it more into place. This prevented it from accidentally coming loose and rolling around on the inside of the fuselage. A touch more glue made sure it was going to stay. Then began the semi-tedious task of masking a very long greenhouse. A few interior details were glued in and then the canopy was attached. I had broken the rear gun removing from the sprues so this one would be modeled with the gun stowed. The cowling was stuffed with tissue and it was off to the paint shop.
|
COLORS & MARKINGS |
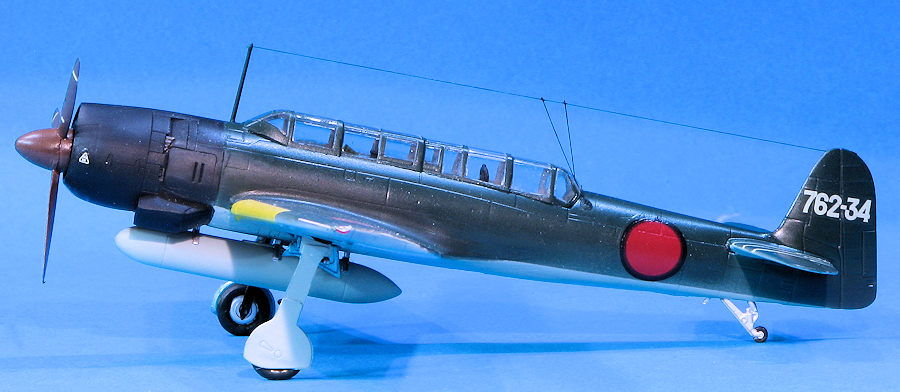
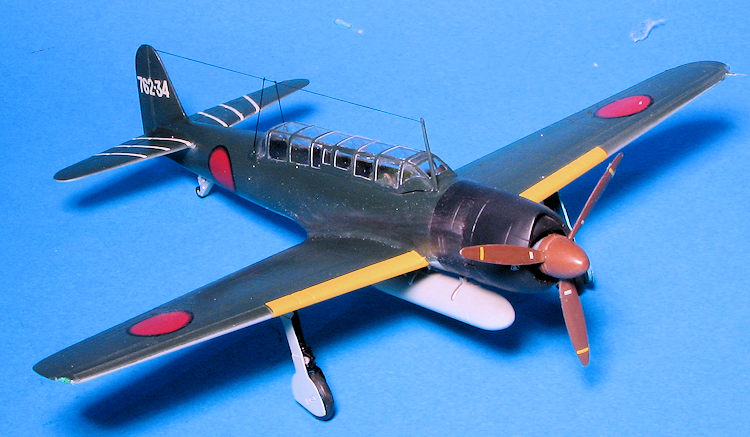
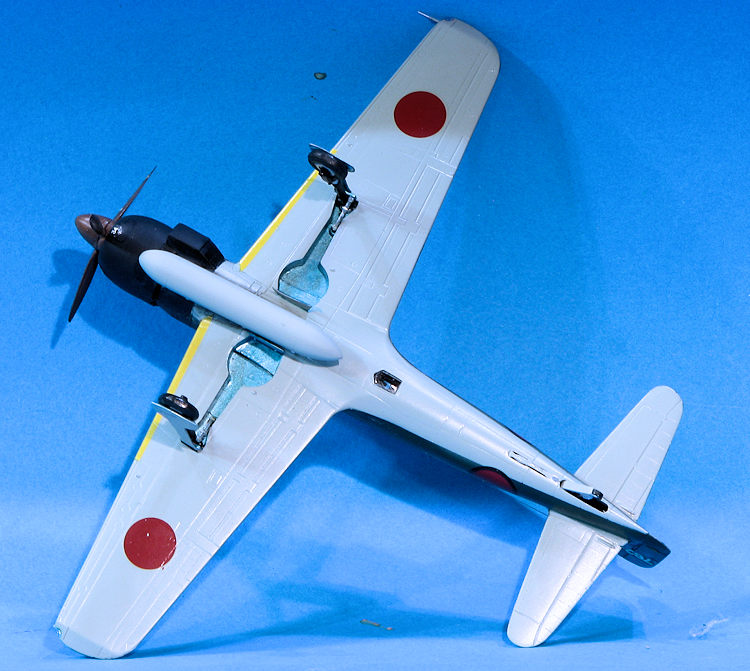
The only colors I had for this kit were Aeromaster acrylics so I first sprayed it all with Tamiya extra fine primer. This included the prop, drop tank and the gear doors. The gear legs were painted black. When dry, the prop was painted a leather brown and the cowling with Mitsubishi blue-black. Now I have a suspicion that these cowlings were really black and weathered to a blue-black, but I've been using this shade for years and have never had a knock on the door from the Farbe Polizie. When dry, it was masked off and the underside painted with Nakajima Navy grey. More masking and the Nakajima Navy Green was sprayed.
 After all that had dried, I removed the masking and painted the
gear wells and inside of the gear doors with Aeromaster Aotake a greenish
metallic color. Then it was time to attach the main landing gear. These are
extremely loose and I eventually used super glue to hold them in place. There
are retraction struts to be put in place as well as the wheels and gear doors.
At this time, the airframe save the nose was given a coat of clear gloss
acrylic.
After all that had dried, I removed the masking and painted the
gear wells and inside of the gear doors with Aeromaster Aotake a greenish
metallic color. Then it was time to attach the main landing gear. These are
extremely loose and I eventually used super glue to hold them in place. There
are retraction struts to be put in place as well as the wheels and gear doors.
At this time, the airframe save the nose was given a coat of clear gloss
acrylic.
Then it was time for decals. Based on how well the instrument decals worked, the kit markings were used for the yellow wing ID bands. Thanks to Mr. Mark Softer, which is designed for older Japanese decals, they snuggled right down with no issues. I was not, however, ready for what happened next. I wet the tail stripes that go on the stabs. These have a clear carrier that joins them all together for proper alignment. As I pulled the wet decal from the backing, all the clear coat shredded and I was left with individual stripes with ragged bits of shredded clear carrier jutting from them. It was a total pain to get these in place. I then coated all the rest of the decals with clear carrier in them (such as the tail code numbers) with Microscale decal film, and had no further issues.
Once the decals were in place, the last items were added such
as the radio mast and the pitot tube. This kit comes w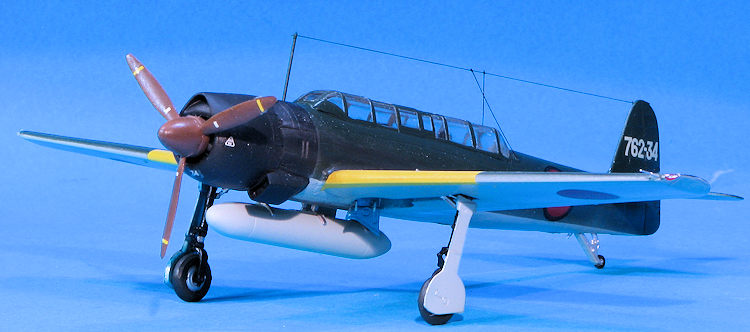 ith a very small diameter
tubing and even smaller metal wire to make the pitot. I only ended up using
about 1/3 of what was there as the pitot is small. Once those were in place, I
did some touch up painted and sprayed a coat of semi-matt on the airframe to
seal the decals and even out the paint. The masking was removed from the clear
bits and I found I had to do some work on some paint the snuck under the
masking.
ith a very small diameter
tubing and even smaller metal wire to make the pitot. I only ended up using
about 1/3 of what was there as the pitot is small. Once those were in place, I
did some touch up painted and sprayed a coat of semi-matt on the airframe to
seal the decals and even out the paint. The masking was removed from the clear
bits and I found I had to do some work on some paint the snuck under the
masking.
The final bits were to glue on the drop tank, then the clear wing lights. These do not fit well at all. I used clear paint for this. An antenna was made from EZ-Line. There are two feed wires that go to it and these are both angled in. Since any sort of glue causes EZ-Line to contract when another piece is added to it. I used stretched sprue for these wires. These lines were painted black and the prop pressed in place. Last step was to do a bit of exhaust staining with pastels and that was it.
|
CONCLUSIONS |
Overall, the build went pretty smoothly. The fit of the parts is fairly good and while it is lacking the finesse of modern kits, it does make into a very nice model. It is also a relatively uncommon aircraft in most collections so well worth seeking.
26 August 2016
Copyright ModelingMadness.com
If you would like your product reviewed fairly and fairly quickly, please contact the editor or see other details in the Note to Contributors.
Back to the Previews Index Page