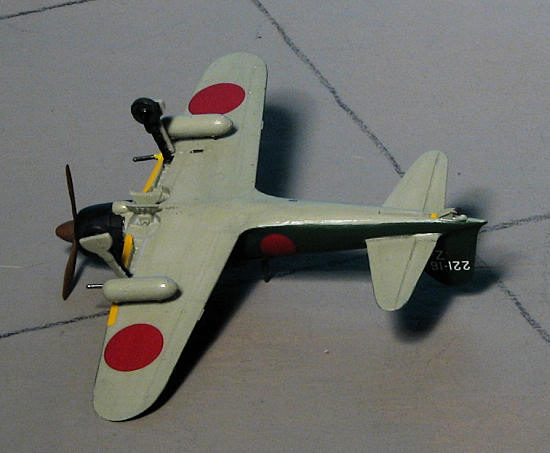
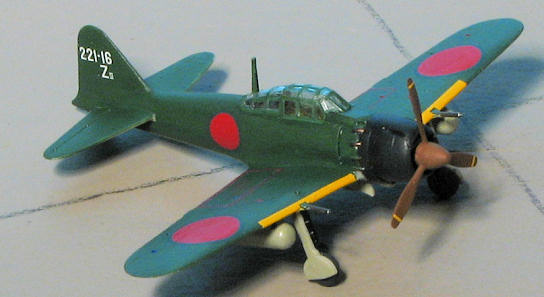
Sweet 1/144 A6M5b with drop tanks
| KIT #: | 28 |
| PRICE: | 2000 yen at Hobby Link Japan |
| DECALS: | Five options |
| REVIEWER: | Scott Van Aken |
| NOTES: | Includes resin parts |
| HISTORY |
The A6M5 Model 52 was developed to face the powerful American Hellcat and Corsair, superior mostly for engine power and armament. The variant was a modest update of the A6M3 Model 22, with non-folding wing tips and thicker wing skinning to permit faster diving speeds, plus an improved exhaust system. The latter used four ejector exhaust stacks, providing an increment of thrust, projecting along each side of the forward fuselage. The new exhaust system required modified "notched" cowl flaps and small rectangular plates which were riveted to the fuselage, just aft of the exhausts. Two smaller exhaust stacks exited via small cowling flaps immediately forward of and just below each of the wing leading edges. The improved roll-rate of the clipped-wing A6M3 was now built in.
 Sub-variants included:
The A6M5 had a maximum speed of 540 km/h (340 mph) and reached a height of 8,000 m (26,250 ft) in nine minutes, 57 seconds. Other variants were the night fighter A6M5d-S (modified for night combat, armed with one 20 mm Type 99 cannon, inclined back to the pilot's cockpit) and A6M5-K "Zero-Reisen"(model l22) tandem trainer version, also manufactured by Mitsubishi.
| THE KIT |
This
is the latest of the superb line of 1/144 fighter kits from Sweet. This
continues with their A6M series by providing parts for the A6M5b with two under
wing drop tanks. Unlike most of their kits, this one only has parts enough for
one aircraft. There are sprues from three different variants, the A6M3, A6M5a/b
and A6M5c. This provides enough parts from the various sprues as one has the
 proper wing, another the correct prop and another providing landing gear and
tail planes. Seems like an odd way to do things, but it is easier to provide
ready made sprues than to mold a new one.
proper wing, another the correct prop and another providing landing gear and
tail planes. Seems like an odd way to do things, but it is easier to provide
ready made sprues than to mold a new one.
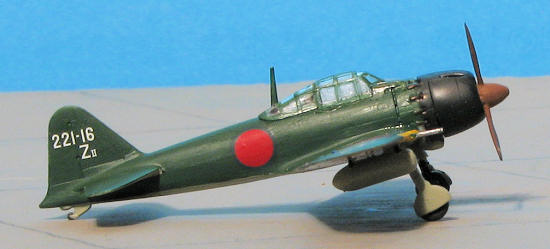
As you might expect, the molding on the parts is first rate and the build should go rather quickly. The highlight of this kit are the under wing drop tanks. These are provided on a separate resin sprue. There are four tanks (which makes one wonder why there aren't enough parts for two planes) as well as a pair in crates. These crates have the covers as well so will make for a very nice diorama. The resin parts are superbly molded as one would expect from Sweet.
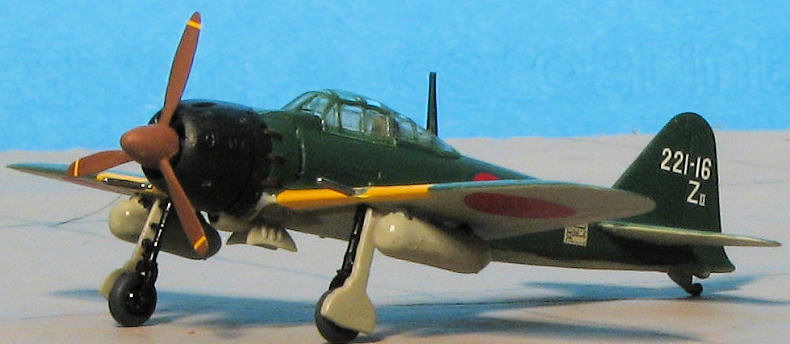
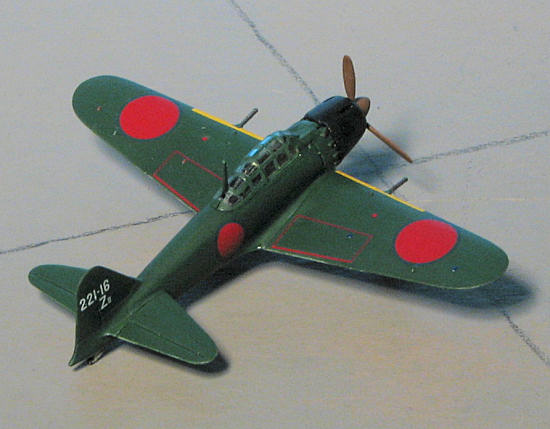
Markings are for five aircraft, all in the IJN Green over IJN Grey with black cowlings. The wing leading edge ID stripes are included on the decal sheet. There are four options for the 221 flying group and one for the 653 flying group. A variety of upper wing and fuselage roundels is included with most having the white surround overpainted in green. Stencils are included for the drop tanks and their cases. The decals are superbly printed by Cartograf and are as good as any quality aftermarket sheet.
| CONSTRUCTION |
Sweet gives you so many
sprues as you will be needing to pick bits and pieces from the various sprue to
do this aircraft. This is an A6M5b and so it has items in common with the 5a and
5c versions as well as generic Zero bits. First thing I found was that the part
numbers for the A6M5c fuselage halves I was to use were not printed correctly.
Not a big deal, but something for which one
 has to be wary.
The halves literally snapped into place and then some glue was added to keep them that way. I used the wing from the A6M5a sprue, and that glued in place rather easily as well. Next, the cockpit bits were painted and installed (OK, the seat). Then the tail planes were glued in place. I then painted the area under the canopy. I used Colourcoats paints as they have a wide arrange of Japanese colors in their enamel line. As they are gloss or semi-gloss, they take a couple of days to where you can handle them.
Anyway, I attached the radio mast and when I slid the canopy over it, the rear of the canopy cracked. This was only the beginning of my canopy hassles. I tried several times to mask it with both Tamiya tape and Bare Metal Foil. All attempts ended up looking like crap so now with a goodly scratched canopy, I settled down to hand brushing.
| COLORS & MARKINGS |
 For
this one I decided to forego the compressor and see what my hand brushing skills
might be (turns out they are poor). I used Mitsubishi Navy Green for the upper
surfaces and Undersurface green-grey for the undersides. This color was also
used for the resin drop tanks. Using a relatively wide brush, I put on the
various colors. Each color took at least a second coat to cover without obvious
streaking.
For
this one I decided to forego the compressor and see what my hand brushing skills
might be (turns out they are poor). I used Mitsubishi Navy Green for the upper
surfaces and Undersurface green-grey for the undersides. This color was also
used for the resin drop tanks. Using a relatively wide brush, I put on the
various colors. Each color took at least a second coat to cover without obvious
streaking.
Meanwhile the engine, gear legs and wheels were painted black. I still had enough of my Aeromaster paints for the blue-black cowling and the primer brown prop. I also had to drill new mounting holes for the drop tanks. The instructions give good guidance, but I just eyeballed it using one of the extra tanks as a guide.
Once painted, I glued on the landing gear and got ready for decals. Sweet's decals are first rate. One does have to cut holes in the yellow wing ID bands to fit through the cannon. The areas on the decal are clear, but need to be cut open. They behaved beautifully with Solvaset.
With all the markings in place, I attached a few more bits (the tiny gear doors that are part of the main gear doors were not fitted as one of them disappeared between opening the kit and attachment time), including the prop. The model was then brush painted with Vallejo matte clear, a few bits for the formation lights and that was it.
| CONCLUSIONS |
 This kit
really is well done and builds easily. I found that just drilling the forward
hole for the tanks and clipping off the rear one eliminated any need to be
really exact in measuring out the new holes you need to drill in the wing. As to
my attempts to hand paint this one, I'm sure you will all agree that it sucks.
Next time, I'll stop being lazy and air brush the paint. Regardless, it makes
for a very nice addition to my growing 1/144 aircraft collection. I'm sure you
will be equally pleased with it.
This kit
really is well done and builds easily. I found that just drilling the forward
hole for the tanks and clipping off the rear one eliminated any need to be
really exact in measuring out the new holes you need to drill in the wing. As to
my attempts to hand paint this one, I'm sure you will all agree that it sucks.
Next time, I'll stop being lazy and air brush the paint. Regardless, it makes
for a very nice addition to my growing 1/144 aircraft collection. I'm sure you
will be equally pleased with it.
Before dumping on me too much for poor construction, painting or photos, keep in mind that no dimension on this model exceeds 3 inches.
| REFERENCES |
I used http://en.wikipedia.org for that.
My thanks to Hobby Link Japan for the review kit. Get yours today at Japanese prices.
If you would like your product reviewed fairly and quickly, please contact me or see other details in the Note to Contributors.