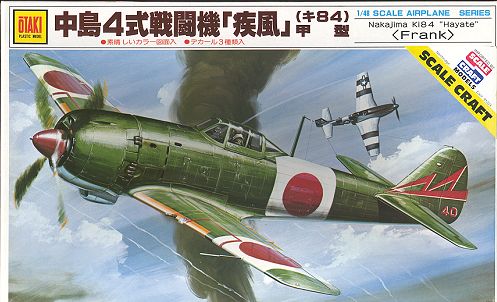
Otaki/ARII 1/48 Ki-84 Frank
|
KIT # |
7 |
|
PRICE: |
$10.00 |
|
DECALS: |
Three options: see writeup |
|
REVIEW BY: |
|
|
NOTES: |
|
HISTORY |
The Ki-84 was undoubtedly the finest Japanese Army fighter of the war. Based loosely on the Ki-44 interceptor, the Ki-84 had a bigger engine, more armor plating, greater firepower, and greater range. It was also a super aircraft to fly having regained the maneuverability lost in the Ki-44. Unfortunately, the aircraft was not put into full production until mid-1944, by which time quality control was a big problem. This was due to the bombing of factories by B-29s operating from China and later the Marianas islands. In addition, most of the skilled labor was in the army or otherwise in the field.
|
THE KIT |
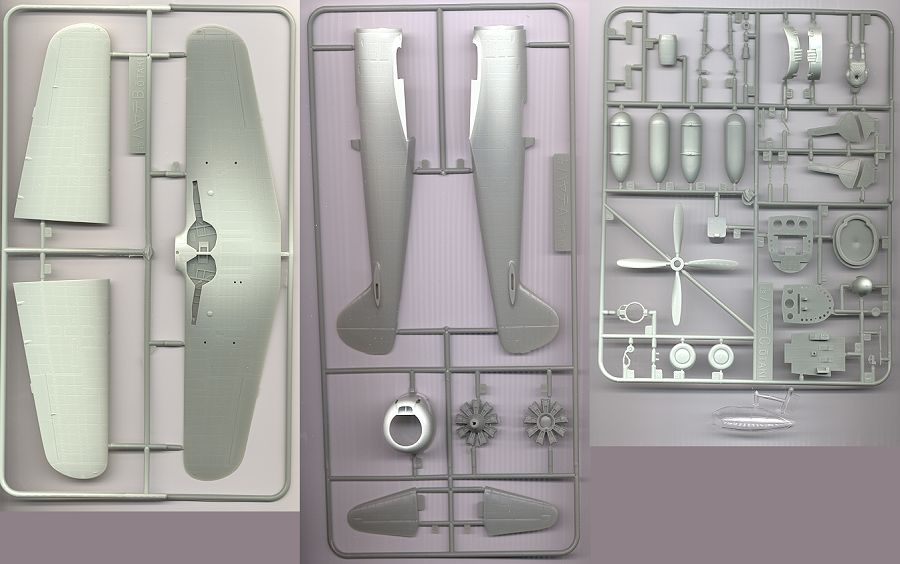
Molded in Otaki's typical grey green, the kit offers engraved panel lines, lots of rivets, and a pretty complete interior. Especially when one considers the age of the molds. It has a one piece canopy and a full engine. Many of the details are now suspect when one looks at the information now available on the aircraft in the intervening years. The only 'option' is whether to put on the external tanks or not. If you choose to leave them off, you'll have to fill in the holes for the mounts.
|
CONSTRUCTION |
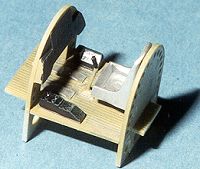
One starts this kit as any other, and that is with the cockpit. There really isn't much too it. Just a floor, front and rear bulkheads, seat , and control column. The instrument panel is a bit fanciful and 'sort of' looks like the one in a Frank. It will have to be painted and detailed as you like, since there is no decal or other real detail on it. There is, however, some sidewall detail. Some of it is marred by ejector pin marks, which will be difficult to remove. Fortunately, the canopy isn't crystal clear so these will probably not be seen. What detail is there is pretty general, but gives a good impression. For the interior, I chose Aeromaster Nakajima Interior Green. It seems to do the trick nicely. Once it was painted, it was washed with dirty thinner and then dry brushed with a light green. Of course, I broke the control stick at this time and had to glue it back in place! The instrument panel looked pretty boring so the dials were painted white and Reheat Instrument decals placed in there, just to give it some interest.

Once the interior was completed, it was glued into one fuselage half. Then the halves were glued together. While this was drying, the wings were cemented together and the holes for the drop tanks filled in with putty. Once the gaps in the fuselage were filled and sanded smooth, the wings were attached. These were a very good fit; tighter than a Scottish Loan Officer! Just a tad of filler needed at forward wing roots and underside at the rear. Once that was done, the tailplanes were glued in place. These needed to have the tabs filed down a bit as they didn't exactly match the root on the fuselage.
Next bit to do was the engine. It comes with both cylinder banks and these items are glued to each other. The prop shaft is inserted in the front part and the hold back is in the back of the front cylinder bank. The engine was painted flat black and dry brushed with steel. The front housing was painted aluminum. Interestingly enough, the kit does not mention the assembly that needs to be glued to the front cylinder bank. This should be painted aluminum and I painted the pipes around it burnt iron just to give it some additional color. The next step in preparation came to the cowling. The cowling flaps and exhaust are separate bits on each side of the cowling that need glued in place. Typically for me, the cure of the inserts was greater than the cowling and the inserts were also shorter. These items were fit in place as well as could be and filler was used to smooth things out. The cowling is supposed to be removable to see the engine 'detail', but is a poor fit. The only choice is to glue it in place. Grab the files and filler here as well, because the cowling is larger in circumference than the surrounding nose.
Once the nose was dealt with, the headrest cushion and gunsight were added to the interior, then the undernose radiator was glued in place. The cockpit surrounding area was then painted flat black. When that was dry, the canopy was glued into place and masked with Scotch Transparent Tape. Then the antenna was glued in place and it was then off to the paint shop!
|
PAINT & DECALS |
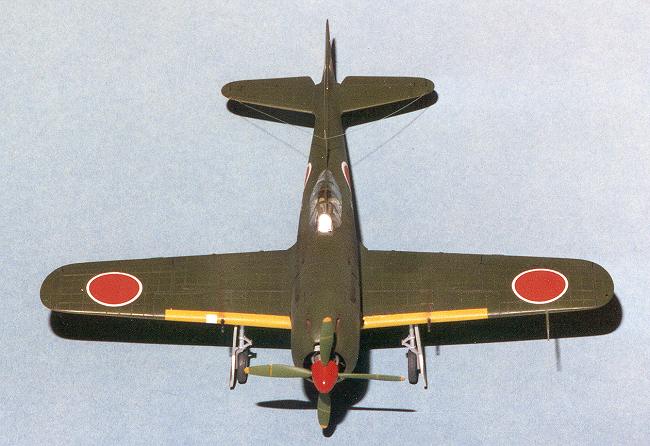
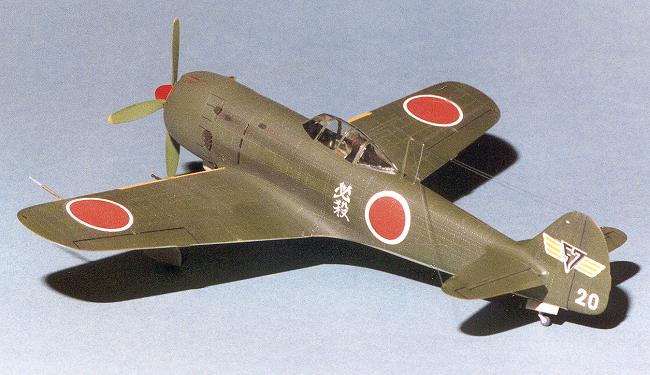
First the front of the wings were painted with Testors Model Master Gloss White enamel. When dry, Aeromaster ID Yellow Acrylic was sprayed over it. When that was dry it was masked and the entire underside of the airframe was painted with Aeromaster IJAAF Underside Green-Grey Acrylic. Once that was dry, top surfaces were painted Aeromaster Nakajima Army Green. When it was dry, the upperside had the panel lines accented with dark grey paint. Then it was lightly oversprayed with the Army Green. After going back and forth to fix glitches, the kit was given a gloss coat in preparation for the decals. In the mean time, the prop spinner was painted red, undercarriage and inside of gear doors aluminum, and the propeller a medium green color that is typical of Ki-84 props.
Once the airframe was painted, it was time to return to the assembly room before adding any decals. First, the tailwheel was glued in place. Next the main gear had the oleos covered with Bare Metal Foil and then they were attached to the wheel wells, which were painted aluminum. The mounting lugs for the main gear are too long and need sanding down to a shallower depth before installation. The pitot tube on the wing was also installed at this time.
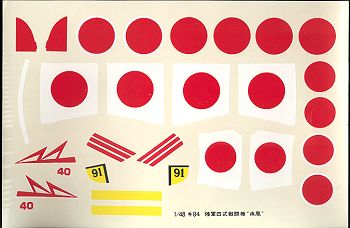 The kit provides three options to choose from. First of all is a bare metal aircraft from the 73rd Squadron, from 1944/45. Next is a bare metal with overall green squiggles over the upper surface from the 1st Squadron, also in the Philippines, 1944/45. Finally, in the 'normal' green upper and light blue undersides is an aircraft from the 35th Squadron with white 'bandages' behind the Hinomaru. I think this may be a misprint as I believe these markings are from the 44th Squadron.
I had really wanted to use the 35th Squadron markings, but once the decals came off the paper, I knew I was in trouble. The decals were very brittle and the white parts were too short to cover completely. They went into the trash and I brought out the standby decals. These came from the Aeromaster set 'Special Attack Squadrons'. There are four Ki-84s in the sheet and I chose one from the 57th
Shimbu-tai, flown by 2nd Lt. Tetsujiro Karasawa on May 18, 1945. On May 28th Lt. Karasawa was one of 11 Franks that attacked shipping near Okinawa. The emblem on the side of the aircraft is the motto 'Hissatsue' (sure to kill). Typical of Aeromaster decals, they were no problem to
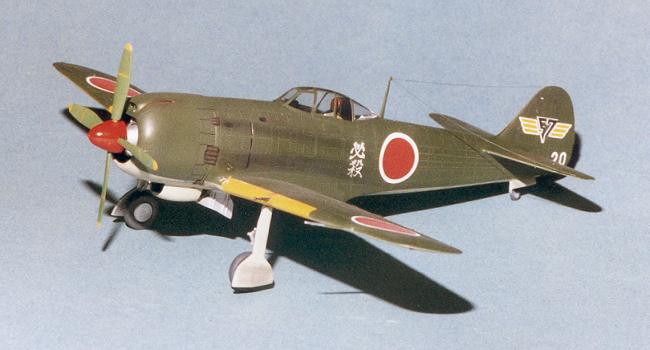 install. I did have to find another source for Hinomarus as the Otaki ones were unusable and the Aeromaster sheet only provides one set for the Ki-84. While a tiny bit undersized, I found sufficient roundels from an old IPMS sheet from IPMS Spruce Goose circa 1984 that fit the bill.
Once that was done, and the excess setting fluid cleaned up, it was back to the paint shop for the matte clear coat. Then the wheels and gear doors were attached as were the guns. I had to cut of the upper door attachment points as there was no way they would fit. Then pastels were used to simulate gun and engine exhaust stains. Back to the paint shop again for the sealer matte finish.
At this time the final bits such as prop and spinner were added and the tape taken off the canopy. It was at this time that I noticed that the control stick was missing. Must have broken off and fallen out somewhere, hope no one notices, and I'm sure you won't tell!! The very last thing done was the addition of the antenna using stretched sprue. This isn't a simple antenna but only took a short time to do.
|
CONCLUSIONS |

I enjoyed building this kit. It was simple without any of the usual fussy bits that modern kits have. It is nice to build an oldie like this every once in a while. I can recommend this to even beginners, but they will need some help with the landing gear as it isn't a positive fit. I was also quite disappointed in the decals as I really wanted to use them. However since this was the Otaki boxing (and at least 20 years old), I can only hope that the ARII version has better made decals.
Comparing this kit with the Tamiya version points out a major difference. That is the wing. The Tamiya kit's span is actually longer even though the Tamiya version is a slightly smaller scale! The Otaki wings are shorter and much wider, actually being more like the ones on the Ki-44 as anything else. For this reason, it would not be my kit of choice if I were out shopping for Ki-84s. However it does have a more complete, though inaccurate, interior. If shown by itself, it looks like a Frank.
|
REFERENCES |
Japanese Aircraft of the Pacific War, Rene J. Francillon
There are two FAOW books, but I cannot find them at the moment to give you the numbers.
Copyright ModelingMadness.com. All rights reserved. No reproduction in part or in whole without express permission from the editor.