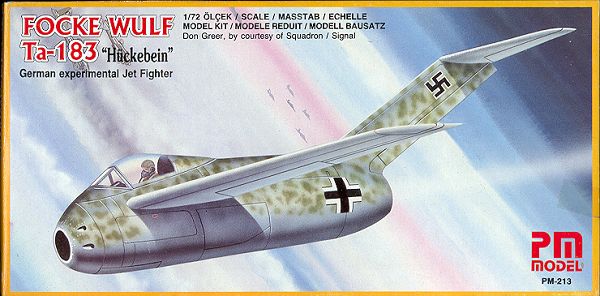
PM Model 1/72 Ta-183 'Hukebein'
|
KIT # |
PM-213 |
|
PRICE: |
$5.95 |
|
DECALS: |
One basic set of insignia |
|
REVIEW BY: |
|
|
NOTES: |
Swastika included |
|
HISTORY |
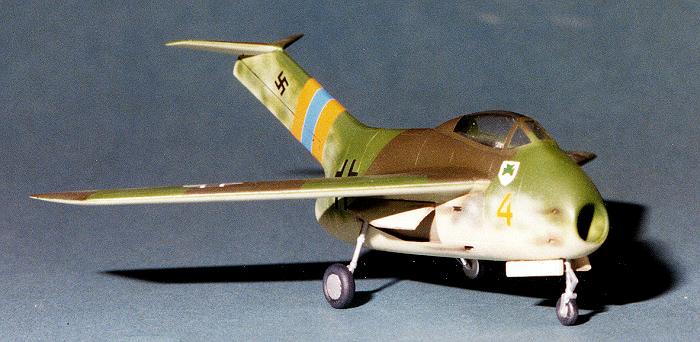
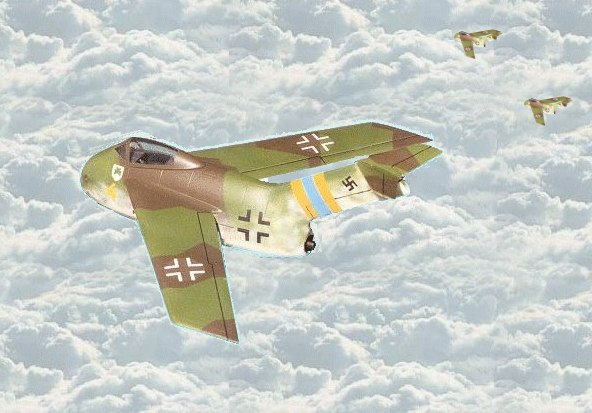
June 1946, on an airfield near Gurteenulla in southern Ireland, the men of 9./JG92 rush to their aircraft. Painted in the summer camouflage of light and dark green, await the Ta-183s of the staffel. Appropriately marked with the badge of a green clover and resplendent with the Gruppe tail bands of orange and blue, the small interceptors start up with a whine of their Heinkel engines. Soon the aircraft are aloft and searching for the enemy.
Radar has reported a large formation of bombers coming from the west, undoubtedly headed to bases in England, though they are farther south than normal, usually passing to the north of Ireland. Ever since the uprising in Russia in 1944, as well as the retaking of much of North Africa, thanks to the assistance of the Bedouins seeking independence from Great Britain, the small island of Great Britain has been under siege. The Irish have never been trustful of the English and once they were promised the reunification of their island with the help of the Germans, have been anxious to lend assistance where possible. Invading England has been deemed a near impossibility so the main effort has been to surround the island and prevent them from being much of a factor in the war.
This has meant that all supplies have had to run the gauntlet of air and sea attack to keep England supplied. It is no longer good tactics to keep large bomber forces in England. As they are always under the threat of air attack while on the ground, shuttle missions have become more the norm. This usually means a one-way trip to the target from North America with surviving aircraft landing in England for refueling and some repair, a crew change and then the long flight back to the US. With the B-29 having been entered into the European Theater as well as the coming of a new super bomber, there is no longer the pressing need to have American bombers permanently stationed in England.
Uffz. Uli Breiling in yellow 4 wonders what they will meet when the enemy is sighted. Flying to 42,000 feet to meet the oncoming mass of aircraft, it seems that there are not as many as what has been sighted before. It appears that there are six trails of smoke from each aircraft. Could it be…Yes it is! The first of the huge B-36 bombers to be seen in this area. Much rumor and supposition has been spread about these huge aircraft. They are supposed to be able to do round trip trans-Atlantic bomb runs from North America without refueling. They are also said to be bristling with defensive guns. He only hopes that he is able to bring one down.
Flying above them, they seem very small, but as he and his comrades close for the attack, the aircraft become huge!! How will they ever be able to shoot one down! He can see the gun turrets pop out of the airframe and start to track his flight. Suddenly, the air is full of tracer fire from the behemoths. Flying a pursuit curve he angles in toward the last bomber in the group. The sound of his 30mm cannon is mixed with the 'zings' of 50 caliber as they make a few holes in his aircraft. Concentrating on the wing/fuselage join, Breiling is satisfied to see pieces to start to come off the aircraft. As he continues his attack, he sees the wing start to crumple. It all seems as if it is in slow motion.
Pulled from his reverie by more 50 cal coming from the bomber above his victim, he moves the throttle forward and quickly dives away. Uli hears the dull 'boom' as he exceeds Mach 1 getting out of range. Safe from the defenders' weapons, he throttles back and looks around. He spots his victim. The fate of the B-36 is now sealed as it heads for the sea 10 kilometers below. Parachutes blossom from the stricken bomber. It seems to carry a huge crew as at least 15 parachutes open. Uli notices that his wingman is also safe and has stuck with him as they head back to the battle above. They each assist in attacking other bombers and at least 5 more aircraft are seen to fall from the formation.
Now out of ammunition and short on fuel, the flight heads back to their base in Ireland. They have met the enemy and have been successful. Looking around after the flight, they see that the battle was not all one-sided as several of their mates have not returned. Uli only hopes that air-sea rescue was able to pluck crews from the icy North Atlantic. Now for a quick rest and hopefully, they will be called to strike the formation on its way back.
Now back to reality:
Toward the end of WW II in Europe, German engineers had put forth a huge number of new aircraft types, mostly powered by turbine engines. The few that actually reached production, such as the Me-262 and Ar-234 were not as successful as would have been hoped, mainly due to quality control problems and the problems associated with the new engines. However, there were a number of aircraft slated for production had the war continued and many German projects had a great deal of influence on post-war aircraft of other countries. The Ta-183 was such an aircraft. Already in the mockup stage with tooling being done to start production, the first flight of the 183 could have been in late 1945. The plans and all other material concerning the 183 was seized by the advancing Russians and the 183 had a huge influence on many Russian post-war aircraft, including the Mig-15.
|
THE KIT |
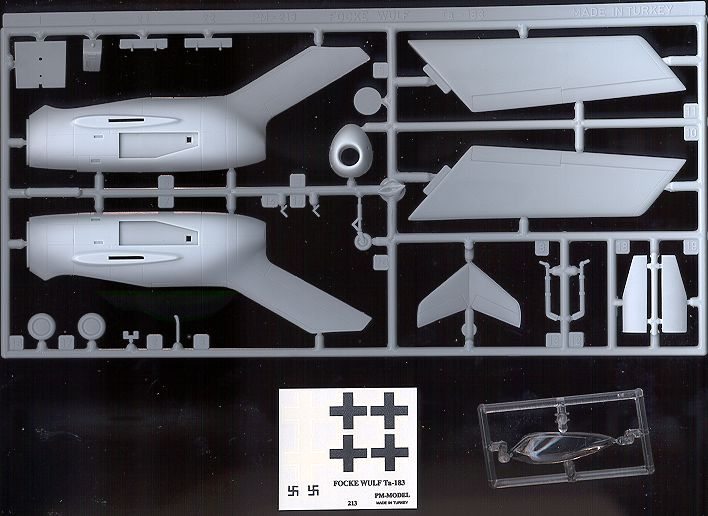
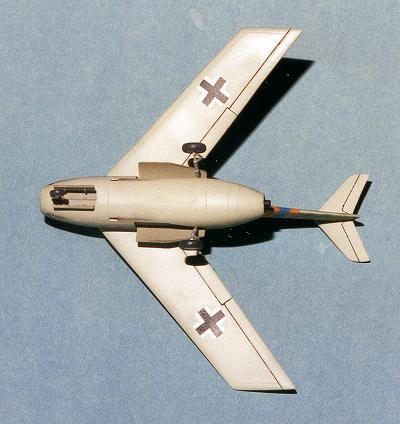
Of all the PM kits I have built, this one seems to be the best in terms of overall appearance. Since the aircraft had mostly wood flight surfaces, there are not a lot of panel lines. Those that are there are very well done. The overall plastic has a slight texture to it, reminiscent of many Italeri kits. What you do get are 24 parts that make up a very basic aircraft. There is precious little cockpit detail. In fact all you get are a floor, seat, control stick and rudder pedals. No instrument panel or even decals. That will have to come from the spares box. The landing gear is also very basic with no retraction mechanism and no wheel well detail at all. Wings are a single piece of plastic.
Initial preview of this kit shows no hint of sink marks. In addition, there are no ejector pin markings on any of the parts except the interior of the fuselage. The others are all on the attaching sprue. Why this particular method cannot be used by others I don't know, but it certainly is effective and I applaud PM for this design feature. It would be interesting to know if this kit is also the basis of the Revell Germany offering.
|
CONSTRUCTION |
Well, without sounding too much like 99% of all the reviews ever written, the first place one starts is the cockpit, such as it is. This interior would make a Frog kit proud. It has a floor, a control column, rudder pedals and a seat that a 5 year-old would look big in. That was painted RLM 66 Dark Grey, as was the surrounding inside of the fuselage. One fuselage half had a small weight superglued into it just in case, to prevent tail sitting. Next the interior and the jet exhaust were glued in a fuselage half and the halves glued together. Now there are many amongst you who are wondering why I didn't scratch build a cockpit for this aircraft. I am determined to make this kit a 'slammer' and do it right from the box. It is a horrible temptation, though!
|
|
|
Once the fuselage halves were glued together, I applied putty to all the seams. I actually found a small sink mark on the bottom. It also appears that the guide pins and slots are a bit misaligned so cut them off. The nose was then glued on and that seam filled as well. The next day, it was then sanded down and the panel lines rescribed. On to the wings and tailplane. I must warn you that the trailing edges are sharp enough to cut you so beware when handling them! There was no real trauma attaching these, though the wing roots are a bit larger than the wings so some filler is needed here. Some is also required for the tailplane. Nothing really unusual for me.
Once the filling and sanding and rescribing were done, the cockpit area was painted RLM 66 dark grey and the canopy installed. Naturally the canopy did not fit too well in the front, so that was filled in with putty and sanded smooth. Once that was finished, it was time to decide on a paint scheme before going on to attaching the landing gear.
|
PAINT & DECALS |
In preparation for painting, the canopy was masked with Scotch Transparent Tape and the main gear doors were fit into their recesses. Good thing I wasn't doing wheels up as the doors are not only a bit smaller than the recesses, but they also sink about 1/16 inch down into them!
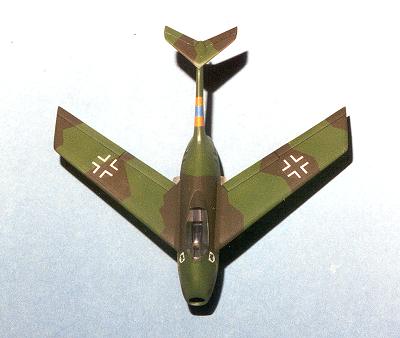
Anyway, I was rather undecided on exactly what kind of scheme to do. Will it be one that was in use in the last year of the war or something semi-original. Not really knowing, what I did was first paint two colors. The underside was painted RLM 84, a sort of sky shade, while the upper surface was painted in RLM 83; a bright green. Both paints are from the Aeromaster line of enamels. The uppersides were masked off in a splinter pattern and RLM 82 Dark Green was then sprayed on. When that was dry, the sides were heavily mottled in the upper surface colors and any glitches were repainted.
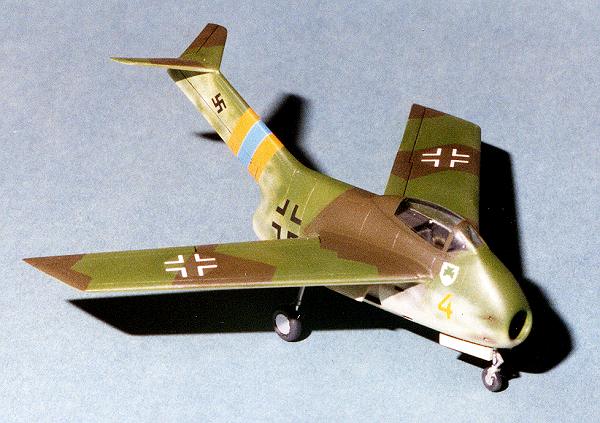
Meanwhile, the landing gear was painted aluminum and the tires painted black. The strut oleos were covered in Bare Metal Foil and the oleo links were attached to the main gear. The gear wells and door interiors were then painted RLM 02. Finally the gear was glued in place and before the main wheels were attached, the aircraft was given a gloss coat to get ready for decals. I chose a scheme of RLM 82/83/84, which is Dark Green/Light Green/Sky. A splinter pattern was chosen and the result looked quite convincing. Now that it was sitting on its gear, it was time to add decals.
The kit decals weren't used as they are not that great. They had yellowed and were very flat. Scrounging through the myriad decal sheets that one tends to collect in 30 years of model building, I found some Superscale sheets with crosses. The swastikas came from an Xtra-decal sheet. The unit badge was garnered from an ESCI Ju-52 sheet while the tail band was from Microscale colored decal sheets. All the decals were treated to Champ setting solution. Once dry they excess solution was removed. The wheels and gear doors were then attached and the kit was flat coated.
When that had dried, it was time to add a few pastels to it, mostly for the guns and exhaust. The kit was then flat coated again and the tape removed from the canopy. Ta-Daaa!
|
CONCLUSIONS |
A very enjoyable kit. The lack of tiny bits made it a dream to build. No anal retentive resin interiors or detail sets for this one. Fit was quite good and the resulting aircraft really looks neat. I guess that this is really what many of us seek from a kit. A pleasant build, a bit of scrounging for parts/decals and finally something that that is personalized and uniquely marked. Recommended for a change of pace and for beginners as well, who won't be frustrated by fiddly bits!!
|
REFERENCES |
Jet Planes of the Third Reich, The Secret Projects, Vol 1 by Manfred Griehl
Monogram, 1999, $49.95
Copyright ModelingMadness.com. All rights reserved. No reproduction in any form without express permission from the editor.
Back to Reviews Page 2026