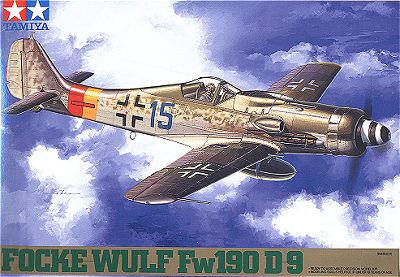
 Tamiya 1/48 FW-190D-9
Tamiya 1/48 FW-190D-9
Kit Number: 61041
Price: $27.00
Decals: three versions: 4/JG 301 (Blue 15), Stab/JG 4, 10/JG 54 (Black 12)
Conversion: Ta-152 tail by Kommandeur Decals
Date of Review: 21 January 1999
Review and Photos by: Scott Van Aken
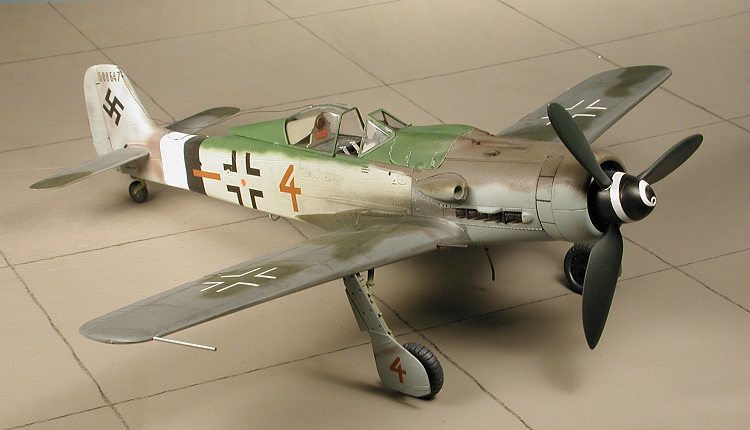
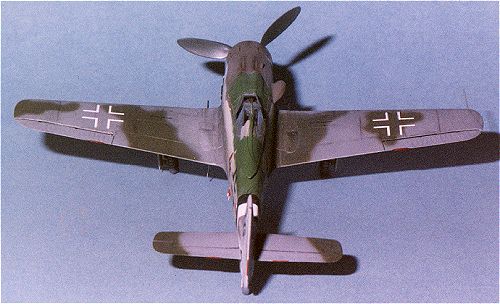
No real need to go into the history of the Fw-190D-9 again, other than to say that it was one of Germany's best late war fighters and though not built in huge numbers was modified a great number of times and has some of the more interesting paint schemes applied to any late war aircraft. This particular variant had the broader tail of the Ta-152; one of three 190D-9s documented as having such a modification. What was more interesting to me, was the number of different colors applied to the aircraft. Since aircraft part production had been dispersed to all parts of Hitler's dwindling empire, and the parts were prepainted, all the parts were not painted exactly the same, and in some cases, not painted at all. They were all brought together at an assembly point were the aircraft was assembled, test flown, and then hurried off into combat.
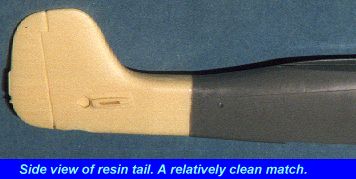
 Conversions generally mean hacking away at some part of the aircraft. In
this case, the tail. The new tail fits along a mold line, which is
helpful. It is also wider than the kit tail, which is not. First
step was to remove the old tail and clean up the join. Next the resin
block was cut from the resin tail and it was cleaned up. I then cut
away some material on the inside of the fuselage until the exterior surface
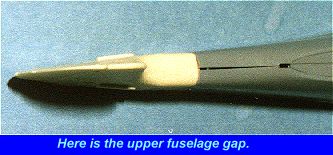
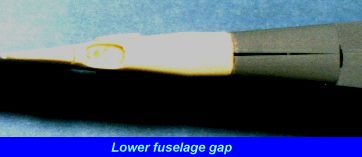
of the tail and fuselage were flush. This left a small gap in the upper
and lower fuselage halves. Concurrent with the tail mods, I decided
to install a Hawkeye
designs resin interior set. An excellent set that includes not only the
interior bits, but sufficient instrument panels and consoles to do any Fw-190.
What you don't use can be used on another kit. No kit interior parts
are used. However, you must cut off all the attachment points in the fuselage.
In addition, you must carve away the inside of the glare shield so the instrument
panel can fit. This took me a while, but was finally accomplished. Once
all that was hacked and filed away, the fuselage interior was painted RLM
66 dark grey.
Conversions generally mean hacking away at some part of the aircraft. In
this case, the tail. The new tail fits along a mold line, which is
helpful. It is also wider than the kit tail, which is not. First
step was to remove the old tail and clean up the join. Next the resin
block was cut from the resin tail and it was cleaned up. I then cut
away some material on the inside of the fuselage until the exterior surface
of the tail and fuselage were flush. This left a small gap in the upper
and lower fuselage halves. Concurrent with the tail mods, I decided
to install a Hawkeye
designs resin interior set. An excellent set that includes not only the
interior bits, but sufficient instrument panels and consoles to do any Fw-190.
What you don't use can be used on another kit. No kit interior parts
are used. However, you must cut off all the attachment points in the fuselage.
In addition, you must carve away the inside of the glare shield so the instrument
panel can fit. This took me a while, but was finally accomplished. Once
all that was hacked and filed away, the fuselage interior was painted RLM
66 dark grey.
|
|
|
|
|
|
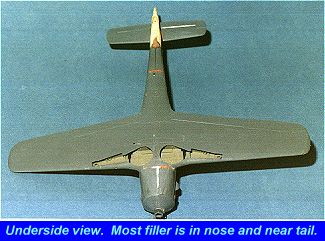
Next the nose section was glued together. Once dry, the resin tail and fuselage were glued together using superglue. When dry, the gaps in the fuselage were filled with superglue and an accelerator was used to allow it to dry quickly. The area was then sanded down. During this operation, I noticed that the tail had corners that were more square than the fuselage and those areas were also sanded down to match. A final putty job was used to smooth things out and then the panel lines were rescribed.
On to the interior. First, the proper consoles were installed, then the rudder pedals and control stick. Next the proper instrument panels were chosen and they, along with the seat, were attached to a piece of stiff paper with white glue. When dry, those components and the interior were painted RLM 66 Dark Grey. The interior was then drybrushed with light grey and the panels given some detail work with different colored paints and washes. Next the lower instrument panel was glued to the interior. The upper panel was glued on with white glue and while still pliant, the interior was temporarily installed in the fuselage to get a good fit. Once that was done, the upper instrument panel was held in place with superglue. The throttle was attached to the left console and painted, and the canopy crank attached to the fuselage interior and painted. During this whole process, which took several days, each step was carefully dry fitted before gluing. Meanwhile, the wings were glued together as per kit instructions.
The interior was then glued in using superglue. A rather good fit.
 The
wings were glued to the fuselage and any gaps and such were smoothed out
with filler. The guns were removed to be replaced with tubing. For
some reason, all my kits need filler, and this one was no exception. Must
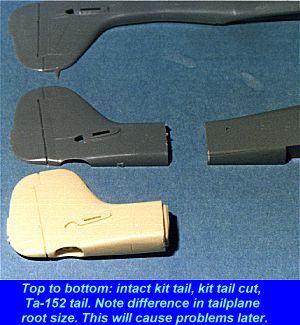
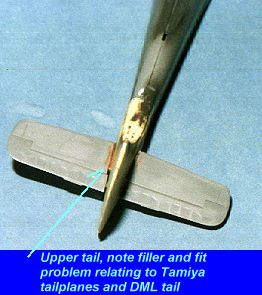
be me :( The tailplanes were next. It was obvious when I tried
to attach them that the resin tail was not made for the Tamiya kit. I
would hazard a guess that it was originally molded from the DML/Trimaster
kit. The tailplane roots on the tail were way too small in both chord
and length for the Tamiya tailplanes. Ah well. It was time for
the superglue and putty.
The
wings were glued to the fuselage and any gaps and such were smoothed out
with filler. The guns were removed to be replaced with tubing. For
some reason, all my kits need filler, and this one was no exception. Must
be me :( The tailplanes were next. It was obvious when I tried
to attach them that the resin tail was not made for the Tamiya kit. I
would hazard a guess that it was originally molded from the DML/Trimaster
kit. The tailplane roots on the tail were way too small in both chord
and length for the Tamiya tailplanes. Ah well. It was time for
the superglue and putty.
Once that was done, it was time to start painting the airframe. It was here that I ran into my first quandry. The Kommandeur decal sheet and an illustration in the book 'Green Hearts: First in Combat with the Dora 9' of the aircraft I was doing, Brown 4, were not in complete agreement on underside color. The Green Hearts illustration had the entire underside (except wings) in a green-grey similar to sky and sometimes called RLM 84, though no documentation has been found confirming this color. The Kommandeur sheet had the nose and tail in RLM 76 and the rest of the airframe underside (except the wings) in the green-grey color. The only photo of the plane is a bit inconclusive as it shows a wreck minus nose cowling, though the tail does appear brighter than the fuselage.
 Well,
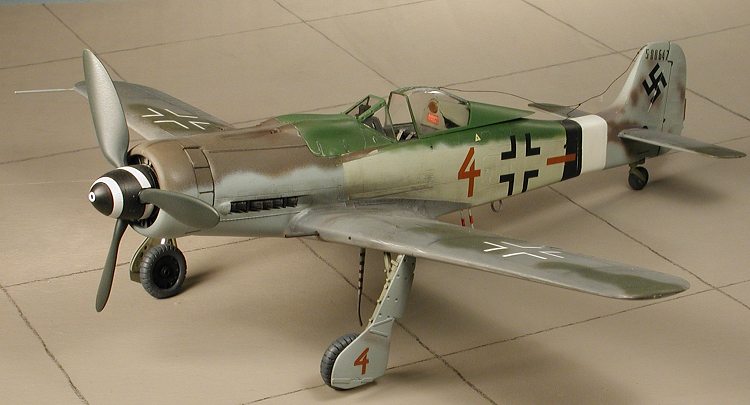
I decided to go with the Kommandeur sheet as it was much more colorful. In
fact, it uses no less than seven different RLM shades plus bare metal, black
,and white. My idea of an interesting paint scheme! Aeromaster enamels
were used for all the paints, except the bare metal and went on beautifully.
In a scheme that needed this much masking, it was possible to add some
bits and pieces during the many stops. It was during this time that
the windscreen and gunsight were added, and the canopy assembled and tacked
on with Elmer's glue. Also at this time, the landing gear was painted RLM
02 grey, and the True Details wheels were cut from their blocks, painted,
and drilled out to fit the Tamiya struts.
Well,
I decided to go with the Kommandeur sheet as it was much more colorful. In
fact, it uses no less than seven different RLM shades plus bare metal, black
,and white. My idea of an interesting paint scheme! Aeromaster enamels
were used for all the paints, except the bare metal and went on beautifully.
In a scheme that needed this much masking, it was possible to add some
bits and pieces during the many stops. It was during this time that
the windscreen and gunsight were added, and the canopy assembled and tacked
on with Elmer's glue. Also at this time, the landing gear was painted RLM
02 grey, and the True Details wheels were cut from their blocks, painted,
and drilled out to fit the Tamiya struts.
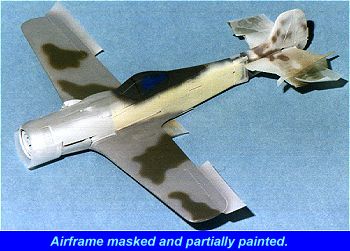
As you can imagine this scheme took lots of masking to prevent major overspray
problems. There was only mottling on the tail so those of you who shy
away from that will like this scheme. Once the paint was dry, the landing
gear was installed. When it was able to stand on its own legs, the airframe
was sprayed with Future in preparation for the decals. I used
Kommandeur's
sheet 4701 for late war Fw-190s. Kommandeur supply all the major
markings plus a set of stencils for one aircraft. I used the Tamiya
kit for what few stencils were used. Kommandeur decals are superb and
very thin. I have used them before and really like them. This set gave
me some problems.
 One
was due to the thinness as I managed to get one folded on itself and no amount
of fussing or floating in water would undo it. No problem as it was
with a number and three different ones are provided. I also had one
of the underwing crosses break into several pieces, the first time I have
run across this. It may be due to the low humidity. Anyway, I
used a cross from Black 3, one of the other aircraft on the sheet. It proved
to be a bit smaller than that of Brown 4, but you probably wouldn't notice
it. All the decals reacted well to Champ setting solution, which was applied
one the decals had had a few minutes to settle down.
One
was due to the thinness as I managed to get one folded on itself and no amount
of fussing or floating in water would undo it. No problem as it was
with a number and three different ones are provided. I also had one
of the underwing crosses break into several pieces, the first time I have
run across this. It may be due to the low humidity. Anyway, I
used a cross from Black 3, one of the other aircraft on the sheet. It proved
to be a bit smaller than that of Brown 4, but you probably wouldn't notice
it. All the decals reacted well to Champ setting solution, which was applied
one the decals had had a few minutes to settle down.
Once they were dry, the airframe was wiped down with a damp cloth to remove any decal residue. At this time, the underwing antenna, which had red warning stripes applied to it, as well as the df loop and boarding step were added to the kit. It was then sprayed with a flattening agent. Now I know that some of you will be saying "Well hey, didn't these guys wax their aircraft for greater speed?". According to what I have read in 'Green Hearts', waxing the aircraft only added a couple of kph to the speed and made it easier to see because of the glint of light on it. It was also time consuming so by very late 1944, this practice was abandon.
 Once
the aircraft was good and flat, I accentuated the panel lines with pastels,
then paid attention to the exhaust and gun soot, also using pastels. It was
during this time that I had an accident with a bottle of black paint and
had to redo the rear fuselage of the aircraft. What a pain!! Needless
to say, I had almost thought of putting the whole thing into a box and forgetting
it, but since it was basically done, I got out the paints and redid the scheme.
Once that was completed, the last thing to do was to add the radio antenna.
This was done using monofilament thread in an attempt to get the proper
sag in it as 190Ds with the 'blown' hood did not have the mechanism installed
to keep the long wire taut. Unfortunately, it doesn't sag as well as I had
hoped so will be replaced with thin wire.
Once
the aircraft was good and flat, I accentuated the panel lines with pastels,
then paid attention to the exhaust and gun soot, also using pastels. It was
during this time that I had an accident with a bottle of black paint and
had to redo the rear fuselage of the aircraft. What a pain!! Needless
to say, I had almost thought of putting the whole thing into a box and forgetting
it, but since it was basically done, I got out the paints and redid the scheme.
Once that was completed, the last thing to do was to add the radio antenna.
This was done using monofilament thread in an attempt to get the proper
sag in it as 190Ds with the 'blown' hood did not have the mechanism installed
to keep the long wire taut. Unfortunately, it doesn't sag as well as I had
hoped so will be replaced with thin wire.
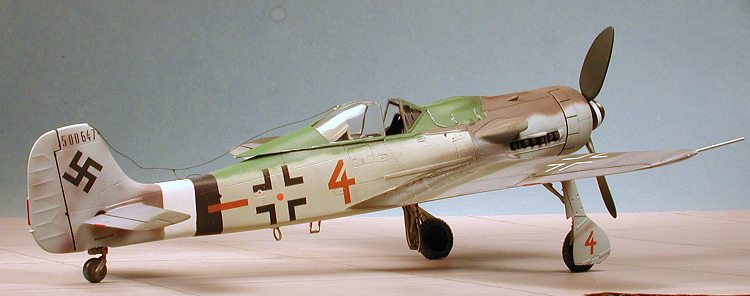
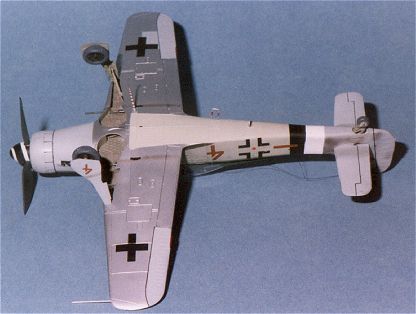
A long saga was over. The final result is quite pleasing to the eye, especially with all the different colors used. Looking back, were I to do this modification again, I would use the DML kit for which the resin tail was designed.
Copyright ModelingMadness.com. All rights reserved. No reproduction in part or in whole without express permission from the editor