| KIT #: | 02003 'Priller Combo' |
| PRICE: | 3000 yen SRP |
| DECALS: | Three options |
| REVIEWER: | Scott Van Aken |
| NOTES: | Includes two kits. 2012 release |
| HISTORY |
The FW-190 series of fighters was such an improvement over the Bf-109 that one
often wonders why the 109 wasn't completely replaced by it. Perhaps it has
something to do with the main tooling already being in place or the influence of
Messerschmitt with the RLM or perhaps an inability to provide
 enough engines.
Whatever the reason, the FW-190 was not produced in the numbers of the 109. In
many ways, the Focke-Wulf fighter was superior to the 109. It was generally
faster, had better pilot protection, a canopy that gave better vision, a much more
secure landing gear, could carry more in the way of ordnance, was more heavily
armed and had room to grow as seen in the late war D-9 version. By comparison,
the 109 was faster at high altitude and generally handled better in a dogfight.
enough engines.
Whatever the reason, the FW-190 was not produced in the numbers of the 109. In
many ways, the Focke-Wulf fighter was superior to the 109. It was generally
faster, had better pilot protection, a canopy that gave better vision, a much more
secure landing gear, could carry more in the way of ordnance, was more heavily
armed and had room to grow as seen in the late war D-9 version. By comparison,
the 109 was faster at high altitude and generally handled better in a dogfight.
Yet the aircraft did have teething troubles, mostly related to the BMW engine, which was prone to catching fire in early versions. So much so that it was standard policy to have a man standing by with a fire extinguisher on engine start. Eventually those were worked out and the 190 went on to be a superb fighter and was able to replace the Ju-87 in the ground attack job.
| THE KIT |
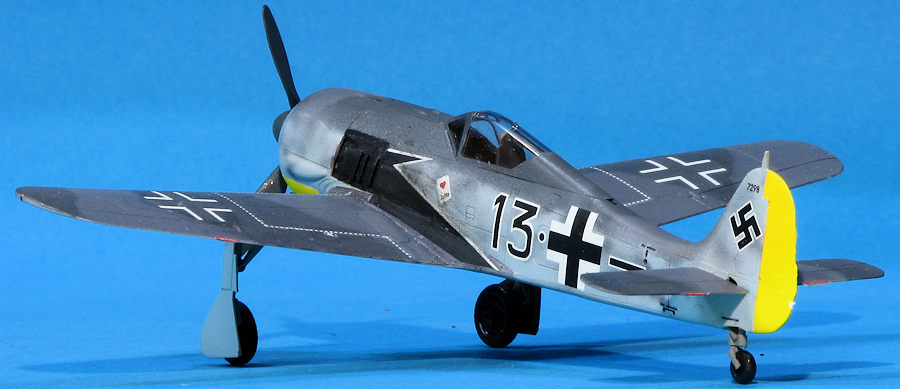
I decided to do at least one of the two kits in this boxing as 'Pips' Priller plane and figured the A-5 variant would be the one to do. The kit itself is standard Hasegawa 1/72 FW-190, but comes with the bits in each kit to do either an A-5, A-6 or A-8 variant. That means an additional upper gun cowling piece for the smaller 7.7mm guns in the A-5 version and a new pitot tube as this was placed farther inboard on the earlier variants.
The cockpit is basic but adequate with a seat, stick and instrument panels.
Decals for the instruments and side consoles. There is a single piec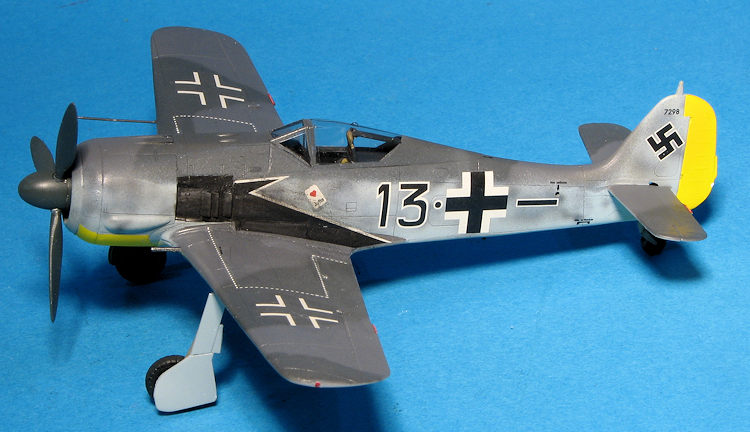 e cowling
with some detail, but it is all but hidden behind the engine cooling fan. The
wing is a single lower section with two upper halves. There are a lot of holes
on the insides of these parts and you simply open whichever ones are required
for the variant you are doing. As these are all fighter version, you get the
centerline rack with tank and none of the bomb stuff.
e cowling
with some detail, but it is all but hidden behind the engine cooling fan. The
wing is a single lower section with two upper halves. There are a lot of holes
on the insides of these parts and you simply open whichever ones are required
for the variant you are doing. As these are all fighter version, you get the
centerline rack with tank and none of the bomb stuff.
The only canopy supplied is the early 'flat' version and that is two pieces with a separate windscreen and separate moveable canopy section. You get both early and late headrests but will only need the early one. Landing gear come with retraction struts and there is a single piece main gear door. The tail wheel is molded in place. For a prop, you get separate blades and spinner, all which mount on the engine cooling fan piece.
Instructions are well done with Gunze paint references. All three decal options are in RLM 74/75/76 with yellow rudder and lower cowling. Mottling is relatively light. These markings cover an A-5, an A-6 and an A-8 variant and are nicely printed. There are swastikas and the black areas behind the exhaust are included on the sheet.
| CONSTRUCTION |
A year back I built the first of the kits that came in this set. Now I decided
to do the second one using the decals that came in the set. I realize that
Priller's planes can count as a 'done to death' scheme,
 but I've never built one
so figured I'd give it a go. Besides, though they may have been eclipsed, I
still like the simplicity of the Hasegawa moldings.
but I've never built one
so figured I'd give it a go. Besides, though they may have been eclipsed, I
still like the simplicity of the Hasegawa moldings.
You have to decide very early which version to build. I chose the A-5 variant. This means sanding off the lower wing gun ejection chutes, the DF loop antenna mount and filling some holes. One is to obliterate the lower fuselage access port. The hole for the pitot tube was also opened at this time.
Meanwhile I painted all the cockpit bits using Tamiya German grey, which is retrospect, is too dark as the instrument decals pretty well disappear when applying them. I used tape for the seat harness and assembled the cockpit. Meanwhile I had cemented the fuselage halves together and after taking care of the seams, the cockpit was inserted from beneath. Don't forget the upper instrument panel as it is easy to leave out.
 With that
done, the wings were assembled. The outer guns were filled and a hole opened for
the pitot. This was then glued on the bottom of the fuselage. Tailplanes were
next, followed by the front engine piece. It really may as well be a blank plate
as you won't see any engine detail through the fan blades. I also assembled the
prop and masked the clear bits. Over the years the frame lines have become more
and more indistinct and while you can see them well enough to use clear tape for
masking, using something like Tamiya tape is a bit of a challenge. I glued on
the head armor piece and then cemented the windscreen and canopy to the
airframe.
With that
done, the wings were assembled. The outer guns were filled and a hole opened for
the pitot. This was then glued on the bottom of the fuselage. Tailplanes were
next, followed by the front engine piece. It really may as well be a blank plate
as you won't see any engine detail through the fan blades. I also assembled the
prop and masked the clear bits. Over the years the frame lines have become more
and more indistinct and while you can see them well enough to use clear tape for
masking, using something like Tamiya tape is a bit of a challenge. I glued on
the head armor piece and then cemented the windscreen and canopy to the
airframe.
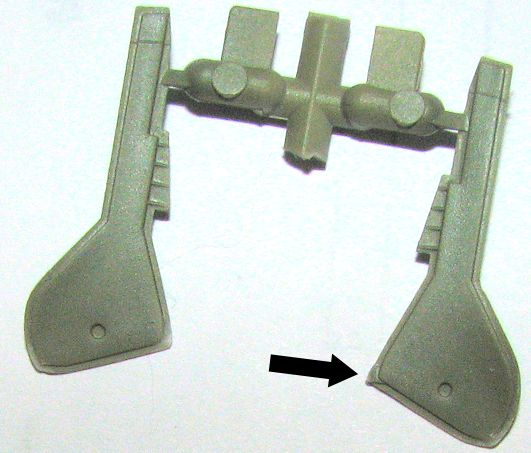
During all this, I cleaned up the main gear doors. Unfortunately, the sprue attachment points intrude on the gear door so you'll have to file that away to get a clean inner door. No need to worry about the ejector pin marks as they are not only very faint under paint, but will be hidden by the struts when done.
| COLORS & MARKINGS |
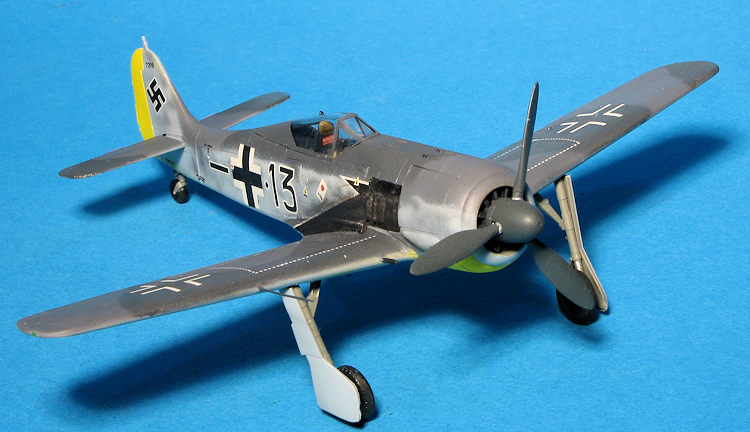
This particular aircraft is in your standard RLM 74/75/76 and I used Model Master enamels for the RLM 76 and Agama enamels for the RLM 74/75. The rudder and lower cowling have to be painted yellow, so I first painted it white and then followed with some yellow with both paints being Tamiya. Yellow seems a bit light, but it is difficult to say if it is 'wrong'. These areas were masked and the lower surface painted RLM 76 along with the outside of the main gear doors. During this painting, all the gear struts were painted RLM 02 as were the wells. I used Silly Putty to mask the gear wells prior to the application of the lower surface color.
 It was then a matter of using my Iwata Revolution and spraying on the pattern
and mottling. Once it was on and dry, I removed the Silly Putty and attached the
landing gear legs. Then the airframe was given a gloss clear in preparation for
the decals.
It was then a matter of using my Iwata Revolution and spraying on the pattern
and mottling. Once it was on and dry, I removed the Silly Putty and attached the
landing gear legs. Then the airframe was given a gloss clear in preparation for
the decals.
I used one of the kit options and while it may be one of those 'done to death' options, I've never done a Priller aircraft. Besides, this may well have been the plane he used to strafe the British during the D-Day landings, one of the few Luftwaffe aircraft to appear in the skies on that day. The kit decals are nicely done and properly thin. I had some issues with the larger ones tearing upon application, but eventually got them all installed, using Microsol to help them snuggle down.
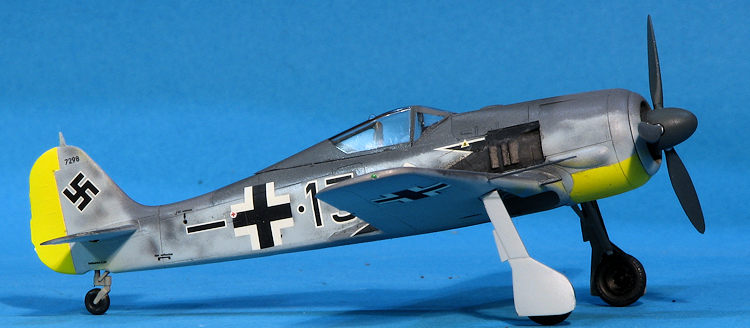
With all those in place, I glued on the wheels, landing gear doors, prop assembly and pitot tube. I had broken one of the inner wing machine guns so replaced it with a section of stretched sprue after drilling it out. Matte clear was then sprayed on, the masking taken from the clear bits and some exhaust staining added. As I was running a bit late in finishing, I did not run any EZ-Line antenna.
| CONCLUSIONS |
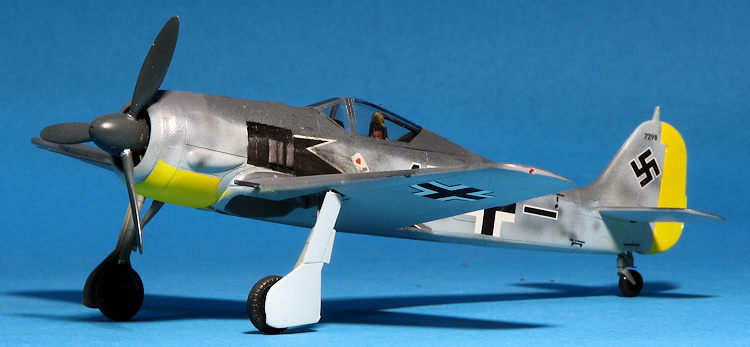 This kit is
becoming an old friend. It is pretty much vice-free and while not as detailed as
some of the newer tool kits, still makes into a most presentable model. Hasegawa
hasn't been releasing Limited Edition boxings of this with the frequency it used
to so one may have to do some looking to find one, but they are well worth
picking up if one can get a good deal on them.
This kit is
becoming an old friend. It is pretty much vice-free and while not as detailed as
some of the newer tool kits, still makes into a most presentable model. Hasegawa
hasn't been releasing Limited Edition boxings of this with the frequency it used
to so one may have to do some looking to find one, but they are well worth
picking up if one can get a good deal on them.
2 December 2016
Copyright ModelingMadness.com. All rights reserved.
Thanks to www.hlj.com for the review kit
If you would like your product reviewed fairly and fairly quickly, please contact the editor or see other details in the Note to Contributors.