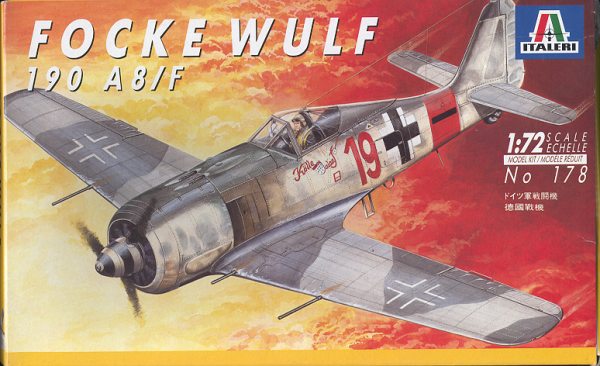
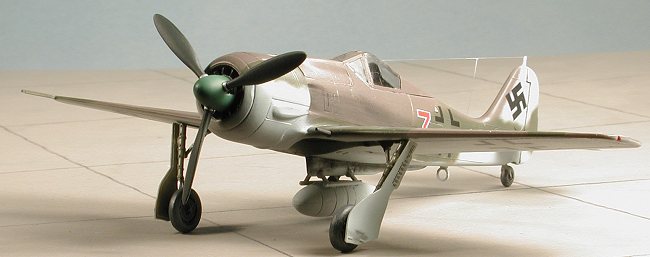
Italeri 1/72 Fw-190A/F-8
|
KIT # |
178 |
|
PRICE: |
$8.50 |
|
DECALS: |
Two aircraft |
|
REVIEW : |
|
|
NOTES: |
` |
|
HISTORY & THE KIT |
For a look at the kit and a brief history, visit the preview.
|
CONSTRUCTION |
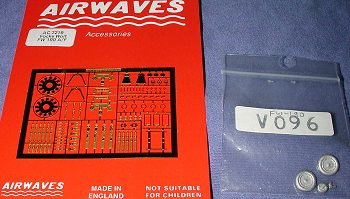 If you recall from
the preview, this kit was bought at a swap meet and missing parts. This made the
kit a candidate for aftermarket stuff. First I got a set of cast metal wheels
from Aeroclub (part V096). Then, because I had seen the paucity of detail in the
cockpit, I bought an Airwaves brass set (#7219) as it was designed specifically
for the Italeri 190 kit. The real benefit of this set is that there are enough
parts in it to do two aircraft. It includes lots of interior bits as well as a
bunch of df loop antennas, steps, and other parts as extras. Obviously they know
that I tend to lose a lot of these tiny bits so have been kind enough to provide
a number of spares.
If you recall from
the preview, this kit was bought at a swap meet and missing parts. This made the
kit a candidate for aftermarket stuff. First I got a set of cast metal wheels
from Aeroclub (part V096). Then, because I had seen the paucity of detail in the
cockpit, I bought an Airwaves brass set (#7219) as it was designed specifically
for the Italeri 190 kit. The real benefit of this set is that there are enough
parts in it to do two aircraft. It includes lots of interior bits as well as a
bunch of df loop antennas, steps, and other parts as extras. Obviously they know
that I tend to lose a lot of these tiny bits so have been kind enough to provide
a number of spares.
Construction begins by gluing the wings together. These parts need to be cleaned up, especially the wheel wells, which have some flash, and the mating surfaces. The ejector pin marks and some flash around the alignment pin holes need sanded down to get a good fit. Once the upper and lower sections were glued together, the wheel well inserts were cleaned up and installed. Fit is fair, but they do leave a gap that will be difficult to fill. Moving to the interior, the various bits were removed from the sprues, the ejector pin marks sanded down, and the base interior built up. At this time, the instrument panel detail was sanded off in preparation for the brass bits.
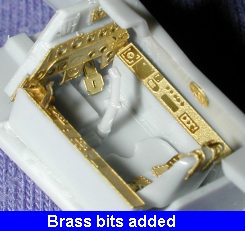 With
that preparation completed, it was time to add some of the parts from the
Airwaves brass set. I used two materials to attach the brass bits; superglue and
clear gloss acrylic. I have a tendency to use too much superglue, so on those
parts that have no stress to them and can't accidentally be knocked off, I use
the clear paint. It has little strength, but for things like the side consoles
and parts glued to the fuselage walls, it is perfect. It also is something I'll
use for some of the exterior bits as it won't leave a blob like I usually get
with superglue. For things that I need instant bonding, like seat harnesses,
superglue is the logical choice.
With
that preparation completed, it was time to add some of the parts from the
Airwaves brass set. I used two materials to attach the brass bits; superglue and
clear gloss acrylic. I have a tendency to use too much superglue, so on those
parts that have no stress to them and can't accidentally be knocked off, I use
the clear paint. It has little strength, but for things like the side consoles
and parts glued to the fuselage walls, it is perfect. It also is something I'll
use for some of the exterior bits as it won't leave a blob like I usually get
with superglue. For things that I need instant bonding, like seat harnesses,
superglue is the logical choice.
Once all the brass bits were
glued on, the cockpit was assembled into the right fuselage half. Not exactly
the best fitting cockpit I have ever done, but you need to remember this is not
a new kit. I especially had problems with the instrument panel. It just sort of
seems to hang by a small attachment point at the top. The seat with harness was
then glued in as was the 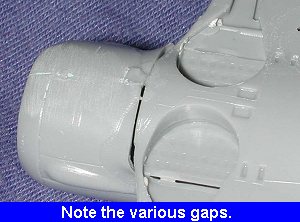 control stick. There is no indication on how far the
control stick is supposed to fit so you need to make a judgment call on that.
When all was installed, the interior was given a coat of RLM 66 and the belts
painted an off white with silver buckles.
control stick. There is no indication on how far the
control stick is supposed to fit so you need to make a judgment call on that.
When all was installed, the interior was given a coat of RLM 66 and the belts
painted an off white with silver buckles.
The cockpit tub was then glued in place and the fuselage glued together. Naturally, I needed some filler on the join, but not that much. The next thing to do was to glue on the wing. Fit here was not that great. I got a large gap at the front that will be difficult to properly fill. I also didn't get the wing roots to line up properly on the left. Much to my dismay, the wings were also out of line with the fin/rudder. I fudged as much as possible, but there is no easy fix.
With that out of the way, the tailplanes were glued in without much fanfare then
the armored headrest was glued in place. I did use the brass facing as it
was better than 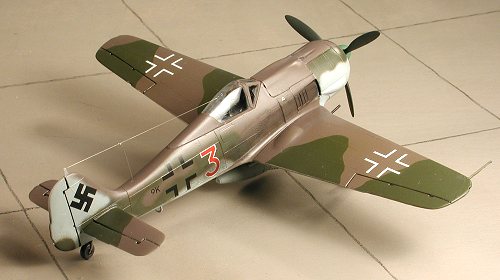 the kit one. This headrest is supposed to slide with the hood,
but on this kit, you have no choice but to glue it to the area behind the
cockpit. Since I planned on having the hood closed, no big deal. Turning to the
underside of the fuselage, I glued on the long rack for the drop tank. I do
believe that the kit has you place it farther back than it is supposed to go,
but I glued in where the instructions showed anyway. The two piece tank
anti-sway bar was glued on at this time as well. Take care as it is not a
precise alignment. The ADF loop antenna mount was glued in place. I broke the
loop as it is too flimsy, but replaced it with the one I didn't use from the
Hasegawa kit.
the kit one. This headrest is supposed to slide with the hood,
but on this kit, you have no choice but to glue it to the area behind the
cockpit. Since I planned on having the hood closed, no big deal. Turning to the
underside of the fuselage, I glued on the long rack for the drop tank. I do
believe that the kit has you place it farther back than it is supposed to go,
but I glued in where the instructions showed anyway. The two piece tank
anti-sway bar was glued on at this time as well. Take care as it is not a
precise alignment. The ADF loop antenna mount was glued in place. I broke the
loop as it is too flimsy, but replaced it with the one I didn't use from the
Hasegawa kit.
The windscreen was then glued on. There is no solid information on exactly which way this fits. The best you can do is to eyeball it with the cockpit hood to get the proper alignment. Either way I positioned it I had a gap at the top where the hood met the windscreen, so chose the position with the least gap. Once in place, the hood was glued on and when dry, both were masked. I use Tamiya tape for most of my masking jobs as it is relatively easy to cut and sticks well, but not too well.
With all this done, it was time to paint on the camouflage.
|
CAMOUFLAGE & MARKINGS |
Once again I turned to Aeromaster sheet 72-042. This sheet has another interesting late war scheme for a blown hood FW-190A-8 from KG 51, a bomber unit. This lets me do a most unusual plane with bomber codes on it. It was painted the same late war colors of RLM 81/82/76 and I used Aeromaster enamels for all three shades. No fancy yellow rudders on this one. Only a green spinner that was painted RLM 25, again using Aeromaster paints.
 As with all my aircraft kits, I first painted the underside, then masked the
tailplanes and painted the lighter of the upper surface colors. When that was
dry, the upper surface was masked and the camo scheme cut into the tape. I
removed the parts that were to be painted in the darker RLM 82 green and
then painted the remainder of the upper surface. Once dry, the underside was
touched up as were some upper surface areas that needed it.
As with all my aircraft kits, I first painted the underside, then masked the
tailplanes and painted the lighter of the upper surface colors. When that was
dry, the upper surface was masked and the camo scheme cut into the tape. I
removed the parts that were to be painted in the darker RLM 82 green and
then painted the remainder of the upper surface. Once dry, the underside was
touched up as were some upper surface areas that needed it.
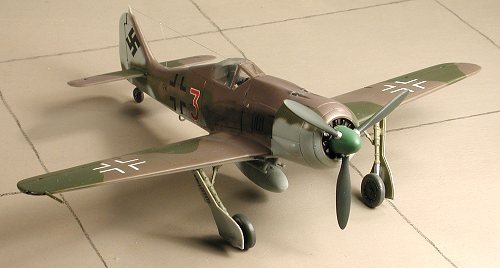
Returning to the work bench, the wheel wells were painted RLM 02 with a brush and when dry the landing gear was installed. For this kit the tail wheel and main wheels are metal replacements from Aeroclub. They fit quite well, though I had to trim back the kit axles to get them to fit snugly. The gear doors were attached after the wheels were put on. These need to be trimmed near the top as shown in the instructions. I also found that they did not fit quite as well as I'd hoped. One thing this kit has in its favor is that of the three I have built, it is the one that captures the proper look of the 190s landing gear. At least that is how it looks to me. The others are not angled in enough or forward enough for my tastes.
During this stage, I also drilled out the holes for the inner wing guns that I had broken off during construction. New guns were found in the spares box or you can use stretched sprue. These guns were painted gunmetal. The control surface joins were highlighted with a Rapidograph pen at this time as well. Then the kit was returned to the painting area for a coat or two of gloss clear.
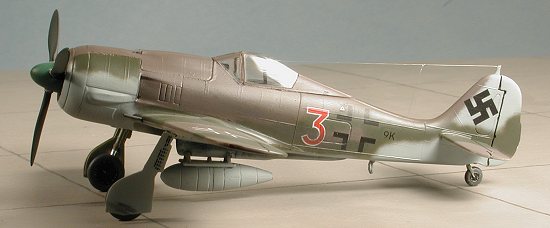
 After that had dried, the decals were put on. These are really very simple
markings with only the red 3 and the small unit codes to distinguish it.
Decaling was done in two days as opposed to the week some kits can take. Once
dry, the excess setting solution was removed and the kit given an overall coat
of semi-matte clear using a formula of Future floor polish and Tamiya flat base
that I have successfully used for a number of years.
After that had dried, the decals were put on. These are really very simple
markings with only the red 3 and the small unit codes to distinguish it.
Decaling was done in two days as opposed to the week some kits can take. Once
dry, the excess setting solution was removed and the kit given an overall coat
of semi-matte clear using a formula of Future floor polish and Tamiya flat base
that I have successfully used for a number of years.
Now for the final bits. This included gluing on the prop assembly, removing the masking from the windows, and adding pastel exhaust stains. I also used the drop tank from the Revell kit as I didn't like the Italeri version. The formation lights were represented by little dabs of paint and the antenna wire added on. This last step completed the kit.
|
CONCLUSIONS |
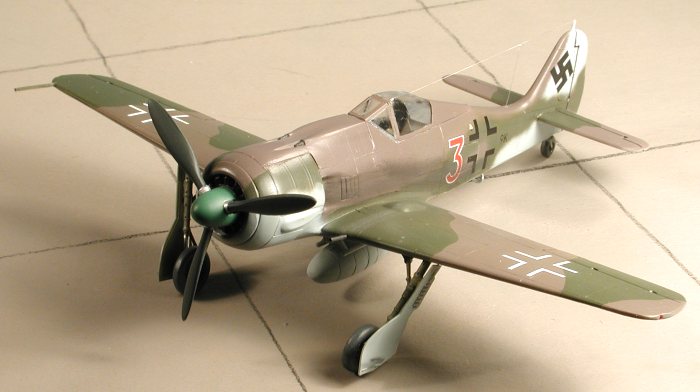
When you get finished with the kit you have a plane that looks very much like what it is supposed to be; an FW-190A-8. However, compared to the new Revell and the Hasegawa 190, it comes out third best in all respects except for the sit of the landing gear. This is not that surprising when you consider that Italeri's product was developed in the late 1970s or early 1980s and is definitely a child of the 'pre-engraved panel detailing' era.
October 2001
Review kit courtesy of me and my wallet!
If you would like your product reviewed fairly and fairly quickly, please contact the editor or see other details in the Note to Contributors.
Back to Reviews Page 2015