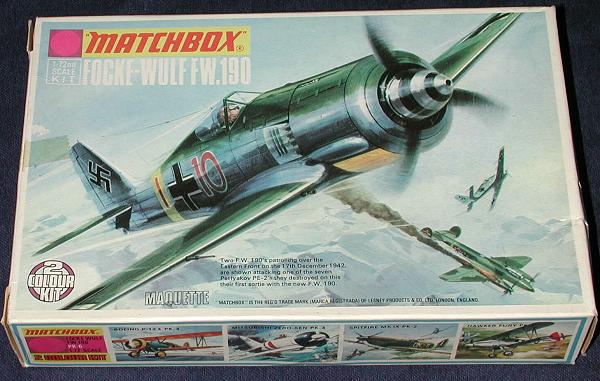
Matchbox 1/72 FW-190A-4
|
KIT # |
PK 6 |
|
PRICE: |
$ |
|
DECALS: |
Two aircraft |
|
REVIEWER: |
|
|
NOTES: |
Not for the serious modeler |
|
BACKGROUND |
For a brief historical background and a look at what is in the kit box, please visit the preview.
|
CONSTRUCTION |
If you have ever built one of the early Matchbox kits, and at PK 6, this is one of the first batch, then you will know that the main goal of these kits is to attract the attention of kids and to part them from their pocket money. This was a viable goal in the early 1970s, when model kit sales were still high and the hobby was a major influence on the young.
 Anyway, there are darn few parts and the fit is generally good. The only
interior is a seat and pilot. I painted the fuselage inside and seat RLM 66 dark
grey. Then the seat was glued in place and the fuselage halves glued together.
At this time the upper cowling gun insert was glued in. Fit side to side is good
but there are large gaps fore and aft. The 'engine' thingie was attached
followed by the forward cowling. There is no delineated cowling armor on this
part as shown on the box art or in photos so it looks a bit odd to those who are
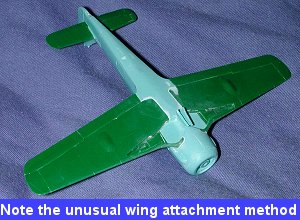
familiar with the FW-190. The wing upper and lower halves were glued together
and then glued to the fuselage. Unusually, the wings do not include a one-piece
lower wing, but there is sufficient lower fuselage sections molded into the
wings so that they fit quite well. The many gaps between parts were filled and
sanded smooth.
Anyway, there are darn few parts and the fit is generally good. The only
interior is a seat and pilot. I painted the fuselage inside and seat RLM 66 dark
grey. Then the seat was glued in place and the fuselage halves glued together.
At this time the upper cowling gun insert was glued in. Fit side to side is good
but there are large gaps fore and aft. The 'engine' thingie was attached
followed by the forward cowling. There is no delineated cowling armor on this
part as shown on the box art or in photos so it looks a bit odd to those who are
familiar with the FW-190. The wing upper and lower halves were glued together
and then glued to the fuselage. Unusually, the wings do not include a one-piece
lower wing, but there is sufficient lower fuselage sections molded into the
wings so that they fit quite well. The many gaps between parts were filled and
sanded smooth.
Then the tail planes were glued in place with no problems. The same with the canopy, though it does look pretty bare in there with nothing but a seat! A set of inner gear doors is provided and those were glue in place. As you can imagine, there is absolutely no detail in the wheel wells at all. The canopy was glued in place and then masked off. Time for some paint!
|
PAINT & DECALS |
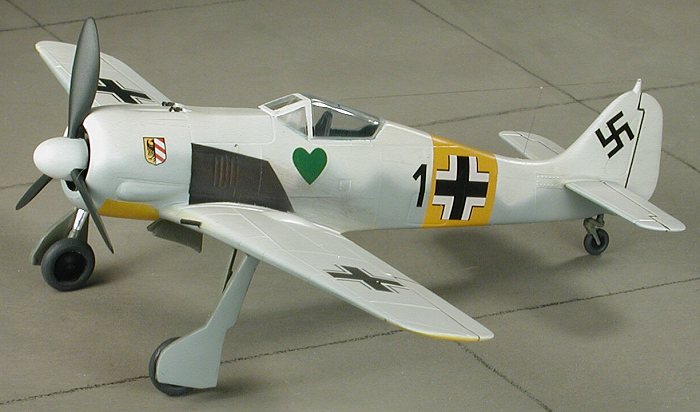
 I had decided to make this an FW-190A-4 version and to do one in winter
camouflage. That being the case, the aircraft was first given a coat of white on
al the upper surfaces as well as the underside of the wing tips, cowling and a
fuselage band. For this purpose, I used Floquil Reefer White lacquer as it coats
very well. During this process, I noticed a rather large, unfilled seam on the
upper cowl that I thought I'd filled, but was painfully obvious once the paint
was applied. After the paint had dried, this area was reglued and more filler
applied. At this time, the upper wings and stabilizers were masked. When the
filler was sanded smooth, the underside was painted white on the wing tips,
under the cowl and center fuselage. This was then painted yellow including a
section around the fuselage. I wasn't really sure just how wide this fuselage
was supposed to be so took my best guess. It turned out to be a bit optimistic.
When dry, these areas were masked and the underside was painted RLM 76 using
Aeromaster enamels. At this time I also painted the sides of the fuselage. Then
I went back over the upper fuselage with white to cover up the yellow overspray
and to cover the forward section that had to be resanded. This particular
aircraft was the 'cleanest' of those in the decal sheet and had a solid coating.
I had decided to make this an FW-190A-4 version and to do one in winter
camouflage. That being the case, the aircraft was first given a coat of white on
al the upper surfaces as well as the underside of the wing tips, cowling and a
fuselage band. For this purpose, I used Floquil Reefer White lacquer as it coats
very well. During this process, I noticed a rather large, unfilled seam on the
upper cowl that I thought I'd filled, but was painfully obvious once the paint
was applied. After the paint had dried, this area was reglued and more filler
applied. At this time, the upper wings and stabilizers were masked. When the
filler was sanded smooth, the underside was painted white on the wing tips,
under the cowl and center fuselage. This was then painted yellow including a
section around the fuselage. I wasn't really sure just how wide this fuselage
was supposed to be so took my best guess. It turned out to be a bit optimistic.
When dry, these areas were masked and the underside was painted RLM 76 using
Aeromaster enamels. At this time I also painted the sides of the fuselage. Then
I went back over the upper fuselage with white to cover up the yellow overspray
and to cover the forward section that had to be resanded. This particular
aircraft was the 'cleanest' of those in the decal sheet and had a solid coating.
Well, this time the kit was taken back to the work bench to have the landing gear added. The tail wheel fit quite well, but the main gear have no positive locators. They are basically butt joined to the wells. Not very precise but thanks to the 'hot' glue I use, it was sufficient. The gear had been painted RLM 02 on the sprue and the oleos wrapped with Chrome Bare Metal Foil. Once solidly in place, the gear wells were brush painted with RLM 02 and the model taken to be given a gloss coat of Future.
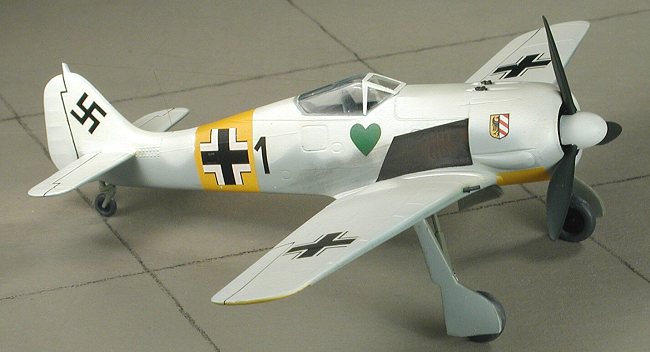
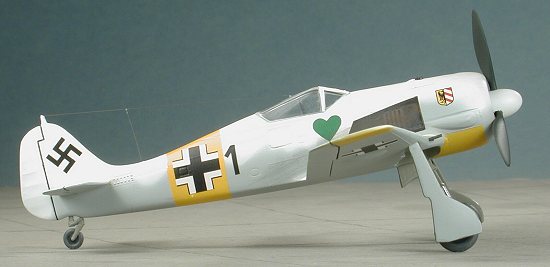 Now it was ready for decals. I used Aeromaster SP72-02 'Luftwaffe Green Hearts'
that has a nice selection of JG 54 aircraft. Of the 20 schemes on the sheet,
four of them are for winter camo FW-190A-4s. I chose the one which was the
whitest and that was the aircraft of Oblt. Walter Nowotny from I./JG 54 in 1943.
Thanks to the winter coat, the plane has only minimal markings, perfect for a
minimal kit! As I feared, the fuselage band was a bit too wide. Since the kit
isn't worth the effort of another repaint, I left it as was. All of the decals
came from the Aeromaster sheet. It was obvious that there are not enough common
markings to do all the planes on the sheet. Of the five 'early' 190s, there are
only enough insignia to do one. Anyway, the decals went on with no problems at
all and I used Solvaset to make sure they went nowhere.
Now it was ready for decals. I used Aeromaster SP72-02 'Luftwaffe Green Hearts'
that has a nice selection of JG 54 aircraft. Of the 20 schemes on the sheet,
four of them are for winter camo FW-190A-4s. I chose the one which was the
whitest and that was the aircraft of Oblt. Walter Nowotny from I./JG 54 in 1943.
Thanks to the winter coat, the plane has only minimal markings, perfect for a
minimal kit! As I feared, the fuselage band was a bit too wide. Since the kit
isn't worth the effort of another repaint, I left it as was. All of the decals
came from the Aeromaster sheet. It was obvious that there are not enough common
markings to do all the planes on the sheet. Of the five 'early' 190s, there are
only enough insignia to do one. Anyway, the decals went on with no problems at
all and I used Solvaset to make sure they went nowhere.
Once the decals had dried, I cleaned up any dried solvent or decal glue with clear water. The kit was then given another coat of gloss to seal in the decals. I then sprayed some flatter clear over it to cut back on the sheen.
|
CONSTRUCTION CONTINUES |
There was still more to go. Specifically, the wheels were glued on the struts
and then the gear doors glued in place. The wheels are like those on a toy with
no detail, but they fit fine. The axle stub stuck out and when the wheels had
dried, these were cut off and the wheel centers painted with flat black. Next it
was the inboard guns. I cut them off the sprue and while trimming off the
attachment point, one of them broke in half. Rather than re-glue what was really
a too long barrel, other one 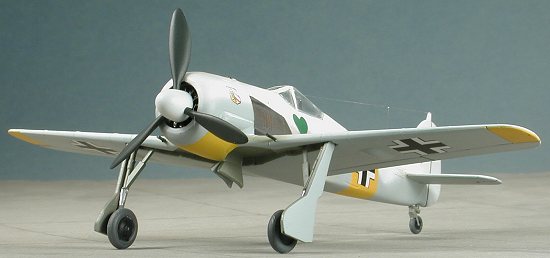 was cut to match. These were glued in place and
painted gun metal. The cowl guns were painted at this time as well. Matchbox
provides no pitot tube and no outboard gun barrels though the lower wing bulges
are there. Those that want these items will have to stretch some sprue or use
small tubing for these. I decided to leave things as they were.
was cut to match. These were glued in place and
painted gun metal. The cowl guns were painted at this time as well. Matchbox
provides no pitot tube and no outboard gun barrels though the lower wing bulges
are there. Those that want these items will have to stretch some sprue or use
small tubing for these. I decided to leave things as they were.
Moving to the front, the prop was glued into the hub and set aside to dry. The 'engine' opening was painted flat black. Normally there would be a flat black or steel colored engine fan. There is a rather poor representation of this fan on the forward cowling so I felt an overall black would do much to hide the lack of detail. About this time I realized that I had not painted the black area behind the engine exhaust as was shown in the decal instructions. Thankfully all the decals had two coats of clear over them so I was able to mask off the area and paint it without any of the decals coming up with the tape.
A long wire antenna was made using hair and attached with superglue. The very last thing I did was to use some pastels to simulate engine stains and push the prop into the front of the cowl.
|
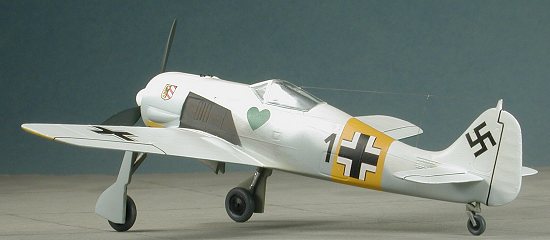
CONCLUSIONS |
Most modelers won't be building this kit. I only built it as part of my 1/72 FW-190 collection. It has some problems with shape, especially the cowl section and to add the sort of detail that comes with the more modern kit would be more expensive in terms of aftermarket stuff and more time-consuming than it would be worth. However, I can say that for the youngsters who are not concerned with detail and just want a model plane, then they will enjoy it. The rest of us can look elsewhere.
July 2002
Copyright ModelingMadness.com. All rights reserved. No reproduction in part or in whole without express permission from the editor.
If you would like your product reviewed fairly and fairly quickly, please contact the editor or see other details in the Note to Contributors.
Back to Reviews Page 2015