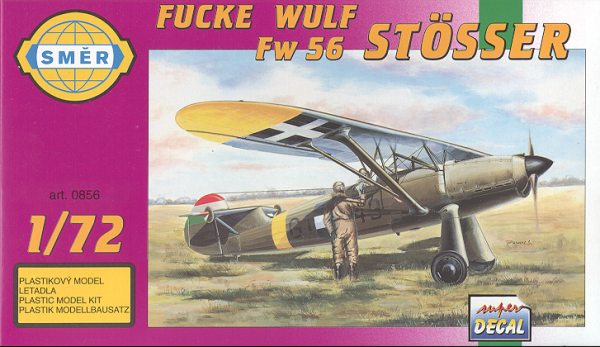
Smer 1/72 Fw-56 'Stosser'
|
KIT # |
0856 |
|
PRICE: |
$8.98 MSRP |
|
DECALS: |
Two aircraft |
|
REVIEWER: |
|
|
NOTES: |
Reboxed Heller kit |
|
BACKGROUND |
For a preview of this neat little kit, please follow this link.
|
THE KIT |
Many years ago I built the Heller boxing of this kit. I remember it as a very nice little model that required minimal effort to make a really neat looking little airplane. This particular boxing has the benefit of having decent decals, something one rarely gets with a Heller kit (sorry, but it's true).
|
CONSTRUCTION |
The first thing I noticed when preparing this kit is that the plastic seems softer than what I remember from Heller. There were also some blemishes in a few parts that were obviously caused by less than pristine molds. Not so much flash, but 'junk' on a few parts. This leads me to believe that perhaps Heller foisted off some worn molds for Smer to use. Perhaps not, but it is plausible.
 Anyway, the kit is simplicity in itself. Probably
the only really difficult part will be installing the wing. The wing is an upper
and lower part and those were glued together. Then the back wall and floor
of the interior were glued to each other and then installed in the left fuselage
side. This is done as the floor is narrower than the lower bulkhead attaching
point and prevents any misalignment during gluing. At least, that is what I hope
happens. The instrument panel was glued to the upper cowling section at this
time. Then the seat and control stick were glued into the interior. When dry,
all of the interior bits were painted RLM 02 using Model Master enamels and the
fuselage halves glued together.
Anyway, the kit is simplicity in itself. Probably
the only really difficult part will be installing the wing. The wing is an upper
and lower part and those were glued together. Then the back wall and floor
of the interior were glued to each other and then installed in the left fuselage
side. This is done as the floor is narrower than the lower bulkhead attaching
point and prevents any misalignment during gluing. At least, that is what I hope
happens. The instrument panel was glued to the upper cowling section at this
time. Then the seat and control stick were glued into the interior. When dry,
all of the interior bits were painted RLM 02 using Model Master enamels and the
fuselage halves glued together.
The overall fit of the fuselage is fairly good, but I did end up destroying some of the fabric detail on the seams. The upper cockpit section was next glued in place. The instrument panel had been previously glued in on this section and it made it a bit tight to get in place. Some sanding and filler was needed for this part as well. I next completed the fuselage by gluing the front piece in place. It had a gap at the top that needed filler.
Moving to the back, the stabilizer was glued on, but not the little aux finlets. Those will be glued on near the end. There are some rather large holes in the upper fuselage for rigging. You can fill them or do as I did and ignore them. With the fuselage cleaned up, the landing gear legs were glued on. Heller isn't big on positive alignment points for these early kits so you need to do some fudging and eyeballing to get things square. It was at this point that I decided to start the painting routine.
|
CAMOUFLAGE |
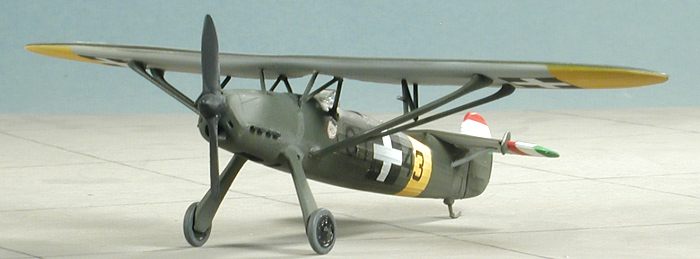
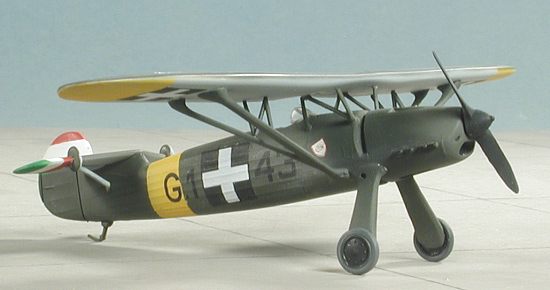
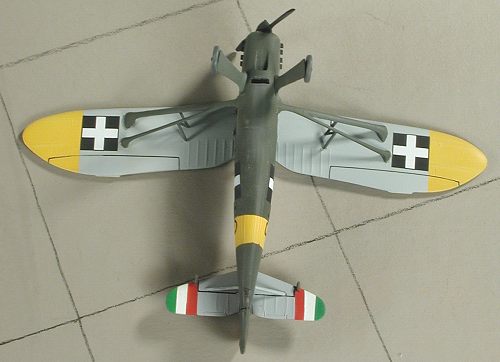
The aftermarket is sorely lacking in bits and pieces for this kit and that includes decals. I could use a set of old (and horribly yellowed) kit decals I have or go with what markings are offered in the Smer boxing. I chose the latter. This means a scheme of basically RLM 71 over 76. Now they say Olive Drab over Light Grey, but I'm of the opinion that they used RLM colors for this. If not, at least they are quite close.
 Now before ANY of this gets applied, the lower wing tips, and
entire rear fuselage, tail planes and rudder were painted white. Then the tail
planes and rudder were crudely masked while the rear fuselage and wing tips were
painted yellow. When dry, those were masked. BTW, I used Floquil Reefer White
for the white and Polly Scale #4 yellow for the yellow.
Now before ANY of this gets applied, the lower wing tips, and
entire rear fuselage, tail planes and rudder were painted white. Then the tail
planes and rudder were crudely masked while the rear fuselage and wing tips were
painted yellow. When dry, those were masked. BTW, I used Floquil Reefer White
for the white and Polly Scale #4 yellow for the yellow.
For the tail bits, I decided to paint the red, white and green
on instead of relying on the decals. I'm sure they would have worked just fine,
but I'd rather paint stuff like this as it looks better. It took a lot of
masking, but it was finally done and the whole areas were masked. Then the
underside of the tail planes and wing were painted RLM 76. Those were masked and
everything else was painted RLM 71, including the underside of the fuselage and
the struts. Then it was back to the workbench for more fun with glues!
|
NOW FOR THE HARD PART |
The hard part is gluing on the wing. There are NO positive attachment points on the fuselage, though the wing does have some indentations for the major struts. What I did was to glue on the major struts to the wing first and place them at a more acute angle than what they'd need. That way, I could gently force them more open if needed when I glued them on the fuselage.
 Hands up from those of you who KNEW that this wasn't going to work. You are
right. It didn't. Somehow, things got a bit skewed and out of hand. Thankfully,
superglue can help to cure most ills. Yes, not all the struts actually fit where
they are supposed to, but with the help of filler and sanding, things are not
the absolute mess that I feared they would be. I had to do a LOT of touchup
painting, but I was blessed in that those areas brush painted looked just like
the airbrushed spots. Most unusual as this rarely happens.
Hands up from those of you who KNEW that this wasn't going to work. You are
right. It didn't. Somehow, things got a bit skewed and out of hand. Thankfully,
superglue can help to cure most ills. Yes, not all the struts actually fit where
they are supposed to, but with the help of filler and sanding, things are not
the absolute mess that I feared they would be. I had to do a LOT of touchup
painting, but I was blessed in that those areas brush painted looked just like
the airbrushed spots. Most unusual as this rarely happens.
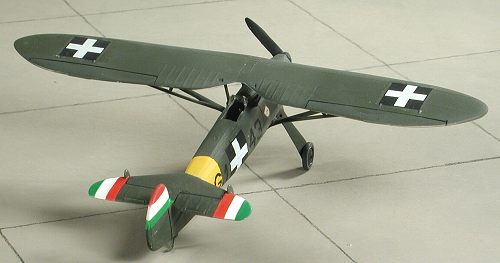
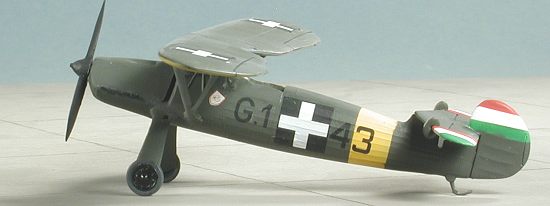
With the wing firmly attached, I went to add the small exhaust extensions to the left side. The first one went 'Sproing'ing off into space when I picked it up with the tweezers to attach it. Well, at least it wasn't the final one! Needless to say, those parts were not installed! I then painted the wheels black and the tires with RLM 66 dark grey. The small finlets on the tailplane were then installed. These don't fit where they show on the box art or on the drawings, being a bit too far inboard according to those images. They were painted RLM 71 with small parts of the underside done in RLM 76. The prop was painted an overall black color, and the tailplane struts with RLM 71 and then glued in place. A bit more touchup and it was time for the decals.
|
DECALS |
 The number of aftermarket sheets is, well, I don't know of any. This meant
the kit decals. Once the model was sprayed with a clear acrylic gloss, the
decals were applied. They fit just beautifully with no problems. I used some
Solvaset to make sure they snuggled down well. I did notice that the unit badges
were slightly off register, but not a real problem. It also seems as if I had
painted the fuselage stripe too wide and too far forward. Either that or the
decals are too large. Either way, I had to put one of the number/letters on the
band. Once they were applied and dry, the plane was wiped down to get rid
of excess setting solution and glue. Then a coat of matte clear was applied and
it was back to the work bench for some final bits.
The number of aftermarket sheets is, well, I don't know of any. This meant
the kit decals. Once the model was sprayed with a clear acrylic gloss, the
decals were applied. They fit just beautifully with no problems. I used some
Solvaset to make sure they snuggled down well. I did notice that the unit badges
were slightly off register, but not a real problem. It also seems as if I had
painted the fuselage stripe too wide and too far forward. Either that or the
decals are too large. Either way, I had to put one of the number/letters on the
band. Once they were applied and dry, the plane was wiped down to get rid
of excess setting solution and glue. Then a coat of matte clear was applied and
it was back to the work bench for some final bits.
|
FINAL BITS |
So what's left? well, the windscreen had to be glued in place, the wheels glued on, the exhaust painted a dark color (burnt iron) and then a little pastel work to simulate exhaust and that was really it. I decided against rigging it as I could only make a bad situation worse by doing so.
|
CONCLUSIONS |
 You know, this kit
was a bit more of a pain in the bum than I remember it being. Not sure why, but
I had major trouble with the wing and struts this time. It could be that I was
looking at the older kit through rose-colored glasses, I don't know. Anyway, I
do know that I won't be building another of these for quite some time. You know,
there are times when things just don't go the way you'd hope and this was one of
them.
You know, this kit
was a bit more of a pain in the bum than I remember it being. Not sure why, but
I had major trouble with the wing and struts this time. It could be that I was
looking at the older kit through rose-colored glasses, I don't know. Anyway, I
do know that I won't be building another of these for quite some time. You know,
there are times when things just don't go the way you'd hope and this was one of
them.
Despite my bumbling around on this one, it really didn't turn out too bad. Just don't look too closely at the pure superglue strut supports! Recommendations? Well, it really isn't a hard kit, but the wing attachment may well give some modelers fits; I know it did me!
September 2002
Thanks to me for providing the kit. n.
If you would like your product reviewed fairly and fairly quickly, please contact the editor or see other details in the Note to Contributors.
Back to Reviews Page 2015