Italeri 1/72 Ju-87D-5 Stuka
| KIT #: | 1070 |
| PRICE: | $18.00 MSRP |
| DECALS: | Three options |
| REVIEWER: | Scott Van Aken |
| NOTES: |
| HISTORY |
The Ju-87 dive bomber is certainly
one of the most famous aircraft of WWII. This characteristic 'inverted
gullwing' aircraft became most well known in the early years of
 the war
when Germany had virtual control of the skies in the battle field. Later,
when up against a more modern and determined enemy, its weakness became
more obvious. It was then that the majority of Stukas were removed from
Western Europe to fight on the Eastern Front against the Russians, where
its robust construction and ease of maintenance became paramount. During
the final year of the war, it was used in many night bombing units. In this
case the ability to fly low and slow were quite important, and some success
was achieved before the lack of fuel and time brought things to a
conclusion.
the war
when Germany had virtual control of the skies in the battle field. Later,
when up against a more modern and determined enemy, its weakness became
more obvious. It was then that the majority of Stukas were removed from
Western Europe to fight on the Eastern Front against the Russians, where
its robust construction and ease of maintenance became paramount. During
the final year of the war, it was used in many night bombing units. In this
case the ability to fly low and slow were quite important, and some success
was achieved before the lack of fuel and time brought things to a
conclusion.
| THE KIT |
This kit was another of the 'I wonder whose kit is being reboxed' sort of deals. I had been told it was a Revell AG mold, but apparently that is not the case. Prior to this and the recent Airfix B-1, the best Ju-87 kits in this scale were by Fujimi. Availability of Fujimi kits has been sporadic at best and often were not around at all.
There are two sprues of grey plastic
and one of clear. The clear bits are bagged while the rest is loose in the
box. Thanks to the close confines of the packaging, no parts separated from
the trees or were broken off. Detail level is very good. The engraved panel
lines may be a bit too much for some, but for me, they
 are about right.
Surface of many of the plastic parts is a tad 'pebbly', but this should
disappear under a coat of paint. My usual quest for molding glitches only
found some ejector pin marks on the rear cockpit instrument panel and the
bomb racks. I also found a teeny bit of flash on the rear part of the
landing gear covers. The cockpit sections are in three parts, allowing the
forward canopy to be displayed open.
are about right.
Surface of many of the plastic parts is a tad 'pebbly', but this should
disappear under a coat of paint. My usual quest for molding glitches only
found some ejector pin marks on the rear cockpit instrument panel and the
bomb racks. I also found a teeny bit of flash on the rear part of the
landing gear covers. The cockpit sections are in three parts, allowing the
forward canopy to be displayed open.
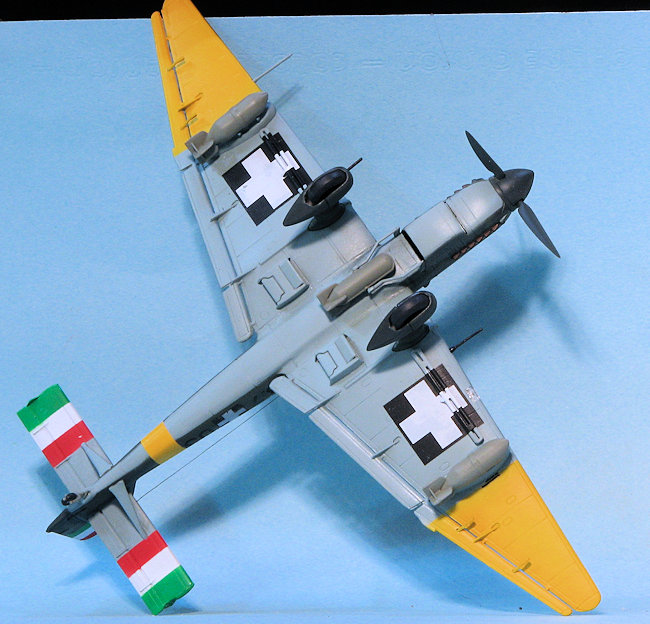
Interior bits include a pilot's seat with molded in harness, control stick, instrument panel, rear radio panel, and gunner's seat. The instrument panel has raised detail, but no dial detail. I would bet that other variants are planned (or already out there) as the nose section is separate (as on the Fujimi kits). Only spatted wheels are provided, so you'll have to go to aftermarket for the 'bare strut' look. One does need to open holes on the lower wing for the various bits. You have dive brakes on this one as well as a central bomb and two wing bomb racks. Optional exhaust are provided with one set being tubular to provide flame dampening properties for night missions.
Instructions are well done with color
information provided by generic and Testors Model Master references. RLM
numbers would be nice as well as I doubt I'll use FS 34227 for the one of
the upper camo colors. Espe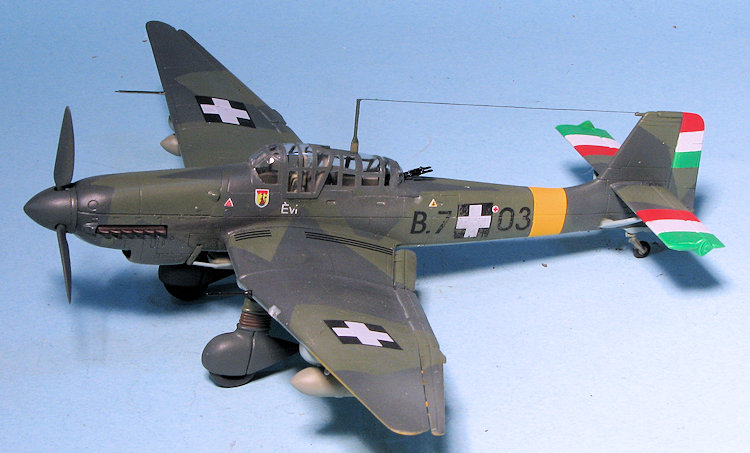 cially as it is a rather bright green and one
really needs to use RLM 71 Dark Green (a color available in the Model
Master line). The instructions do have you installing the lower wing
radiators backwards so be aware of that. Markings are for three aircraft.
All are basically RLM 70/71/65 with yellow lower outer wing markings. One
is the box art aircraft from I./SG 5 in Russia during 1944 that has most of
the airframe painted in winter white. Next is from I./SG 3, also in Russia
during 1944. The entire upper surface of this is white and it has a yellow
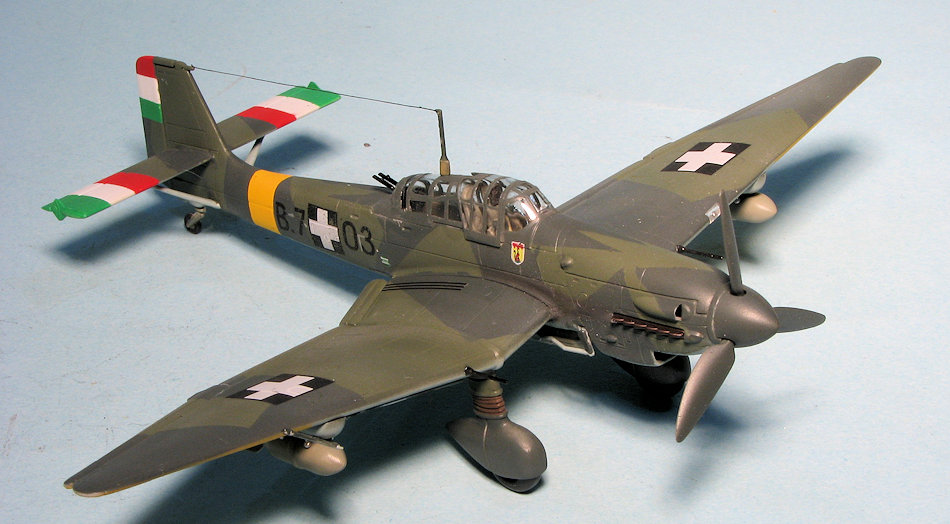
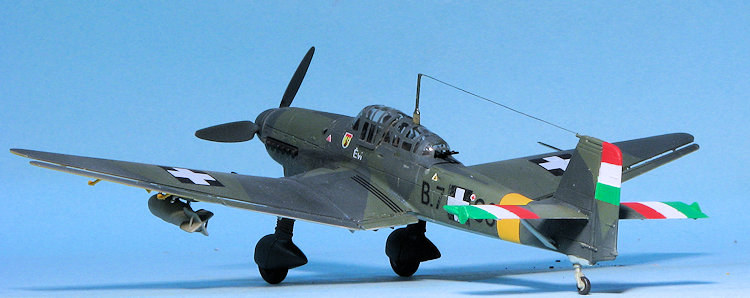
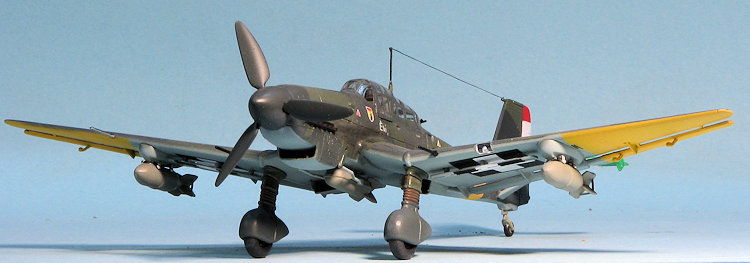
fuselage band. The final one is a D-8 from I./NSG 9 in Italy during 1944.
It also has a yellow fuselage band, which I think should be white for an Italian
based plane. It has an overall scribble pattern in RLM 76
sprayed over the top surface. Decals are well done and my experience with
new Italeri decals has been very positive.
cially as it is a rather bright green and one
really needs to use RLM 71 Dark Green (a color available in the Model
Master line). The instructions do have you installing the lower wing
radiators backwards so be aware of that. Markings are for three aircraft.
All are basically RLM 70/71/65 with yellow lower outer wing markings. One
is the box art aircraft from I./SG 5 in Russia during 1944 that has most of
the airframe painted in winter white. Next is from I./SG 3, also in Russia
during 1944. The entire upper surface of this is white and it has a yellow
fuselage band. The final one is a D-8 from I./NSG 9 in Italy during 1944.
It also has a yellow fuselage band, which I think should be white for an Italian
based plane. It has an overall scribble pattern in RLM 76
sprayed over the top surface. Decals are well done and my experience with
new Italeri decals has been very positive.
| CONSTRUCTION |
 , but contest
modelers will need to be aware that those will need attention.
, but contest
modelers will need to be aware that those will need attention. | COLORS & MARKINGS |
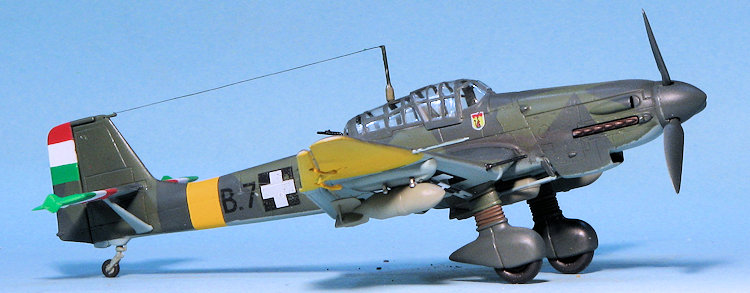
 the fuselage band and
lower wing areas, except I used yellow atop the white areas. This was masked while the underside was painted
RLM 65 and the upper surfaces with RLM 70. There followed considerable
masking before the RLM 71 was sprayed on. During that time, I had painted
the wing racks RLM 65 as well as the dive brakes. The bombs were assembled
and they were painted RLM 02. When it came to the landing gear, the wheels
were painted then installed. Once these were masked, the upper portion was
painted RLM 71 and the lower RLM 70 with the 'crinkly bit' in between
painted with leather.
the fuselage band and
lower wing areas, except I used yellow atop the white areas. This was masked while the underside was painted
RLM 65 and the upper surfaces with RLM 70. There followed considerable
masking before the RLM 71 was sprayed on. During that time, I had painted
the wing racks RLM 65 as well as the dive brakes. The bombs were assembled
and they were painted RLM 02. When it came to the landing gear, the wheels
were painted then installed. Once these were masked, the upper portion was
painted RLM 71 and the lower RLM 70 with the 'crinkly bit' in between
painted with leather. 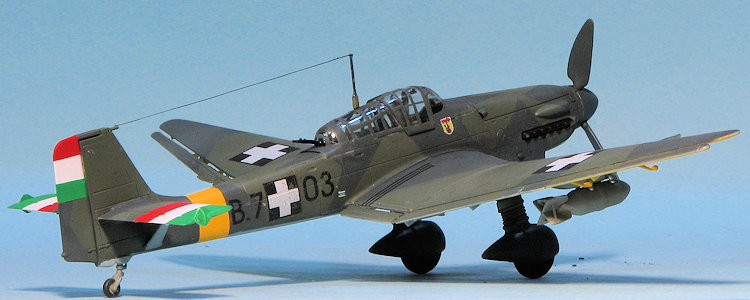 vered a couple of
things. One is that the holes for the brakes are drilled too far apart by
about 1mm. I cured this by making the outer hole more oval. I also had to
remove a rather prominent ejector mark or the brakes will have a decidedly W
look to them. I took this time to paint the brakes where the insignia would
go. Since it is black and white, it is a pretty easy operation.
vered a couple of
things. One is that the holes for the brakes are drilled too far apart by
about 1mm. I cured this by making the outer hole more oval. I also had to
remove a rather prominent ejector mark or the brakes will have a decidedly W
look to them. I took this time to paint the brakes where the insignia would
go. Since it is black and white, it is a pretty easy operation. | CONCLUSIONS |
There were a couple of reasons for building this one. First is that the kit had languished on the shelves for a long time and I felt like building a Ju-87. The second is that when I build the Airfix Ju-87B-1, I want to have something to which it could be compared. Modelers are pretty lucky in having several good 1/72 Ju-87 kits such as this one from Italeri and the one from Fujimi (which seemed a bit more basic than this one). Adding the Airfix release, which is undoubtedly going to be done in several variants, is a plus and aside from the Ju-87A, will allow all variants to be built using mainline plastic kits. This one was not difficult to build and looks just great when it is done. If you have one in your stash, do yourself a favor and give it a build.
| REFERENCES |
The instruction sheet.
Junkers Ju-87 by Eddie J. Creek, Classic Books, 2012
January 2016
Copyright ModelingMadness.com
If you would like your product reviewed fairly and fairly quickly, please contact the editor or see other details in the Note to Contributors.