| KIT #: | 8413 |
| PRICE: | $10-12 retail |
| DECALS: | One option |
| REVIEWER: | Scott Van Aken |
| NOTES: | Easy Snap |
| HISTORY |
In February 1943, the G-6 was introduced on the production line with the 13 mm (.51 in) MG 131s, replacing the smaller 7.92 mm (.312 in) MG 17 – externally this resulted in two sizeable Beule blisters over the gun breeches, reducing speed by 9 km/h (6 mph). Over 12,000 examples were built well into 1944 although contradictory factory and RLM records do not allow an exact tally. The G-5 with a pressurized cockpit was identical to the G-6. A total of 475 examples were built between May 1943 and August 1944. The G-5/AS was equipped with a DB 605AS engine for high-altitude missions. GM-1-boosted G-5 and G-6 variants received the additional designation of "/U2". and were clearly identifyable as they use a modified, aerodynamically cleaner, engine cowl without the usual blisters.
 The G-6/U4 variant was armed with a 30 mm (1.18 in) MK
108 cannon mounted as a Motorkanone
firing through the propeller hub instead of the 20 mm MG 151/20. The G-6 was
very often seen during 1943 fitted with assembly sets, used to carry bombs or a
drop tank, for use as a night fighter, or to increase firepower by adding
rockets or extra gondola guns.
The G-6/U4 variant was armed with a 30 mm (1.18 in) MK
108 cannon mounted as a Motorkanone
firing through the propeller hub instead of the 20 mm MG 151/20. The G-6 was
very often seen during 1943 fitted with assembly sets, used to carry bombs or a
drop tank, for use as a night fighter, or to increase firepower by adding
rockets or extra gondola guns.
The following variants of the G-5 and G-6 were produced:
One offensive weapons upgrade in 1943 for the Bf 109G
was one that mounted the Army`s Werfer-Granate
21 rocket weapon system with one launching tube under each wing panel. The
rockets, fitted with a massive 40,8 kg (90 lbs) warhead, were aimed via the
standard Revi reflector sights, and were spin-stabilized in flight. In
emergency, the tubes could be jettisoned via a small explosive charge. Intended
as a "stand-off" weapon, fired from a distance of 1,200 meters and outside the
effective range
 of the formations defensive guns, it was employed against Allied
bomber formations, the Wfr. Gr. 21 rocket was unofficially known as the BR 21 (Bordrakete
21 cm) for the Bf 109G-5, G-6 and G-14. The weapons system received the
designation of Rüstsatz
VII on the G-10.
of the formations defensive guns, it was employed against Allied
bomber formations, the Wfr. Gr. 21 rocket was unofficially known as the BR 21 (Bordrakete
21 cm) for the Bf 109G-5, G-6 and G-14. The weapons system received the
designation of Rüstsatz
VII on the G-10.
During the course of 1943, a number of improvements were gradually introduced. In an attempt to increase the pilot's field of view an armoured glass head-rest, the so-called Galland Panzer was developed, and subsequently began replacing the bulky armour plate in the spring of 1943. Towards the end of the year the clear-view Erla Haube canopy appeared, named after the Erla Maschinenwerk sub-contractor involved in building new examples, and upgrading older examples of the Bf 109. Often misnamed the "Galland Hood" in postwar Western aviation books and periodicals, it eventually replaced the older heavily framed two-piece canopy on the Bf 109G. The canopy structure was completely redesigned to incorporate a greater area of clear perspex; the welded framing was reduced to a minimum and there was no longer a fixed rear portion, with the entire structure aft of the windscreen being hinged to swing to starboard when opened.
The Bf 109 G-10, AS-engined G-5s, G-6s and G-14s as well as the K-4 saw a refinement of the engine cowlings. The Beule blisters which had formerly covered the spent shell-casing chutes of the synchronized fuselage-mount MG 131s became more streamlined and were lengthened and enlarged to cover both the weapons and the engine bearers. Initial prototype versions were symmetrical, but as larger superchargers were fitted, the engines required modified upper engine bearers to clear the supercharger housing, and as a result the final shape of the new cowling was asymmetrical, being enlarged on the port side where the supercharger was mounted on the DB engine. There were also special streamlined panels fitted to the forward fuselage. These so-called agglomerations could be seen in several different patterns. Because of their aerodynamically more efficient form in a side-view of DB 605AS and D -powered Bf 109 Gs and Ks, the agglomerations were barely discernible compared with the conspicuous fairings they replaced.
| THE KIT |
 Pegasus Hobbies have been doing a line of snap kits
for quite a few years. Not that long ago, I built their Me-262 and was generally
pleased with the end result. The kits have large parts, large pin and socket
locators and go together fairly well. The detailing is engraved and probably too
much for many modelers, but for the intended audience, they are just fine. The
kit has but a single option, and that is to be built with the gear up so the
fledgling aviator can properly take them on missions.
Pegasus Hobbies have been doing a line of snap kits
for quite a few years. Not that long ago, I built their Me-262 and was generally
pleased with the end result. The kits have large parts, large pin and socket
locators and go together fairly well. The detailing is engraved and probably too
much for many modelers, but for the intended audience, they are just fine. The
kit has but a single option, and that is to be built with the gear up so the
fledgling aviator can properly take them on missions.
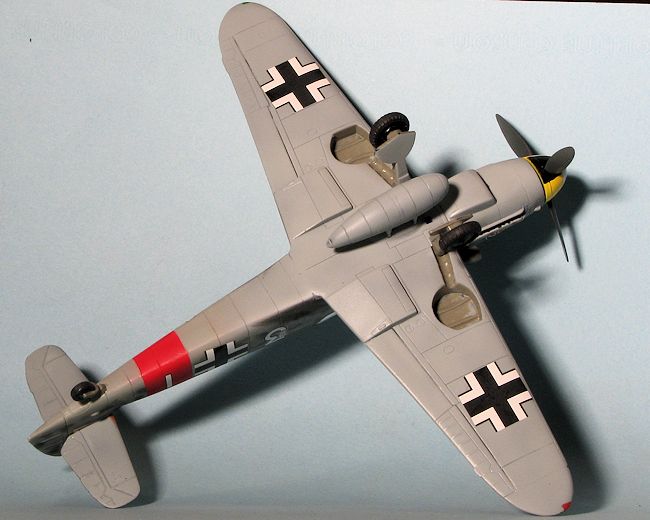
There are quite a few compromises to authenticity in these kits. The 109 kit has no aileron balances, no oil radiator, no radio mast, no control stick, the gear legs molded to the doors, no wheels showing in the gear up option, though one could glue them in the wells first, no opening canopy, no pitot tube and all the control surfaces are fixed in the neutral position. The one piece canopy is a late war Erla Haube version with no armor. The kit does come with a drop tank, the tank mount being molded onto the lower wing, much like Revell's 1/48 109G-10.
 Sounds pretty horrible, eh? Well, it is not. One has
to keep in mind the intended audience, who rarely cares about such things and
basically wants an airplane model to play with in the shortest period of time.
The overall look of things is quite good. One will not mistake it for anything
other than a late war 109G-6. Those who want to put the effort into it can
replicate many of the missing features from the spares bin or stretched sprue.
Sounds pretty horrible, eh? Well, it is not. One has
to keep in mind the intended audience, who rarely cares about such things and
basically wants an airplane model to play with in the shortest period of time.
The overall look of things is quite good. One will not mistake it for anything
other than a late war 109G-6. Those who want to put the effort into it can
replicate many of the missing features from the spares bin or stretched sprue.
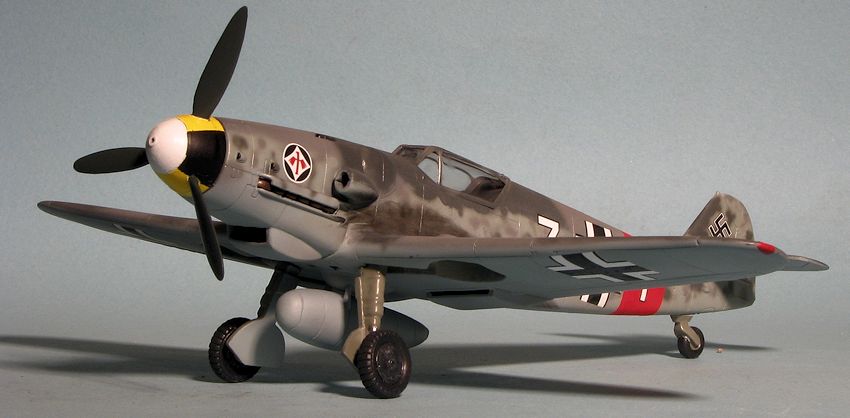
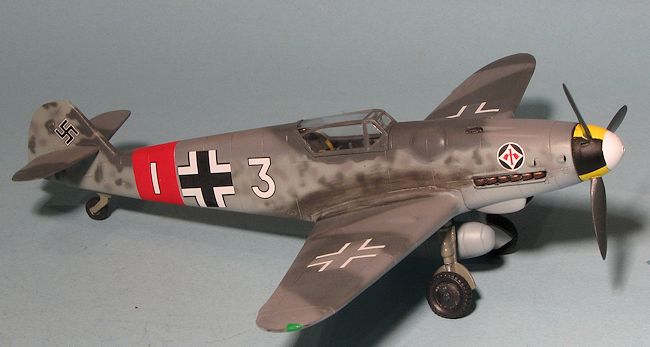
Instructions and very simple and well done. There is one marking option that is not identified, but I have to assume it one of Erich Hartmann's planes due to the 'tulip nose'. My kit had no decals, but from other kits, I'm assuming they are really stickers.
| CONSTRUCTION |
I won this kit in a raffle. Considering the money I spent on the raffle and the number of kits won, I'd say it cost me $2. This kit had already been started. The previous owner had glued together the wings, painted the interior, wheels, wheel wells, prop spinner, and exhaust in flat black, and cut away all the alignment lugs and pins from the fuselage halves.
This leads to a bit of a tirade. This is not the first time I have won a kit that was incomplete or started in a raffle. Often I've gotten kits missing parts, with parts broken (like canopies) or in various levels of completion. Those people who donate these sorts of kits are really doing the modeling community a disservice.
What if a kit like this had been won by a youngster,
excited to be able to get a nice model, and yet disappointed to find out that
the kit was started, or worse, was unable to be built because of broken or
 missing parts? I can recall at a show several years back when my friend Drew
Nix, won what looked to be a Hasegawa Stuka, only to find out that the box was
full of nothing but bare sprues from various kits. I had won an AMT Indy Car at
the same show that had only parts of several kits in it, already poorly painted
and broken with not enough parts to build anything. Both of these were tossed in
the trash at the show.
missing parts? I can recall at a show several years back when my friend Drew
Nix, won what looked to be a Hasegawa Stuka, only to find out that the box was
full of nothing but bare sprues from various kits. I had won an AMT Indy Car at
the same show that had only parts of several kits in it, already poorly painted
and broken with not enough parts to build anything. Both of these were tossed in
the trash at the show.
This isn't the fault of the show promoters, but shows a callousness on the part of the donor to foist off his trash on an unsuspecting modeler. It only makes the show look bad. "I got this P.O.S. at the xxx show" is all many remember. If you donate to a raffle, be sure the kit is complete and can be built. Otherwise, sell it for what it is and keep it out of the raffles.
Back at the kit, I filled all the seams in the wing
with super glue and sanded it smooth. The drop tank was assembled and similarly
treated. I painted all the interior bits with RLM 66 and dry brushed them with
white. The interior and instrument panel were snapped in place along with the
exhaust. I then glued
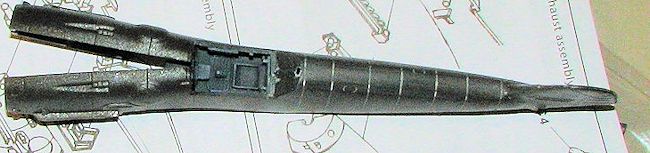 the rear fuselage halves together, filling in the large
fin seam and the rear fuselage seams. I did not glue the front fuselage at this
time as the halves were rather warped. When it was time to glue the front
halves, I first inserted the prop shaft piece and then held it together with
tape until the glue dried. The wings were then glued in place. Yes, I could have
snapped them in, but since I was going to put stress on the parts during
sanding, glue seemed the best way to go.
the rear fuselage halves together, filling in the large
fin seam and the rear fuselage seams. I did not glue the front fuselage at this
time as the halves were rather warped. When it was time to glue the front
halves, I first inserted the prop shaft piece and then held it together with
tape until the glue dried. The wings were then glued in place. Yes, I could have
snapped them in, but since I was going to put stress on the parts during
sanding, glue seemed the best way to go.
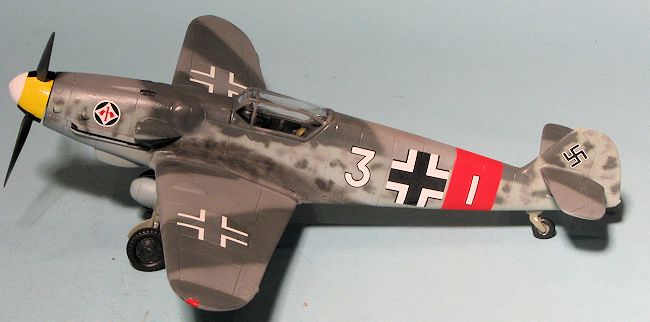
Since the kit is a snap, the seams are large and I decided to fill most of them in, using super glue. Thankfully the plastic and the engraving is quite thick. I think it may be ABS plastic as it gives off a rather odd odor when sanding. Anyway, it can take a lot of it so breakthroughs were not an issue. Meanwhile, the prop had the blades painted RLM 70 and the drop tank was painted RLM 76. Thin strips of tape were used to simulate a harness and the canopy masked and attached. The tail planes were glued in place and it was time for paint.
| COLORS & MARKINGS |
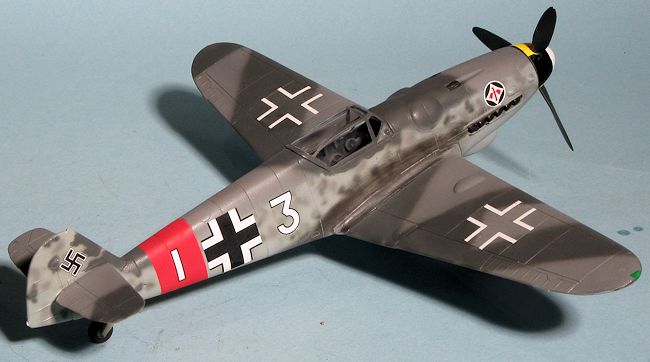
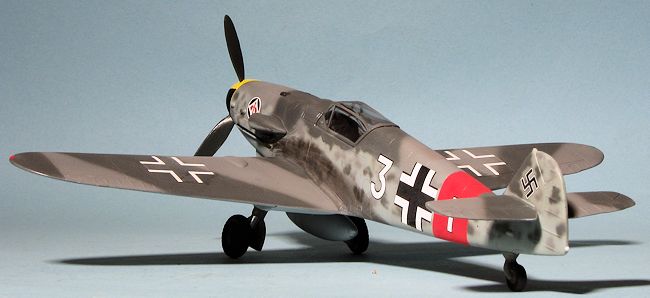
The kit had no stickers and I wouldn't have used them anyway so I started looking through my stash for an appropriate scheme. As luck would have it, there are darn few markings out there for a Bf-109G-6 that has an Erla Haube canopy and the short tail. Lots of them with wooden tails, but I only found one that had the original tail. Makes one wonder why this kit wasn't developed either with the standard canopy or a wooden tail. Anyway, it was a JG 3 plane from 1944 with a red fuselage band and standard RLM 74/75/76 paint as shown on Aeromaster sheet 48-685.
 First step was the paint the underside RLM 76. When
that was dry, the tailplane undersides were masked and the fuselage
stripe area and prop spinner were done in white. I then painted the stripe area
red and when all that was dry, it was masked off. The rest of it was just
following the camo pattern from the decal sheet I was using. The decals I used
were Aeromaster 48-685: JG 1 Defense of the Reich 1942-43. I chose it because it
was only one of two options I could find that matched the kit's configuration.
The markings come with a red fuselage stripe, but I decided painting it would
look better and when I went to apply the markings, I found out that it was a
good choice. I also lightened the lighter shade of grey quite a bit so there
would be more contrast. Not accurate as it actually seems too light, but it does
look a bit nicer. I also discovered that the decals were a bit undersize
compared to the placement drawings. Whether this means that the kit is a bit big
is a possibility.
First step was the paint the underside RLM 76. When
that was dry, the tailplane undersides were masked and the fuselage
stripe area and prop spinner were done in white. I then painted the stripe area
red and when all that was dry, it was masked off. The rest of it was just
following the camo pattern from the decal sheet I was using. The decals I used
were Aeromaster 48-685: JG 1 Defense of the Reich 1942-43. I chose it because it
was only one of two options I could find that matched the kit's configuration.
The markings come with a red fuselage stripe, but I decided painting it would
look better and when I went to apply the markings, I found out that it was a
good choice. I also lightened the lighter shade of grey quite a bit so there
would be more contrast. Not accurate as it actually seems too light, but it does
look a bit nicer. I also discovered that the decals were a bit undersize
compared to the placement drawings. Whether this means that the kit is a bit big
is a possibility.
First the airframe was gloss coated and the decals applied. Judging from the instructions, either the decals are a bit too small or the model is a bit over-scale. I'll bet on the latter. The sheet also does not include any data markings, which is a bit odd and since I did not have the kit sheet, I had to scrounge for a few of them so things would not look too out of place.
Quite a bit of detail painting was also done in terms of the guns, exhaust and formation lights as well as some of the vents. The wheels were pressed on, the airframe given a matte coat and some exhaust stain was added. Finally, the drop tank was installed.
| CONCLUSIONS |
There are probably a few of you who are wondering why
I didn't raid the spares box for the radio mast, DF antenna and perhaps a few
other bits. I thought about it, but then it would not have been i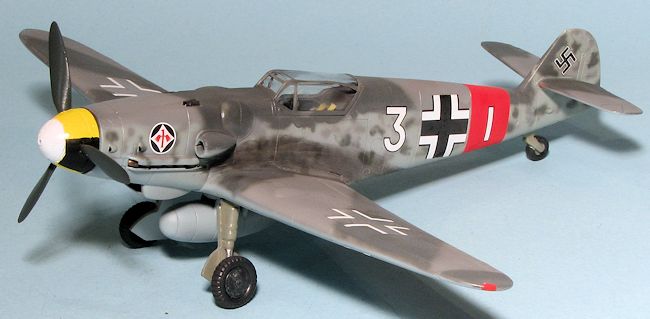 n the spirit of
the kit. It is designed to be a quick build with no fuss and for many who buy
it, that is just what it is. Those of us who want to go a step farther and
provide a non-brush painted scheme can do that, as did I. Others can add as many
of the missing details and that will make things even nicer. No way does this
compare with a Hasegawa or ICM 109G, and thanks to the odd combo of canopy and
tail, few will find anything really compatible, though I guess it could be built
as a G-14.
n the spirit of
the kit. It is designed to be a quick build with no fuss and for many who buy
it, that is just what it is. Those of us who want to go a step farther and
provide a non-brush painted scheme can do that, as did I. Others can add as many
of the missing details and that will make things even nicer. No way does this
compare with a Hasegawa or ICM 109G, and thanks to the odd combo of canopy and
tail, few will find anything really compatible, though I guess it could be built
as a G-14.
In the end, it fulfilled its requirements and while lacking in finesse, still makes into a very nice model for all ages and experience levels. It is a kit that you will not see built up on many other web sites, that's for sure.
| REFERENCES |
http://en.wikipedia.org/wiki/Messerschmitt_Bf_109_variants#G-5.2C_G-6
October 2013 Thanks to the raffle at the 2013 IPMS Gateway
annual contest. If you would like your product reviewed fairly and fairly quickly, please
contact
the editor or see other details in the
Note to
Contributors.