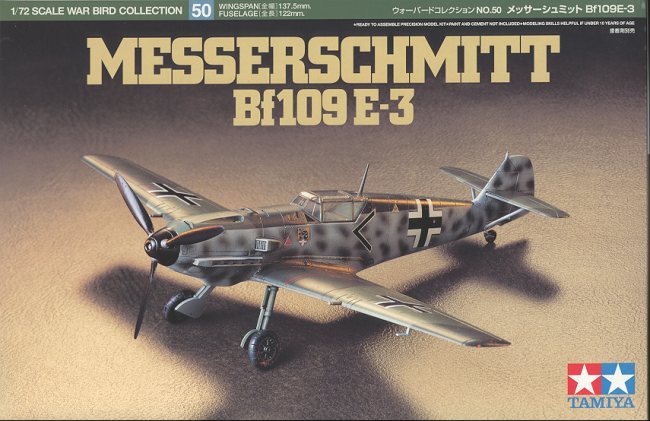
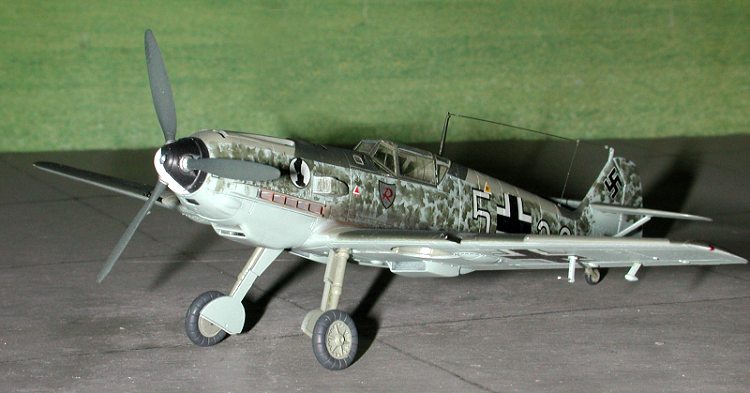
Tamiya 1/72 Bf-109E-3
|
KIT # |
60750 |
|
PRICE: |
$16.50 |
|
DECALS: |
Three aircraft: see review |
|
REVIEW : |
|
|
NOTES: |
|
HISTORY |

The Battle of France and subsequent Battle of Britain was the first real test of the Bf-109E. Earlier aggressions had pitted the Luftwaffe against smaller and less well-equipped forces. When coming against the French and British, for the first time, German pilots had to fight more modern air arms, and the results were not as one-sided as earlier in the conflict. While the French put up a good fight, their tactics did them in and they were unable to stem the assault of the Wehrmacht.
It was against the British that the Bf-109E was put to the test. Though faster, more heavily armed, and able to go into a dive without the engine cutting out, thanks to its injected engine, the Spitfire was more maneuverable and climbed faster. The Bf-109E-3 and later the E-4 were the main variants to be used in mid-1940, with the E-3 being the most plentiful early on. The lack of range was a real hardship and one that wasn't cured until a drop tank was added to the aircraft, starting with the E-7, but it wasn't available early on and the E-3 did not have it, severely limiting its usefulness as a bomber escort.
 Nevertheless, it was still
quite capable and in those few minutes of combat that were allowed, the pilots
of the Luftwaffe did their job in knocking down a lot of Hurricanes and
Spitfires during that time period. The early Battle period was also one of the
more boring times when it comes to camouflage. Most all Bf-109E-3s were painted
in the new splinter pattern of RLM 71/02 uppers with most of the sides and
undersides in RLM 65 light blue. It is a pleasant scheme, but other than unit
markings, all the aircraft looked basically the same. It wasn't until later in
1940 that side mottling was applied. One thing that did break up the monotony
was that several Geschwaders decided to use yellow on rudders, noses or wing tips
to help in identifying friend from foe during the large air battles that took
place during the time.
Nevertheless, it was still
quite capable and in those few minutes of combat that were allowed, the pilots
of the Luftwaffe did their job in knocking down a lot of Hurricanes and
Spitfires during that time period. The early Battle period was also one of the
more boring times when it comes to camouflage. Most all Bf-109E-3s were painted
in the new splinter pattern of RLM 71/02 uppers with most of the sides and
undersides in RLM 65 light blue. It is a pleasant scheme, but other than unit
markings, all the aircraft looked basically the same. It wasn't until later in
1940 that side mottling was applied. One thing that did break up the monotony
was that several Geschwaders decided to use yellow on rudders, noses or wing tips
to help in identifying friend from foe during the large air battles that took
place during the time.
For details on the kit itself, please follow this link.
|
CONSTRUCTION |
 Most people thing that construction starts with the cockpit. In
actuality, I have found that the first thing I do to a kit is to apply some
paint. In this case, all the interior parts, wheel wells, struts and wheels were
painted RLM 02 green-grey. The instructions dictate a dark grey for the floor of
the interior. There is no evidence that this was done. The switch to RLM 66 dark
grey was not mandated until Nov 1941 so it was unlikely that this color would be
used anywhere other than on instrument panels until aircraft started rolling off
the assembly line in 1942. This basically meant that all Bf-109Es and
Bf-109Fs, at least the -2 and some -4s were delivered with RLM 02 cockpits
Most people thing that construction starts with the cockpit. In
actuality, I have found that the first thing I do to a kit is to apply some
paint. In this case, all the interior parts, wheel wells, struts and wheels were
painted RLM 02 green-grey. The instructions dictate a dark grey for the floor of
the interior. There is no evidence that this was done. The switch to RLM 66 dark
grey was not mandated until Nov 1941 so it was unlikely that this color would be
used anywhere other than on instrument panels until aircraft started rolling off
the assembly line in 1942. This basically meant that all Bf-109Es and
Bf-109Fs, at least the -2 and some -4s were delivered with RLM 02 cockpits
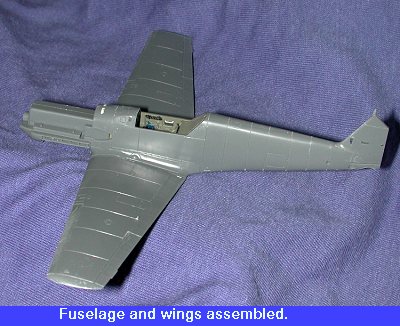
Once the bits were painted, it was on to the real construction. For me, this meant first gluing the wings together. Do not punch out any of the holes in the lower wing as the E-3 did not carry a drop tank or bomb. The fit of the upper wing halves is very good. Make sure you clean up any sprue attachment points before doing any gluing. You'll find the kit fits much better if you do.
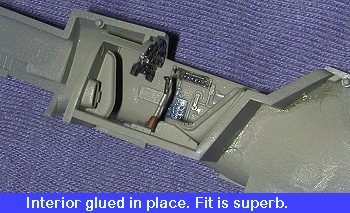 Then the interior bits were glued in. This meant the seat,
control stick, forward cockpit and the instrument panel. There are decals for
the instrument panel and for seatbelts. These were used. The side walls of the
fuselage have some detail on it and this was painted and later drybrushed. Then
the interior was glued in place. Fit is just great. This is one well engineered
kit. After the interior was in place, the prop bushing was installed and glued.
Then the fuselage halves glued together. Normally, I would clean up the mold
lines on the fuselage before proceeding to add on the wings, but in this case I
test fit the wings on and the fit is the best I have ever seen in any
model, so I ran a bit of glue in the seams and let it dry.
Then the interior bits were glued in. This meant the seat,
control stick, forward cockpit and the instrument panel. There are decals for
the instrument panel and for seatbelts. These were used. The side walls of the
fuselage have some detail on it and this was painted and later drybrushed. Then
the interior was glued in place. Fit is just great. This is one well engineered
kit. After the interior was in place, the prop bushing was installed and glued.
Then the fuselage halves glued together. Normally, I would clean up the mold
lines on the fuselage before proceeding to add on the wings, but in this case I
test fit the wings on and the fit is the best I have ever seen in any
model, so I ran a bit of glue in the seams and let it dry.
 Then the parts for the nose radiator were glued into the lower
nose section. At this time, you are supposed to glue the upper and lower cowling
in place. I did not as I am not really sure what paint scheme I'm doing. If it
is a yellow or white nosed version, it will be MUCH easier to paint these
components and then glue them in. I also did not do the air intake for the same
reason.
Then the parts for the nose radiator were glued into the lower
nose section. At this time, you are supposed to glue the upper and lower cowling
in place. I did not as I am not really sure what paint scheme I'm doing. If it
is a yellow or white nosed version, it will be MUCH easier to paint these
components and then glue them in. I also did not do the air intake for the same
reason.
Next step, after cleaning up the seams, was to install the tailplanes. They fit very well and are keyed to make sure you don't install them upside down. The braces were simply snapped into place without glue to make sure that everything remained level and fit properly. They were then removed and painted separately from the rest of the kit.
Having determined that I would not be doing a yellow nosed or tailed aircraft, the rudder and upper and lower engine cowlings were glued in place, as was the supercharger intake on the side of the nose. Fit is superb. This kit is getting better and better as time goes on.
I then installed the gunsight into the interior and then glued the windscreen and canopy in place. These were then masked. The wheel wells were filled with U-Knead-It from Jim's Hobbies and it was off to the paint shop.
|
PAINT & DECALS |
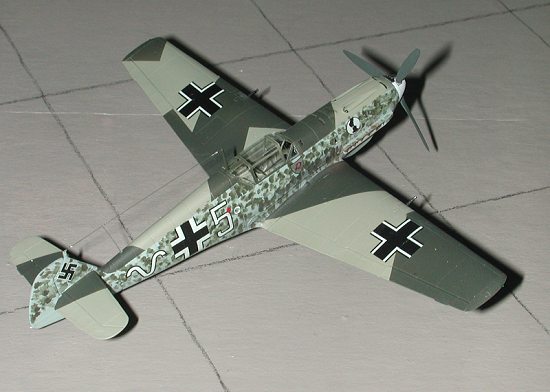
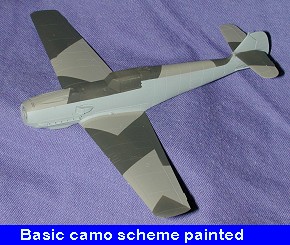
This kit is to be painted in the second major scheme of RLM 71/02 uppers and RLM 65 lowers and sides. The first thing I did was to paint the RLM 65 undersides. Now this will get a lot of overspray on it from the upper colors and will need to be done again, but it does allow me to do the underside of the tailplanes and so then be able to mask them. I'll then do the uppersurface colors and mask them before returning to doing the RLM 65 again. It is important to mask everything that you don't want paint on. Overspray is insidious and gets into any open spots in the tape. This seems to work best for Bf-109s, and I have built a lot of them!
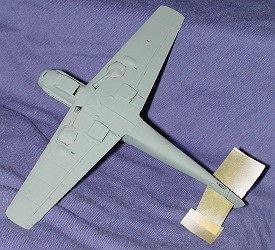 After RLM 65 painted, tail masked. |
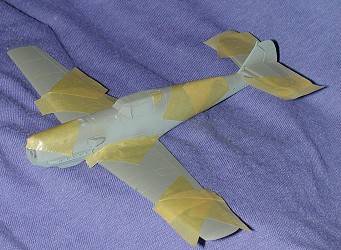 RLM 02 painted then masked for RLM 71. |
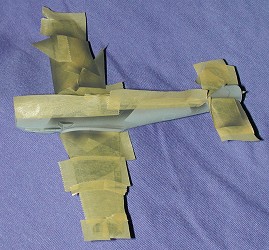 Upper colors masked for respray. |
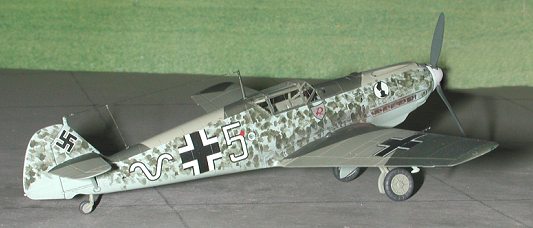
 Once the aircraft was fully painted, the landing gear was
installed minus wheels and doors. Then came the tricky part. This particular
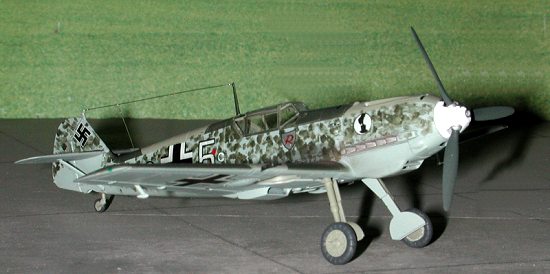
aircraft was heavily mottled on the sides using a brush and sponge. I was in a quandary
about exactly how to do it. Using a paint brush would not have given the effect
that I was looking for. Then it came to me that I could use Microbrushes and
just dab on the mottling. The next step was to figure how much paint to use. For
this, I practiced on an old model piece.
Once the aircraft was fully painted, the landing gear was
installed minus wheels and doors. Then came the tricky part. This particular
aircraft was heavily mottled on the sides using a brush and sponge. I was in a quandary
about exactly how to do it. Using a paint brush would not have given the effect
that I was looking for. Then it came to me that I could use Microbrushes and
just dab on the mottling. The next step was to figure how much paint to use. For
this, I practiced on an old model piece.
It seemed that the best way of doing it was to dip the brush into the paint, then dab most of it off onto a cloth or rag. Then the remaining paint was spotted onto the fuselage side. By changing the angle of the dabbing, different splotch patterns were created. After quite a bit of time, the dappling was finished. It looks quite good to me and could actually stand to be a bit more dense if that is what is wanted, but I was pleased with the effect.
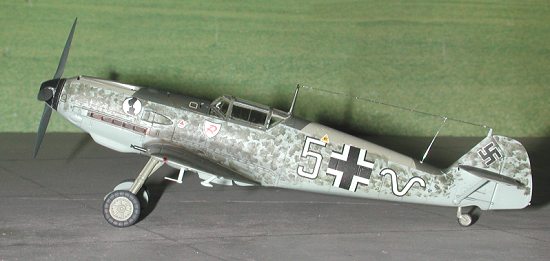
 Then it was time for the decals. As I
mentioned in the decal review, these decals are some of MSAP's initial
production and are all on a single carrier. As I had discovered many years ago
with another sheet of theirs, these decals are also brittle. Any sharp bending
of the sheet will cause the decals to crack and splinter. Fortunately, I only
had that happen to one wing cross as I was cutting them out and it was
repairable. The decals have a heavy white adhesive film that should be rinsed
off before applying the decals. The decals also do not react to any but the
strongest setting solution. I used Solvaset on them to get them to snuggle down
into panel lines. Once dry, they stick quite well. Some of the kit decals were
used for a few common maintenance stencils and such, though you need to realize
that most of these on the fuselage side would have been painted over and not
replaced.
Then it was time for the decals. As I
mentioned in the decal review, these decals are some of MSAP's initial
production and are all on a single carrier. As I had discovered many years ago
with another sheet of theirs, these decals are also brittle. Any sharp bending
of the sheet will cause the decals to crack and splinter. Fortunately, I only
had that happen to one wing cross as I was cutting them out and it was
repairable. The decals have a heavy white adhesive film that should be rinsed
off before applying the decals. The decals also do not react to any but the
strongest setting solution. I used Solvaset on them to get them to snuggle down
into panel lines. Once dry, they stick quite well. Some of the kit decals were
used for a few common maintenance stencils and such, though you need to realize
that most of these on the fuselage side would have been painted over and not
replaced.
After the decals were on and dry, the kit was wiped
down with a damp cloth to remove any excess solution. Then it was sprayed with a
matte or semi-matte clear acrylic coat. I have been using Future mixed with
Tamiya Flat Base for years and highly recommend it as an inexpensive and
adjustable medium that is a piece of cake to mix and use.
|
CONSTRUCTION CONTINUES |
 Now that it was painted and flattened (so to speak), all the
masking was removed from the canopy. So clear is the canopy that the interior
can easily be seen through it. Then it was time to add on the other small bits
that are best left to the end of construction. This included the underwing pitot
tube and aileron mass balancers. The wing guns were also inserted as was the
radio antenna mast. This last item had to have its base trimmed before it would
fit. The wheels and gear doors were glued in place and that was it for the
gluing.
Now that it was painted and flattened (so to speak), all the
masking was removed from the canopy. So clear is the canopy that the interior
can easily be seen through it. Then it was time to add on the other small bits
that are best left to the end of construction. This included the underwing pitot
tube and aileron mass balancers. The wing guns were also inserted as was the
radio antenna mast. This last item had to have its base trimmed before it would
fit. The wheels and gear doors were glued in place and that was it for the
gluing.
Naturally, there was a bit of touchup painting that had to be done to things like guns and pitot tube and aileron balancers. There also had to be a radio antenna wire made. This was done using clear sprue. I like using clear sprue. Looking at photos of the real aircraft, you'll notice that the antenna wire is barely visible. Clear represents this quite well. It also has the benefit of not curling when stretched like regular plastic will. This was affixed using superglue and accelerator.
After I had a pretty complete aircraft, the pastels were brought out and some staining was done using them. I had thought about accentuating the panel lines, but decided against it. Aircraft of this time were much better maintained than later in the war so would have been generally pretty clean. Last act was to press in the prop and I was done.
|
CONCLUSIONS |
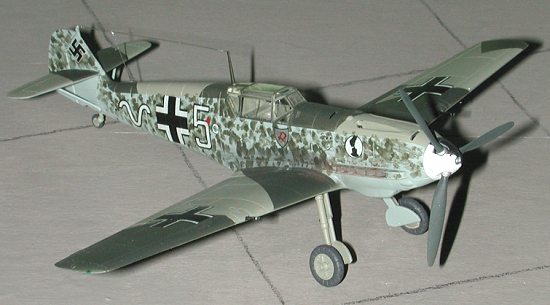 This kit is without a doubt among the finest I have ever built. Tamiya just does
a super job of engineering and it shows. The kit offered no hassles at all and
was nearly filler free, which for me is a near miracle. I just cannot say enough
about how much I enjoyed building this model and I can guarantee that there will
be more of these on the shelves in the near future. Now the big question is one
of worth. Is it worth it to pay so much for such a small kit? That you will have
to answer for yourself. Very highly recommended.
This kit is without a doubt among the finest I have ever built. Tamiya just does
a super job of engineering and it shows. The kit offered no hassles at all and
was nearly filler free, which for me is a near miracle. I just cannot say enough
about how much I enjoyed building this model and I can guarantee that there will
be more of these on the shelves in the near future. Now the big question is one
of worth. Is it worth it to pay so much for such a small kit? That you will have
to answer for yourself. Very highly recommended.
|
REFERENCES |
German Aircraft of the Second World War, by JR Smith & Anthony Kay, Putnam, 1972.
August 2002
Copyright ModelingMadness.com. All rights reserved.
Review kit courtesy of me and my wallet!
If you would like your product reviewed fairly and fairly quickly, please contact the editor or see other details in the Note to Contributors.
Back to Reviews Page 2020