Trumpeter 1/48 Me-509
| KIT #: | 02649 |
| PRICE: | $31.99 SRP |
| DECALS: | Two options - both fictitious |
| REVIEWER: | Scott Van Aken |
| NOTES: |
New tool kit |
| HISTORY |
 The
Messerschmitt Me 509 was a project underway in
Germany
during
World War II based on the
Me 309 but with the engine located behind the
cockpit like
the US
Bell
P-39 Airacobra. The engine was a
Daimler-Benz DB 605B driving a three-blade
propeller and armament was to consist of two 13 mm (.51 in)
MG 131 machine guns and two 20 mm
MG
151/20 cannons. The
tricycle landing gear from the Me 309 was retained, which worked better on
the 509 due to the lower weight on the nosewheel - the Me 309's front landing
gear had collapsed during trials. Visibility was also better with the smaller
nose. The project was cancelled along with the Me 309, but the Japanese made a
similar aircraft, the
Yokosuka R2Y Keiun, which suffered from engine overheating.
The
Messerschmitt Me 509 was a project underway in
Germany
during
World War II based on the
Me 309 but with the engine located behind the
cockpit like
the US
Bell
P-39 Airacobra. The engine was a
Daimler-Benz DB 605B driving a three-blade
propeller and armament was to consist of two 13 mm (.51 in)
MG 131 machine guns and two 20 mm
MG
151/20 cannons. The
tricycle landing gear from the Me 309 was retained, which worked better on
the 509 due to the lower weight on the nosewheel - the Me 309's front landing
gear had collapsed during trials. Visibility was also better with the smaller
nose. The project was cancelled along with the Me 309, but the Japanese made a
similar aircraft, the
Yokosuka R2Y Keiun, which suffered from engine overheating.
| THE KIT |
 raised detail and a
decal is also provided for this.
raised detail and a
decal is also provided for this.
 lowered position, which would be appropriate for a plane on the ground. The
three piece canopy assembly can be posed with the canopy open if one wishes.
There is no indication of any nose weight being needed, but I can bet that you
will need some so plan for it during the build. As the installation of the prop
is about the last thing, you might well be able to delay weight installation
until that time.
lowered position, which would be appropriate for a plane on the ground. The
three piece canopy assembly can be posed with the canopy open if one wishes.
There is no indication of any nose weight being needed, but I can bet that you
will need some so plan for it during the build. As the installation of the prop
is about the last thing, you might well be able to delay weight installation
until that time.
| CONSTRUCTION |
I am a huge fan of doing subassemblies as well as getting together as many of the bits that will be the same color as I can right off the bat. This meant building up the cockpit and assembling all the wheel well bits. I have to say that building up the wheel well walls was not my idea of fun. To make sure all the bits properly lined up, I cemented the wing halves together soon after the wells were assembled and the glue still tacky. This way, I was able to gently push the bits into place before adding more cement to make sure they stayed there.
 I then turned to the interior. This is a straight-forward
build and the spot where most of the photo etch goes. I found the p.e. to be
quite soft so one can easily bend it, but also has to take care when
handling it. There was no trauma installing the belts or the rudder pedals.
The rest of the p.e. fret was installed on the the radiator housing. Back at
the interior, everything was painted RLM 66 using Agama enamels. The gear
wells were painted RLM 02 using Model Master enamels. I also painted the
spinner black and the prop with RLM 70, again, using Model Master paints.
I then turned to the interior. This is a straight-forward
build and the spot where most of the photo etch goes. I found the p.e. to be
quite soft so one can easily bend it, but also has to take care when
handling it. There was no trauma installing the belts or the rudder pedals.
The rest of the p.e. fret was installed on the the radiator housing. Back at
the interior, everything was painted RLM 66 using Agama enamels. The gear
wells were painted RLM 02 using Model Master enamels. I also painted the
spinner black and the prop with RLM 70, again, using Model Master paints.
While that was drying, I assembled the tail planes and the supercharger intake. One of the tailplanes did not fit as well as the other, for some reason. One also has to be careful with the supercharger intake as there are no guide pins.
 The interior was then glued into one fuselage half and
the exhaust glued in place. Then the fuselage halves were cemented together.
Fit is quite good, though the section in front of the cockpit did not want
to close all the way. I squeezed it then taped it, but when the glue dried,
there was a gap still there. I also noticed that masking the exhaust would
be a pain so removed them, figuring I would install them through the opening
in which the radiator bath would fit. This would allow me to paint the plane
first.
The interior was then glued into one fuselage half and
the exhaust glued in place. Then the fuselage halves were cemented together.
Fit is quite good, though the section in front of the cockpit did not want
to close all the way. I squeezed it then taped it, but when the glue dried,
there was a gap still there. I also noticed that masking the exhaust would
be a pain so removed them, figuring I would install them through the opening
in which the radiator bath would fit. This would allow me to paint the plane
first.
The wing was then installed. This includes the lower forward fuselage that includes the nose gear opening. Fit in the front was only fair and that at the lower rear was not all that great. I had to use quite a bit of superglue and sanding to take care of the fit of these areas. The upper wing roots also had some gaps in them that needed filled and sanded. Tail planes are keyed so one cannot put them in the wrong side. It was now 48 hours since I started this project and the airframe was pretty well complete. To say that I am pleased with the fit would be about right.
I then added the bit behind the seat and the supercharger intake. Then the windscreen and canopy were installed after masking. The canopy was tacked into place. I also pushed the radiator assembly into place and filled the wells and such with tissue in preparation for painting.
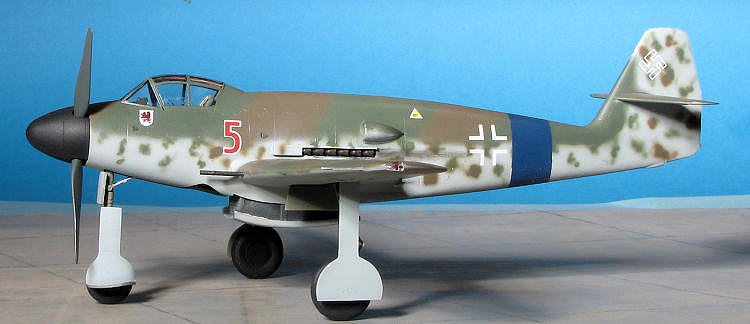
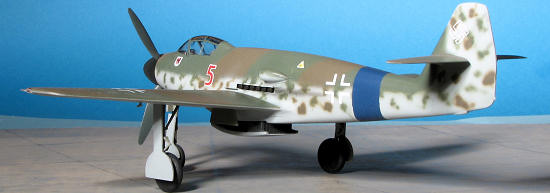
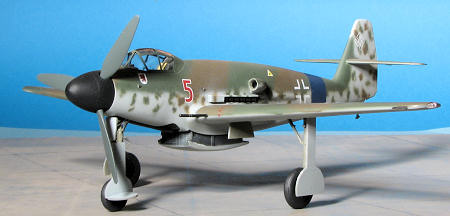
| COLORS & MARKINGS |
 Had this aircraft actually seen service, it would have been rather late in
1944 or so. Since this is a sort of 'Luft '46' aircraft, one can pretty much
paint it as one might see fit. First I painted the cockpit area with RLM 66.
Then it was the underside color so I chose RLM 76 from the Model Master
enamel range. Then areas were masked off and the upper surface was painted
RLM 82 dark green, again using Model Master enamels. I decided to keep the
demarcation line on the fuselage about half way up, though had thought about
having it down near the bottom of the fuselage. The the next color was RLM
81 and for that I used some of my remaining Aeromaster enamels and painted
this brown shade in wide bands as was sometimes seen on late war Me-262s.
Had this aircraft actually seen service, it would have been rather late in
1944 or so. Since this is a sort of 'Luft '46' aircraft, one can pretty much
paint it as one might see fit. First I painted the cockpit area with RLM 66.
Then it was the underside color so I chose RLM 76 from the Model Master
enamel range. Then areas were masked off and the upper surface was painted
RLM 82 dark green, again using Model Master enamels. I decided to keep the
demarcation line on the fuselage about half way up, though had thought about
having it down near the bottom of the fuselage. The the next color was RLM
81 and for that I used some of my remaining Aeromaster enamels and painted
this brown shade in wide bands as was sometimes seen on late war Me-262s.
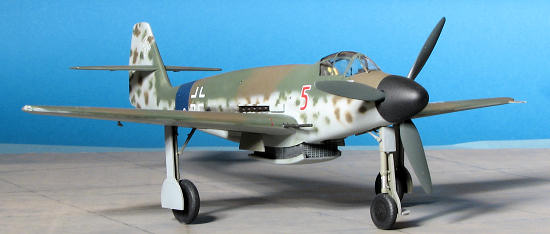
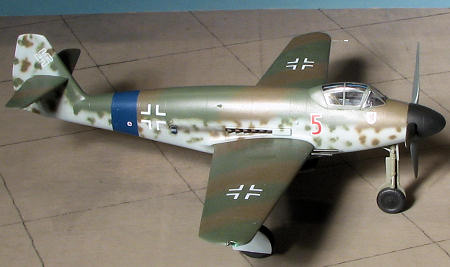
| FINAL CONSTRUCTION |
Generally, I put a kit on its landing gear before applying
decals. Makes it easier to put on the gloss coat (for which I used Pledge clear
gloss) and then the decals. I used kit decals for this purpose. They went on
well and reacted well to setting solutions. I
 decided to use the blue fuselage
band and have to say that there was no thought given as to it actually fitting
when it was designed. These things should be at least curved, but this one is
not. I got it in place and then cut it quite a bit in order to get it to at
least look normal. Should have painted it on.
decided to use the blue fuselage
band and have to say that there was no thought given as to it actually fitting
when it was designed. These things should be at least curved, but this one is
not. I got it in place and then cut it quite a bit in order to get it to at
least look normal. Should have painted it on.
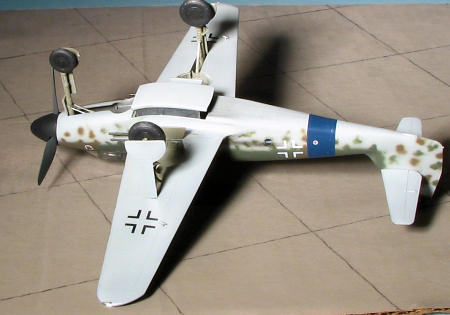
With the markings in place, I then glued on the exhaust from
the inside then attached a bunch more weight. I ended up using over 20 grams and
it is a borderline case where a heavy tap will cause it to tail sit. With that
in place, I atta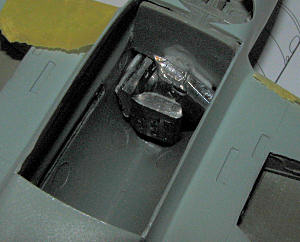 ched the radiator bath in the lowered position. There are no
retraction struts and the bath is smaller than the opening so it was very much a
case of it fitting where I could build up super glue. Wheels were glued in place
as were the gear doors. The large main wheel doors and the upper nose gear door
have a dedicated slot for attachment. The rest are butt joins so one does have
to be careful. Especially with the smaller door on the lower nose gear door. As
it is curved, there is not much attachment room.
ched the radiator bath in the lowered position. There are no
retraction struts and the bath is smaller than the opening so it was very much a
case of it fitting where I could build up super glue. Wheels were glued in place
as were the gear doors. The large main wheel doors and the upper nose gear door
have a dedicated slot for attachment. The rest are butt joins so one does have
to be careful. Especially with the smaller door on the lower nose gear door. As
it is curved, there is not much attachment room.
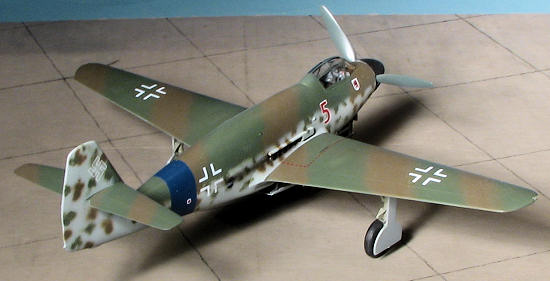
Last bits to be added were the wing root cannon (after suitable painting), the clear wing tip light lenses, and finally the prop assembly. Though the canopy was only tacked in place, it is clear enough to see all of the interior so it was left closed.
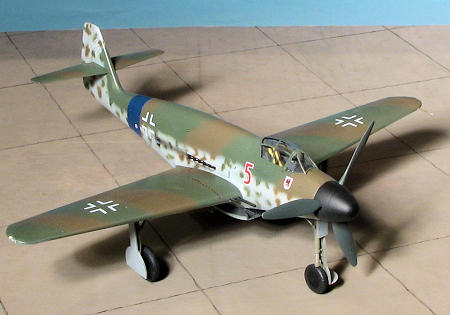
| CONCLUSIONS |
Perhaps this kit will be part of a resurgence of Luft '46 subjects, this time in 1/48 scale. The molding is excellent and I fully expect the fit to be equally good. For those of you who have built one of the various resin 1/48 Me-309 kits, this one will look very nice sitting next to it, and be a lot easier to build!
| REFERENCES |
http://en.wikipedia.org/wiki/Messerschmitt_Me_509
January 2010 Copyright ModelingMadness.com. All rights reserved. No reproduction in part or in whole without express permission from the editor If you would like your product reviewed fairly and fairly quickly, please contact the editor or see other details in the Note to
Contributors.