| KIT #: | 8263 |
| PRICE: | $28.79 on line |
| DECALS: | Five options |
| REVIEWER: | Scott Van Aken |
| NOTES: | Profipack Edition. 2012 release. |
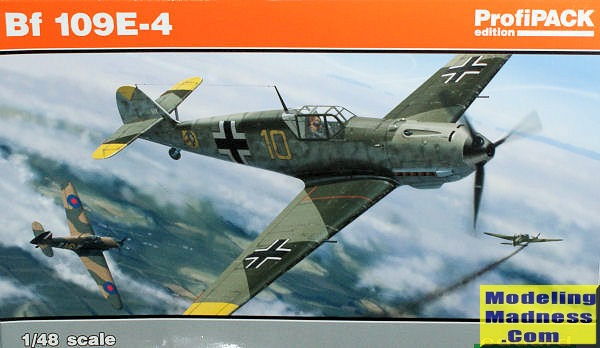
| HISTORY |
The E-3 was replaced by the E-4 (with many E-3 airframes being upgraded to E-4 standards starting at the beginning of the Battle of Britain), which was different in some small details, most notably by using the modified 20 mm MG-FF/M wing cannon and having improved head armour for the pilot. With the MG FF/M, it was possible to fire a new and improved type of explosive shell, called Minengeschoß (or 'mine-shell'), which was made using drawn steel (the same way brass cartridges are made) instead of being cast as was the usual practice. This resulted in a shell with a thin but strong wall, which had a larger cavity in which to pack a much larger explosive charge than was otherwise possible. The new shell required modifications to the MG FF's mechanism due to the different recoil characteristics, hence the MG FF/M designation.
The cockpit canopy was also revised to an easier-to-produce, "squared-off" design, which also helped improve the pilot's field of view. This canopy, which was also retrofitted to many E-1s and E-3s, was largely unchanged until the introduction of a welded, heavy-framed canopy on the G series in the autumn of 1942. The E-4 would be the basis for all further Bf 109E developments. Some E-4 and later models received a further improved 1,175 PS (1,159 hp, 864 kW) DB601N high-altitude engine; known as the E-4/N; owing to priority being given to equipping Bf 110s with this engine, one fighter gruppe was converted to this version, starting in July 1940. The E-4 was also available as a fighter-bomber with equipment very similar to the previous E-1/B. It was known as E-4/B (DB 601Aa engine) and E-4/BN (DB 601N engine). A total of 561 of all E-4 versions were built, including 496 E-4s built as such: 250 E-4, 211 E-4/B, 15 E-4/N and 20 E-4/BN. Many E-4s were retrofit to being able to carry a drop tank, a modification made for the E-7 versions.
| THE KIT |
 Eduard's kits have earned a reputation for being well
engineered and quite detailed. No longer are they high volume short run kits,
but are right up there with the big boys and have been for several years. Often
accused of over-engineering their kits, this one shows signs of some of that,
but at least one does not have to build it with everything opened up as was the
curse of their very nice FW-190A kit. You'll notice that you get quite a few
bits 'not used'. Using some of these will allow planes other than what is kitted
to be built.
Eduard's kits have earned a reputation for being well
engineered and quite detailed. No longer are they high volume short run kits,
but are right up there with the big boys and have been for several years. Often
accused of over-engineering their kits, this one shows signs of some of that,
but at least one does not have to build it with everything opened up as was the
curse of their very nice FW-190A kit. You'll notice that you get quite a few
bits 'not used'. Using some of these will allow planes other than what is kitted
to be built.
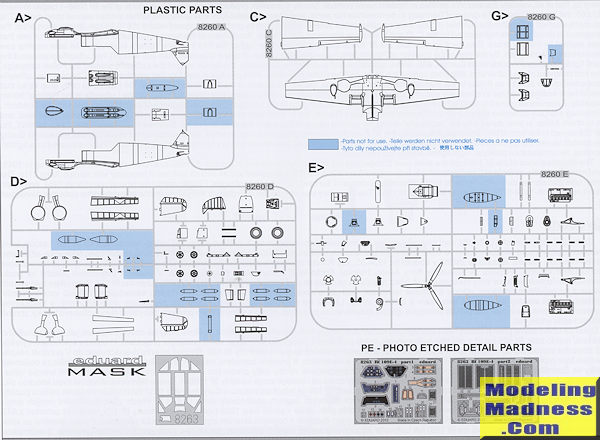
This kit has a nicely detailed cockpit with sidewall detail, rudder pedals, a nice seat and well detailed instrument panels. By having no photo etch, you get a rather bland seat, but there are resin replacements that include belt detail. The kit also comes with a complete engine. Some will think this is a great addition and others are more luke-warm to the idea. Fortunately, those who want to model their 109 with all the covers in place, this has been taken into consideration and the instructions have sections on building things closed up, though the construct will be more fiddly than simply sticking an upper cowling over the engine. You still need the basic engine block to provide a prop shaft and a place to install the exhaust. The exhaust is six separate pipes on each side of the engine. I would have liked to have seen a single mold option.
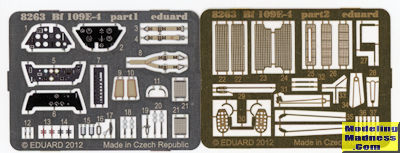 Since this is
the Profipack version, you get two frets. One is in color and this is primarily
for the cockpit. The other is standard brass and will be used where you'd paint
it anyway. This second fret includes cooler screens, rudder pedals and a few
other bits. The kit includes separate flaps so these can be
modeled in the lowered position. It would have been nice if the elevators were
separate as well, but these should be pretty easy to cut and reglue lowered if
you wish. Landing gear is nicely done and the wheels are three parts with
separate inner and outer wheels as well as a separate tire. The clear bits are
crisply done with separate windscreen, canopy and backlight. This boxing also
includes a nice set of masks for the clear bits.
Since this is
the Profipack version, you get two frets. One is in color and this is primarily
for the cockpit. The other is standard brass and will be used where you'd paint
it anyway. This second fret includes cooler screens, rudder pedals and a few
other bits. The kit includes separate flaps so these can be
modeled in the lowered position. It would have been nice if the elevators were
separate as well, but these should be pretty easy to cut and reglue lowered if
you wish. Landing gear is nicely done and the wheels are three parts with
separate inner and outer wheels as well as a separate tire. The clear bits are
crisply done with separate windscreen, canopy and backlight. This boxing also
includes a nice set of masks for the clear bits.
Instructions are very well done with a lot of color in the large booklet. All
the paint information is from the Gunze line, but since it is pretty standard
stuff, you shouldn't have any issues. The nice thing about the Profipack series,
aside from the photo etch and masks is that you have a lot of markings options.
This one has no fewer than five. All of them are in RLM 71/02 over RLM 65. Most
of them have mottling of various patterns on the fuselage side. As the Battle of
Britain progressed, these planes got, for the most part, areas of yellow on the
airframe which started small and grew to large sections.
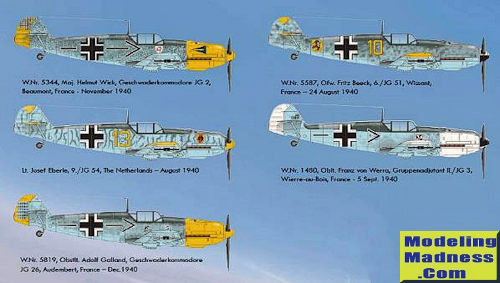
Using the accompanying illustration starting on the left and working down the
page, we have Helmut Wick's plane from JG 2 in November 1940, Josef Eberle's
plane from JG 54 in August 1940, Adolf Galland's JG 26 aircraft in December
1940, Fritz Beek's JG 51 plane from August 1940 and finally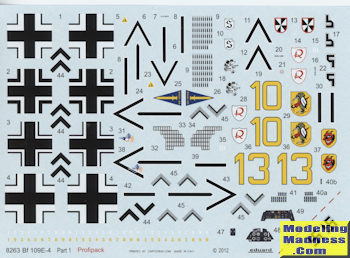 Franz von Werra's white marked plane from JG 3 in September 1940. The large
decal sheet is very nicely printed and you not only get full color markings
guides, but a complete stencil suite as well. If doing a mottled plane, you
might want to apply the stencils first as these were frequently over-painted
either in part or completely. Eduard supplies the swastikas either in bits or
(hidden behind the MM logo) complete and ready to remove for those nations where
it is against the law to portray the marking.
Franz von Werra's white marked plane from JG 3 in September 1940. The large
decal sheet is very nicely printed and you not only get full color markings
guides, but a complete stencil suite as well. If doing a mottled plane, you
might want to apply the stencils first as these were frequently over-painted
either in part or completely. Eduard supplies the swastikas either in bits or
(hidden behind the MM logo) complete and ready to remove for those nations where
it is against the law to portray the marking.
| CONCLUSIONS |
This is a very nice kit. It can also be a real PITA to build if you choose to close everything up. I built their E-1 several years back and it was a real struggle to do a closed cowling version. Here is a link to that build. I got this kit on line for only a few dollars more than an SRP Weekend Edition, so in this case, it was a good deal. This time, when I do the cowling closed, I'm going to try a different approach and see if that will make any difference. No matter how it is built, it does make a nice model when you are done. It just isn't an easy build. You want easy, then go with Tamiya or Hasegawa.
December 2016
Copyright ModelingMadness.com. All rights reserved.
Thanks to me for the preview kit. If you would like your product reviewed fairly and fairly quickly, please contact the editor or see other details in the Note to Contributors.