| KIT #: | 32517 |
| PRICE: | $15.00 MSRP |
| DECALS: | Four options |
| REVIEWER: | Scott Van Aken |
| NOTES: |
| BACKGROUND |
Please visit the preview to have a look in the box and get a bit of background history on this car.
| CONSTRUCTION |
These types of kits are very
difficult to review. The main reason is that every thing fits. No huge gaps
to fill, no sink marks, no ejector pin marks, no real hassles at all. The
folks at Tamiya have a reputation as probably the best kit engineers on the
 market and this one follows along in that vein quite well.
However, a story must be told on this one so here goes. The first thing I did was to remove the major pieces from the sprues; the body, frame, forward fenders, wheels and clean them up. This did not take long, though the bumper braces will take a little bit of time. I then looked for pieces that would be painted the same color and though not many of those, I did glue the instrument panel to the forward fender part, followed by the steering shaft followed by the steering wheel itself. When that dried, I headed for the paint shop. You may think this a bit premature, but for cars, painting starts early. I didn't have to mask anything.
| COLORS & MARKINGS |
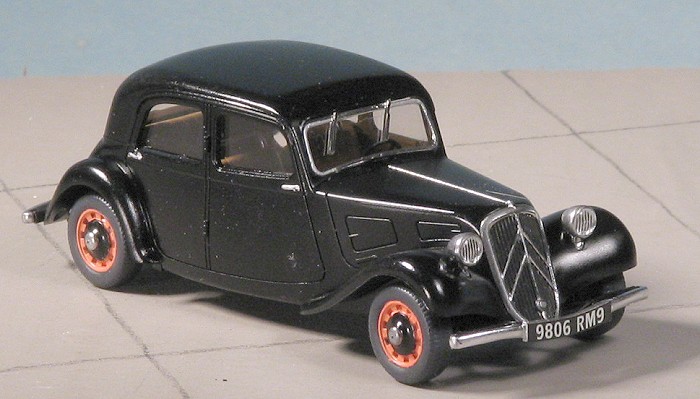
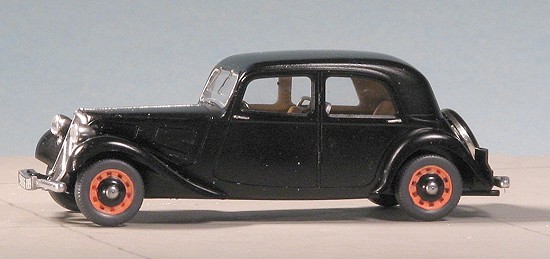
 All those cars operated by the
Gestapo or the French Resistance in the movies were painted black. Well, I
think they were black as the movies generally were not in color. However, a
black car was pretty common in the 30's and while my trip to Google did
show some in dark green and a burgandy color, I thought that black would be
more in keeping with the effect. Scrounging through my paints I found that
among the hundreds of bottles and tinlets was but one bottle gloss black
and that an acrylic by Tamiya.
All those cars operated by the
Gestapo or the French Resistance in the movies were painted black. Well, I
think they were black as the movies generally were not in color. However, a
black car was pretty common in the 30's and while my trip to Google did
show some in dark green and a burgandy color, I thought that black would be
more in keeping with the effect. Scrounging through my paints I found that
among the hundreds of bottles and tinlets was but one bottle gloss black
and that an acrylic by Tamiya.
As some of you may be aware, acrylics are not my first choice of paints and Tamiya is not my first choice when it comes to acrylics. However, it was here and after thinning it with some rubbing alcohol, I sprayed several coats on the body sections, including the underside as these cars had the underside painted in the upper surface colors. I put it on fairly wet and left it to dry (which didn't take that long). Then the interior of the body, the floor of the chassis and the seats were painted in a brownish tan. I used Testors Model Master Wood for this and the effect is just what I was seeking.
| CONSTRUCTION CONTINUES |
I then attached the speedometer decal and hit it with a bit of Solvaset. The fender/dash section was then glued to the forward body by the two pins that are provided. The front seats had the upper sections painted bright silver using Humbrol paints. I used this Humbrol color for many of the small trim items. The seats were glued in place and the interior glass was then glued in. I should have done the windscreen at this time as well, but stupidly, I didn't.
 With the interior in place. I glued
on the chassis. Fit here is outstanding as well. I then drilled out
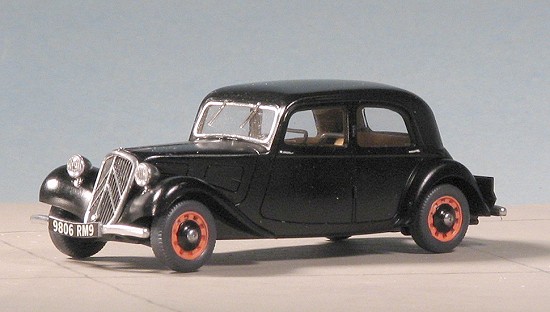
and glued on the exhaust pipe. Meanwhile, the grille, bumpers, headlight
bezels and other small bits were getting the chrome treatment. I used Alclad II Chrome for these parts. First I cleaned up the plastic, then
sprayed on the Alclad II gloss black undercoat. After drying, the Chrome
was sprayed on in several small applications. It really is effective, but
also a bit fragile so care needs to be taken when handling these parts.
With the interior in place. I glued
on the chassis. Fit here is outstanding as well. I then drilled out
and glued on the exhaust pipe. Meanwhile, the grille, bumpers, headlight
bezels and other small bits were getting the chrome treatment. I used Alclad II Chrome for these parts. First I cleaned up the plastic, then
sprayed on the Alclad II gloss black undercoat. After drying, the Chrome
was sprayed on in several small applications. It really is effective, but
also a bit fragile so care needs to be taken when handling these parts.
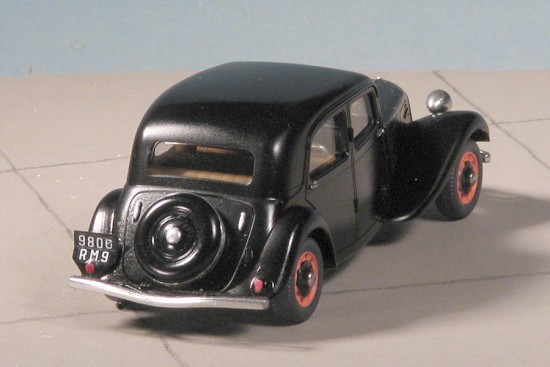
Back at the body, I glued on the rear license plate bracket and did some painting on the underside. the engine block is to be a standard green (again, Humbrol for this one), while the exhaust and muffler were painted in Burnt Iron. When that was dry, I installed the front axle and then trapped it with the lower front suspension piece.
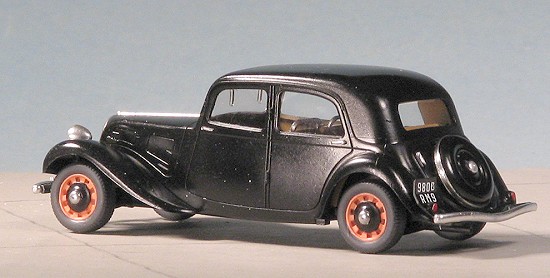
The next step was to install the windscreen. It fit fairly well, but I'm willing to bet it would have fit even better if I'd attached it earlier. The chrome bits were next. I glued in the grille, headlight bezels and the two bumper. The clear lenses for the headlights were simply pressed in place and I do hope they stay there! I used Bare Metal Foil Chrome on the hood center line and the band around the spare tire carrier. The grille area was given a treatment with Vallejo matte black acrylic.
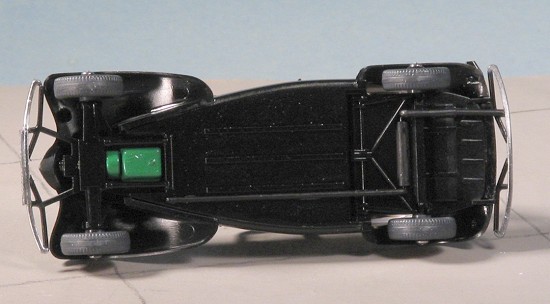 The wheels/tires were a bit unusual.
The hub caps were painted gloss black using Vallejo's acrylics. Then I
mixed orange and white as directed in the instructions for the wheels
themselves. What resulted was a sort of salmon color. Now I know nothing
about pre-war cars so maybe this was the norm. Certainly adds a bit of
color, but looks a bit unusual. I brush painted this shade as well and it
took a while to dry. Once that was done, I painted the tires themselves
with Floquil Weathered Black.
The wheels/tires were a bit unusual.
The hub caps were painted gloss black using Vallejo's acrylics. Then I
mixed orange and white as directed in the instructions for the wheels
themselves. What resulted was a sort of salmon color. Now I know nothing
about pre-war cars so maybe this was the norm. Certainly adds a bit of
color, but looks a bit unusual. I brush painted this shade as well and it
took a while to dry. Once that was done, I painted the tires themselves
with Floquil Weathered Black.
A bit of touch up on the tires, then some minor overspray on the inside of the fenders was patched with Vallejo Gloss Black. I painted the tail lights silver and then used clear red over it. Last steps were to attach the small chrome hubcap axle covers (using clear paint), then glue the wheels onto the axles. I didn't want this model rolling around so I glued things pretty solidly. That was it. No pastels, no radio wires, no gun gas exhaust. I didn't add an overcoat of clear gloss because frankly, real cars just are not that shiny. Look at what's on the street and rarely will you see a car that isn't brand new or someone's toy that is highly polished, even after a good washing.
| CONCLUSIONS |
 Despite all the stuff that has to be done to the civilian version, it
took four days from start to finish. I imagine that if I went for the
military ones, I could have done it in two as there would be no reason to
go through all that detail painting or trying to get all the chrome bits
done. Though it does have some small parts, it is a kit that would be
perfect for those beginners who are wanting something a bit more detailed
to work on. I'll leave the cost of the kit to your judgment as to whether
it is worth the price.
Despite all the stuff that has to be done to the civilian version, it
took four days from start to finish. I imagine that if I went for the
military ones, I could have done it in two as there would be no reason to
go through all that detail painting or trying to get all the chrome bits
done. Though it does have some small parts, it is a kit that would be
perfect for those beginners who are wanting something a bit more detailed
to work on. I'll leave the cost of the kit to your judgment as to whether
it is worth the price.
August 2005
#1374 in a series
Copyright ModelingMadness.com. All rights reserved.
You can thank me (THANK YOU!) for providing this neat kit for review.
If you would like your product reviewed fairly and quickly, please contact the editor or see other details in the Note to Contributors.