Fujimi 1/24 Chaparral 2D
Chaparral Cars was a United States automobile racing team which built prototype
race cars from the 1960s through the early 1970s. Chaparral was founded in 1962
by Hap Sharp and Jim Hall, a Texas oil magnate with an impressive combination of
skills in engineering and race car driving. The name "Chaparral" was formed from
the last names of the two founders. Throughout the 1960s and 1970s, Chaparral's
distinctive race cars experienced strong success in both American and European
racing circuits. Despite winning the Indy 500 in 1980, the Chaparrals left motor
racing in 1982. Chaparral cars also featured in the SCCA/CASC CanAm series and
in the European FIA Group 7.
Chaparral was the first to introduce effectively designed air
dams and spoilers ranging from the tabs attached to the earliest 2 model to the
driver-controlled high wing 'flipper' on the astoundingly different looking 2E,
all the way through to Hall's most idealistically inspired creation, the 2J, the
car that would forever be known as the 'vacuum cleaner', and was the forerunner
of modern "ground-effects" cars. The use by Jim Hall of a semi-automatic
transmission in the Chaparral created flexibility in the use of adjustable
aerodynamic devices.
The development of the Chaparral chronicles the key changes
in race cars in the '60s and '70s in both aerodynamics and tires. Jim Hall's
training as an engineer taught him to approach problems in a methodical man ner
and his access to the engineering team at Chevrolet as well as at Firestone
changed aerodynamics and race car handling from an art to empirical science. The
embryonic data acquisition systems created by the GM R&D group aided these
efforts.
ner
and his access to the engineering team at Chevrolet as well as at Firestone
changed aerodynamics and race car handling from an art to empirical science. The
embryonic data acquisition systems created by the GM R&D group aided these
efforts.
The Chaparral 2-Series was designed and built to compete in
the United States Road Racing Championship and other sports car races of the
time, particularly the West Coast Series that were held each fall. Following the
lead of innovators like Bill Sadler from Canada and Colin Chapman who introduced
rear engined cars to Grand Prix cars in Europe (where Jim Hall had raced in
Formula 1), its basic design concept was a rear engined car.
First raced in 1963, it was developed into the dominant car
in the series in 1964 and 1965. Designed for the 200 mile races of the sports
car series, it was almost impossible to beat. It proved that in 1965 by winning
the 12 Hours of Sebring on one of the roughest tracks in North America.
As the car was being developed, Jim Hall took the opportunity
to implement his theories on aerodynamic force and rear wheel weight bias.
In addition, the Chaparral 2-Series featured the innovative
use of fiberglass as a structural element. Hall also developed 2-Series cars
with conventional aluminum chassis.
It is very difficult to identify all iterations of the car as
new ideas were being tested continually. There are three generally accepted
variants:
The 2A is the car as originally raced, featuring a very
conventional sharp edge to cut through the air. It also featured a square
tail with a concave rear section reminiscent of the theories of Dr Kamm.
Almost immediately there arose an issue with the front end being very light
at speed with a consequent impact on steering accuracy and driver
confidence-
. The first aerodynamic appendages began to appear on the 2A.
The 2B was the name applied to the cars with the full
package of “aero tweaks”, chin spoilers, fender slots and rear spoiler.
The 2C was the name applied to the car with the first
in-car adjustable rear wing which was designed to be flat on the straight
and tipped up to add rear downforce under braking and in corners. This was a
direct benefit of the automatic transmission which kept the left foot free
to operate the wing mechanism. The 2C was based on a Chevrolet designed
aluminum chassis and was a much smaller car in every dimension than the 2A.
Without the natural non-resonant damping of the fiberglass chassis, Jim Hall
nicknamed it the EBJ, “Eye Ball Jiggler.”
Coincidental with the development of aerodynamics was Hall's
development of race tires. (This is a complex subject that should have a
separate article.) Jim Hall owned Rattlesnake Raceway adjacent to his race shop;
that proximity allowed him to participate in much of Firestone's race tire
development.
A two-article series in "Car and Driver" magazine featured
Jim Hall's design theories. The article turns speculation about vehicle handling
into applied physics. It was the precursor to the elaborate data collection and
management of current racing teams. Hall's methodology was probably the first
documented approach to measuring and managing the properties of race cars.
 2D
2D
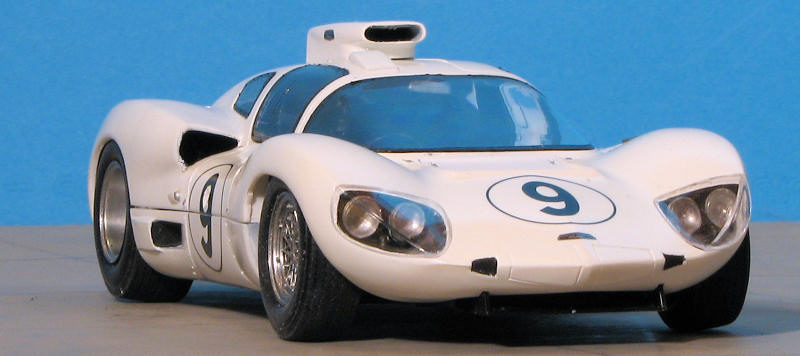
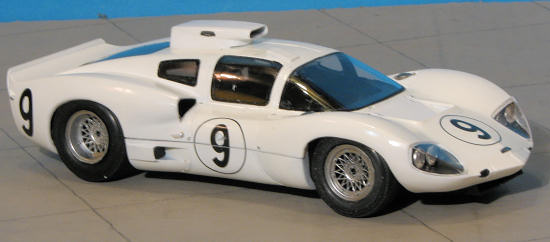
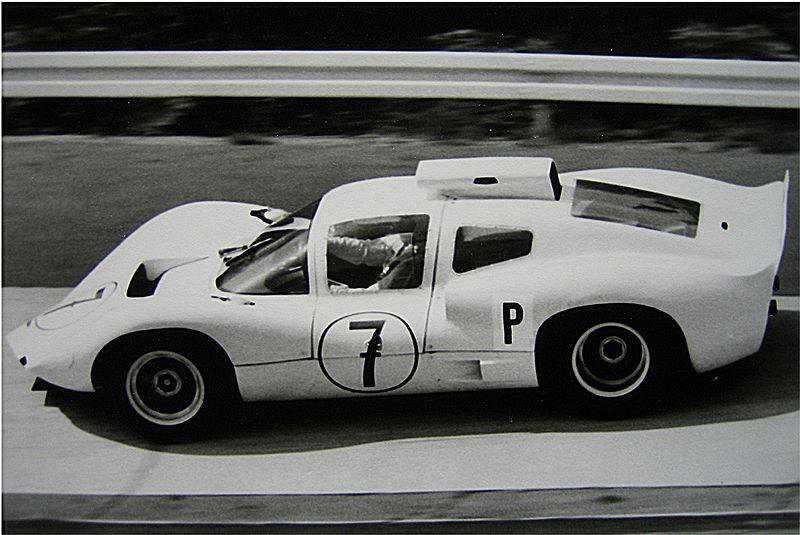
The 2D, and subject of this kit, was a closed cockpit variant
of the 2A/B/C series (which were all open cockpit designs), designed for
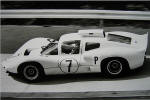
endurance racing in 1966. It won at 1000 km Nürburgring in 1966 with Phil Hill
and Joakim Bonnier driving (shown in photo with Bonnier at the wheel). It
competed in the 1966 24 Hours of Le Mans, withdrawing after 111 laps. The car
was also raced during the 1967 season at select events, but rarely did well.
Despite
the 2010 date on the side of the box, This is an old Modeler kit from the 1970s
or so. Back then, these were quite pricey and highly sought so I'm pleased to
see that Fujimi is reissuing these.
The kit is molded in black plastic with a white body and the
usual clear sprue. This is very much a curbside with the interior consisting of
a plastic section that includes a molded on engine shape. It does look like a
small block Chevy with Weber d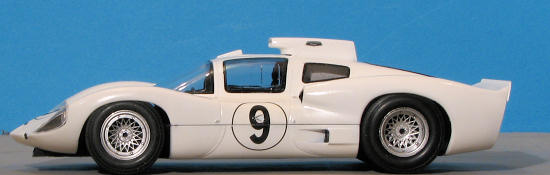 owndraft carbs; there just isn't a ton of engine
detail. Having the lower body /chassis and roof intake in black will require
some primer prior to painting it white. Same may be true for the wheels, though
if one uses a nice metallic shade, like Alclad, the black will be a good basis
for some of the more shiny shades.
owndraft carbs; there just isn't a ton of engine
detail. Having the lower body /chassis and roof intake in black will require
some primer prior to painting it white. Same may be true for the wheels, though
if one uses a nice metallic shade, like Alclad, the black will be a good basis
for some of the more shiny shades.
In
addition, there are a number of metal parts for the head lights, tail lights,
rear view mirrors and fuel caps. They are not as shiny as shown on the box art.
The kit also includes five rubber tires (the racing rules required a spare).
There are optional parts for two cars. One as raced at Nurburgring and the other
at Le Mans in 1966. There are differences in the rear spoiler and various scoops
and lights that one should take into consideration during the build.
Instructions are quite well done with very nicely drawn
construction steps. These include all painting information and there is a Gunze
paint reference. Decals are nicely printed and have tire lettering decals in
addition to race number and race sponsor markings. The only color for any
Chaparral sports racer or GT is white.
This is not really a complex kit, however, thanks to
its age, it also is not the best fitting kit on the planet. Nothing major, but
most parts need some sort of trimming to fit well. Typical of car kits, painting
is an on-going 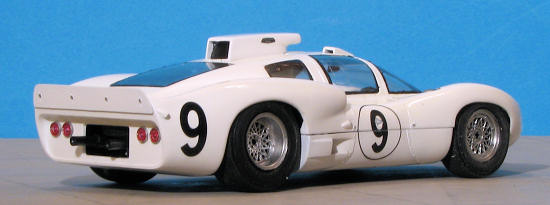 process and one of the first things one does with the kit.
For this, I started painting the tub. Most of it is a
darkish brown with an aluminum engine and some black bits here and there. The
detail really needs to be brush painted and so I broke out the acrylic and hit
all the detail bits in aluminum and black, for the most part. The instrument
panel has separate instrument decals to be installed. The decal sheet works
great with setting solutions, which is quite nice. You are given more
instruments and other markings that you'll actually use.
While all the paint was drying, the differential was
assembled and cleaned up. Same with the exhaust. This latter piece needs to be
trimmed quite a bit to get it to fit properly. On the tub section are alignment
marks where the exhaust fits. I drilled these out to help the part sit better
after leveling out the depth of all the other exhaust pipes.
The wheels were painted with aircraft aluminum, and
then sealed. I sanded the tread of all the tires except the spare, to remove the
mold seam. Then slide them on the wheels. There is a clear induction piece that
gets all but the front and rear part painted aluminum. I also painted the lower
tray black and tan as shown in the instructions. The side panels were painted
white.
I now had a bunch of parts ready to glue together.
Taking things slowly, the various bits and pieces were glued to the upper tub
and that included the differential attachment point, rear interior bulkhead that
had been painted black, shift lever, brake pedal and the instrument panel
assembly. When that had dried, the lower tub section, including the valence
section, axles and differential were glued in place. The fit of all these parts
was actually quite good, much to my delight and some pre-assembly flash removal.
had a bunch of parts ready to glue together.
Taking things slowly, the various bits and pieces were glued to the upper tub
and that included the differential attachment point, rear interior bulkhead that
had been painted black, shift lever, brake pedal and the instrument panel
assembly. When that had dried, the lower tub section, including the valence
section, axles and differential were glued in place. The fit of all these parts
was actually quite good, much to my delight and some pre-assembly flash removal.
Now for the body itself. I had decided to do the
LeMans car rather than the one shown on the box art, which I figured most
modelers would build. This meant I had to use the proper rear spoiler and the
different external mirror housing. It also meant I had to drill a hole in the
right rear for the additional number light that was required for tracking the
car at night when it flashed by the scoring stand.
 The body was painted white using Testors Boyd gloss
white, the same shade I used for the lower valence panels. Each of the windows
was masked off and a black gasket line was sprayed in place. Back at the body,
the dash and interior were painted flat black using a brush. The windows were
installed using clear gloss paint. At this time, the few markings were
installed. These are basically numbers and the Chaparral logo. I used Mr Mark
Softer to help the decals snuggle down into the door handle crevices. The whole
car was given a coat of Future, which turned things a slight ivory color. So
much for using old Future on a white car. I should have known better.
The body was painted white using Testors Boyd gloss
white, the same shade I used for the lower valence panels. Each of the windows
was masked off and a black gasket line was sprayed in place. Back at the body,
the dash and interior were painted flat black using a brush. The windows were
installed using clear gloss paint. At this time, the few markings were
installed. These are basically numbers and the Chaparral logo. I used Mr Mark
Softer to help the decals snuggle down into the door handle crevices. The whole
car was given a coat of Future, which turned things a slight ivory color. So
much for using old Future on a white car. I should have known better.
My next step was to paint the headlight openings in black,
again using a brush. The kit comes with metal parts for the tail lights, head
light bezels and the fuel fillers. I didn't use the nicely done external mirrors
as those were not attached at LeMans. The metal
 bits were glued using superglue
from the underside of the body. Tail lights were painted red using Vallejo
transparent red. For the head light lenses, I again used clear paint to glue
them in place. The clear covers were attached, also using this material.
bits were glued using superglue
from the underside of the body. Tail lights were painted red using Vallejo
transparent red. For the head light lenses, I again used clear paint to glue
them in place. The clear covers were attached, also using this material.
I then removed the masking from the windows, fearful that it
would pull them out. Didn't happen, though it did take a bit of paint from a few
areas. The air box was glued to the roof and that was it. I should mention that
the front axle seems a bit long or I messed up somewhere as the left front wheel
sticks out more than it should. Getting it jammed into the wheel well was not
easy. Frankly, I hate those plastic axles as they make it nearly impossible to
get the wheels on straight, the fit is so sloppy.
It really is nice to see this particular kit
available again. Prior to Fujimi releasing it, the Modeler kit was horribly
expensive due to its collectible nature. Now, with fresh decals and still all
the well molded metal bits, those of us who wanted to build this very sharp
looking care can do so without taking out a loan.
http://en.wikipedia.org/wiki/Chaparral_2D#2D
January 2011
Thanks to
Hobby
Link Japan for the preview kit. Get yours at the link.
If you would like your product reviewed fairly and quickly, please
contact
me or see other details in the
Note to
Contributors.
Back to the Main Page
Back to the Review
Index Page
 2D
2D