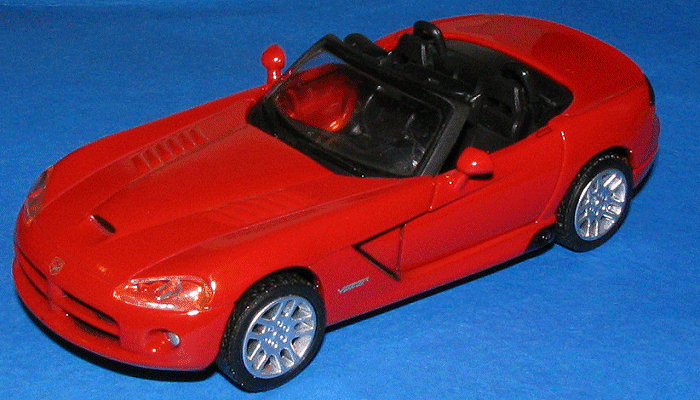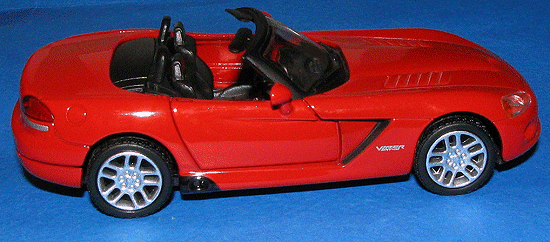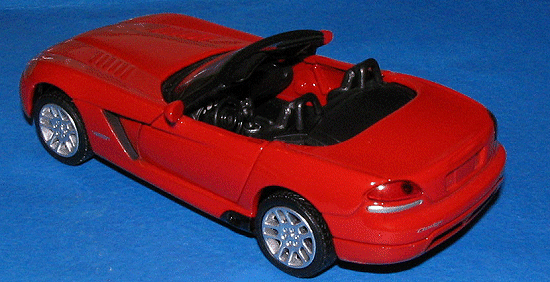
Testors 1/32 Dodge Viper SRT-10
| KIT #: | 6630016 |
| PRICE: | $10.00 MSRP |
| DECALS: | No options |
| REVIEWER: | Scott Van Aken |
| NOTES: | Metal car kit built right out of the box |

| HISTORY |
Those who have never driven or ridden in a Dodge Viper can scarcely understand the way the car translates torque into forward momentum, nor can they fully appreciate the turning and braking capabilities of its massive tires and disc brakes.
The new Viper SRT-10 takes that unbelievable rush of performance to an entirely new level - beyond even that of the current American performance car standard. If one ride doesn't thrill, exhilarate, energize or excite you more than any other car on the road, check your pulse.
 Engineers at Dodge, who had grown
fond of their RT/10 Roadster and GTS Coupe and proud of the cars'
performance capabilities, were fully aware of the wide tiretracks they
would have to fill when the decision was made to create a new, true
convertible version of America's ultimate sports car.
What began as a simple plan to alter the RT/10's roofline quickly grew to a 'blue-sky' redesign when designers and engineers discovered that the accompanying 2.6-inch lengthening of the wheelbase would change more than 50 percent of the car's body panels and many chassis components. Vehicle synthesis engineers, never ones to sit idly by, set to work immediately using the stretch as their opportunity to find incremental ways to update and improve the car. And quicker than you can say 'hasta la vista,' the teams found out that with a little bit of tweaking here and an upgraded assembly there, they would have an entirely new car to build.
The result is the new SRT-10 convertible, a 500 hp $85,000 automobile that extends the reputation of the Viper to the next level and places it squarely up there with the world's foremost performance toys.
| THE KIT |
This is yet another in the series of metal car kits from Testors in 1/32. I'd call this very much a quickie build as all one needs is the ability to read instructions and operate a screwdriver.
 The kit itself is already pre-painted
and I have to confess that the detailing on it is really quite good.
Apparently the folks in China have a pretty efficient assembly line and
good quality control as I noted only one place where there was a paint
glitch; on the lower pan. This part is plastic unlike the metal upper body
and that was probably due to it rubbing on the plastic tray it was held in.
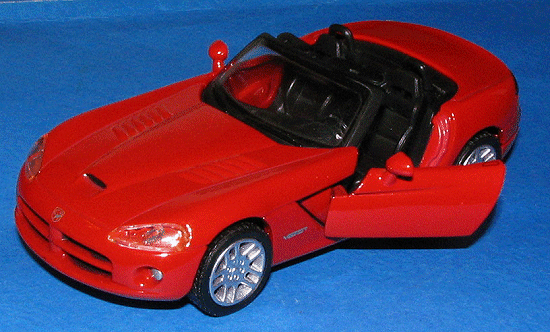
Like the Monster Truck I built a few months back, this one has opening doors, and while there is detail on the inside of the doors, it is rather crude in comparison with the injected plastic bits. There are four well done wheels with vinyl tires and the kit comes with metal axles. It is a curbside with no engine and really, most dedicated car modelers would probably not touch this kit with a 10 foot pole anyway.
These kits are obviously aimed and the youngsters out there. They have bright colors, are easy to build, and are sturdy when done. In other words, they have play value, something that most of us do not even consider when choosing a model.
| CONSTRUCTION |
Assembly is so simple and quick that I'm almost embarrased to take up a segment of the article with it. One simply removes the parts from the packaging and then turns over the box to begin.
First up is to press a wheel onto an
axle, thread it through the lower tray part and push on the other wheel.
One thing I did notice is that it makes a difference which hole to put the
axles. I'd not noticed any difference in length, but apparently there
 is as
my first attempt gave little additional axle space for the opposite wheel.
I did not have to use a hammer, but merely squeezed on the wheels until
they were on all the way.
The dashboard section fits into the underside of the windscreen. This is then pressed onto some metal stubs. You'll have to open the doors to provide clearance and even then it is a bit of a struggle to get the parts far enough forward to fit over the pins. Though I thought I'd break something pushing things forward, it didn't happen and the bits snapped into place. Next the interior is put over its little stubs that are in the back of the body.
The final step is to screw the bottom plate onto the rest of the car. The interior had a tendancy to seem to want to fall out so take some care. These are self-tapping metal screws so you'll have to give it a bit more grunt to get them fully tightened. The easy way to tell is that if there is any give when you push down on the area around the screw, it needs a bit more. Once that is completed, you are done.
| CONCLUSIONS |
Since this one is so well painted from the factory, you really don't need to embellish it. In fact, the only place I'd add something would be some Chrome Bare Metal Foil to the backs of the side view mirrors. The fit is positive and one has a great looking model to add to the shelf.
As I mentioned earlier, this is really designed for kids and they will surely enjoy playing with it. The axles are sturdy enough to where they can probably be pretty rough with it as they zoom it along the floor. It will mean even more to them if they were able to build it themselves. Sure, it isn't like when most of us were children and we actually did the glue thing, but then this one will undoubtedly last a heck of a lot longer!
November 2005
#1388 in a series
Copyright ModelingMadness.com. All rights reserved.
If you would like your product reviewed fairly and fairly quickly, please contact the editor or see other details in the Note to Contributors.
Back to the Review Index Page 2019