Nitto 1/100 DC-3/C-47
|
KIT # |
? |
|
PRICE: |
$10-20 at swap meets |
|
DECALS: |
Three aircraft |
|
REVIEW : |
|
|
NOTES: |
|
HISTORY |
Though not the first truly modern airliner, the Boeing 247 takes that honor, the DC-3 is the first airliner that was actually able to allow airlines to show a profit. Capable of carrying a reasonable number of passengers a decent distance, it was the DC-3 that turned flying from the purvey of the wealthy, to something that could be done by persons of modest means. (that means us).
First flying in 1935 and entering service with American Airlines, the DST (Douglas Sleeper Transport), or DC-3 was a direct response to Trans World Airways smaller but similar DC-2s. Thus began the saga of what is undoubtedly the most recognized aircraft in the world. Even today, 66 years after its first flight, there are DC-3s or its military derivative, the C-47 in paying service either as a passenger plane or cargo transport in areas around the world. Several of them have been lovingly restored as warbirds or nostalgic airliners and can be seen in the US on any given weekend at airshows around the country.
|
THE KIT |
 I'm really not sure what the
origins of this model are, but I know it has been boxed by Nitto and Doyusha.
Undoubtedly other smaller companies have also produced this kit. The particular
boxing that I built had decals in it for TWA, a Japanese airline and for a C-47.
There was a second set of fuselages and props for the C-47 version as well as
skis.
I'm really not sure what the
origins of this model are, but I know it has been boxed by Nitto and Doyusha.
Undoubtedly other smaller companies have also produced this kit. The particular
boxing that I built had decals in it for TWA, a Japanese airline and for a C-47.
There was a second set of fuselages and props for the C-47 version as well as
skis.
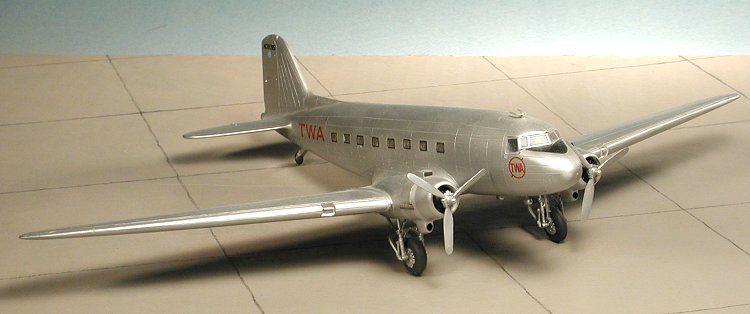
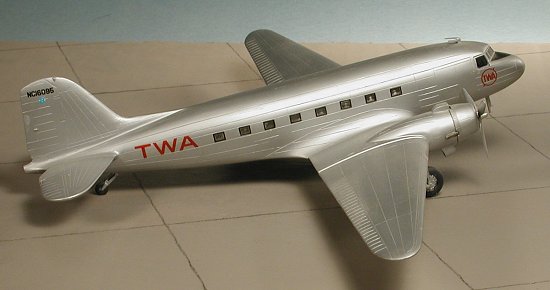
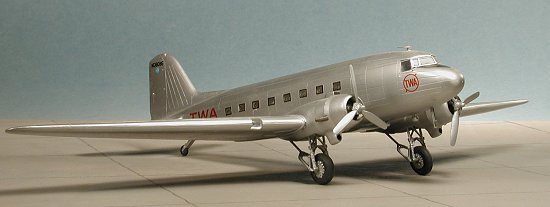
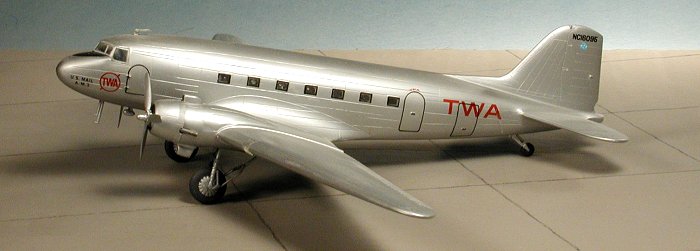
Considering that this kit is at least 30 years old, the detailing is quite good, consisting of the now required engraved panel lines. There is no interior other than a rudimentary cockpit, but that is fine as the side windows are a bit on the thick and distorted side so nothing can be seen inside anyway. The instructions were in Japanese, but with pictorial construction diagrams. No real hindrance to building the kit. I should also mention that this model has been on my shelves for nearly two decades and still looks very good as long as I dust it once in a while! The kit decals are what you need to use as there really isn't anything out there in the way of aftermarket stuff. Fortunately, they are quite good albeit a bit thick.
|
CONSTRUCTION |
Really there is not much to construction as there are not many parts. The wings are a three piece affair with a full lower wing and separate right and left upper sections. These were glued together first as were the tailplanes. The engine nacelles are built into the wing sections. Landing gear wells are devoid of detail but are full so no embarrassing openings are seen from underneath.
The kit has a pretty complete cockpit and even includes the bulkheads of the radio room. The cockpit was painted aluminum and then the seats and control columns along with some other bits and pieces picked out in black and other colors. With no real cabin section, you can paint it black if you wish, but I just installed the cabin windows and left it as it was. You really can't see anything anyway due to the thickness of the clear bits. The fuselage was glued together and the cockpit window installed. Then the windows were masked. Naturally, I needed filler on the fuselage seam. The wings were then glued onto the fuselage. Filler was needed here as well, but not as much as you might think. The tailplanes were then glued in place.
 Now to the engines. There are some generic engines to place into
the cowlings. Not the greatest, but they are quite convincing. These were
painted steel and then given a wash with black. There are separate engine
accessory sections that fit onto the engine nacelles. The fit of these is not
bad, but it does require filler to smooth things out. You also have different
carb intake scoops that fit on the top of the nacelles. The aircraft I was doing
used the short ones without the large air filter that was common on the C-47.
Now to the engines. There are some generic engines to place into
the cowlings. Not the greatest, but they are quite convincing. These were
painted steel and then given a wash with black. There are separate engine
accessory sections that fit onto the engine nacelles. The fit of these is not
bad, but it does require filler to smooth things out. You also have different
carb intake scoops that fit on the top of the nacelles. The aircraft I was doing
used the short ones without the large air filter that was common on the C-47.
The engine cowlings with engines were then glued on, the openings stuffed with tissue and it was off to the paint shop. ( I masked the windows earlier)
|
PAINT & DECALS |
Well, color is not a problem with this kit. I wanted to do a pre-war TWA version so that means natural metal. All that was available at the time was Testors Metallizer so that is what I used. Today, I'd use Alclad II or SNJ and paint the controls surfaces with the Metallizer. Back then, it was all to be painted one color. The props were also painted aluminum as were the landing gear struts and wheels. The tires were painted a very dark grey.
 When done it was time to get this
beast on its wheels. The landing gear are quite scale and actually a bit
fragile. I did manage to break both of them while removing them from the sprues.
Nowadays, I'd just use a razor saw, but back then it was a dull knife! The main
gear axles were gently spread apart as I struggled to get the main wheels in
place. These wheels are not exactly the best representation of DC-3 wheels I
have ever seen, but they will do. The main gear and struts were then glued in
place as was the tail wheel/strut.
When done it was time to get this
beast on its wheels. The landing gear are quite scale and actually a bit
fragile. I did manage to break both of them while removing them from the sprues.
Nowadays, I'd just use a razor saw, but back then it was a dull knife! The main
gear axles were gently spread apart as I struggled to get the main wheels in
place. These wheels are not exactly the best representation of DC-3 wheels I
have ever seen, but they will do. The main gear and struts were then glued in
place as was the tail wheel/strut.
The kit decals worked just great. They were well printed and clear, though a bit thick. I unmasked the windows at this time as the decals include black outlines for the cabin windows. The cockpit and passenger doors are just decal outlines as is the baggage door. Not fancy, but acceptable. The rest of the decals are the TWA logos, the N number and a small anti-glare panel for the nose. That is it! Clear parts for the landing light and the upper tail becon (long lost), as well as a few antennas complete the parts.
The masking was taken out of the engines, any paint glitches cleared up and the kit given a coat of clear gloss acrylic to seal in the decals. The exhaust were then drilled out as best as could be and painted Metallizer exhaust before being glued in place. The props were stuck into the engines and that was it.
|
CONCLUSIONS |
Now I am sure that this kit has a number of inaccuracies. For one thing, the fin looks a bit too rounded at the top and I'm sure it probably doesn't have the proper landing gear for a DC-3, but 999 people out of 1,000 won't notice that. This is a kit that is often overlooked. I have seen none in contests and it is a shame. It is a great little kit. The 1/144 version looks too small and even a 1/72 model takes up a prodigious amount of room. This scale fits it quite well. If you can find one, and it has been released by Doyusha and others, I highly recommend picking one up. You'll like it.
Copyright ModelingMadness.com. All rights reserved.
Review kit courtesy of me and my wallet!
If you would like your product reviewed fairly and fairly quickly, pleasecontact the editor or see other details in the Note to Contributors.