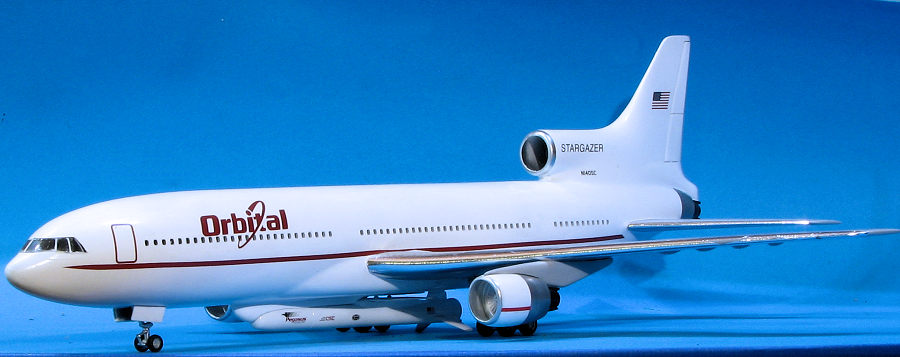
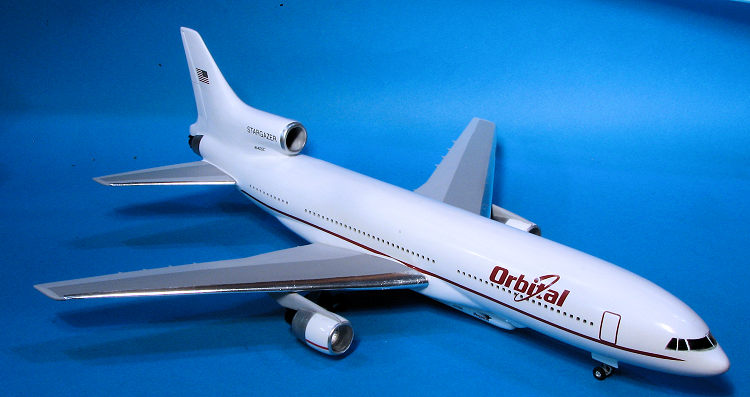
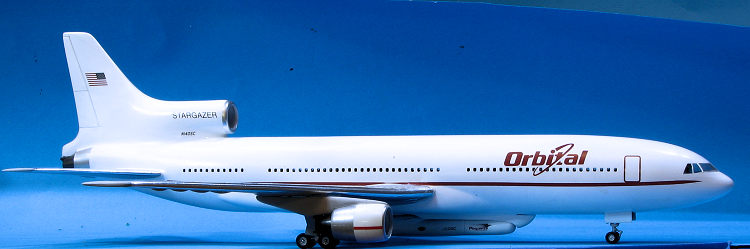
Airfix 1/144 L.1011 w/Pegasus
| KIT #: | SK-631/CELO44005 |
| PRICE: | $8.00/ |
| DECALS: | Several options for Air Canada L.1011. None for Pegasus |
| REVIEWER: | Scott Van Aken |
| NOTES: | Includes resin parts. |
| HISTORY |
In a Pegasus launch, the carrier aircraft takes off from a runway with
support and checkout facilities. Such locations have included Kennedy Space
Center / Cape Canaveral Air Force Station, Florida; Vandenberg Air Force Base
and Dryden Flight Research Center, California; Wallops Flight Facility,
 Virginia; Kwajalein Range in the Pacific Ocean, and the Canary Islands in the
Atlantic. Orbital offers launches from Alcantara, Brazil, but no known customers
have performed any. The capabilities of Alcantara are superfluous to other
sites, without being any more convenient.
Virginia; Kwajalein Range in the Pacific Ocean, and the Canary Islands in the
Atlantic. Orbital offers launches from Alcantara, Brazil, but no known customers
have performed any. The capabilities of Alcantara are superfluous to other
sites, without being any more convenient.
Upon reaching a predetermined staging time, location, and velocity vector the aircraft releases the Pegasus. After five seconds of free-fall, the first stage ignites and the vehicle pitches up. The 45-degree delta wing (of carbon composite construction and double-wedge airfoil) aids pitch-up and provides some lift. The tail fins provide steering for first-stage flight, as the Orion 50S motor does not have a thrust-vectoring nozzle.
Approximately 1 minute and 17 seconds later, the Orion 50S motor burns out. The vehicle is at over 200,000 feet (61 km) in altitude and hypersonic speed. The first stage falls away, taking the wing and tail surfaces, and the second stage ignites. The Orion 50 burns for approximately 1 minute and 18 seconds. Attitude control is by thrust vectoring the Orion 50 motor around two axes, pitch and yaw; roll control is provided by nitrogen thrusters on the third stage.
Midway through second-stage flight, the launcher has reached a near-vacuum altitude. The fairing splits and falls away, uncovering the payload and third stage. Upon burnout of the second-stage motor, the stack coasts until reaching a suitable point in its trajectory, depending on mission. Then the Orion 50 is discarded, and the third stage's Orion 38 motor ignites. It too has a thrust-vectoring nozzle, assisted by the nitrogen thrusters for roll. After approximately 64 seconds, the third stage burns out.
 A fourth stage is sometimes added for a higher altitude, finer altitude
accuracy, or more complex maneuvers. The HAPS (Hydrazine Auxiliary Propulsion
System) is powered by three restartable, monopropellant hydrazine thrusters. As
with dual launches, the HAPS cuts into the fixed volume available for payload.
In at least one instance, the spacecraft was built around the HAPS.
A fourth stage is sometimes added for a higher altitude, finer altitude
accuracy, or more complex maneuvers. The HAPS (Hydrazine Auxiliary Propulsion
System) is powered by three restartable, monopropellant hydrazine thrusters. As
with dual launches, the HAPS cuts into the fixed volume available for payload.
In at least one instance, the spacecraft was built around the HAPS.
Guidance is via a 32-bit computer and an IMU. A GPS receiver gives additional information. Due to the air launch and wing lift, the first-stage flight algorithm is custom-designed. The second- and third-stage trajectories are ballistic, and their guidance is derived from a Space Shuttle algorithm.
So far, there have been 45 launches. 38 were a total success, two a partial success, and three were failures.
| THE KIT |
The L-1011 is a kit that I got on the 'junk kit' table several years ago. I
bought it specifically for this project and while it had been started, it was
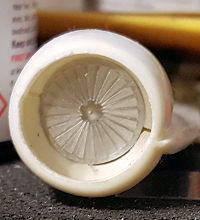
allegedly complete. Well the alleged engine fans were missing and finding a set
of replacements turned out to be an impossible task. Forward a decade or so and
a Revell A.320 kit provided a spare set of fans that, though a bit too small,
did fit into the engine
 nacelles so the project was back on. For those not
familiar with the Airfix kit, this is one with several sections of clear windows
to put into the fuselage and all the various doors and baggage compartment
hatches are separate.
nacelles so the project was back on. For those not
familiar with the Airfix kit, this is one with several sections of clear windows
to put into the fuselage and all the various doors and baggage compartment
hatches are separate.
The Pegasus was produced by Cutting Edge. It is a simple kt consisting of only seven parts. Two are the mount for the underside of the L.1011 and the rest are for the missile itself. No decals are provided, but Cutting Edge did a sheet for this which was duly purchased. The Pegasus is dated 2003 while the decals are 2004 so these are early in the Pegasus historyAll the C.E. bits are dated
| CONSTRUCTION |
As mentioned, the L.1011 was a kit that was already started. The previous owner had glued together the fuselage without installing the cabin windows or the blanking plate for the middle engine. He had also attached all the doors and the aft nozzle. Most of the fuselage seams had been filled, but needed a few more runs. He had also glued together the wings and tailplanes.
 After sitting for many years, when I'd finally gotten something to use for
the missing intake fans, I got back into the project. The fans fit neatly inside
the mount frames and I closed up the engine nacelles. I also added more filler
to the fuselage, took care of the nacelle seams and put filler on all the gaps
of the flight surfaces.
After sitting for many years, when I'd finally gotten something to use for
the missing intake fans, I got back into the project. The fans fit neatly inside
the mount frames and I closed up the engine nacelles. I also added more filler
to the fuselage, took care of the nacelle seams and put filler on all the gaps
of the flight surfaces.
Meanwhile, I constructed the Pegasus. While the molding on this is fairly
good, I found a lot of errant resin lumps on some parts. This was a particular
problem with the wings where the entire trailing edge was imbedded in a resin
sludge. Cutting the wings from the sprue and then sanding the trailing edge was
time consuming. The wing also does not fit well into the upper fuselage housing
for it. This would not be an issue as it would be hidden by the pylon mount. T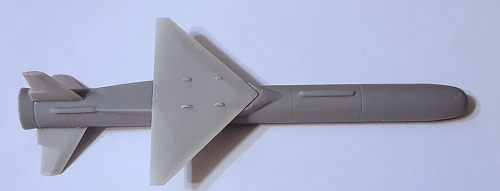 he
tail fins have no guide as to placement and anyway, the upper one will
eventually need to be drastically trimmed when attached, unless I wanted to cut
a slot in the L.1011's lower fuselage for it. One thing I did notice when test
fitting is that the alignment slot in the pylon is too far back and it won't
allow the Pegasus to fit all the way forward. Some trimming of the attachment
area on the Pegasus should cure that.
he
tail fins have no guide as to placement and anyway, the upper one will
eventually need to be drastically trimmed when attached, unless I wanted to cut
a slot in the L.1011's lower fuselage for it. One thing I did notice when test
fitting is that the alignment slot in the pylon is too far back and it won't
allow the Pegasus to fit all the way forward. Some trimming of the attachment
area on the Pegasus should cure that.
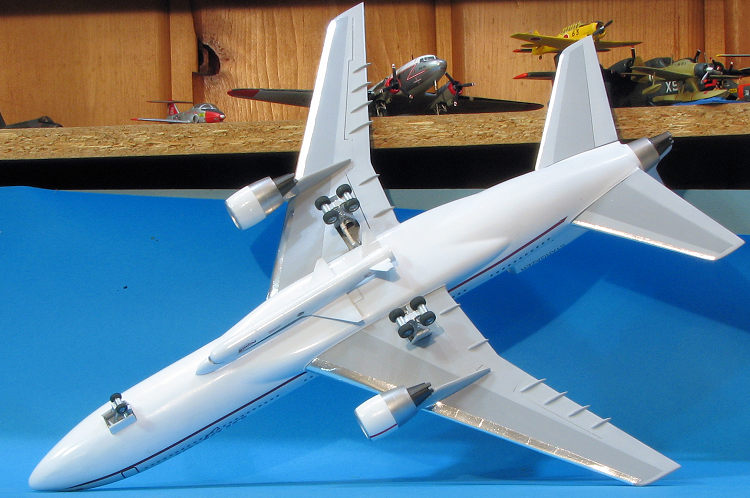
Once the fuselage had been sanded down, I glued on the Pegasus pylon and blast area. These fit fairly well. I sanded down all the areas on the wings and tail planes that needed it. These all needed filler. It was then to start some painting. Little did I realize how much time this would take.
| COLORS & MARKINGS |
 und the fuselage intake was masked and the
lip was painted with Alclad II's polished aluminum.
und the fuselage intake was masked and the
lip was painted with Alclad II's polished aluminum.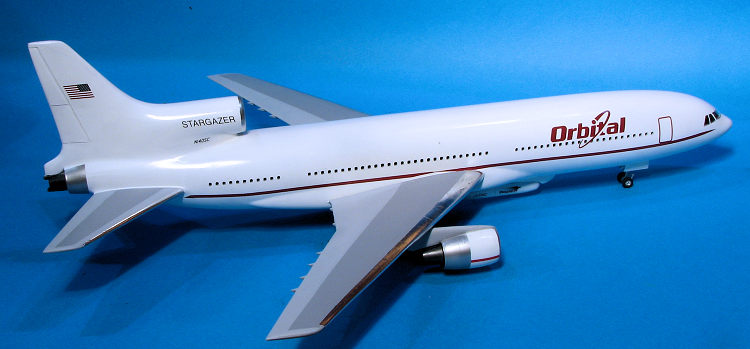 other.
Well, perhaps. They do not fit the Airfix kit perfectly. This is most
obvious in the area at the top of the wing and in the rear. Apparently
other kits have a large diamond shaped area around the horizontal stabs
that the Airfix kit does not have, so the long stripe simply ends. The
sheet also does not include cockpit window decals or any of the other
door decals. Not having a dedicated set of markings for these areas, I
had to mask the poorly fitting cockpit windows and leave the areas
around the doors blank.
other.
Well, perhaps. They do not fit the Airfix kit perfectly. This is most
obvious in the area at the top of the wing and in the rear. Apparently
other kits have a large diamond shaped area around the horizontal stabs
that the Airfix kit does not have, so the long stripe simply ends. The
sheet also does not include cockpit window decals or any of the other
door decals. Not having a dedicated set of markings for these areas, I
had to mask the poorly fitting cockpit windows and leave the areas
around the doors blank.  Let
me back up a bit regarding the Pegasus attachment. You see, the launch
rail is such that the nose is pretty far back when left as it is. The
fix for this is to trim the vertical portions of the rail as it is too
long, hitting the wing well before the rocket is far enough forward. The
vertical fin also needs to be trimmed to fit, or one can cut a slot in
the lower fuselage for it. I did the trimming part and it took a bit of
trim, test fit, repeat to get it in place.
Let
me back up a bit regarding the Pegasus attachment. You see, the launch
rail is such that the nose is pretty far back when left as it is. The
fix for this is to trim the vertical portions of the rail as it is too
long, hitting the wing well before the rocket is far enough forward. The
vertical fin also needs to be trimmed to fit, or one can cut a slot in
the lower fuselage for it. I did the trimming part and it took a bit of
trim, test fit, repeat to get it in place. | CONClUSTIONS |
| REFERENCES |
https://en.wikipedia.org/wiki/Pegasus_(rocket)
14 April 2017 Copyright ModelingMadness.com. All rights reserved.
If you would like your product reviewed fairly and fairly quickly, please
contact
the editor
or see other details in the
Note to
Contributors. Back to the Main Page
Back to the Review
Index Page
Back to the Previews Index Page