Hasegawa 1/200 MD-90
|
KIT: |
Hasegawa 1/200 MD-90 |
|
KIT # |
10215 (LL15) |
|
PRICE: |
@$20.00 |
|
DECALS: |
Japan Air System (JAS) |
|
REVIEW & |
|
|
NOTES: |
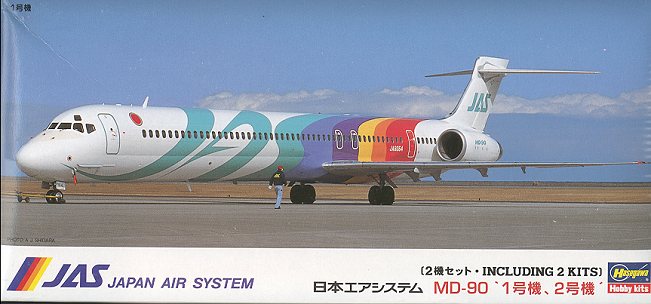
'MD-90 1st and 2nd Aircraft' Double kit |
|
HISTORY |
The Douglas DC-9 was one of the more successful of the Douglas twin jet short/medium range airliners ever built. Hundreds of them are still plying the skies of the world providing reliable service. When McDonnell bought out Douglas, the DC-9 nameplate was changed to MD-80 (the MD standing for McDonnell/Douglas). Regardless of what it was named, it was still a DC-9 in heart. As aircraft design improved, mostly in the area of avionics and engines, the DC-9/MD-80 also improved. This resulted in the MD-90 that is currently being flown by a number of the world's airlines.
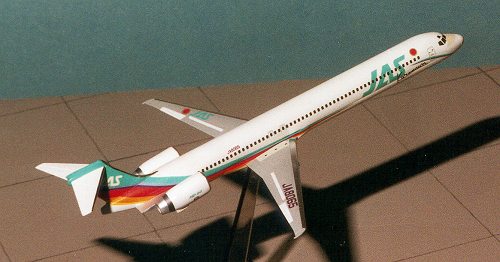
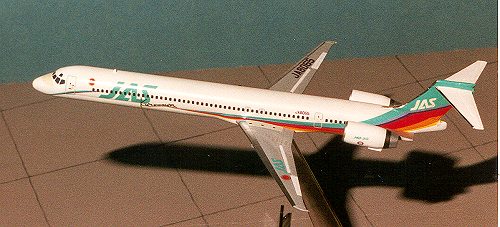
The MD-90 has a modern 'glass cockpit' and an engine, the V-2500 turbofan, that was developed by a consortium of 50 nations. There are three versions of the MD-90 so far produced. The 114 seat -10, the 153 seat -20 and the 180 seat -30. This kit depicts the MD-90-30 version in its very colorful paint scheme as delivered to Japanese Air System (JAS) for use in domestic service.
|
THE KIT |
Hasegawa has been well-known for its production of 1/200 airliners. These kits are small enough to allow those airliner enthusiasts with limited space the opportunity to get involved in the hobby. Over the years, the kits have been transforming themselves. This is an example of the latest design by Hasegawa. It is actually getting closer to the 'Wooster' type of airliner with few parts and those parts basically snap together.
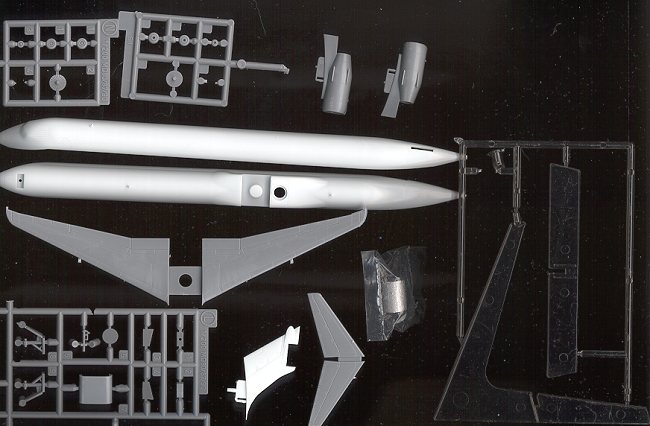
You will notice in the image above, that the fuselage is now split top and bottom instead of side to side as in 'standard' kits. There are no window holes as most airline builders will fill those in and use decals in their stead. Wings and tailplanes are one piece moldings as are the engine bodies. The landing gear are still like the older kits, however the option of closed gear doors is given where it wasn't before. Previously, the hole for the mounting stand had to be opened in the bottom of the fuselage. Now that hole is permanently there and a plug given for those who do not wish to mount the kit on it's stand. There is also a large nose weight provided for those that wish to display their kit on its landing gear.
 The
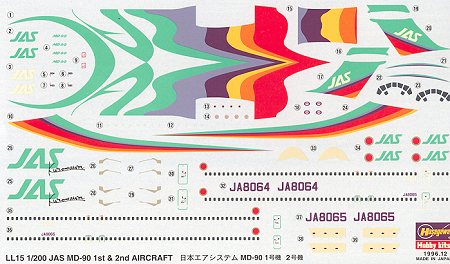
decal sheet with this kit is really impressive. It offers two different schemes,
both of them extremely colorful as is the norm with airliner paint jobs
nowadays. The more colorful of the two is illustrated on the box top. As it is
with most Hasegawa printed decals, they are a bit thick, but should be able to
survive the frequent handling that is required to get it just right!
The
decal sheet with this kit is really impressive. It offers two different schemes,
both of them extremely colorful as is the norm with airliner paint jobs
nowadays. The more colorful of the two is illustrated on the box top. As it is
with most Hasegawa printed decals, they are a bit thick, but should be able to
survive the frequent handling that is required to get it just right!
As you can see, the wing walks and anti-glare panels are offered as decals. From looking at the box top, the aircraft is in white, whereas these items are in an ivory color.
I bought my kit on the second-hand market so that is why there are few sprue trees in the kit image.
I look forward to building this kit. Now I need to do some research into possible aftermarket decal sheets for this as I would rather do an US carrier. However, that box top photo is pretty tempting!
|
CONSTRUCTION |
 There really isn't much to this kit, so I am hoping that it will
be a swift, pleasant build. I made an early determination to have this one on a
stand with the wheels up. That means that I don't have to use the large weight
and can dispense with the wheels and landing gear. Fortunately, there are 'gear
up' wheel well doors, unlike the earlier 1/200 airliner kits. First thing I did
was to glue the fuselage halves together and glue in the nose gear doors. Then
the tail was glued in place. When dry, the tailplane was glued onto the top of
the tail. At this time, the main gear doors were glued into the wing in the
retracted position.
There really isn't much to this kit, so I am hoping that it will
be a swift, pleasant build. I made an early determination to have this one on a
stand with the wheels up. That means that I don't have to use the large weight
and can dispense with the wheels and landing gear. Fortunately, there are 'gear
up' wheel well doors, unlike the earlier 1/200 airliner kits. First thing I did
was to glue the fuselage halves together and glue in the nose gear doors. Then
the tail was glued in place. When dry, the tailplane was glued onto the top of
the tail. At this time, the main gear doors were glued into the wing in the
retracted position.
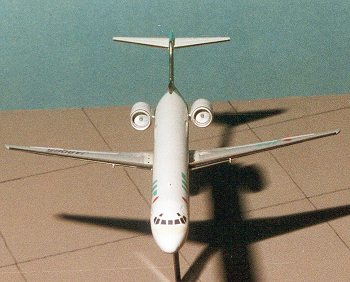
I then sanded down the fuselage to help find low spots. There were quite a few of them on the top fuselage half, mostly because there are a number of 'ribs' on the inside to give it strength. Where there are thick sections of plastic, it is not unusual to find sunken areas. While the filler was drying, the engine pods, which are one piece, were cleaned up. I found that the mold was slightly misaligned for these pieces, making cleanup a bit of a chore.
|
PAINT & DECALS |
You may think this a bit early to head for the paint shop, but actually, with as few pieces as there are, it really isn't. The first thing I did was to stick (not glue) the engines onto the fuselage. There is an underfuselage piece that seals in the wing that was also just lightly tacked into place. Then the fuselage was given an overall medium flat grey primer coat. When that was dry, it was painted with flat white. Then the kit was painted with gloss white (so far all paints used are Testors Model Master enamels). Before the gloss white had dried, a thinned down gloss white was sprayed over the entire fuselage to smooth out any lumps and bumps left by the flat undercoats.
 Then I applied Bare Metal Foil to the leading edges
of the fin and tailplanes. The wings were painted an overall grey with white
areas and when those were dry, Bare Metal Foil was applied to the leading edge
slats.
Then I applied Bare Metal Foil to the leading edges
of the fin and tailplanes. The wings were painted an overall grey with white
areas and when those were dry, Bare Metal Foil was applied to the leading edge
slats.
Then it was time for the decals. I tried to apply the huge main decal. It was a total disaster. It tore, it folded on itself and when I got it relatively straight, it dried with a lot of air holes in it. I then applied a setting solution to it and it permanently wrinkled. AAAUUUGGGHHH!!!!! I admitted defeat and used Champ solution to soften and remove the decals. The decals had stained the paint underneath so the fuselage got a couple more coats of white paint to cover the stains.
I still had one scheme left on the sheet, so used that one instead. This one wasn't as bad. I used diluted Solvaset on a few areas without too much problem, though it did cause some spots to permanently wrinkle. The key, I guess, is to not use the kit decals if it covers a lot of compound curves. Too bad as I like the scheme. Unfortunately, I cannot find any aftermarket decals for the MD-80/90 series in 1/200 (at least, not as of this writing in July 2000) :( In case you hadn't guessed, I am really less than pleased with the final outcome of the decals. There were a number of areas that needed patching and I used bits and pieces of the original scheme that I screwed up to provide those patches. A contest winner this will never be. I'll take it to our monthly club meeting, show it to them and then stick it on my 'shelf of shame', an area reserved for kits that just didn't do well.
|
CONSTRUCTION |
Heck, there really isn't much more to construction on this one. I simply snapped the wings and engines in place and then stuck it on the stand that came with the kit.
|
CONCLUSIONS |
 What started out as a real hope for having a quick and
satisfying build turned out to be a kit that I basically put off finishing for
several weeks. The blame for this lies solely with the kit decals or my
inability to properly apply them. I feel that had I had aftermarket decals for
this kit, that I would not have had all the trouble. The kit itself builds very
well and I wouldn't hesitate to recommend it to all who like airliners.
What started out as a real hope for having a quick and
satisfying build turned out to be a kit that I basically put off finishing for
several weeks. The blame for this lies solely with the kit decals or my
inability to properly apply them. I feel that had I had aftermarket decals for
this kit, that I would not have had all the trouble. The kit itself builds very
well and I wouldn't hesitate to recommend it to all who like airliners.
July 2000
Review copy courtesy of me and my wallet!
If you would like your product reviewed fairly and quickly, please contact me or see other details in the Note to Contributors.