|
HISTORY |
Mun-Ruc-Din 1/200 B.727-100
|
KIT # |
? |
|
PRICE: |
? |
|
DECALS: |
none |
|
REVIEW & |
|
|
NOTES: |
A very basic kit |
|
HISTORY |
One of the most produced and still most commonly seen airliners is the tri-jet 727. Built in rather large numbers, this was once probably the fastest airliners around, especially in the short/medium range market. With its fuselage based on the 707, as were many of the earlier Boeing jetliners, the 727 was quickly accepted by the many airlines that flew the plane.
Though no longer being built, the 727 is still a very common sight at airports in the US and around the world.
|
THE KIT |
Back about ten or fifteen years ago, I was heavily into airliners. I bought magazines, kits, decals, and postcards. When I finally sold off my postcard collection about ten years ago, there were well over 5,000 items in it! I had bought a very nice 1/200 Microscale sheet for 727s, however, I was stymied by the lack of a 727-100 on which to use them. I could have shortened the then-new Hasegawa Love Liner version, but wanted to save that kit for other sheets.
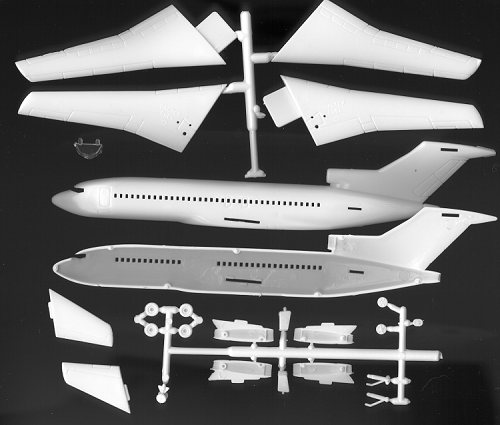
While going through the ATP catalogue, I came across this ad for 1/200 727-100 kits by a company called Mun-Ruc-Din. No, that is not a made up name! Anyway, the kits were bagged and had no decals or instructions. I ordered several. What I got was what appears to be a one-time promotional kit. It is very simple. There are no wheel wells and only a transparency for the cockpit windows. There are cabin windows in the kit, though you will have to fill them with white glue or something. However, many airliner builders fill in the cockpit and cabin windows and use decals so that really isn't a problem. One thing that looks a bit odd is the fuselage itself; it appears to be a bit boxy and not the smooth curved side that is on the real aircraft.
Aside from that, it is a -100 727, and the only one in 1/200 that I am aware of. I'm not sure if this kit is still available, but if so, and you want an early 727 in this scale, it is worth it.
|
CONSTRUCTION |
 As there are really very few parts in
this kit, there isn't much one can say about it. Fit is quite good with little
in the way of problems. The biggest area of concern is getting the fuselage
square. I removed all the mounting tabs as on this example they were more of a hindrance
than a help. The wings glued together well and only a small amount of filler was
needed at the wing/fuselage join. The underside of the fuselage was another
story and that took quite a bit of filler to get things smoothed out.
As there are really very few parts in
this kit, there isn't much one can say about it. Fit is quite good with little
in the way of problems. The biggest area of concern is getting the fuselage
square. I removed all the mounting tabs as on this example they were more of a hindrance
than a help. The wings glued together well and only a small amount of filler was
needed at the wing/fuselage join. The underside of the fuselage was another
story and that took quite a bit of filler to get things smoothed out.
Engine pods just snapped into place, though I did glue them in to keep from losing them. Probably the most difficult part of building this kit and one I didn't do, would be to smooth out the seams inside the intakes. The mold marks on the landing gear were rather thick, but since there is so little detail there, removing the seam wasn't a real problem.
When moving to the underside, you will notice several things. One are the lack of wheel wells. Secondly the lack of front gear doors. The rear outer doors have nice, big tabs to fit the grossly too thick outer doors into. I did not bother adding gear doors which I know is sacrilege, but there you have it.
|
PAINT & DECALS |
 The kit doesn't
have any so I used an old Microscale sheet #200-11. Typical of the old
Microscale airliner sheets is a lack of any striping or cheat lines. My basic
laziness determined that I would choose the scheme that didn't have any and that
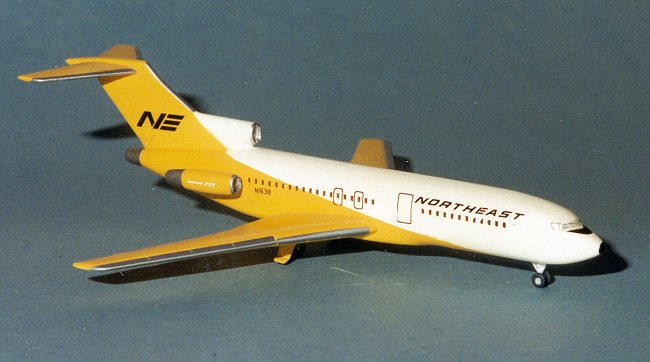
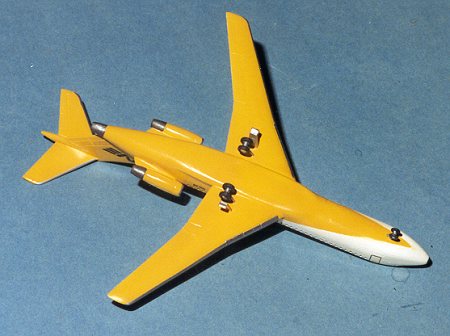
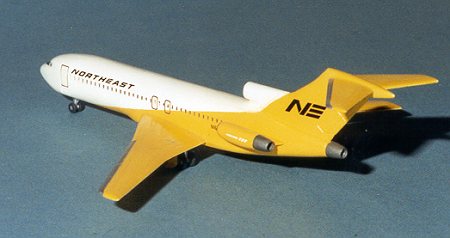
was the very colorful Northeast 'Yellowbird' scheme. This meant painting the
fuselage white and then masking off the appropriate area and painting everything
else yellow. Not much easier, if you ask me.
The kit doesn't
have any so I used an old Microscale sheet #200-11. Typical of the old
Microscale airliner sheets is a lack of any striping or cheat lines. My basic
laziness determined that I would choose the scheme that didn't have any and that
was the very colorful Northeast 'Yellowbird' scheme. This meant painting the
fuselage white and then masking off the appropriate area and painting everything
else yellow. Not much easier, if you ask me.
For the yellow I used Testor's enamel in the little bottles. Mixing the yellow with some white and a touch of orange gave me the color I wanted. It was then sprayed on and being gloss, give a good base for the decals. The leading edges of the wings, stabilizer, and engine fronts were coated with Bare Metal foil and the engine exhaust areas painted with Metallizer exhaust.
You will also notice that I didn't fill in the windows and then apply decals to replace them. Mark that one down to sloth as well. The clear cockpit window insert was slid in place and the frames hand painted white. There should also be some eyebrow windows on the 727, but those were left off. The industrious can cut tiny decals to represent them.
The Microscale markings were complete, but there were not many of them. It did include an anti-glare panel which was nice as it saved me from hand painting one.
|
CONCLUSIONS |
Well, I liked this kit. It was a real no brainer, and if I recall, the kits were pretty inexpensive (cheap). Probably the biggest hurdle for this kit (assuming you can find one) is finding decals for it. The Microscale 1/200 airliner ones are notoriously difficult to locate and once found, require you to do a lot of extra painting for most schemes. However, if you want something quick and easy to build, then this is the kit for you (assuming you can find one as I understand they are now (2008) nigh near impossible to locate)!
Copyright ModelingMadness.com. All rights reserved.