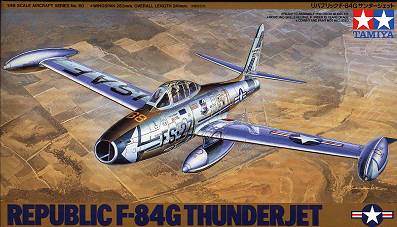
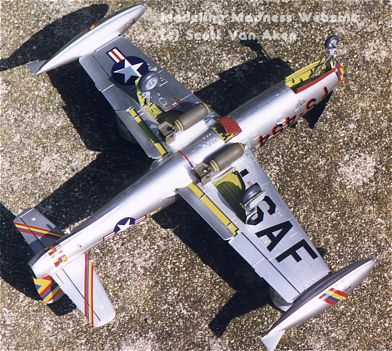
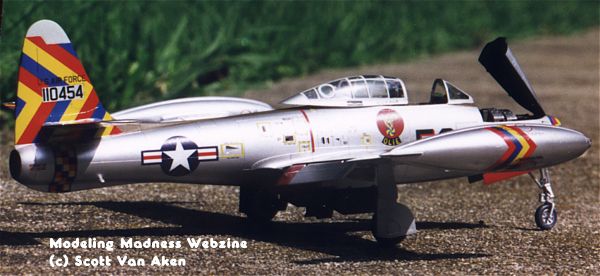
Tamiya 1/48 F-84G Thunderjet
Kit Number: 61060
Price: 2400 yen (bought direct from Japan)
Decals: Three versions, all very colorful: 58FBS Wing CO plane, Taegu Korea 1952; 8FBS, Taegu Korea 1952; 508 SFW, Turner AFB 1956 (boxtop).
Date of Review: 8 August 1998
Review and Photos by: Scott Van Aken
Republic's F-84 was in response to a USAAF requirement for a mid-winged day
fighter capable of speeds of 600 mph. The first prototype was completed in
Dec 1945 and flown from Muroc in Feb of 1946. Despite the usual problems,
the Army wanted the P-84 and ordered several hundred P-84A and P-84B aircraft
off the drawing board. The first true production aircraft were P-84B's with
6 .50 calibre machine guns. Problems with engines and wing skin wrinkles
carried over to the F-84C, although they were eventually solved. The D version
had a more powerful engine and thicker aluminum skin. It was a great improvement
over earlier versions and was vastly better than the F-80. The F-84D
was used by a large number of ANG units and continually improved during it's
service life.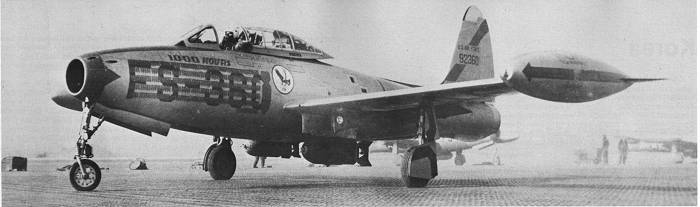
F-84E of 136 FBG. Markings are in red. Note braced canopy that was installed
on earlier aircraft. In fact for all intents and purposes, you can make this
aircraft using the Tamiya kit.
The F-84E was the version that finally lived up to full expectations. The fuselage was lengthened, JATO was added as were underwing pylons for additional fuel tanks or bombs. For the first time a production Thunderjet exceeded 600 mph. Most F-84Es were used in Korea with 100 of the 843 built going to France. The F-84G was the final embodiment of the straight-winged F-84. Over 3,000 were built with 2,300 going to a dozen foreign countries. Considering it was an 'interim' aircraft (due to problems with the F-84F and need for them in Korea), it was built in the largest numbers. It was faster, more capable (thanks to in-flight refueling), and able to carry an atomic weapon. Problems with the clear canopy cracking on earlier models were solved by bracing it and earlier models in service were retrofitted.
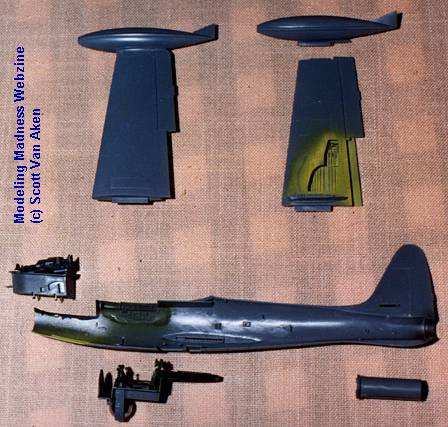
The Tamiya kit represents a mix of early and later F-84Gs. Interestingly enough, the kit also comes with a late version of the ejection seat and while beautifully done, does contain a few errors. Frankly, only those that are a-r will notice these things, I just found out about them while researching the introduction. If you wanted to do an F-84E, puttying over the wing refuelling doors would basically cover it. I'm sure that someone will be producing replacement seats for those that want it perfect. F-84E/G's that were serving in the Far East where there were no boom equipped tankers had probes built into the inner sections of the wing tanks.
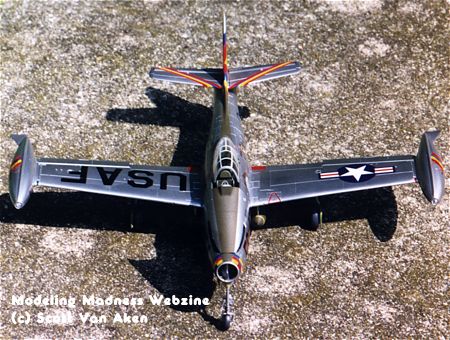

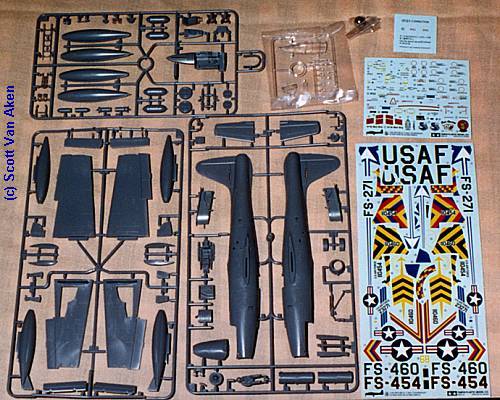
Tamiya's latest offering was highly anticipated by all 1/48 jet modelers. It will be interesting to see how the ProModeler kit compares to this one when (if) it is released later this year. In typical Tamiya medium grey plastic with the now obligatory nose weight (thanks, Tamiya), it comes with a huge decal sheet and two smaller ancillary sheets. Options are raised or lowered flaps, and open or closed canopy and nose gun bay as well as under fuselage speed brake. Almost all photos I have seen have the flaps up but a few show the speed brake lowered. Underwing stores are either two large drop tanks or 500 lb bombs. The underwing pylons are molded as part of the lower wing surface so an F-84G with no stores will require some surgery. Interestingly, Tamiya gives the option of leaving off the wing tip tanks. An interesting options as the F-84G rarely flew without them. However, if you are going to do a tip-tow diorama with two F-84s and a B-29, the bare wing tips would be needed.
For me, construction begins by carefully studying the instructions and then
cleaning up all the mold marks from parts. Next, I paint as much as
I can while the parts are on the tree, finish cleanup when dry, and then
finish painting them. Following that I basically follow the
instructions and build subassemblies. Things like the tanks, bombs,
wings, interior, gun bay, and exhaust.
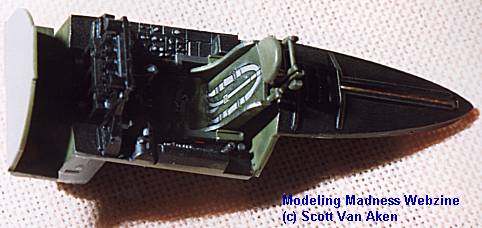 To pick the interior
as an example, the kit is so well done, that at this juncture, any aftermarket
parts aside from decals seem a waste of money. The instrument panel
is a combination of raided detail and a central area that has dial faces,
but no detail in them. The kit decal is a perfect fit for this area and the
decals respond well to setting solution, unlike Japanese decals of the past.
The seat is also very well detailed and comes with decals for the seat belts,
which look a lot better than none at all! It is under the fuselage that the
large ball bearing (weight) is held. There are two posts under the cockpit
(one of which was broken off on my kit) and a U-shaped plastic band holds
in the weight. I had to superglue mine to the plastic band and hope
that it never breaks loose!
To pick the interior
as an example, the kit is so well done, that at this juncture, any aftermarket
parts aside from decals seem a waste of money. The instrument panel
is a combination of raided detail and a central area that has dial faces,
but no detail in them. The kit decal is a perfect fit for this area and the
decals respond well to setting solution, unlike Japanese decals of the past.
The seat is also very well detailed and comes with decals for the seat belts,
which look a lot better than none at all! It is under the fuselage that the
large ball bearing (weight) is held. There are two posts under the cockpit
(one of which was broken off on my kit) and a U-shaped plastic band holds
in the weight. I had to superglue mine to the plastic band and hope
that it never breaks loose!
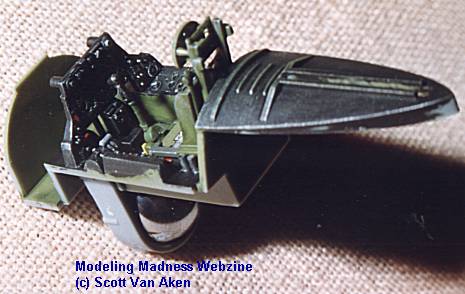 The cockpit
is basically interior green and black while wheel and speedbrake wells are
yellow zinc chromate primer, paints by Testors. Next the fuselage halves
are glued together, trapping the gun bay, interior, speedbrake bay, and exhaust.
If you wish to permanently mount the boarding ladder, holes in the left fuselage
half need opened before the halves are joined. Now most of you know
that I usually make a goof during
The cockpit
is basically interior green and black while wheel and speedbrake wells are
yellow zinc chromate primer, paints by Testors. Next the fuselage halves
are glued together, trapping the gun bay, interior, speedbrake bay, and exhaust.
If you wish to permanently mount the boarding ladder, holes in the left fuselage
half need opened before the halves are joined. Now most of you know
that I usually make a goof during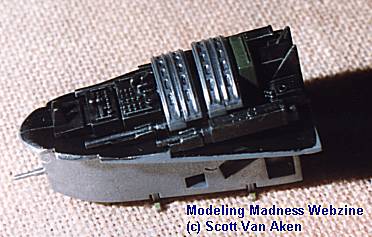 construction and this is one. I thought
the speedbrake bay was a drop in and when I realized it wasn't (after the
fuselage halves dried), I had to cut open the fuselage to install it and
then do a re-glue. Not a major disaster, but one has to be careful when deviating
from instructions sometimes. While that was drying, I attached the
wing tip tanks to the wing.
construction and this is one. I thought
the speedbrake bay was a drop in and when I realized it wasn't (after the
fuselage halves dried), I had to cut open the fuselage to install it and
then do a re-glue. Not a major disaster, but one has to be careful when deviating
from instructions sometimes. While that was drying, I attached the
wing tip tanks to the wing.
Of course I needed some putty; I always do. In this case a bit on the tip tanks and some on the fuselage seams. I also had to sand back the nose ring as it was a touch wider than the fuselage. It was probably my construction error that made it too small. During this operation, I broke off the carefully drilled out pitot tube that is in the intake. RATS! It was replaced by a piece of brass tubing.
 When all the putty was dried and sanded down, the detail was rescribed and
it was time to install the wings and the horizontal stabilizers. Both of them
have some dihedral and that is engineered into the mating surfaces. You
should need no putty on the wing/fuselage or stabilizer/fuselage match. For
one thing, the molded in wing pylon gives very little room to apply or sand
down filler. Naturally, fit was as exemplary as expected, and the kit was
going together in record time.
When all the putty was dried and sanded down, the detail was rescribed and
it was time to install the wings and the horizontal stabilizers. Both of them
have some dihedral and that is engineered into the mating surfaces. You
should need no putty on the wing/fuselage or stabilizer/fuselage match. For
one thing, the molded in wing pylon gives very little room to apply or sand
down filler. Naturally, fit was as exemplary as expected, and the kit was
going together in record time.
Then it was time to paint. I used SNJ and after painting the
gear and speedbrake wells zinc chromate yellow and masking it, the first
of three coats of SNJ were applied. Each coat was done within 15 minutes
of the other and the assembly left to dry. While that was being done, the
canopy was masked.
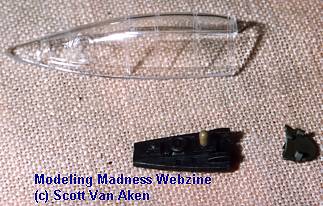 The bracing
is painted white so that was masked and painted. While the bracing was drying,
the nose gear was assembled and it as well as the main gear were ready for
paint. After the white in the canopy was dry, it was remasked and the
windscreen as well as the gear doors and speed brake and landing gear and
gun bay cover were painted with SNJ. The inside of the doors and speedbrake
were done in zinc chromate yellow, a Testors paint.
The bracing
is painted white so that was masked and painted. While the bracing was drying,
the nose gear was assembled and it as well as the main gear were ready for
paint. After the white in the canopy was dry, it was remasked and the
windscreen as well as the gear doors and speed brake and landing gear and
gun bay cover were painted with SNJ. The inside of the doors and speedbrake
were done in zinc chromate yellow, a Testors paint.
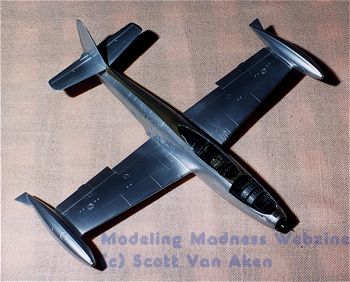 When all had
dried for a day, I got out the buffing pad and proceeded to put a slight
shine on the entire airframe. After that had been cleaned off, the gunbay
door and upper portion of the fuselage were masked with lo-tack tape and
painted olive drab using Polly Scale acrylics.
When all had
dried for a day, I got out the buffing pad and proceeded to put a slight
shine on the entire airframe. After that had been cleaned off, the gunbay
door and upper portion of the fuselage were masked with lo-tack tape and
painted olive drab using Polly Scale acrylics.
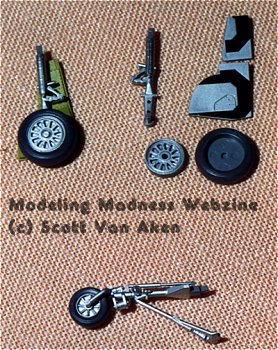 The main
wheel tires were painted dark grey and then assembled and glued to the struts.
Tamiya makes one side of the wheel an insert so it really helps painting.
While that was drying the nose tire was painted and the landing light
installed. After those had dried overnight, they were installed on
the airframe and it was time to start adding decals.
The main
wheel tires were painted dark grey and then assembled and glued to the struts.
Tamiya makes one side of the wheel an insert so it really helps painting.
While that was drying the nose tire was painted and the landing light
installed. After those had dried overnight, they were installed on
the airframe and it was time to start adding decals.
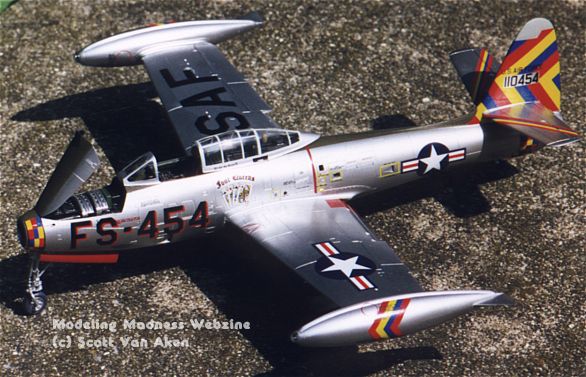
I chose the box art and most colorful scheme. Here is where I ran into my
first real problem. With all those compound curves, these decals really
need a good setting solution to help them conform.. Unfortunately, all those
I tried (Microscale system, Solvaset, and Champ) gave the decals a permanent
wrinkle that would not go away once dry, or gave them a permanent curl. (I
tested it on a spare decal from the sheet first). Since it was needed,
what I did was put on the decal, let it get pretty dry, and then put on the
strongest I had. I then immediately dosed it with water once it started
to wrinkle. Then I used a large, wet brush to smooth out the decal.
 It worked
pretty well, but not as well as I had hoped. I tore a few and hand
to touch them up with paint. I only used the solution on those that
needed it. The flat ones (like on the wing) were untreated. My
advice is to wait for aftermarket decals. As I write, the kits have not yet
reached US distributors and the decal makers are working furiously to supply
decals, so you should not have to wait long for them.
It worked
pretty well, but not as well as I had hoped. I tore a few and hand
to touch them up with paint. I only used the solution on those that
needed it. The flat ones (like on the wing) were untreated. My
advice is to wait for aftermarket decals. As I write, the kits have not yet
reached US distributors and the decal makers are working furiously to supply
decals, so you should not have to wait long for them.
After the decals had been put on, the fuel jettison tubes were installed and painted to match. Then the windscreen, bottom of the canopy, gun bay hatch, and tank tip lights were installed using 5 minute epoxy. When that was dry and touched up, the canopy was attached in the open position using white glue. Finally the two bombs were glued in place using super glue. Tamiya has made attaching these goof-proof by incorporating a long tab that goes between the molded in anti-sway braces on the bomb. This tab fits into an equally long slot in the bottom of the pylon. Great engineering!
The end result is a super kit that builds quickly and needs nothing more than a nice set of aftermarket decals to be perfect. I'm sure that you will enjoy yours as much as I did mine.
Copyright ModelingMadness.com. All rights reserved. No reproduction in part or in whole without express permission.