Aeroclub/Hasegawa 1/72 Mig-17
| KIT # | |
| PRICE: | $ |
| DECALS: | N/A |
| REVIEW & | |
| NOTES: | Conversion |
| HISTORY |
I have to start out by saying that I think the Mig-17 falls intothe category of classic jet aircraft. To me, it is in the same category as theHunter and F-86. It is an aircraft that just looks right. I know it is just amodification of the Mig-15, but the -15 is dumpy in comparison.
Mikoyan really hit on a good plane when the Mig-17 was designed.The Mig-15 had trouble at transonic speeds and was decidedly unstable. The 17was lengthened and had a slightly different wing. This was enough to allow it tobe supersonic in a dive and much more easily handled. It also had anafterburning engine. Though it really didn't seem to add that much to theaircraft's performance, it was some help and looks neat to have that flameshooting out the back! Like other Russian aircraft, the -17 was a basic aircraftand easy to maintain. It was also very rugged and able to take a lot of damage.
 Too late to seeservice in Korea, the -17 was the standard 'give away' fighter that all Sovietbloc countries got for siding with the Russians during the early years of thecold war. The fact that it was easy to maintain and fly made it a natural formany countries who couldn't handle sophisticated aircraft. Just because itwasn't sophisticated didn't mean that it was not a superb fighter. Just ask thepilots of F-105s and F-4s who met the Mig-17 in Vietnam. The -17's superiormaneuverability was enough to knock down quite a few US jets during thatconflict.
Today, one can often seen a Mig-17 at air shows around thecountry. A local dentist owns one as well as several -15s and an F-86!
| THE KIT |
Actually, this is more of a conversion deal than anything else.Aeroclub made (makes?) several vacuform fuselages to use with either theHasegawa or KP 1/72 Mig-17. I chose to do the Mig-17F as it is one that was mostoften exported. This was well before Dragon came out with their Mig-17 kit.
Anyway, the Hasegawa kit is of a Mig-17PF which has a radarnose, missiles or guns, and a different canopy. It is also a bit overscale. TheKP kit is also a PF, but has the option of guns. It is a toss-up as to which kitto use. The Hasegawa wings are a bit off and the KP tailplanes are too large. Ihad a bunch of bagged Hasegawa kits so used one of them as the donor model. Itis typical of the late '60s in that it is raised panel lines, minimal cockpitand thick plastic, but it builds into a nice kit.
The Aeroclub conversion consists of vacuformed fuselage halves,a vac canopy and white metal nose ring and exhaust. If you have never workedwith a vacuformed kit, these fuselage conversions are the best way to start.
| CONSTRUCTION |
 First thing wasto remove the vacuformed fuselage halves from the backing sheet. Simply scribearound the edges, snap off the backing sheet and then gently sand the edgedsquare. The Hasegawa wings were assembled and cleaned up. Then some nose weightwas put in the front of the Aeroclub fuselage. The Hasegawa interior wasassembled and painted black. Then it was inserted in the Aeroclub fuselage. Thehalves were then glued together. I put in a few strips of plastic on the edgesof the fuselage to give some mating surfaces.
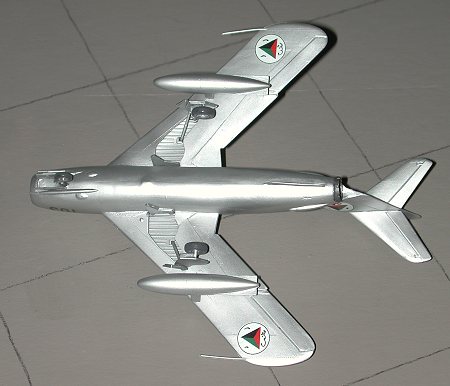
Before installing the intake and exhaust, I made some blankingplates to prevent see-through and glued them in place. The areas were then brushpainted black. Fitting the wings and tailplanes was also very easy. I simply cutslots in the fuselage and glued the wings/tailplanes to them. Really very easy.The nose and tail cones were then glued in place with superglue. There was needto attend to nearly all the seams with filler. The guns were gleaned from theHasegawa kit as was the radio antenna
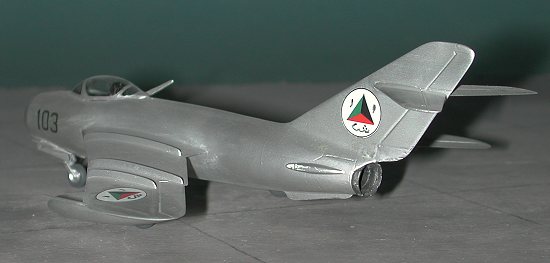
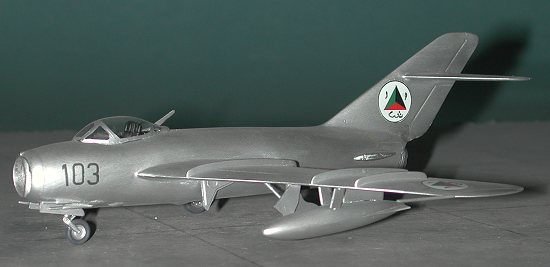
The last steps were to glue in the landing gear. I left off thewheels and gear doors until after painting. The drop tanks were also glued ontothe wings at this time. The last thing done before hitting the paint shop was tocut out and attach the vac canopy. After getting it glued in place, I masked it.The frames were extremely faint, and I fear I didn't do a great job of masking.
| PAINT & DECALS |
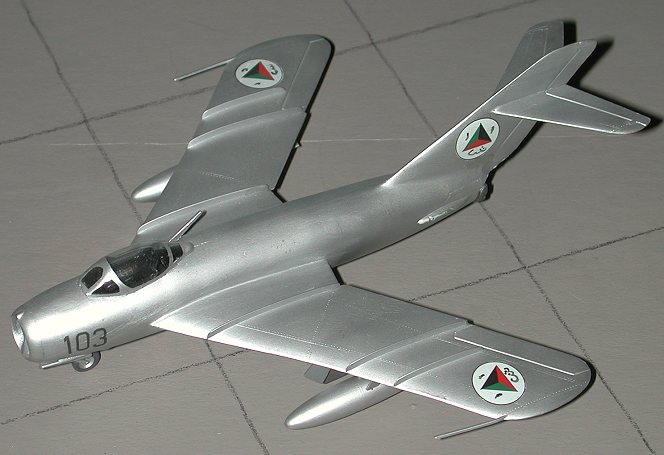
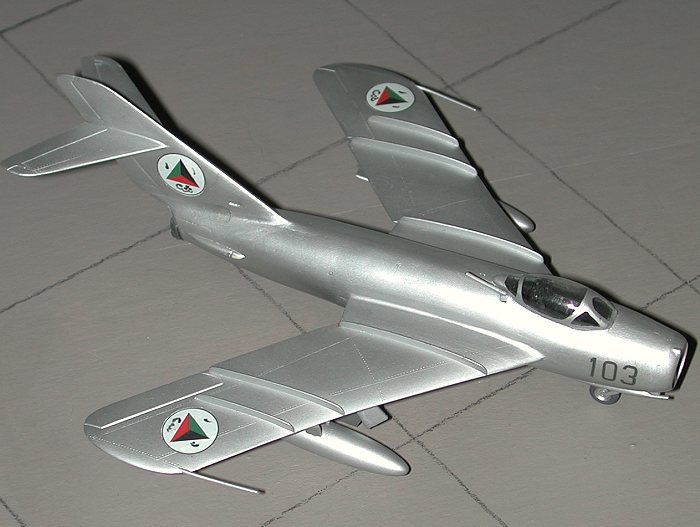
 It seems like mostexport Mig-17s were in natural metal. Though many were later camouflaged, theyall started life in bare metal. When I built this kit in the early 1980s, Iwasn't real concerned about getting a multi-hued paint job. Breaking out theTestors Metallizer, I proceeded to give the entire kit a good coat of the stuff.
Onceit was dry, the aircraft was coated with a gloss clear. Then the wheels werepainted dark grey and attached to the landing gear. This was followed by thegear doors and the airframe was complete.
Now it was on tothe markings. At this time, I was interested in doing 1/72 aircraft from everynation I could possibly find decals for. Thanks to ESCI (I think), there weresome Afghan markings available. However, they were not exactly right as theywere missing the Arabic lettering that were on the photo I was using forreference.
What I did, was to first apply the decals to theusual six positions on the airframe. Then using a fine felt-tipped pen, Icarefully copied the Arabic as best as I could. It is actually quite convincingand no one has yet caught on to the fact that they are not part of the decal!The nose letters came from one of the many KP kits of Russian jets that theyhave done.
| CONCLUSIONS |
Despite being well over 20 years old, this model has held up quitewell. It is one of those favourites that seems to always find a spot on thedisplay shelves. This type of conversion was very easy to do and one that I canrecommend as a good introduction to vacuformed modeling.
November 2000
Review kit courtesy of me and my wallet!
If you would like your product reviewed fairly and fairly quickly, please contact the editor or see other details in the Note to Contributors.