| KIT #: | A82011 |
| PRICE: | $17.99 SRP |
| DECALS: | One option |
| REVIEWER: | Scott Van Aken |
| NOTES: | Part of a double kit that includes an F-86. Released in 2012. |
| HISTORY |
 The MiG-15 was not as sophisticated an aircraft as its contemporary
the F-86. It was lighter, had less wing loading and had a more powerful
armament. The F-86 was heavier, had superior electronics for the gun sight, and
had better armor. The MiG-15 was a better dog-fighting aircraft thanks to its
higher thrust to weight ratio and lower wing loading. It was unstable at very
high speed. The F-86 was able to dive better, and had a greater weight
of fire from its faster firing .50 caliber machine guns than the MiG did with its three, slow firing cannon.
The MiG-15 was not as sophisticated an aircraft as its contemporary
the F-86. It was lighter, had less wing loading and had a more powerful
armament. The F-86 was heavier, had superior electronics for the gun sight, and
had better armor. The MiG-15 was a better dog-fighting aircraft thanks to its
higher thrust to weight ratio and lower wing loading. It was unstable at very
high speed. The F-86 was able to dive better, and had a greater weight
of fire from its faster firing .50 caliber machine guns than the MiG did with its three, slow firing cannon.
However, the MiG-15 was an easy to maintain and generally easy to fly aircraft. In the hands of an expert it was very difficult to beat. It was widely exported and was built under license in Czechoslovakia, China, and Poland. The two seat trainer was used in active military service well beyond its single seat compatriot.
| THE KIT |
Airfix's MiG-15 is a newish tooling as part of Hornby's plan to eventually replace most if not all of the old Airfix catalogue with new tool kit. It has really caught the attention of modelers who are fans of the company and from what I have seen, is the right move to bring the company back into profitability.
This kit consists of three grey sprues and one clear. There is a full cockpit
tub into which one places a control stick, instrument panel and seat. A pilot
figure is provided, something that is pretty much a staple of Airfix kits and
there are decals for instruments and consoles. The instrument panel also
contains  bulkhead sections which slot into the sides of the fuselage to hold the
cockpit in place. There is an intake piece and an exhaust section to prevent
'see through' and one will need some nose weight.
bulkhead sections which slot into the sides of the fuselage to hold the
cockpit in place. There is an intake piece and an exhaust section to prevent
'see through' and one will need some nose weight.
Tailplanes are single castings while the wings are upper and lower pieces with holes for both styles of wing tanks already drilled out. From how it looks, if using the conformal tanks, there will be no visible holes, however, if using the larger tanks, at least the forward hole will need to be filled. Of course, if doing the plane without the tanks all four holes will need filler. I personally wish that model companies would leave this option up to the builder to open any holes needed and many of them do, but not Airfix.
Interestingly, the kit does not offer a single main gear door assembly for gear up and actually, does not provide the option to open a slot for a display stand. Oddly, there is a separate one piece nose gear door assembly. The landing gear is nicely done with a retraction strut and the nose wheel is incorporated into the nose strut. The speed brakes are separate items and can be posed either open or closed. A single piece canopy/windscreen is the only cockpit option, but this is fine as there is little to see in the cockpit. About the only obvious parts I thought were missing (and it seems to always be something with these kits) were the T shaped radio altimeter antennas for under the wing and the pitot tube.
I also took the opportunity to measure the main airframe parts against two other
relatively new MiG-15 kits I have in this scale by Hobby Boss and Eduard.
Several things came to light, and I'd caution the reader in that I did not do
any measurement against plans, but simply to the two other kits. First, the
Hobby Boss and Eduard kits were pretty much the same in all dimensions and had
greater surface detail than the Airfix offering. The Airfix kit had a fuselage
that was longer and taller and with a greater circumference than the
 others.
There were also differences in the wing. The Airfix wing is considerably shorter
than the others and by considerably I mean 3+mm on each wing. The wing tips are
shaped differently with the Airfix ones being much broader, the wing fences are
farther out on the wing by about a millimeter or so, and the shape of the aft
portion of the Airfix wing near the root is not squared off as it is on the
other. All the wings are the same breadth. Take this information however you see
fit, but it seems that Airfix missed out.
others.
There were also differences in the wing. The Airfix wing is considerably shorter
than the others and by considerably I mean 3+mm on each wing. The wing tips are
shaped differently with the Airfix ones being much broader, the wing fences are
farther out on the wing by about a millimeter or so, and the shape of the aft
portion of the Airfix wing near the root is not squared off as it is on the
other. All the wings are the same breadth. Take this information however you see
fit, but it seems that Airfix missed out.
Instructions are well done with only Humbrol paint number provided for references during the build. There is but a single set of markings for this plane and that is a tiger camouflaged plane of the Chinese Air Force. Aftermarket decals are out there if one so wishes.
| CONSTRUCTION |
First step on this one was to paint the interior. Instructions call for a light blue, but that is because Humbrol does not have a blue-green cockpit color in their line-up; Testors does and that is what I used. I next glued both sets of under wing fuel tanks together as I wasn't sure just yet which I'd use. It was at this point that I ran into an issue I've had with other Airfix kits. The sprue gates are rather close to the part and while nice and wide, for those using any sort of cutters to remove parts, there will be issues regarding cutting chunks out of the part while removing it.
I also glued the upper and lower wing halves together before considering
where to go next. Well, it was the cockpit wh ich I
dutifully painted in Soviet blue-green. The instructions say light blue, but it
looks like it has quite a bit of green in it and the flash only makes the colors
look brighter. There are decals for the instruments and consoles so I used
those. The instrument panel does not fit quite as well as we would like as the
control stick interferes because the holes for these parts are too close. The
seat was installed and then the cockpit, anti-glare panel, exhaust and intake
pieces were glued into one side. The instructions state 3 grams of weight is
needed and I'd put in more as there is not all the much room for it until you
get behind the cockpit tub. The fuselage halves were then cemented together. As
is often the case, areas where the sprue attachment joins were located were
small divots and so I filled these and other seams with super glue.
ich I
dutifully painted in Soviet blue-green. The instructions say light blue, but it
looks like it has quite a bit of green in it and the flash only makes the colors
look brighter. There are decals for the instruments and consoles so I used
those. The instrument panel does not fit quite as well as we would like as the
control stick interferes because the holes for these parts are too close. The
seat was installed and then the cockpit, anti-glare panel, exhaust and intake
pieces were glued into one side. The instructions state 3 grams of weight is
needed and I'd put in more as there is not all the much room for it until you
get behind the cockpit tub. The fuselage halves were then cemented together. As
is often the case, areas where the sprue attachment joins were located were
small divots and so I filled these and other seams with super glue.
When that was all sanded down, I attached the
tailplanes and the wings. The fit is excellent. The intake was next and that
proved to be a tad smaller than the opening, but thanks to Airfix's somewhat
soft plastic, it was easy to fair in. I then masked and installed the canopy.
Airfix missed on this part by completely forgetting to put in the metal brace
that runs down the center of the canopy. Fortunately a couple of cuts in the
masking will take care of that. Makes one wonder just what they used for a
reference when doing the molds. The canopy was attached and I did a
 preliminary
overall painting by spraying the airframe with Tamiya grey primer. This primer
is excellent and one can put a metal finish right over the top of it the grain
is so fine.
preliminary
overall painting by spraying the airframe with Tamiya grey primer. This primer
is excellent and one can put a metal finish right over the top of it the grain
is so fine.
I then filled the holes in the wing for the conformal tanks. The kit conformal tanks are laughingly too small and while the other tanks appear to the the right length, the fins are shorter than on the other kits. These were assembled and set to the side to be painted. I then glued on the various antennas and the guns. The fairing for the big gun seems a bit long to me, but may be correct. I also glued the speed brakes closed as they seem to be more often like that on the ground than open.
| COLORS & MARKINGS |
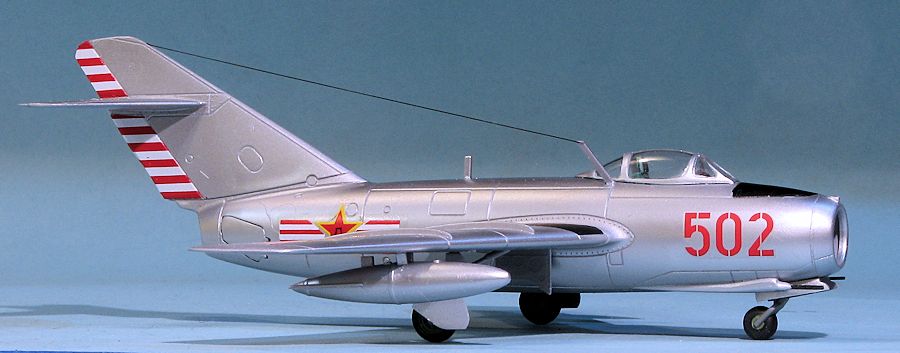
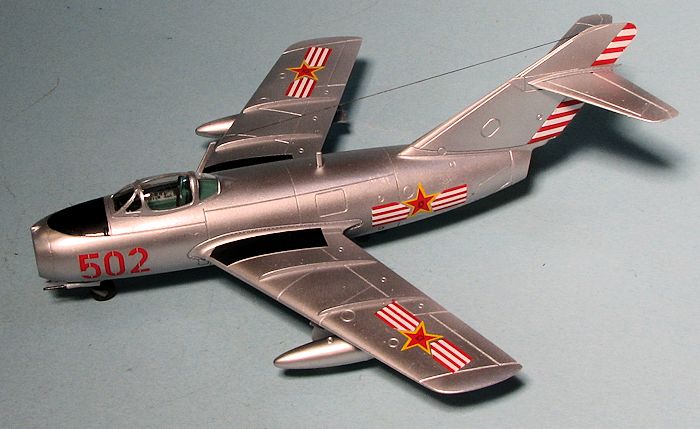
Seemed like a good time to paint so, deciding to make this one easy, I sprayed everything with Alclad II aluminum. I then brush painted all the landing gear struts and wheel wells with neutral grey. You can find all sorts of colors for MiG wheel wells on the net and I happened to have this paint handy. The landing gear attachment points are huge and very positive, so no worries about the bits wriggling around. This kit may not be totally accurate, but it is a delight to build, and perhaps that, in many circles, is more important.
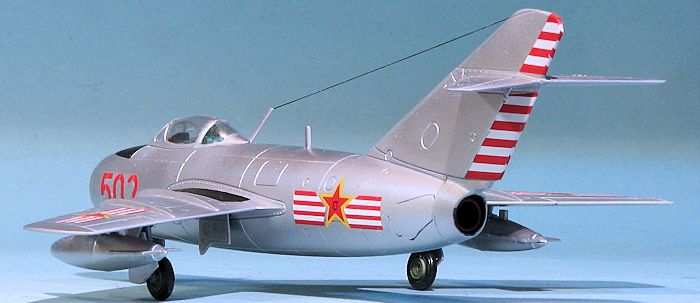
 Once the gear was on and painted, I thought it might
be a nice time to apply decals. I wasn't all that taken with the tiger scheme
offered by Airfix, but fortunately, I did have an old Microscale MiG-15 sheet,
72-426, that has a lot of options for non-Korean War, bare metal MiG-15s. I
chose a PLAAF version before the current insignia was settled upon. This version
also had red and white rudder stripes which I hoped would fit the kit. But first
a return to the paint shop was in order as this plane had a black upper nose
panel. Often times these panels were painted black to act as an anti-glare
panel.
Once the gear was on and painted, I thought it might
be a nice time to apply decals. I wasn't all that taken with the tiger scheme
offered by Airfix, but fortunately, I did have an old Microscale MiG-15 sheet,
72-426, that has a lot of options for non-Korean War, bare metal MiG-15s. I
chose a PLAAF version before the current insignia was settled upon. This version
also had red and white rudder stripes which I hoped would fit the kit. But first
a return to the paint shop was in order as this plane had a black upper nose
panel. Often times these panels were painted black to act as an anti-glare
panel.
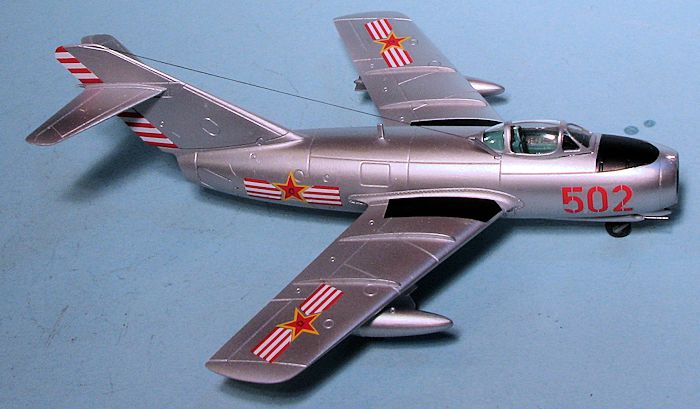
Like most of you, I'm always a bit nervous when using a decal sheet that is 35-40 years old, but my concern did not play out. As expected, the rudder stripes did not fit. They are far too broad, undoubtedly designed for the old Airfix MiG-15. The lower section was also not shaped properly, but having all that extra decal is not a bad thing and allowed me to trim them while still having extra to fold over the back of the rudder. I also used the nose numbers and the wing walk bits from the Airfix sheet.
| FINAL CONSTRUCTION |
There were a few things that needed to be added. One
was the main wheels. The kit ones are too short and w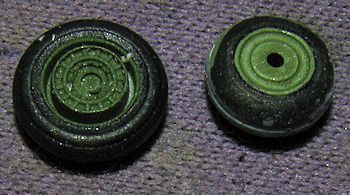 ay
too fat, looking like something an Alaska bush plane would have. Not much I
could do about the nose wheel as it is molded in place, but I was able to rob
the main wheels from a Hobby Boss kit to use. It may make the sit of the plane a
bit off, but it certainly looks a lot nicer than the kit offerings. I did have
to trim back the axle stubs to get them to fit.
ay
too fat, looking like something an Alaska bush plane would have. Not much I
could do about the nose wheel as it is molded in place, but I was able to rob
the main wheels from a Hobby Boss kit to use. It may make the sit of the plane a
bit off, but it certainly looks a lot nicer than the kit offerings. I did have
to trim back the axle stubs to get them to fit.
Next, the gear doors were attached. This was pretty painless as the attachment areas are quite large and easy to work with. I then glued on the drop tanks. I could not glue the aft section of the mount as it sits right atop a decal. A radio long wire was then glued on using EZ-line. While researching just how this fits, I looked at a lot of photos of MiG-15s and came to the realization that the small stub antenna on the upper fuselage was not fitted on all of the period photos I looked upon. It was certainly not on the plane that defected from North Korea in 1953, though I did spot it on some Czech, Polish, and Chinese built versions, but again, not all of them. As it was already in place, I left it there. The masking was removed, the nose anti-glare panel painted in matte clear and a bit of touchup painting was done.
| CONCLUSIONS |
Frankly, I was surprised at the differences in
dimensions and size between this kit and the Eduard/Hobby Boss versions. It was
also a bit of a disappointment to find that Airfix had so goobered up the wheels
and 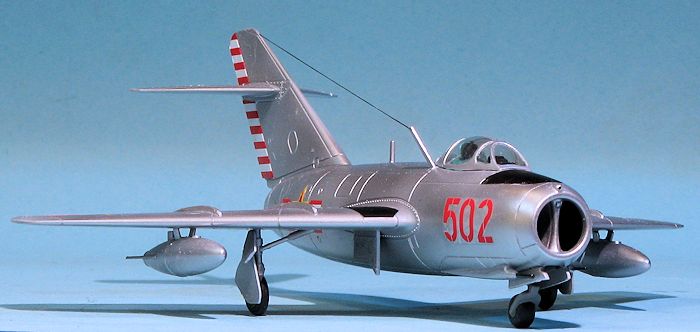 the
frames in the canopy. One has to wonder how this could happen. It is not like
there are not examples from which one could do research. It seems like every
aviation museum in the world has one or more and there are plenty of warbirds
around. However, there it is.
the
frames in the canopy. One has to wonder how this could happen. It is not like
there are not examples from which one could do research. It seems like every
aviation museum in the world has one or more and there are plenty of warbirds
around. However, there it is.
The kit is easy to build. The attachment areas are large and positive and the fit is generally very good. Those who want a more accurate kit should pass on this one and go for the Hobby Boss or Eduard kit. For modelers who want a nice build or are really pinching pennies, then the Airfix kit will fill the bill nicely.
March 2015
If you would like your product reviewed fairly and fairly quickly, please contact the editor or see other details in the Note to Contributors.