Amodel 1/72 Yak-18
| KIT #: | 72203 |
| PRICE: | $10.45 at www.scale-model-kits.com |
| DECALS: | Four options |
| REVIEWER: | Scott Van Aken |
| NOTES: | Treat it like a short run kit. |
| HISTORY |
 ace the earlier Yakovlev UT-2 and Yak-5 in service with the Soviet Air Forces and DOSAAF (Voluntary Society for Collaboration with the Army, Air Force and Navy, which sponsored aero clubs throughout the USSR). The new aircraft flew a year later, powered by a Shvetsov M-11 five-cylinder radial engine and featuring a retractable tail wheel landing gear. The design proved exceptionally easy to build and maintain, and it continues in production today, 55 years later, in two of its many variants, the four-seat Yak-18T and two-seat Yak-54. The CJ 6a, produced in China, is sometimes quoted as a variant but is a completely different aircraft but uses some Yakovlev features such as the undercarriage from the tricycle version of the Yak 11.
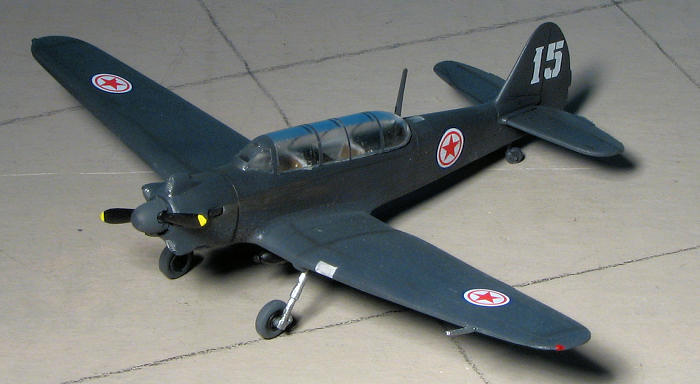
The subject of this kit is one of the early Yak-18 trainers that were ubiquitous throughout the Soviet-influenced block of nations from Afghanistan to Zambia, and served with the North Korean/Chinese air force during the Korean War as a night nuisance bomber.
| THE KIT |
Molded in a light grey plastic with thick sprues and rather thin sprue gates, this is very much typical of the A-model kits I've built in the past. Surface detail is well done with engraved lines and subdued fabric representation. The somewhat soft plastic means that care will be needed when removing the smaller parts. I found the usual flash on nearly all the parts but nothing major and typical of low pressure molding.
 The single transparency is thick and has somewhat indistinct canopy frame lines. Unlike the earlier boxing, this one has plastic bombs instead of the cast metal ones and the detailing on these seems to be a bit better. The cockpit is very basic consisting of a floor, two seats and two instrument panels. No control sticks or sidewall detail or rudder panels. However, not much detail will be visible through the rather thick transparency. One thing I did find that was rather cool is that the elevators are slightly deflected downward with the trim tabs correctly deflected up a bit. Can't think of many other kits that provide this.
The instructions just show a general area for placement and it appears they are to be mounted under each of the wing roots. Markings are provided for four aircraft. One in Dark Green over Light Blue and another in overall Black for the North Korean AF. The reason for the 12 roundels is that one is a stencil variety. There is another for the Polish Air Force with civil registration (which may have been required on training aircraft), and one for the USAF, all from about 1950 if I read the cryptic '50th' commentary for each markings option correctly. I'm not sure just how opaque the markings are, but have found previous A-model kits to have usable decals. Instructions are quite usable and well drawn.
| CONSTRUCTION |
This is not the first 1/72 Yak-18 I've built. The first was a resin version that I bought at Mildenhall in 1989. It was basically a complete airframe where one added the prop, interior, canopy and landing gear. It was also a later version.
Amodel's is a typical low pressure injection molded kit that requires careful clean up of all parts, plenty of test fitting and use of one's developed modeling skills with filler and files and sandpaper. Test fitting parts multiple times is a definite requirement, making what appears to be a simple kit into a somewhat long build.
 I started out by cleaning up the wings and sanding down the outer edges of the lower wing to remove the step that would be there near the wing tip as the lower wing is either too thick or the upper wing has insufficient depth to accept the lower portions. I also had to sand away at the forward wheel well on the lower wing to get the leading edges to mate.
While the usual filler was drying on the wing, I glued on the interior parts. Amodel has decided that a floor, two seats and two instrument panels are all you will need. There is some sidewall detailing of what appear to be side consoles on the inner fuselage. With the interior together and painted, it is glued into one fuselage half. There are no alignment pins or shelves so one just gets it in there best one can and to make adjustments, tapes the fuselage halves together to be sure all will fit properly. Then the instrument panels are glued in place once the interior is dry. These are two different shapes and no indication as to which goes where. The clear lens in the upper fuselage (for the direction finding equipment, or so I've been told) is glued into one half after the opening is enlarged to take it. Then the two halves of the fuselage are glued together in steps to be sure all is properly aligned. I didn't sweat glue getting on the upper surface of the clear piece as that would be sanded level with the upper fuselage along with all the filler that would be applied.
Once the fuselage was filled, sanded and rescribed. the engine front was glued on. Fit here is not very good and there was much muttering and grumbling during the multiple filler applications. With the fuselage somewhat complete, I attached the tail planes. 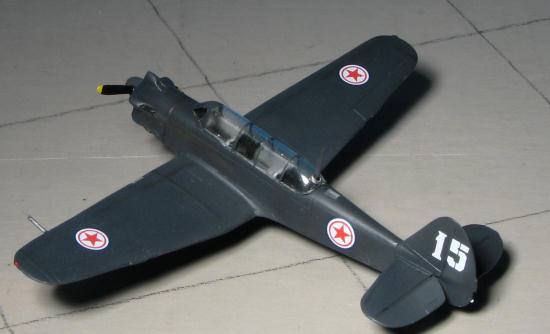 These actually fit rather well once cleaned up. Then the wings. Well, some carving is needed to get them to fit closer to the fuselage without too much of a step in the front and rear. On the upper section, there is a goodly gap on either side of the wing root. But I didn't fill it just yet. You see, there needs to be some dihedral in the wings and there wasn't any at this point. Doing it one side at a time, I filled the join with super glue, bent the wing into position and then zapped the join with accelerator until the join set. Then the mass of filler to take care of the remaining gap. Much detail was sacrificed in the process.
With the wing taken care of, the canopy has to be dealt with. As one expects by now, this doesn't fit well, but with a bit of trimming, I was able to get it close. There is a radio mast that fits through a hole in the back of the canopy. Step one was to drill it out enough to accept the mast. Step two was to drill out the hole in the rear deck so it would fit. Once that was done, I glued the mast to the rear deck and put the canopy in place to where I could pull up on the mast so it would block the rear hole. After that dried, I removed the canopy and masked it. The frame lines are quite light and in the front, non-existent. That job completed, I glued on the canopy with clear paint, filling in the front area several times as there is quite a gap. At this time, I glued on the landing gear. The main gear are a bit of a loose fit so one has to be a bit careful when attaching these. The upper fuselage and wing leading edge clear bits were masked and it was off to the paint shop.
| COLORS & MARKINGS |
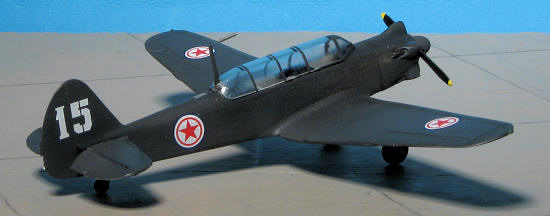
I wanted to do the black box art plane, but thought black was a bit too much. So I used Floquil's Weathered Black, which is actually a very dark grey. Spraying this on was a snap as basically everything is a single shade. Probably the easiest part of the build, actually. When dry, a coat of Future/Kleer was applied and it was back to the bench for decals. Amodel's decals are fairly good. There is a bit more carrier film around each marking that most, but the decals are thin, in register and fairly opaque. The decals reacted well to a couple of coats of Microsol. Then it was back to the paint shop for some clear matte to seal everything in.
| FINAL CONSTRUCTION |
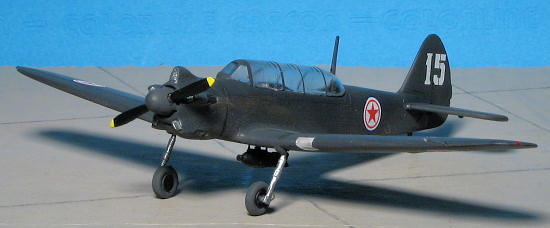
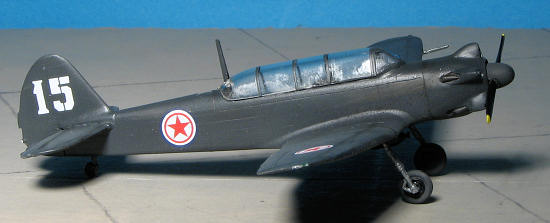
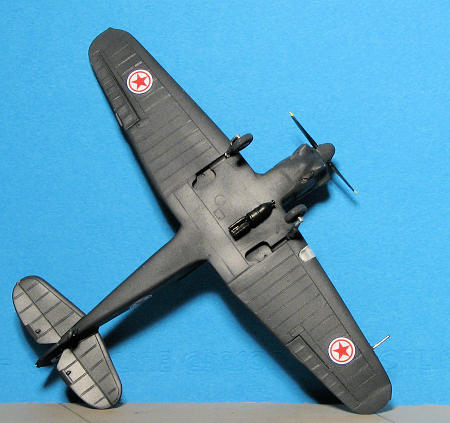 Not much to this one. While the paint was drying, I sanded and filed on the prop and the spinner to get them to fit each other. It takes a bit of work, but one can get the prop into the spinner and it is a tight fit. The spinner was painted Weathered Black and the prop black with yellow tips. The prop needs a lot of clean-up. I then painted the landing gear aluminum and the exhaust with burnt iron. It seems to me that there should be an exhaust stack on the upper cylinder, though none is supplied or on the molds. I left it as it was. The main wheels were glued on and the prop pushed into the opening in the nose after a bit of detail painting was done on various parts of the aircraft. As I had forgotten about the bombs, I assembled one of them, painted it black, drilled a hole in the underside of the fuselage and attached it. Then, with much trepidation, I pulled the tape off the clear bits. Much to my dismay, I noticed that I'd missed the back of the front canopy framework by about millimeter or so when masking. As I thin my paints with lacquer thinner, there was no opportunity to scratch off the old line and do a new one so that will have to be my major error for this model (it seems there is at least one per project). A bit of pastels and the project was done.
| CONCLUSIONS |
So, after about 6 weeks of work, a nice 1/72 model of an important Soviet era trainer. I'm sure many of you would be able to finish this in less time, but I guess I'm slow and I tend to get side-tracked. Not for me building a 1/32 kit in a weekend! If you have the skills to build a kit like this, you'll have the chance to add something interesting to your collection.
| REFERENCES |
May 2010
Thanks to www.scale-model-kits.com for the review kit. Get yours at the link and at a discount.
If you would like your product reviewed fairly and fairly quickly, please contact the editor or see other details in the Note to Contributors.