Matchbox 1/72 Provost T.1
| KIT #: | PK-30 |
| PRICE: | $4.00 |
| DECALS: | Two options |
| REVIEWER: | Scott Van Aken |
| NOTES: |
| HISTORY |
The
Percival P.56 Provost was a
British ab initio
trainer that was developed for the Royal Air Force in the 1950s as a replacement
for the Percival Prentice.
 It was a low-wing, monoplane with a fixed, tailwheel
undercarriage and had an unusual side-by-side seating arrangement. The Provost
has the distinction of being the last piston-engine basic trainer aircraft to be
operated by the RAF.
It was a low-wing, monoplane with a fixed, tailwheel
undercarriage and had an unusual side-by-side seating arrangement. The Provost
has the distinction of being the last piston-engine basic trainer aircraft to be
operated by the RAF.
The Provost was later adapted to make use of a turbojet engine, producing the BAC Jet Provost. The type was withdrawn in the 1960s, in favour of its jet-powered successor. The aircraft was exported to Ireland, Rhodesia/Zimbabwe, Oman, Burma, Iraq, Malaysia, and Sudan. Several are still flying in the UK.
| THE KIT |
 This
is a standard series one Matchbox kit with the window in the box and multi-color
sprues; in this case white and red are used. Detailing is of the raised variety
and while the kit is pretty basic, it is also nicely done.
This
is a standard series one Matchbox kit with the window in the box and multi-color
sprues; in this case white and red are used. Detailing is of the raised variety
and while the kit is pretty basic, it is also nicely done.
The cockpit is simply a tub in which the two seats, a roll bar and crew figures are placed. The engine face fits into a three piece cowling of which the front is a single piece. There is a one piece prop and a spinner to attach to it. Wings are two pieces on each side and slot into the fusleage. A one piece tail slots into the rear once the fuselage halves are glued together.
This aircraft has fixed gear with each leg having a separate wheel. A tail wheel is a single molding. Other bits are an exhaust stub, carb and oil cooler intake and a pitot tube. The canopy is a single piece with somewhat thick framelines.
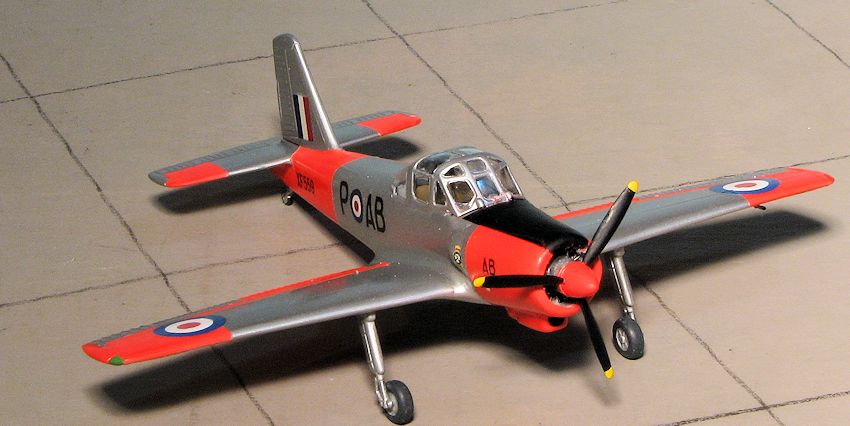
 Markings
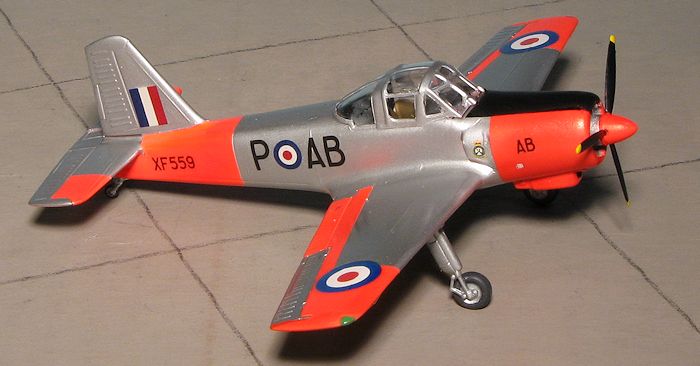
are for two planes. One is a camouflaged version with the Omani Air Force and
the other is the box art plane with the RAF Central Flying School. I assume all
of these are from the mid-late 1950s. Decals are nicely printed and I snipped a
piece from the sheet to see if they were still viable, which, despite their age,
they are. Good thing, too, as aftermarket sheets for this one are not common at
all. You may notice that the reds are all off register to some extent or
another, requiring new roundels at the very least. The instructions are typical
of Matchbox for the time with all the detail painting information provided at
the end of the instructions. My kit was missing the stand and the pilot figures
as it was bought second-hand.
Markings
are for two planes. One is a camouflaged version with the Omani Air Force and
the other is the box art plane with the RAF Central Flying School. I assume all
of these are from the mid-late 1950s. Decals are nicely printed and I snipped a
piece from the sheet to see if they were still viable, which, despite their age,
they are. Good thing, too, as aftermarket sheets for this one are not common at
all. You may notice that the reds are all off register to some extent or
another, requiring new roundels at the very least. The instructions are typical
of Matchbox for the time with all the detail painting information provided at
the end of the instructions. My kit was missing the stand and the pilot figures
as it was bought second-hand.
| CONSTRUCTION |
Matchbox kits are well known for being rather basic
kits that generally build quite well. This is especially true of their least
expensive kits, of which the Provost can be included. The first thing I did was
what most folks do when building airplane kits, and that is assemble the
interior. This is quite basic consisting of a bench seat and a roll bar that
fits into the cockpit floor. This and the interior were all painted a dark grey
with 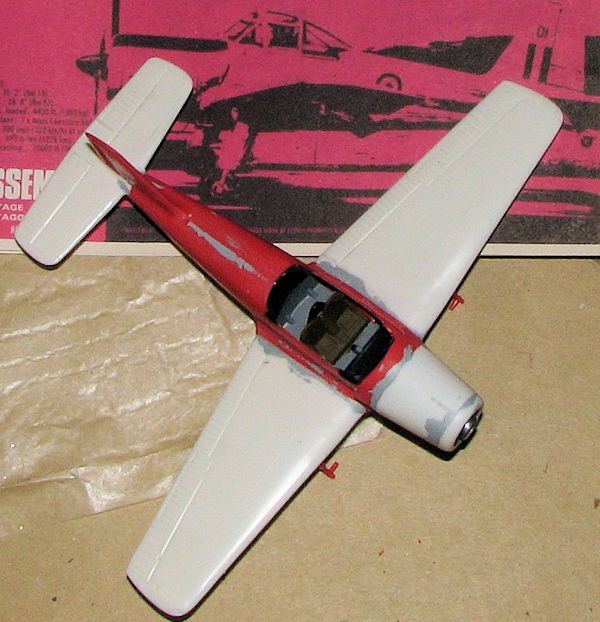 leather seats and a black roll bar, as indicated in the painting guide. I
then glued the wings together and installed the interior into the fuselage
halves, gluing those together. Then the wings were attached.
leather seats and a black roll bar, as indicated in the painting guide. I
then glued the wings together and installed the interior into the fuselage
halves, gluing those together. Then the wings were attached.
Now began one of several filler and sanding sessions. While the kits were designed for pocket money of the day, they require those of us who are a bit more along in our skills to fill in seams and sink areas. For this I used Tamiya basic type putty (grey). I also cemented the main engine cowling halves together and, along with the exhaust panels, attached those to the nose.
When that was dry and filled, I glued on the tailplane and the engine/forward cowling piece. I left off the prop as I generally do not have rotating props on my models. A piece of the tailplane where it mates to the fuselage was slightly short shot, but nothing filler can't fix.
Next items were the lower oil cooler section and then the landing gear. The tail gear is too small for the well in which it is supposed to snugly fit, so I had to be quite careful when gluing this in place. As you can see from the image, filler is a main requirement for a smooth finish. I then masked the canopy and attached it in preparation for painting.
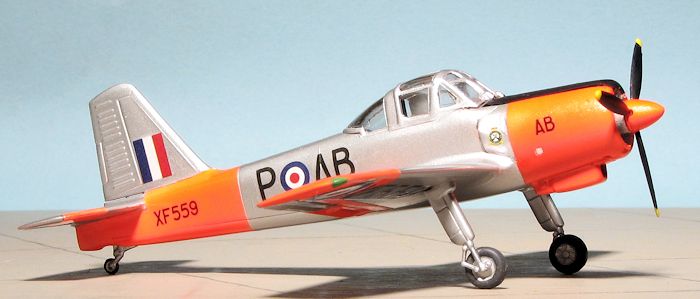
| COLORS & MARKINGS |
Since red plastic is so difficult to properly cover, I first
sprayed on some grey primer using Tamiya's extra fine. This primer is the best
I've ever used. For one thing, you can paint gloss right over it without sanding
and still have a smooth finish. The next was some white primer, followed by
Tamiya X-1 gloss white. All this was needed because of the da-glo sections and
those need a gloss white base. I then painted on the da-glo, which covered quite
a bit of the airframe. When dry, that was masked off and the rest of the
airframe painted using Tamiya Gloss Aluminum in a rattle
 can. I find this color
duplicates aluminum lacquer better than just about anything else. It isn't a
really effective color for bare metal, but does make a nice undercoat for Alclad
II. The nose anti-glare panel was then masked and painted.
can. I find this color
duplicates aluminum lacquer better than just about anything else. It isn't a
really effective color for bare metal, but does make a nice undercoat for Alclad
II. The nose anti-glare panel was then masked and painted.
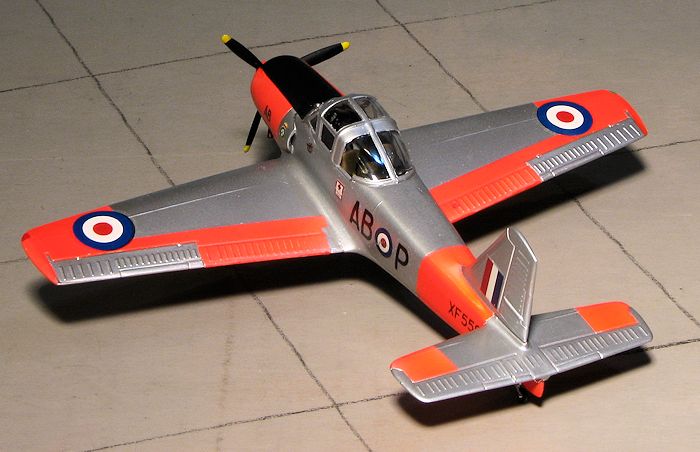
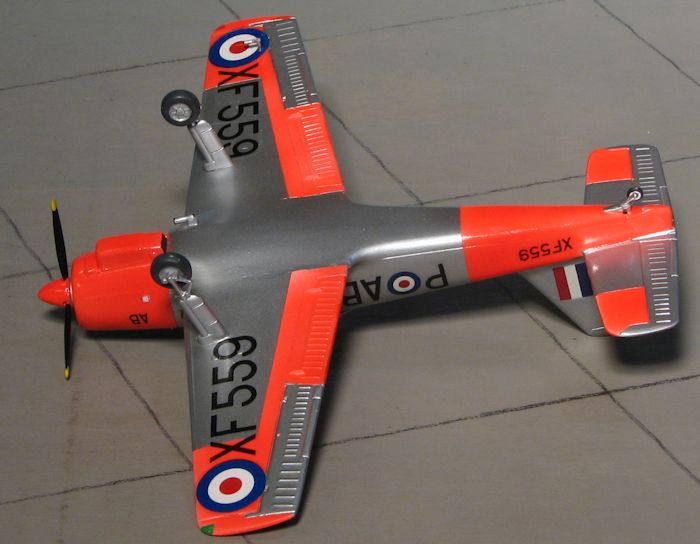
Now it was time for some decals. I used Modeldecal sheet #38 from 1977 as it has a couple of similar schemes for a Provost. I fully expected to have no issues with these decals, despite their age, but to be sure, I started with the insignia. Much to my delight, there were no issues with cracking or breaking apart. However, there was bleed-through of the underlying da-glo through the white portions. Not at all unexpected and while it won't show that much in images, it will show in person so I decided to double up on these bits to help make things a bit more opaque. Another note is that the under wing serials seem to be oversize compared to the decal placement drawings so be sure that the lower wing roundels are up against the wingtip join. Eventually I got all the markings on and used Solvaset to help these old decals conform a bit to what few panel lines the kit has. Doubling up on the wing insignia really helped make them more opaque.
| FINAL CONSTRUCTION |
With that done, I gave the airframe a coat of gloss acrylic clear to gloss up the da-glo and seal the decals. The final bits to add were the venturi, exhaust, pitot and the prop. The wheels had to be drilled out and the axles trimmed to get a proper fit. The masking was removed, a clear matte applied to the nose anti-glare panel and the kit was done.
| CONCLUSIONS |
 The
Modeldecal sheet suggested several additions to add to the kit's accuracy, but I
did none of these, preferring to build it pretty much out of the box. I was
pleased that the 35 year old decals held up well and reacted well to Solvaset. I
have noticed that over the last month or so, most of what I've built has been
trainers. Not sure why that is the case as it certainly wasn't planned that way,
it just happened. The end result of this build is a very colorful model of a
relatively obscure plane (at least outside of the UK), and one that looks nice
when done. Matchbox kits are not for everyone due to their lack of modern kit
amenities, but for a relatively trouble-free build, they can't be beat.
The
Modeldecal sheet suggested several additions to add to the kit's accuracy, but I
did none of these, preferring to build it pretty much out of the box. I was
pleased that the 35 year old decals held up well and reacted well to Solvaset. I
have noticed that over the last month or so, most of what I've built has been
trainers. Not sure why that is the case as it certainly wasn't planned that way,
it just happened. The end result of this build is a very colorful model of a
relatively obscure plane (at least outside of the UK), and one that looks nice
when done. Matchbox kits are not for everyone due to their lack of modern kit
amenities, but for a relatively trouble-free build, they can't be beat.
| REFERENCES |
http://en.wikipedia.org/wiki/Percival_Provost
May 2014 Copyright ModelingMadness.com. All rights reserved. No
reproduction in part or in whole without express permission from the editor.
If you would like your product reviewed fairly and fairly quickly, please contact the editor or see other details in the Note to Contributors.