| KIT #: | 001? |
| PRICE: | $48.00 from Fantastic Plastic |
| DECALS: | One option |
| REVIEWER: | Scott Van Aken |
| NOTES: | Resin kit with a vacuformed canopy |
| HISTORY |
Allow me to quote from the instructions on this one
"In 1967, Former US Navy pilot and aviation writer Jack D. Pickett and his business partner Harold Baker visited MacDill AFB to gather information for a USAF sponsored article on historic experimental aircraft. At the edge of the base, they were shown four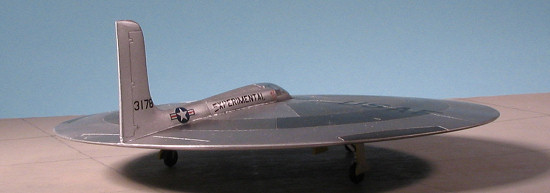 de-commissioned X-planes - all of they flying discs - measuring about 20, 40, 70, and 116 feet across.
Through interviews with various base personnel, Pickett and Baker concluded that, during the 1950s, the USAF had developed several models of jet-powered flying discs for recce flights over the Soviet Union. In addition to having radar evading abilities, the discs could fly at supersonic speeds and, on occasion, even reach altitudes that approached the edge of space (50 miles). Many disc flights - particularly those of the highly successful 40 foot version - were no doubt responsible for the many "flying saucer" reports during that period.
The proposed article was ultimately cancelled, no doubt for reasons of security. Years later, the amazing story was published by Michael Schratt, who generously provided background material for this scale model."
For more info, please visit this link:http://www.ufowisconsin.com/news/n2003_02xx_flyingsaucersforreal.html
| THE KIT |
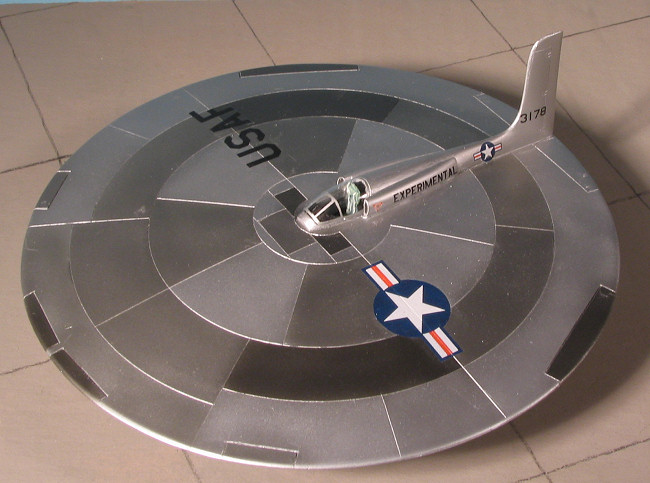
You may well be tempted to say "this looks like an Anigrand Craftworks kit". Well, you'd be right as they did the master and casting under contract from Fantastic Plastic. The result is a kit that is like all the other Anigrand kits you may have ever bought or built. The detail is well done and while seems a bit overdone, when it is painted it will look just fine. There are a few air bubble holes to deal with as well as some resin flash, but nothing out of the ordinary for those of us who love resin kits.
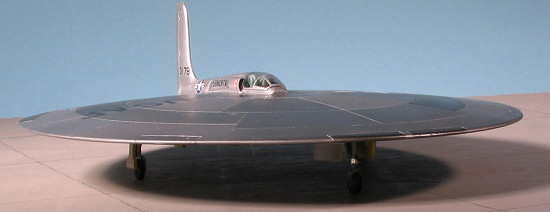
 Basically, most of the kit mass is the upper and lower fuselage halves. No need to fuss over wing alignment on this one. It appears that there are alignment pins/slots for the upper fuselage, but I'll have to wait to see how this works once I remove some of the resin pour stubs. There is a cockpit which includes a seat and control stick. The kit seat is detailed with belts and is much better than the average Anigrand kit. Canopy is fairly well done, but lacks easy to see framework detail so masking will be tricky. You get sturdy landing gear and wheels and since the kit isn't very heavy, with these short gear, things should be just fine in terms of weight warpage. There is also a set of louvered jet exhaust and an upper wing fin assembly. Gear doors are a tad thick, but well formed. Thanks to a non-complex shape, those wishing to replace them with card stock or brass sheet won't have any problems in this area. I have been informed that no nose weight is required.
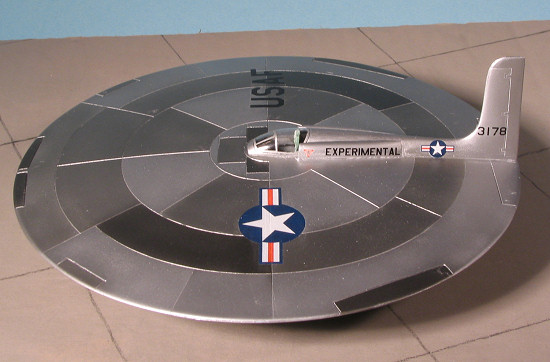
Instructions are quite different from the Anigrand varieity. The single sheet has a historical background and actual construction steps with photos. There is a small two view of the kit to help in decal placement. It shows a multi-hued unpainted metal craft. The decals are ALPS printed (or something similar) by JBOT and very nicely done. They come on a single carrier so will have to be cut separately prior to application. This will help in reduction of carrier film that always seems to be so obvious on unpainted metal models.
| CONSTRUCTION |
 I started out by cleaning up the saucer sections and then dry fitting them MANY times. The little alignment pin thingies are not really alignment pins, according to Fantastic Plastic. I eventually removed all but one and then cemented the saucer sections together. I recommend a slow setting
 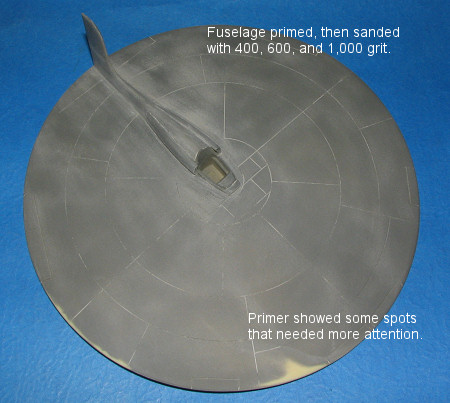 super glue for this. I didn't use it and it was a bit of a mess. Once cleaning all the excess glue off things, I glued on the tail section. Then a few rounds of filler and a coat of primer. I used Alclad II primer. It covers well but is a bit coarse, especially around the vertical surfaces where it was downright rough. This is probably because it dries quickly. A good sanding with 400,600, and 1,000 grit paper showed up a few spots that needed attention and smoothed the surface out considerably.
| COLORS & MARKINGS |
I then painted the entire saucer section with Alclad II Aluminum. I noticed that after setting the saucer upside down for a day or so, I had a slightly warped fin. Nothing that a dose of hot water from the kettle wouldn't fix!
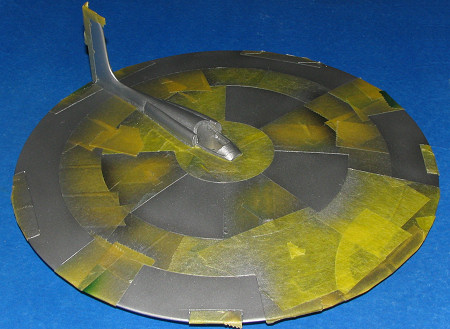 Then it was on to a variety of shades of Alclad II, some of which are very close to each other, though I didn't know that until after the masking had been removed. Thanks to the deep engraved panel lines, cutting the tape was a very simple
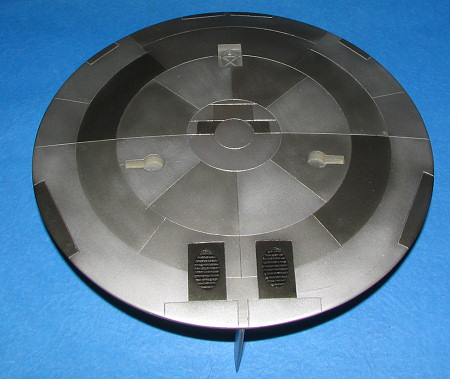 task, though it was still a time consuming job. Eventually, you'll have a saucer covered with tape aside from the last application, and in this case, it was basic aluminum. The wheel wells and inner gear doors were painted zinc chromate yellow.
Then, like undoing the wraps on Frankenstein's monster, the paint job revealed itself! "It's alive, it's alive".......oops, bit carried away there. With the paint fully done, I next attached the landing gear and then moved on to the decals.
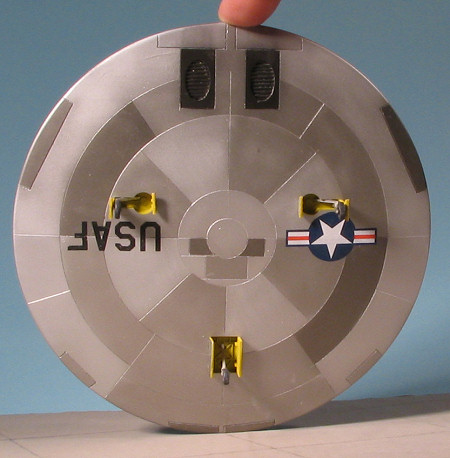
These are ALPS printed by JBOT and are VERY thin. In fact, I had trouble with about half of them due to this thinness. They tore and had bits break off. The markings on the right side and bottom are less than perfect and will be replaced prior to any attempt to enter this in shows. The ink pattern on the red, for example, was quite prominent, though I will say that the white was pretty opaque and I noticed no problem with bleed-through. Still, I'd recommend robbing the spare decal bin if you are in the least bit ham-fisted. The serial numbers came from the spares bin.
| FINAL CONSTRUCTION |
 The rest of the build was pretty normal. The gear doors, which may be grossly over-scale in thickness, but who knows without photos, fit very well once cut. This is thanks to the longer than the norm gear door hinges, which miraculously stayed intact. I then glued in the control and the seat, which I painted some odd colors. I also had less than the usual trouble with the canopy. While not exactly a perfect fit, it is so much better than some of my other attempts. This is not the fault of the manufacturer, but me as I'm not good with vac canopies. By using thin strips of tape, I was able to mask it successfully and used clear paint to attach it.
A bit of pastel exhaust and that was it.
| CONCLUSIONS |
This one is near unique in my collection. Only the XF5U-1 has such an interesting planform and that is not as pure a disc because of the tailplanes and props. This one is a bit of a cross between the 'Area 51 UFO' and a standard prototype. The evidence for its existence seems clear, but until the wraps are pulled off it, it will remain a mystery and superb fodder for the 'whiffers' out there. Thanks to the rather uncomplicated construction and minimal need for resin repair, this would make a superb first shot for a resin kit builder.
May 2006
#1415 in a series.
Copyright ModelingMadness.com. All rights reserved. No reproduction in any form without express permission from the editor.
If you would like your product reviewed fairly and fairly quickly, please contact the editor or see other details in the