Heller 1/72 F-94B Starfire
| KIT #: | 0302 |
| PRICE: | Around $10.00 when you could get it new |
| DECALS: | Two options |
| REVIEWER: | Scott Van Aken |
| NOTES: | Currently (March 2005) OOP |
| HISTORY |
In the late 1940s and early 1950s,
after the Soviet Union detonated their atomic bomb using a back-engineered
B-29, the new USAF realized that it would need to have something to combat
that. What was needed was an all-weather bomber interceptor. Problem
was, they didn't have one. To design a specific aircraft was going to take
time and N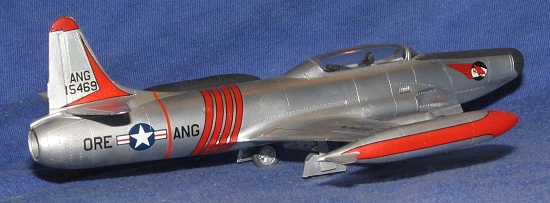 orthrop was the main
contender with its F-89 Scorpion. But until that Scorpion entered service,
there needed to be a stop-gap.
orthrop was the main
contender with its F-89 Scorpion. But until that Scorpion entered service,
there needed to be a stop-gap.
That was found by taking a T-33 Shooting Star, adding an afterburner to it and installing a then state-of-art radar system. A T-33 was chosen as the airframe was already proven, it held a second seat for the Radar Intercept Officer, and could carry the needed electronics and weapons. The F-94A was identifiable by having the wing tip tanks under the tip of the wings like on the F-80. The B model had some electronic improvements and the larger tip tanks that were so common on T-33s and straight winged F-84s. The A models were used in Korea as night fighters with, I believe, some B models joining them in the last months of the war. The later F-94C was a much larger and improved airframe with a different tail section, engine and nose. Few of these planes remain extant, though there is an F-94A/B at the USAF museum.
| THE KIT |
It is probably no surprise that when
Heller issued its very nice T-33 kit in the mid 1980s that there would be
an F-94. Basically all that was needed was a new fuselage and a few other
small bits; the rest of the sprues coming from the T-33. Raised panel lines
were in vogue at the time so this is from that generation. Also in vogue
was a relatively well detailed cockpit with a tub,
 seats and instruments with
raised detailing. While the wheel wells were boxed in, no detailing was
provided; same went for the speed brake wells. No real options aside from
the choice to add wing mounted gun pods were provided, though you could
pose the canopy open as long as you weren't fussy about things.
seats and instruments with
raised detailing. While the wheel wells were boxed in, no detailing was
provided; same went for the speed brake wells. No real options aside from
the choice to add wing mounted gun pods were provided, though you could
pose the canopy open as long as you weren't fussy about things.
The kit suffered from sink marks, ejector pin marks, but no flash. There were huge sink areas on the very visible wheel surfaces and lower fuselage. Ejector pin marks are on all the gear and a number of other parts like inner gear doors and the like. In those days, modelers didn't fuss about these things as they do now and so we didn't worry about fixing them.
Instructions for Heller kits of the time were not bad, though all paint references were for Heller paints (with a chart included to decipher what the numbers meant). Heller decals were provided for one aircraft, the unit of which escapes me, but it did have the red 'Arctic' markings on the wings and tail section.
| CONSTRUCTION |
When I built this kit back in December of 1985, I was on a US fighters kick. In fact, it was the second that I'd built in less than four months. What happened to the other I have no idea, but I do know that I used a Superscale decal sheet on both of them.
Anyway, when one is cranking out 15
models a month (yep, I was in that stage), then simplicity and ease of
construction were what was sought and this kit fit right in. I first built
up the cockpit. It has nicely done seats, and the back seat has the large
scope shield in the extended position. It does somewhat fold forward so
that the RIO can get in the back seat, but
 comes right up to his face
when he is using it. If you have seen the movie 'Jet Pilot', one of John
Wayne's more forgettable films but with some great aviation scenes, one of
them involves and early F-94 doing a radar intercept of a B-36. These radar
sets were not the usual PPI scope we are all used to seeing, but actually
had spikes running along a datum line. The position and intensity of these
spikes helped guide the aircraft to the target after being brought into the
vicinity by ground control.
comes right up to his face
when he is using it. If you have seen the movie 'Jet Pilot', one of John
Wayne's more forgettable films but with some great aviation scenes, one of
them involves and early F-94 doing a radar intercept of a B-36. These radar
sets were not the usual PPI scope we are all used to seeing, but actually
had spikes running along a datum line. The position and intensity of these
spikes helped guide the aircraft to the target after being brought into the
vicinity by ground control.
But I digress. The cockpit tub was then glued to one side of the fuselage along with the nose gear well. Then the exhaust section was glued in place and a weight glued in the nose. It is now loose and rattles around rather effectively. Blanking plates were glued to the inside of the intakes. These intakes are part of the fuselage so no seams to worry about. The fuselage halves were glued together and filler used on the seams. I also needed filler on the rather large sink areas near alignment pins, the ones on the lower fuselage being rather nasty.
 Next, the wings were
assembled; the gear wells being molded in with the lower wing. I also glued
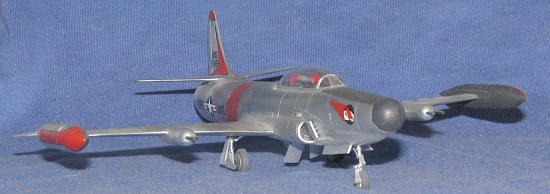
together the wing tanks and gun pods at this time. The gun barrels are
little more than short pieces of rod that really need to be replaced with
something more convincing. There is no positive locator for these pods, but
they do fit to where the bottom of the pod fairing nearly meets the gap
between the ailerons and flaps. No filler was used to attach these or the
tanks. Same cannot be said for when the wing was glued in place. I used
quite a bit on all wing/fuselage join areas. Tail planes fit with no
hassles.
Next, the wings were
assembled; the gear wells being molded in with the lower wing. I also glued
together the wing tanks and gun pods at this time. The gun barrels are
little more than short pieces of rod that really need to be replaced with
something more convincing. There is no positive locator for these pods, but
they do fit to where the bottom of the pod fairing nearly meets the gap
between the ailerons and flaps. No filler was used to attach these or the
tanks. Same cannot be said for when the wing was glued in place. I used
quite a bit on all wing/fuselage join areas. Tail planes fit with no
hassles.
I then glued in the canopy, followed by the small windscreen. I forget what I was using for masking back then, but I suspect it was liquid mask for the round bits and Scotch tape for the flat ones.
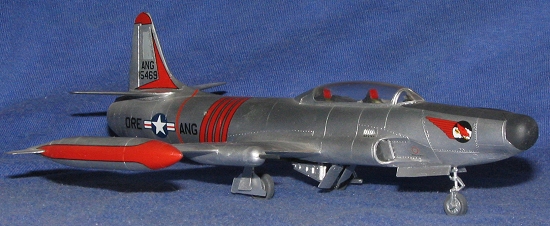
| COLORS & MARKINGS |
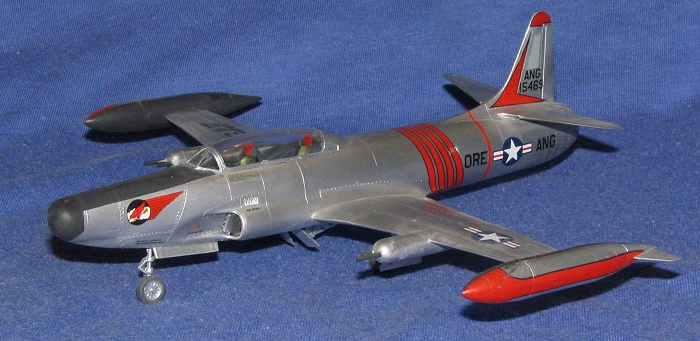
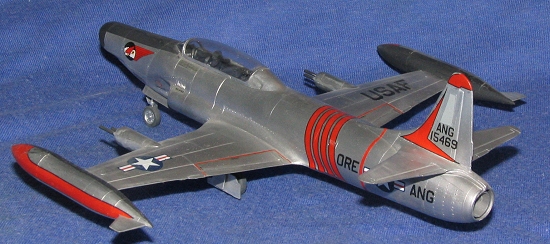
I then proceeded to paint the fin antenna section with light grey, the nose and inside of the tip tanks in black, then masked those. Everything else was drenched with Testors Aluminum metallizer. When dry, it looks like I gave it a clear coat. It can't be Testors GlossKote as it hasn't turned yellow, so it must have been Gunze gloss clear as I was using a lot of Gunze products back then and had not yet discovered Future. I yanked off the masking and painted the wheel wells with what looks to be FS 34079 dark green. I don't know why. I was younger and didn't know any better.
 Then the landing gear and
wheels were glued in place as were the gear doors and speed brakes. Judging
by the glops of super glue on some parts, a few of these bits have come
adrift over the last near 20 years and 5 or 6 moves.
Then the landing gear and
wheels were glued in place as were the gear doors and speed brakes. Judging
by the glops of super glue on some parts, a few of these bits have come
adrift over the last near 20 years and 5 or 6 moves.
During these days, I tended to have decaling as the last step. For this particular model, I chose a nice Microscale sheet (the split had not yet occured) that had the Commander's plane from the 123rd FIS, Oregon ANG. The decals fit fairly well with little real trouble. I must have goofed up the fuselage stripes as they don't match on the bottom, crossing over on the front and not meeting in the back. Naturally, I didn't do the usual slicing to get rid of the cross-over or try to match the gap as I was on a mission and taking that five minutes would mean I couldn't go on to the next kit!
I pulled or peeled the masking from the clear bits, blessed the model, stuck it on the shelf and that was it. Probably did it all in just a few days. Now it would take me two weeks at least!
| CONCLUSIONS |
The Heller F-94B is still out there. I see them all the time at swap meets when I go to contests. I don't see them on contest tables. For many modelers, it is old, it doesn't have the right kind of detail (eeewww! raised panel lines!!!), or enough. There is little in the way of aftermarket save a cockpit set and wheels as decals for it are very difficult to find. But it does make into a very nice little model, even looking back 20 years. I know I have one in my stash awaiting that time when I'll get around to revisiting this neat 50s jet.
March 2005
Copyright ModelingMadness.com. All rights reserved. No reproduction in part or in whole without express permission.
If you would like your product reviewed fairly and fairly quickly, please contact the editor or see other details in the Note to Contributors.