| KIT #: | 098 |
| PRICE: | $3.00 from the 'junk kit' table |
| DECALS: | Three options |
| REVIEWER: | Scott Van Aken |
| NOTES: | 1998 release |
| HISTORY |
The North American F-100 Super Sabre was an American supersonic jet fighter aircraft that served with the United States Air Force (USAF) from 1954 to 1971 and with the Air National Guard (ANG) until 1979. The first of the Century Series of USAF jet fighters, it was the first USAF fighter capable of supersonic speed in level flight. The F-100 was designed by North American Aviation as a higher performance follow-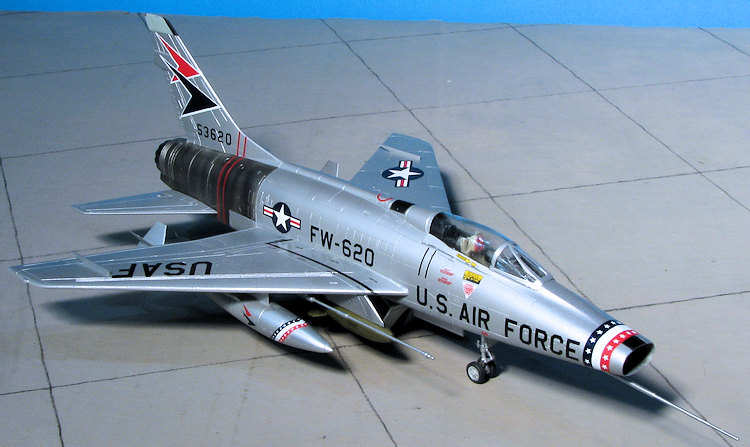 on to the F-86 Sabre air superiority fighter.
Adapted as a fighter bomber, the F-100 was supplanted by the Mach two class F-105 Thunderchief for strike missions over North Vietnam. The F-100 flew extensively over South Vietnam as the air force's primary close air support jet until being replaced by the more efficient subsonic LTV A-7 Corsair II. The F-100 also served in other NATO air forces and with other U.S. allies. In its later life, it was often referred to as the Hun, a shortened version of "one hundred".
ANG F-100s were retrofit with F-102 afterburner nozzles, which were much less maintenance intensive than the North American versions. This was also fitted to some NATO planes. The type was finally retired from military service in the US when a 113 TFS F-100D was flown to the boneyard in December 1979. Hundreds were expended as QF-100 drones. The type lasted in military service longer with other nation's air arms. At this writing, there are seven F-100s flying as warbirds, six of them two seat F-100Fs.
| THE KIT |
This kit first hit the streets in 1998 and at first glance, one would think that this was little more than a reboxing of the older, but still nice ESCI kit. This is not the case as this kit is a complete retooling, though perhaps b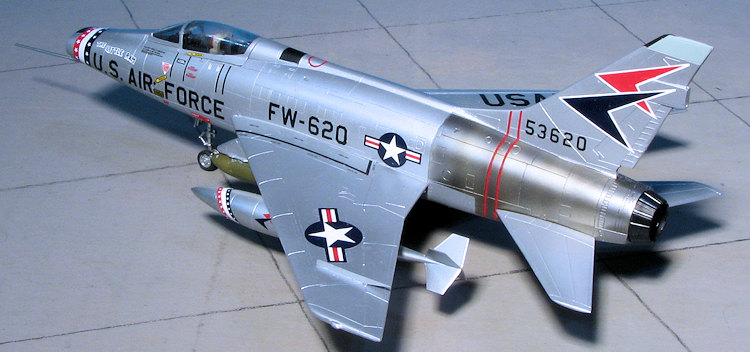 ased on the ESCI version. Like the ESCI kit, it is a pretty simple kit. There is a single piece canopy, a fairly nice cockpit tub with a three piece bang seat and no decals for the instruments, though there is raised detail instead.
The instructions recommend 20 grams of nose weight, which is a considerable amount. Fortunately, even with the cockpit and nose well in place, there is room to place it. There is a single piece nose section which means no intake trunking, the depth of the intake being about an inch. Wings have a complete lower piece with separate upper halves. All the holes for the pylons are already opened and there is a separate hole for the two different refueling probes (one straight and the other 'cranked'). Wing fences are separate.
On the bottom of the plane is an insert for the two inner guns and a separate speed brake, which can be posed lowered. This was normal as the hydraulics bled down. A tail hook is provided and one gets the option of a standard or F-102 burner nozzle. Landing gear and nicely molded and there are separate inner mian gear doors. I mention this as often times these inner doors were latched up. Same is true for the large nose gear door. With three pylons per wing, you'd expect something to put on them. The kit provided two large fuel tanks, a pair rocket pods with aerodynamic fairings and a pair of M117 bombs. These latter two items are nice, but would benefit from replacements. I would be remiss if I did not mention a glitch in the kit. For some reason, Italeri thought there was an additional frame about two thirds the way back on the canopy. This does not exist and you'll need to sand this off.
In brief, this is not the ESCI kit though it is similar. Major differences in this kit are:
A spurious extra frame on the canopy that shouldn't be there, the ESCI canopy is correct.
The shorter 275 gal tanks, the ESCI kit has the larger drop tanks.
Improved main landing gear parts with brake cables and slightly more detailed wheels.
 A cockpit with raised switch/gauge detail while the ESCI kit had a smooth instrument panel and side consoles for use with the cockpit decals provided.
A better ejection seat.
The kit comes with M117 750lb bombs and rocket pods while the ESCI kit did not have any stores
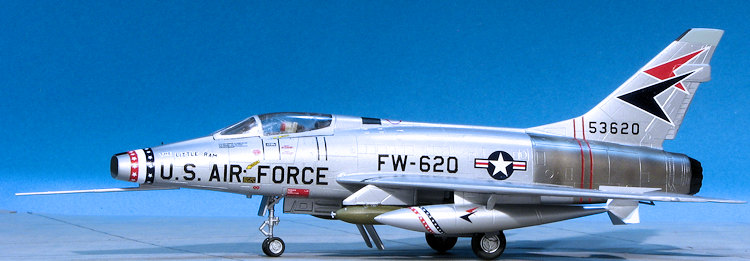
Instructions are nicely done with Model Master paint references. Now that the MM enamel paint line has been reduced, you may have difficulty finding some of the shades listed, especially on the camouflaged options. Three markings options are provided. One is the box art plane from the 353 TFS in 1958. This is probably in unpainted metal. A bit later in life bare metal F-100s were painted in aluminum lacquer. Next is a French Version in a camouflage scheme reminiscent of the USAF SEA scheme but with different colors. This option has a huge shark mouth. The third option is a Danish plane from 1961 in unpainted metal. As always, check for reference photos to be absolutely sure of the colors as kit instructions have been known to be wrong. The decals are quite nicely printed by Cartograf. There are quite a few aftermarket sheets for this plane in case you want something different.
| CONSTRUCTION |
The LHS takes kits that it buys in collections that are either missing parts or have been started and puts them on the 'junk kit' table for a few dollars. Despite having more kits than I can build in my stash, I am drawn to the items on this table. This one had the wings together (without opening the hole for the refueling probe), wheels and underwing ordnance together and most of the parts off the sprue in a bag. It had also been in a fire and there was soot on the wing and inner fuselage halves. Not sure how viable the decals might be if they got too hot.
 As the previous owner had simply glued the aforementioned parts, I cleaned up the seams as required and then took the bits to the paint booth. There, those parts that needed it were painted with Alclad II aluminum. Meanwhile, I sanded away the errant frame and polished the canopy best I could before dipping it in Future.
The cockpit section was painted using dark gull grey with a medium grey seat. Instrument panels were painted black and dry-brushed with white. The instrument panel is an iffy fit in one fuselage half (it is supposed to fit on the cockpit floor, but it is a butt join there as well. The cockpit and nose gear well are also not a very positive fit.
I taped the fuselage halves together and stuck on the wings and tailplanes to check for weight. Unlike the 20 grams recommended in the instructions, it requires considerably less. I'd guess at about 4 grams. I installed a piece of lead weight and then closed the fuselage halves. I had an Obscuro resin wing with separate slats that I wanted to use. Unfortunately, it was too small for the opening and I ended up snapping off one of the wings attempting to get it to fit, so I tossed it and used the kit wings. After the usual sanding, the wings were glued on and more sanding ensued. Same for the nose cone. The plastic used by Italeri on this is 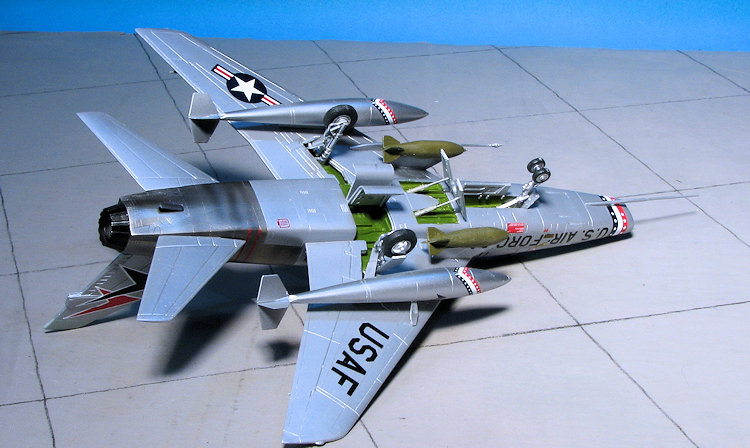 rather soft so one has to be careful not to over do it.
The gun sight piece was installed as was the brace for the inner main gear doors and the tail bumper. This latter item is also a butt join so take care. I decided at this time to do a plane from the late 1950s and early 1960s so I found the ghost on the lower wing for the refueling probe and opened this up. I also filled in the outer pylon as few period photos showed this installed. Since these photos did not show the tail hook as the upgrade that included this part did not start until 1962, I filled in that hole as well. Plastic card and super glue were the fillers utilized. The canopy was masked and attached. It does not fit all that well, but a bit of trimming on this part and the fuselage got something reasonable.
As a note, when it comes to having the inner main gear doors down and the speed brake lowered, I looked at a lot of period photos of the F-100D and found that most had the inner main gear doors lowered. As for the speed brake, European Sabres more often had this lowered on the ground than US planes. In fact, the vast majority of photos of US F-100s showed the speed brake raised.
| COLORS & MARKINGS |
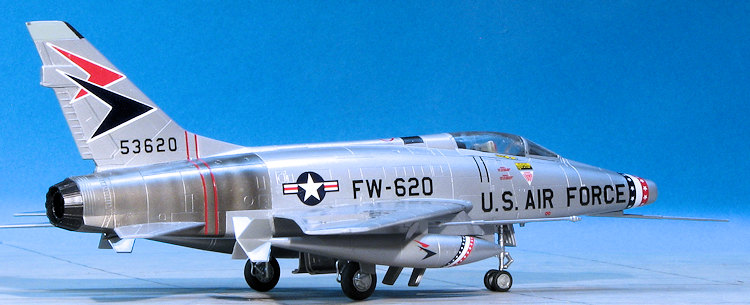
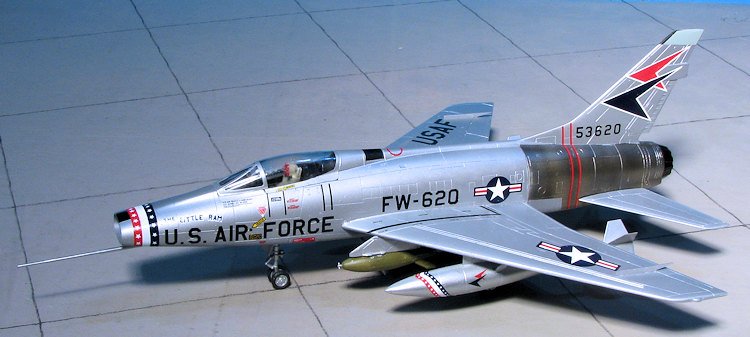
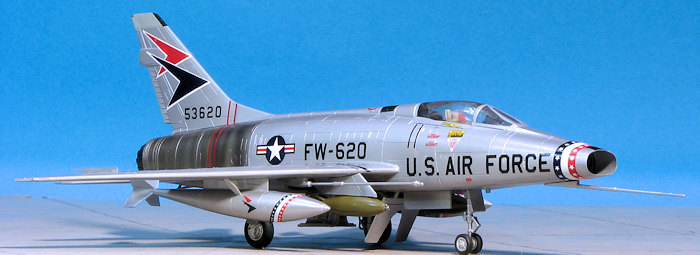
First step was to paint the hot exhaust area. Alclad II was used for all the metallics in this area. I started with magnesium and streaked on a bit of titanium, light burned metal and steel. Not sure how realistic it is, but it looks better than just a straight color. This was then masked when dry. The rest of the airframe was painted with the last of my Floquil old silver. To be honest, this paint gave me some issues and though it looks more like painted aluminum (which is what I wanted) than the Alclad colors, in the future, I'll use Alclad. The various wells were painted chromate green with a brush and the antennas were masked around and painted black. The fin tip was painted ADC Grey with a black leading edge.
 Then I started adding the landing gear. These all fit quite well, but are not as positive a fit as I'd have liked. Gear doors are a mixed bag. The two small outer main gear doors were a real challenge to get into place and I had to use on-line images of the real deal to get them close to correct. I also glued on the burner can at this time.
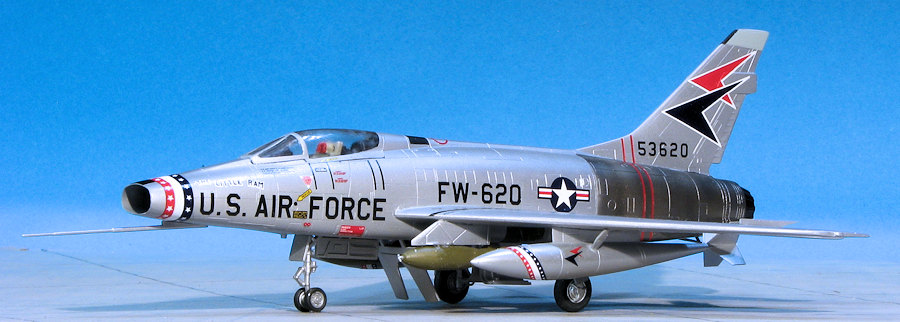
Meanwhile I'd been adding decals. For this build, I was using Microscale sheet 72-98. This was a partial sheet I got from somewhere as one of the options was already used as long as some of the common markings. So I used the kit decals for all the common markings and insignia. These worked quite well. For the specialty markings, I used the 21 TFW option, which is pretty straight forward compared to some of the more flamboyant schemes. Since the markings are fitted for the Hasegawa kit, those that fit around things don't fit too well. This was particularly true of the fuel tank stripes which are too short, even when moved forward on the tanks. The nose band also was not a great fit, but one expects things like this when fitting markings to a kit for which they are not designed. Eventually I got them all in place and continued adding bits.
 Items in the final stretch included the inner wing pylons, which caused me some grief. You see, I had dutifully painted them and had them setting on the work bench, all set to be installed. I glued on one and when I reached for the other, it was gone. The usual frantic search commenced to no avail. Fortunately, that night the local IPMS meeting was a 'bring your spares' night and while there was no Italeri F-100 inner pylon, there was a pair of Hasegawa pylons. These proved to be too large by about 20%, but they could be cut down and so that is what I did, attaching the new pylon after it was reduced and painted. The bombs were glued on and the speed brake attached in the lowered position. Then the refueling probe and the outer wing tanks. The little supports are too large and wise modelers (of which I am not one) will reduce the size of these as well.
The pitot tube was then attached and I decided to give the airframe a coat of Metallizer Sealer to help seal in the decals. Last thing to attach were the tail planes, the masking was removed from the canopy and it was done.
| CONCLUSIONS |
Aside from self inflicted issues and the redundant canopy frame, this is a nice kit. Fit is good and it is a lot more available than the ESCI kit. It also does not suffer from the glitches of the Trumpeter versions. It has been reboxed by Revell and Tamiya so finding one should not be an issue. If you like the Hun and model in this scale, pick one up.
April 2016
Copyright ModelingMadness.com
Thanks to me for the review kit. If you would like your product reviewed fairly and fairly quickly, please contactthe editor or see other details in the