Sword 1/72 F-80C Shooting Star
| KIT #: | SW72025 |
| PRICE: | $29.95 MSRP |
| DECALS: | Two options |
| REVIEWER: | Scott Van Aken |
| NOTES: | New mold kit with resin parts |
| HISTORY |
The Lockheed P-80 Shooting Star was the first jet fighter used operationally by the United States Army Air Forces, and saw extensive combat in Korea with the United States Air Force as the F-80. As one of the world's first successful turbojet-powered combat aircraft, it helped usher in the "jet age" in the USAF and other air forces worldwide. One of its claims to fame is in training a new generation of pilots, especially in its closely-related, and actually faster, T-33 Shooting Star trainer development.
Shooting Stars first saw combat service in the Korean War, employing both the F-80C variant and RF-80 photo-recon variants. The first jet-versus-jet aircraft battle took place on 8 November 1950 in which Lieutenant Russell J. Brown, flying an F-80, claimed 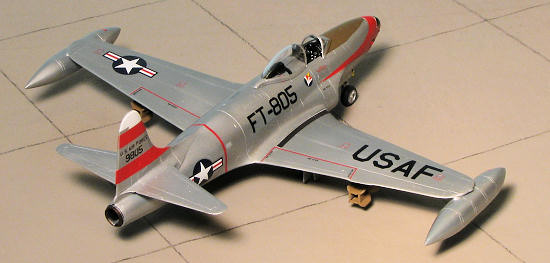 a MiG-15 shot down. Despite the initial claim of success, the straight-wing F-80s were inferior in performance to the MiGs and were soon replaced in the air superiority role by the swept-wing F-86 Sabre. When sufficient Sabres were in operation, the Shooting Star was assigned to ground attack missions, advanced flight training duties and air defense in Japan. By the end of hostilities the only F-80s still flying in Korea were photo-recon variants.
F-80Cs equipped ten USAF squadrons in Korea:
Of the 277 F-80s lost in operations (approximately 30% of the existing inventory), 113 were destroyed by ground fire and 14 shot down by enemy aircraft. F-80s are credited by the USAF with destroying 17 aircraft in air-to-air combat and 24 on the ground. MajorCharles J. Loring, Jr. was posthumously awarded the Medal of Honor for his actions while flying with the 80th Fighter-Bomber Squadron, 8th Fighter-Bomber Wing on 22 November 1952.
| THE KIT |
 Sword's F-80C (Incorrectly listed as a P-80C on the box) is the first new mold F-80 kit in 1/72 scale since the venerable Airfix version of the early 1970s. The kit includes two sprues of grey plastic (actually one sprue cut in half to fit into the box) a clear sprue with a separate windscreen and canopy, and a small bag of resin parts. These resin parts consist of the center main gear well, complete nose gear well, seat, gun sight and landing light section. I'm pretty sure the seat is the proper one for a Korean War plane. The resin is superbly done with considerable detail. It would have been nice to have the cockpit tub also in resin as the plastic detailing, while good, is not as nice as it would have been in resin. In fact, the plastic tub is somewhat generic without all the little details and panels as on the real aircraft.
Detailing on the plastic parts is excellent with fine engravings. I found flash on several pieces, but this is to be expected from what is really a short run kit. I also noted that the sprue attachment areas intrude into most of the parts so some care will be needed to remove the bits and to clean up these attachment areas. There are blanking plates for the intakes to prevent see-through and the kit comes with both Misawa and standard tip tanks. The majority of planes used the Misawa tanks. Speed brakes 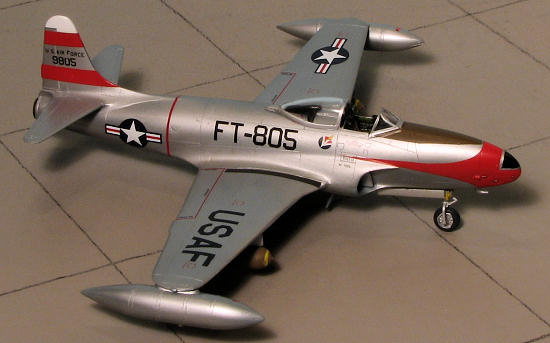 are separate items as well with all the appropriate retraction struts included. This is true of the main and nose gear legs. The nose gear has a separate wheel/tire piece. Two styles of nose wheel are provided, though most will use the later variant that is the same design as the main wheels. Still a good idea to check photos. The only ordnance included are a pair of 500 lb bombs and racks. There are indentations on the underside of the wing for these rack. One would probably be wise to open them up a bit more to ensure a good fit.
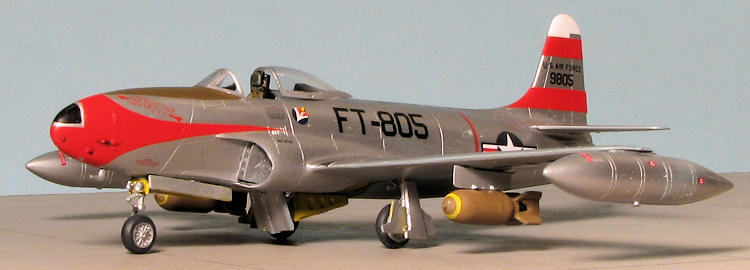
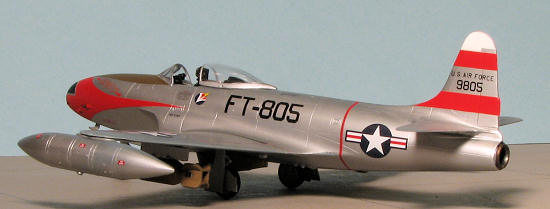
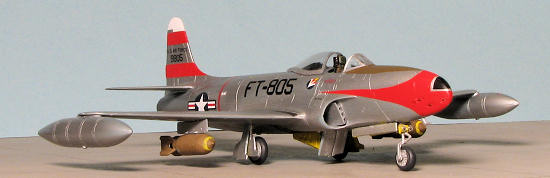
Instructions are well done with generic color references and indications as to what to paint the small bits during construction. Detail alignment information is given to be sure that we get things properly in position. Two options are given, with both aircraft in overall unpainted metal. First is the box art plane "Kansas Tornado" from 1951. No unit info is provided, but it is the 51st FIW. The second is "Eagle Eye Fleegle" from the 36 FBS/8 FBG in 1952. The decals are superbly printed by Techmod and provide either the OD or Black anti-glare panel for your option of choice. Full stencil suite is also provided. The blue on the 51 FIW plane will have to be painted on as will the red on the lower nose of the 36 FBS version. The very tips of the wing tanks are also in unit colors. No wing walk decals are given so paint will be required here as well.
| CONSTRUCTION |
This one has subassemblies so there is where I started. This meant a cockpit, Misawa tanks, and bombs were removed from the sprues and had the parts cleaned up. I'll save a lot of repetitive verbiage by stating that this is a short run kit. All of the pieces will need the mating surfaces sanded and the areas where the sprue gates intrude on the part cleaned up. I used filler on everything so will only mention the areas where I used more than one application.
 The tip tanks have rather prominent bands around them. You may think these are over-scale, but not by much as photos show they existed. If anything, some of you will want to replace the sanded off sections with thin strips. I just rescribed the areas as I am lazy. I found the cockpit to fit rather well, though the installation of the instrument panel was quite fiddly. The seat will be left off until just before attaching the canopy piece.
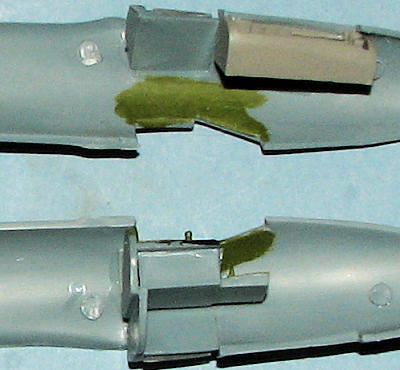 Anyway, I also glued together the jet exhaust sections after painting the inside of it black. This was glued into a fuselage half. At the same time, I attached the resin nose gear well after removing the pour stub. This kit has intake assemblies to build. Pay special attention to which goes where. One side had a small notch where the splitter plate fits. These are also fussy fits and it may be worthwhile to glue in the larger piece to the fuselage half first, fill and sand the seam and then install the splitter plate. I didn't and felt I should have.
With those in and dry, the interior and rear bulkhead can be installed. There is no positive guide as to where it all goes, but the lower rear bulkhead needs to ride on top of the intake pieces and flush with the back of them. If not, the wing won't fit. With that installed, I glued in some nose weight and then cemented the fuselage halves together. When doing this, be sure that the horizontal tailplanes line up. I didn't and mine are slightly askew. I glued the fuselage in stages to be sure things properly lined up and to minimize filler and sanding.
I glued the wing halves together and found the fit to be fairly good. Cementing the main gear well was not a problem and fit of that was excellent. The wing tip areas needed some additional filler, though I was pleased that the tips themselves are a single mold.
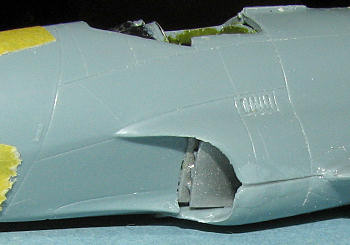 The next step was to install the wings. You'll need to do some trimming to get it to fit properly. I have to say that I'm less than enthralled by having the intake split into upper and lower sections. The fit wasn't that great and it took additional attention to seal the seam. Even when all was done, the lip looked a bit too large. Perhaps having a separate forward intake piece would
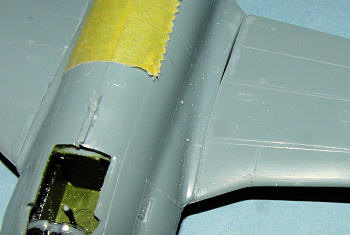 have produced better results or perhaps it is just me. I also found a bit of a gap on the left upper wing root and a step on the right front, even after a lot of trimming. Perhaps this would be a case where gluing the upper wing halves to the fuselage first would be a wise course of action. Fit near the nose gear well was not good either, but the soft plastic aids in smoothing this out.
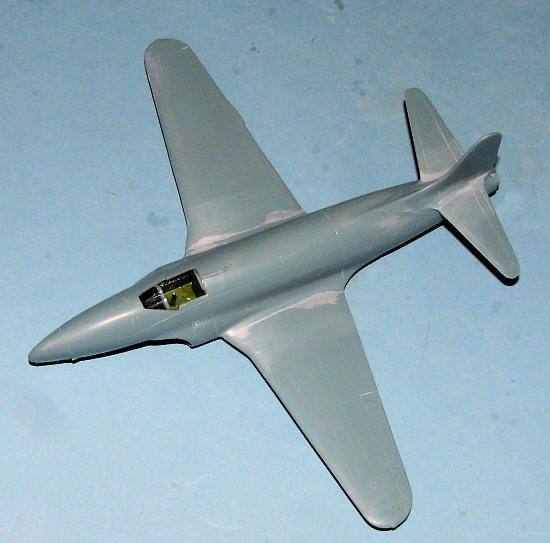
After multiple applications of filler and sanding, the wing was smoothed out and I glued on the tailplanes. Fit here is fairly good, but still needs filler, as has nearly every join I've had to do. It was now time to look into installing the seat and attaching the canopy. Couple of things about the seat in this kit. While it is definitely not the later seat as used in the T-33, it is a tad off in my eyes regarding the early seat. Specifically, the head rest is too narrow. OK, big deal. We can live with it, but I thought you'd like to know. Secondly, the instructions state to paint it chromate green. Looking through the reference book, I saw them in black and in what looked to be a light brownish OD, but none looked green or yellow. I chose to use black for mine with a more greenish drab for detail bits and for the belts.
The seat was then installed and I found it to be a tad too tall to fit the canopy closed atop it. It will be fine for an open canopy as these seats could be and often were raised once the pilot was on the ground and ready to get out. I then masked the canopy and the windscreen. The windscreen was glued in place and the fit is very good indeed. Like on the real plane, it snuggles down flush with the fuselage in the front. I then cut strips of tape to fill the cockpit and it was tie to paint.
| COLORS & MARKINGS |
 Overall unpainted metal with an OD anti-glare panel are what is called for. As these planes often had the paint oxidize to a solid sheen, I didn't do any of the usual multiple metallics on this one. I used Alclad II Aluminum and would recommend a primer coat as often times one can rub some of this paint off bare plastic if handled a lot and the underneath plastic is polished smooth. Ask me how I know! The only other part I airbrushed was the, which is listed as white in the instructions. I've seen it also a light grey so you could use that if you wished. The nose radome was brush painted as were the wheel wells, which were done using Testors Zinc Chromate Yellow in the small bottles. This color was also painted on the inside gear doors but not the speed brakes. Photos show that the nose gear door interiors were definitely this shade and the speedbrakes were unpainted.
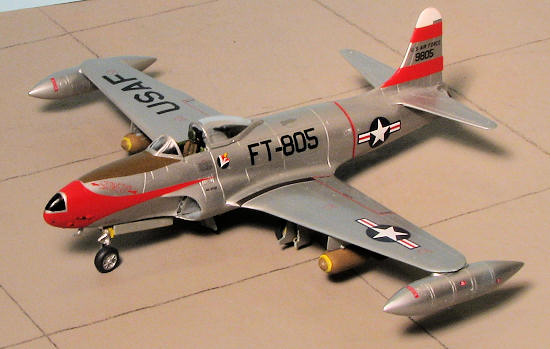
Once the paint was on and dry, I started to apply decals. I wanted something different from the kit markings so found an old Microscale sheet, 72-338, which had several Korean War F-80Cs on it. I chose the red nosed, 25 FIS plane, "Seductive Shirley" for this build. The Microscale decals went on very well, despite their advanced age. Microscale stopped doing a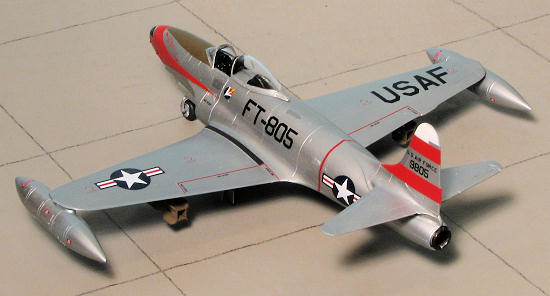 ircraft decals and split those off to Superscale well over 20 years ago. The only issue I had was it took a while for the decals to slide off the backing. Usually it is nearly instantaneous. The use of Solvaset helped the nose markings to snuggle down quite well. I did notice that the Microscale placement guide had the wrong tail serial shown. For all the other markings, I used the kit decals. Both worked superbly, both were quite thin as well so one needs to take care with their application to prevent tearing. I used the kit OD anti-glare panel decal and had to trim it so it wouldn't cover up the nose art. That is why it looks so wretched.
I then attached the wing pylons and the landing gear with wheels. You'll need to drill out the attachment holes for the wheels and for the main gear. In fact, every hole for pylons and such are too small and too shallow so have our drill set handy. With the plane on its wheels, it was given a clear coat to seal things in. BTW, you'll need to paint or use black stripe decals for the wing walks. All F-80s seem to have them and while most are skinny, some are quite broad, so check photos if you can. DOLT ALERT!! I also just realized that the nose gear has been put on the wrong way. While I redid several of the images after breaking it off and putting on correctly, there are still some that show it backwards, so no need to send e-mails. DOH!
| FINAL CONSTRUCTION |
There is quite a lot in the final construction part of things. First of all, the gear doors and speed brakes need to be installed. The main and nose gear leg have retraction struts that are fragile to the max and need to be clean up before installation. I broke the nose retraction strut removing it from the sprue. The attachment points are also a bit on the vague side. Not so vague are the speed brake links. However, fitting things well will take nerves of steel to keep from tossing them into the dustbin.
 Once the gear doors are removed and cleaned up (be cautious of the large main gear doors as I bent them both while removing them from the sprue), installation is pretty straight forward. Sword has made a major boner in the outer main gear door assembly sequence. The one right next to the wheel must go on first or you'll never get the smaller outer door to fit. The instructions have you do it the other way around.
On the nose strut, there is a landing light assembly as part of the resin. This was glued in place and small MV lenses were installed. There are no clear lenses for these in the kit so unless you want the housing empty, you'll need to come up with something.
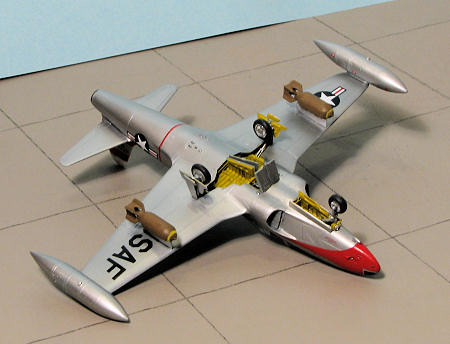
Moving to the wings, the bombs were butt glued to the pylons after having been crudely painted. Then the wing tanks were cemented into position. These are not handed so the data decals will be on the same side on both of them. There are also no where near enough data decals for the tanks. Photos show over twice as many as provided on the kit decal sheet. The next to last item is the canopy. There is a section to fit under the rear of the canopy section, but it causes the canopy to ride far too high up. This was trimmed and sanded, then glued to the fuselage as far back as the end of the guide. Then the canopy was glued atop it, both times using clear, gloss paint. The last piece was the nose pitot tube. I drilled a rather large hole in the lower fuselage for this and was SURE that the part would go time warping off into the future before I got it in place, but I lucked out and it slid right in. A bit of touch-up painting and that was it.
| CONCLUSIONS |
I certainly have to say that it looks TONS nicer than the Airfix kit, despite my misgivings about the intake arrangement. The resin is not overwhelming, the parts fit is fairly good and the decals are superlative for those wanting to do those markings. The end result is a fine addition to my Korean War collection as well as an addition to the P-1 to F-35 display. If you are not squeamish about doing semi-short run kits, then this is one I can easily recommend.
| REFERENCES |
F-80 Shooting Star Units over Korea, Warren Thompson, Osprey 2001. This book is a MUST for Korean war Shooting Stars.
July 2009
Copyright ModelingMadness.com. All rights reserved. No reproduction in
part or in whole without express permission. If you would like your product reviewed fairly and fairly quickly, please contact the editor or see other details in the Note to Contributors.