| KIT #: | 5432 |
| PRICE: | $6.50 at the time |
| DECALS: | Two options |
| REVIEWER: | Scott Van Aken |
| NOTES: | 1984 Boxing |
| HISTORY |
In the late 1940s, North American brought out their improved,swept wing version of the Navy's FJ-1 for the Air Force. This aircraft becamethe F-86 and was a huge success. Republic had already delivered the initial runof it's fighter, the F-84, however, it was obvious that the straight winged F-84was no match of the speedier swept winged F-86.
 A development program was started to apply swept wing technologyto the F-84. What resulted from that was basically a new aircraft. However,there was no funding available for new aircraft, though there was money forimprovements for types currently in service. Thus was born the F-84F, anaircraft with very little in common with the F-84E!
It was initially put into service with SAC as a bomber escort,but eventually became one of the most prevalent types of ground attack aircraftin service. It was an excellent aircraft and was chosen by a number of NATO andother overseas air forces as a standard type. In the US, when it was replaced inthe USAF by newer types, it was given to the Air National Guard and served untilthe early 1970s, when corrosion forced the wholesale scrapping of the type. Thanks to its similarities in planform to the MiG-15, the F-84F has been the 'bad guy' in many 1950s Korean War Sabre movies.There are none still flying that I am aware of, but there are many in museums and as displayaircraft all over the US and Europe.
| THE KIT |
This is a kit typical of the efforts of Monogram in the mid1980s. This boxing is dated 1984 and I do not believe it has been reissued sincethen. There were two versions, both of them are basically the same kit, thoughone was in silver plastic and had what was supposed to be a nuclear bomb. Thedetailing of the kit is all that one expects from Monogram and that is superb.The panel lines are raised as was the fashion of the time.
 Options on the kit are a pilot figure, an open or closed canopy,open or closed speedbrake and a choice of loads under the wing. The inner pylonis for fuel tanks while the outer one can hold either M117 bombs or additionalfuel tanks. There is also a bomb cart to display whatever underwing option is not chosen. There is also a tail brace as the kit will be tail heavy without sticking a bunch of weight in the nose. As a side note, there is another boxing of this plane that provides JATO units and a nuclear bomb.
There are two decaloptions included. One is a SEA painted aircraft with the Texas ANG as shown onthe boxtop. The other is an aluminum one with the 110th TFS of the Missouri ANGduring its call-up to active duty and overseas deployment during the CubanMissile Crisis of 1961. The Monogram decals are very colorful, very glossy andprobably useless. I have had almost no real luck with Monogram decals of thisvintage and it is a shame as the Missouri ANG boss bird is quite colorful.
Overall, a very nice kit and if you can get over the olive drabplastic, should build into a nice kit. The only other option for an F-84F inthis scale is the Heller offering of about the same vintage. I have built theHeller RF-84 and while a nice kit, does not have the detail of the MonogramThunderstreak.
| CONSTRUCTION |
This was one of those kits that I got as a raffle prize. These can be a mixed blessing as it is not infrequent to get a kit that is either started or missing parts. This one was a bit of a combination of both. For that reason, it had sat on my 'to do' pile for years before I decided to give it a go.
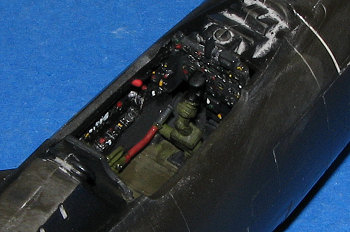 The part that had been started was the cockpit. This area had already been assembled and painted. The part that was missing was one of the large fuel tanks. However, thanks to the kindness of Ben Brown, who was parting out one of these kits, I was able to get another large fuel tank.
There were some bits missing from the cockpit (like the control stick), but the bag of parts (did I mention that this fellow had removed many of the bits from the sprues and put them into a bag) produced one which was duly painted and glued in place. I also glued together the nose gear well and found that there was room for a large fishing weight just above it. That cured the tail sitting problem. The kit has a nicely done exhaust that was cemented into a fuselage half along with the cockpit then the fuselage halves were cemented together after inserting the fuel dump tube. One thing I don't like is that there is a set of alignment pins quite visible in the exhaust opening that sits in front of the exhaust pipe. Either that, or I installed the pipe too far forward.
It was then obvious that something was not right as I had trouble closing the lower forward half. I couldn't figure out the problem so filled the gap with superglue and continued on. The wings were assembled and cleaned up before attaching them to the fuselage. The fit of the wing/fuselage is good; not great, but good. Needs a bit of filler on the seam. The wings slot into each other inside the fuselage helping to provide the proper angle. Same for the tail planes, but those were quite difficult to get properly into place.
| COLORS & MARKINGS |
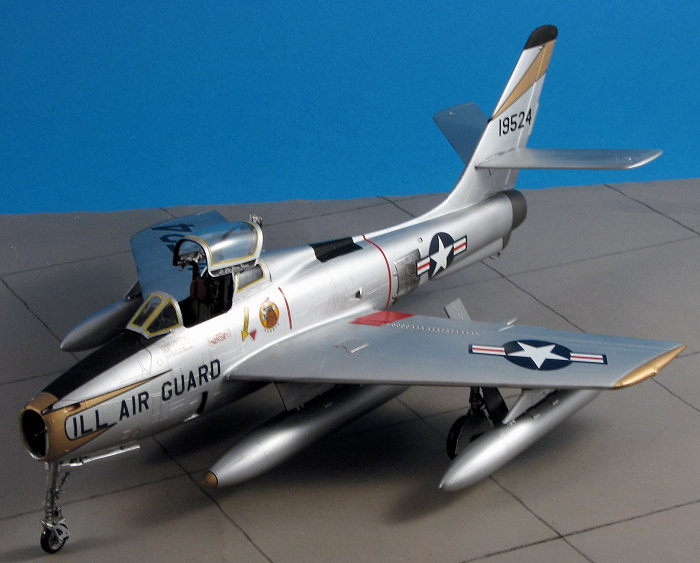
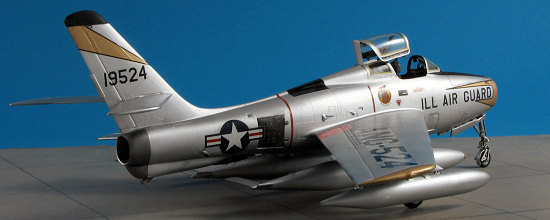
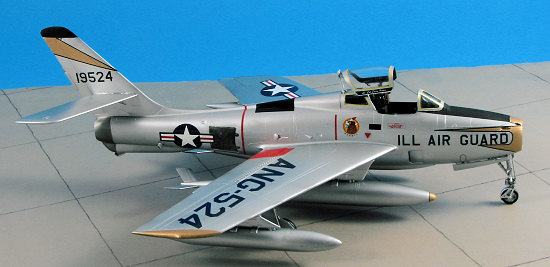
 I now had a basic airframe, so masking off the cockpit with tape, I proceeded to apply some paint. For this, I chose Humbrol #11 aluminum and gave the model several light coats. The speed brakes were painted with Alclad II stainless steel and the exhaust area with regular steel. Fin tip and anti-glare panel on this one are black.
I also painted the four drop tanks, the pylons and the gear with the Humbrol aluminum. While not as 'real metal' as the standard metallizers, it is pretty well fool-proof and so one of the reasons that I use it!
Back on the bench, I glued on the inner gear doors along with the bulkhead piece that comes with it. The main gear were also glued in at this time. The nose gear had the nose wheel trapped between the two forks and the tire painted prior to assembly with the fuselage. I had a terrible time getting the nose gear in place, eventually trimming the base of the retraction strut. The reason is, I suspect, because somehow, I got the nose gear well too far back. This accounts for the fuselage join problem and why I didn't see it before now is one of those mysteries. It looks OK so that isn't a problem, but it sure made installing the nose gear a struggle. I also glued on the main wheels and the speed brakes. The latter are in the closed position as that is the way I've seen most F-84Fs in pictures.
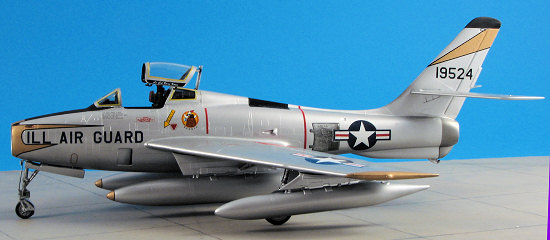
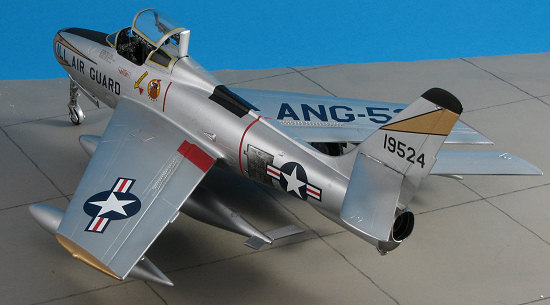
 Then it was time to apply decals. I chose a 2005 Aeromaster sheet, #48-728 as it held a nice option for a 169 FIS Illinois ANG aircraft in markings I'd not seen before. This particular set of markings requires copious amounts of Microsol to get the copper colored markings to conform to the wing tips and nose. Even then, there were gaps as the markings were not a perfect fit. This was especially true on the wing tips. I do wish decal companies would either be positive of the fit or provide sections of spare color for things like this.
The upper fuselage radome decal is far too large and needs trimmed while the tail marking is also too large. I found this to be true of the aft red warning stripe, while the upper forward stripe was a bit too short. The markings for the underside that fit on the gear doors were a perfect fit, however. Getting the decals to conform to the drop tanks wasn't exactly easy either as they are a bit too small to fit where indicated. I moved them forward until the seam closed and put on MANY applications of Microsol until I got something that was close. I found other differences between actual decal size and what was shown on the instructons. I came to the conclusion that either the drawings were not accurate in terms of markings size or the sheet had some rather major sizing errors on it.
| FINAL CONSTRUCTION |
With all the markings in place. I had some additional bits to add. First were the outer main gear doors. and then the drop tanks. The fit of the tanks to the pylons was fine, but the fit of the pylons to the wing wasn't the best. I recommend fitting/adjusting these 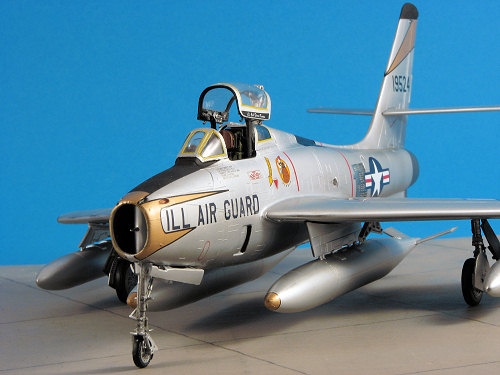 at one of the first steps before the wing is attached. Don't attach the outer pylons until after the decals are in place as they will need to go over insignia/lettering. For those wondering, I couldn't find the anti-sway braces for the outer pylons so just left them out rather than try to cobble some together.
Meanwhile, I used Microscale N gauge yellow striping to outline all the clear bits. This was sheet 71106 and is the 3" and 4" stripes. I used 3" on this one. Getting them around the curves on the main windscreen was easy. Just hit the decal with a bit of Microsol and when it becomes pliable, move it in position. Not perfect on my first successful attempt at doing this, but now I know how to go about it on the next project like this.
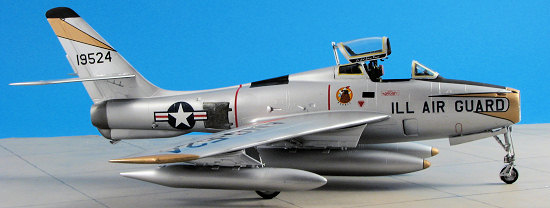
The last things to attach were the clear bits. This was not that easy as I'd not gotten the cockpit straight in the fuselage so getting the main canopy in position was a chore. I eventually had to attach the rear hinged part first then worry around with the canopy until it was on straight. A rather frustrating evolution and next one will be built with the canopy closed. The compass was glued to the inside of the windscreen and the windscreen attached. That was it for the building. Some touch-up painting was needed and for the copper I tried Vallejo's copper enamel. It was too dark and the more I looked, the more the markings looked gold, though not bright gold and actually could be a darkish brass. I ended up using some gold over the areas I touched with the copper and while not a perfect match, it is better than bare plastic.
| CONCLUSIONS |
 I could easily close this by saying "It's a Monogram kit". Many of you will nod your head in full understanding of what that means. For the rest of you, it means you'll have to work a bit at it. You'll have a kit with very good detailing (if you don't mind raised panel lines), decals that really don't work well, and a very nice model to put on the shelves. What's more, you will not have spent $40 to do it as these kits are easily found from vendors at swap meets or other places where one can find 'used' kits.
Give one a go. You'll have a fun time with it.
August 2007If you would like your product reviewed fairly and fairly quickly, please contact the editor or see other details in the