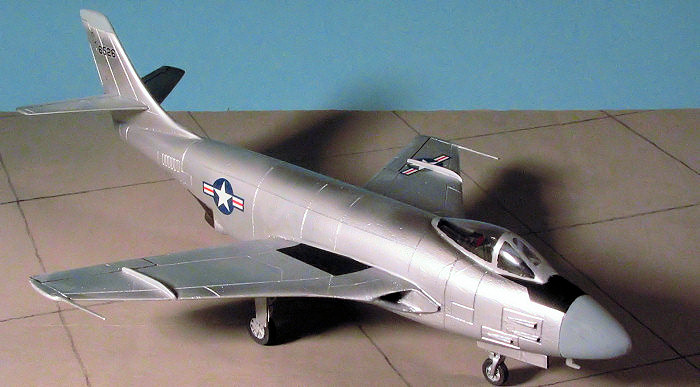
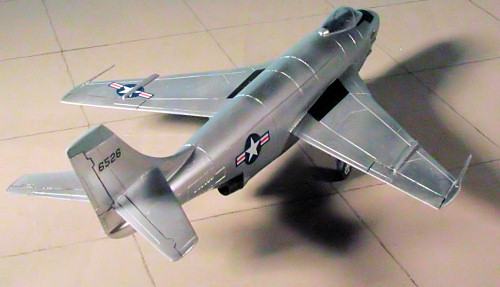
Anigrand Craftworks 1/72 XF-88 Voodoo
| KIT #: | AA-2058 |
| PRICE: | $49.00 |
| DECALS: | One option |
| REVIEWER: | Scott Van Aken |
| NOTES: | Resin kit with vacuformed plastic canopy |
| HISTORY |
In
1945, the USAAF recognized that all the early jet fighters lacked
sufficient range to escort bombers to the target. So proposals for a penetration
fighter were requested. In 1947, McDonnell submitted its larger-sized F2H
proposal, and was chosen for two 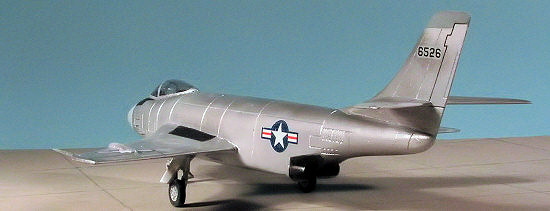 prototypes, designated XF-88 Voodoo. The other
designs entered in the competition were the Lockheed XF-90 and the North
American YF-93A. In 1948, the XF-88 made its first flight. Handling was
acceptable but the speed was disappointing. So the second prototype was modified
with two afterburning turbojets, and was redesignated XF-88A. The XF-88A reached
higher speeds, but still not fast enough. In June 1950, after a fly-off with the
XF-90 and YF-93, the USAF chose the XF-88A as the winner of the contest.
However, no production order was justified at the time because of the outbreak
of the Korean War. At the war’s conclusion, the USAF still required a
modern escort fighter. McDonnell was asked to develop an advanced design based
on the XF-88. Two prototypes were ordered that became the F-101 with the same
name of Voodoo. One XF-88 was modified with a turbo-prop in the nose to become
the XF-88B. Neither prototype survives today.
prototypes, designated XF-88 Voodoo. The other
designs entered in the competition were the Lockheed XF-90 and the North
American YF-93A. In 1948, the XF-88 made its first flight. Handling was
acceptable but the speed was disappointing. So the second prototype was modified
with two afterburning turbojets, and was redesignated XF-88A. The XF-88A reached
higher speeds, but still not fast enough. In June 1950, after a fly-off with the
XF-90 and YF-93, the USAF chose the XF-88A as the winner of the contest.
However, no production order was justified at the time because of the outbreak
of the Korean War. At the war’s conclusion, the USAF still required a
modern escort fighter. McDonnell was asked to develop an advanced design based
on the XF-88. Two prototypes were ordered that became the F-101 with the same
name of Voodoo. One XF-88 was modified with a turbo-prop in the nose to become
the XF-88B. Neither prototype survives today.
| THE KIT |
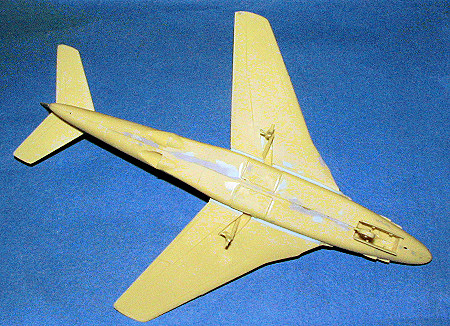
Molded in Anigrand's now common buff resin with well defined engraved panel lines and the usual air bubble holes and flash, the kit provides all that you need to make an excellent model for your shelf as it comes. If you are into doing some extra work in the detailing department, a real show winner can be made.
 These garage kits always provide a bit of a challenge to
the modeler, but when you reach the level where you are building kits like this,
you have to have the skills needed to correct what you find. It is the nature of
the beast that you'll find no two kits exactly alike. Some will require a bit
more work than others. This particular one suffers a bit more than the norm from
molding glitches. For instance, the strut mounting holes have gone all the way
through the wing. There are quite a few air bubbles on the tip of the right
wing, the left fuselage half has a section that is very thin and the nose gear
well and interior have a lot of additional gunk in it that will have to be
chipped out. All of this can be easily repaired using either super glue or epoxy
filler and then carefully sanded smooth.
These garage kits always provide a bit of a challenge to
the modeler, but when you reach the level where you are building kits like this,
you have to have the skills needed to correct what you find. It is the nature of
the beast that you'll find no two kits exactly alike. Some will require a bit
more work than others. This particular one suffers a bit more than the norm from
molding glitches. For instance, the strut mounting holes have gone all the way
through the wing. There are quite a few air bubbles on the tip of the right
wing, the left fuselage half has a section that is very thin and the nose gear
well and interior have a lot of additional gunk in it that will have to be
chipped out. All of this can be easily repaired using either super glue or epoxy
filler and then carefully sanded smooth.
The cockpit consists of a seat, instrument panel and control stick. No instrument detail is provided. The wheel wells have some detail in them made from strip plastic and just in there for looks as the real well detail bears no resemblance at all. But it doesn't really matter to most modelers and those seeing it on display certainly won't know. Gear doors are somewhat thick and need to be cut, for the most part, prior to use. On this kit, the main wheel is molded to the nose gear. Wheels are also quite generic and look very much like the ones used on a dozen other Anigrand kits. No indication of how much weight is needed in the nose, but I'd put in as much as possible to be sure of no tail sitting. A single somewhat cloudy vac canopy is provided with somewhat indistinct frame lines.
 I should point out that there are times when one gets a
good mold and times when the molding needs more work. This it is one of the
latter. Nothing huge, just a bit more clean up than the norm. As an example, one
of the wing intakes was filled solid so will need to be filed clean. One
fuselage half has a lot of crud in it that will need chipped out and smoothed in
areas that will be visible (like the cockpit and wheel well). A few more than
usual air bubbles to contend with as well. Again, nothing major, just needs more
prep work.
I should point out that there are times when one gets a
good mold and times when the molding needs more work. This it is one of the
latter. Nothing huge, just a bit more clean up than the norm. As an example, one
of the wing intakes was filled solid so will need to be filed clean. One
fuselage half has a lot of crud in it that will need chipped out and smoothed in
areas that will be visible (like the cockpit and wheel well). A few more than
usual air bubbles to contend with as well. Again, nothing major, just needs more
prep work.
Instructions are unchanged from kit #1 with a history and photo and exploded view and parts list on one side. The other is a painting and decal guide with a nice three view. I should point out that the nose anti-glare panel shown is for the second prototype. The first prototype has a more straight line to it. Markings are provided for both prototype aircraft and differ only in serial number. The sheet for the YF-93A is provided where you can glean the insignia. Apparently the aircraft never carried the USAF or US Air Force markings. The initial rollout of the first prototype did carry the 'McDonnell XF-88' logo and would have been nice to have.
I should also point out that the first prototype never had guns or fairings and it wore a nose tip probe for its entire existence.
| CONSTRUCTION |
This starts with the usual clean up. My example had
quite a bit of crud in the wheel wells/cockpit and one of the engine intakes was
nearly completely filled in. The resulted in much additional grinding with a low
speed motor drill and some creative gouging with dental tools and files.
I found that the center of it was still uncured and
gooey. Made clean-up a bit more difficult, but with the help of coarse grit
sandpaper and files I was able to get things looking pretty good.
As much as I'd have rather not had to deal
 with
this, it is a fact with short run garage kits that you can get one like this
from time to time. I also sanded flat the fuselage mating surfaces as there is a
ridge which has to be removed for a decent fit. I also had the usual air holes
in the tips of wings and stabilizers. The small ones can be filled with super
glue or applications of Mr. Surfacer. Big ones are most easily filled with epoxy
filler.
with
this, it is a fact with short run garage kits that you can get one like this
from time to time. I also sanded flat the fuselage mating surfaces as there is a
ridge which has to be removed for a decent fit. I also had the usual air holes
in the tips of wings and stabilizers. The small ones can be filled with super
glue or applications of Mr. Surfacer. Big ones are most easily filled with epoxy
filler.
I then started filling the nose with lead weight. There is more than enough room for all you need to keep it off its tail when done. The cockpit was painted a dark grey with black console tops. An instrument panel is supplied (no surface detail) and should be installed prior to gluing together the fuselage halves or you'll not get it in. Then the halves were glued and the usual filler sequence commenced.
Attaching the wings requires quite a bit of test fitting and sanding to get the wings to properly match up and have the correct dihedral. I also found that the area where the intakes joined the little alignment nubs on the fuselage required considerable filling and filing both inside and out to get an acceptable fit. Even then, I'm not totally happy with the join. The tail planes are a butt join and present no real problems.
For
whatever reason,
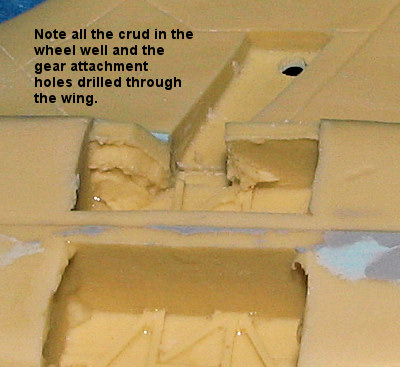 the main gear attachment holes go all the way through the wing.
This is probably because the wells are a bit too deep to allow sufficient resin.
It isn't a major problem, just requires some trimming. Specifically, you have to
trim the retraction strut and provide about a 45 degree angle to the join
surface. I then attached the main gear let to the hole, making it as flush to
the upper wing surface as I could. When dry, any additional holes were filled.
The nose gear and retraction strut need to be trimmed shorter as well for it is
too long.
the main gear attachment holes go all the way through the wing.
This is probably because the wells are a bit too deep to allow sufficient resin.
It isn't a major problem, just requires some trimming. Specifically, you have to
trim the retraction strut and provide about a 45 degree angle to the join
surface. I then attached the main gear let to the hole, making it as flush to
the upper wing surface as I could. When dry, any additional holes were filled.
The nose gear and retraction strut need to be trimmed shorter as well for it is
too long.
 I
then attached the nose gear doors and the inner gear doors. These inner doors
are shown as closed in the instructions and the drawings and all the photos I've
seen. I have to wonder why Anigrand even bothered molding them separately as it
just adds a bit more work to the overall build. Once glued in place I sanded
them down flush.
I
then attached the nose gear doors and the inner gear doors. These inner doors
are shown as closed in the instructions and the drawings and all the photos I've
seen. I have to wonder why Anigrand even bothered molding them separately as it
just adds a bit more work to the overall build. Once glued in place I sanded
them down flush.
The seat was painted and after putting in a few spacers to raise it up (as the top of the headrest is even with the sill without them), it was glued in with the control column. The canopy was masked using small strips of tape around the edges then filling in the rest with larger pieces. I then cut the canopy from its backing and after several trimming sessions attached it using white glue. I also attached the wing tip and nose pitot tubes at this time. More sanding is needed on the wing tip as the tubes are a bit too fat.
| COLORS & MARKINGS |
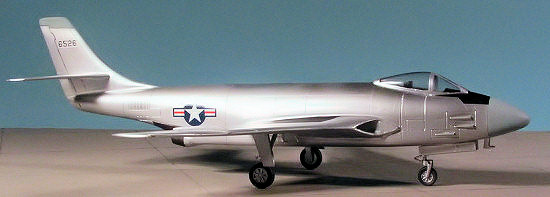
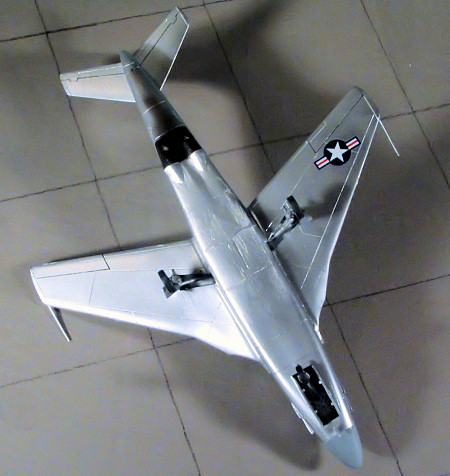
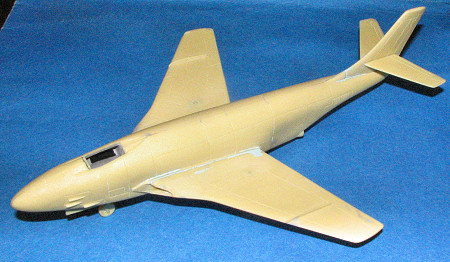
This aircraft was like most other US prototypes of the
time in that it was overall unpainted metal. I used a base coat of Floquil Old
Silver and then put on some Alcad II Aiframe Aluminum lightly applied over it to add
a bit more shine. The
nose and fin cap are in a 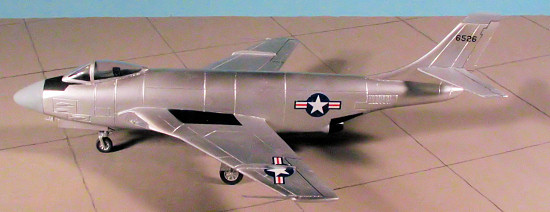 light/medium grey and I used FS 36475 for this. The
anti-glare panel was painted black along with the wing walk ways.
light/medium grey and I used FS 36475 for this. The
anti-glare panel was painted black along with the wing walk ways.
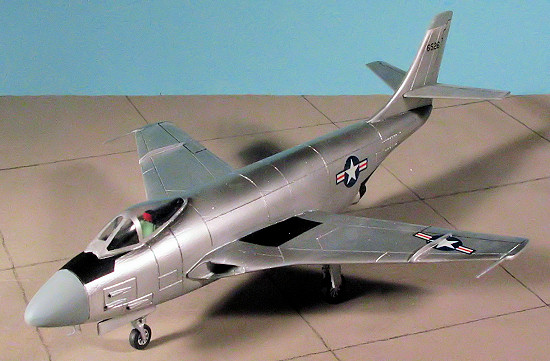
Back at the bench, I added on the wing tip probes that I had forgotten about, did some sanding and also added on the lower pitot housing. There is a tail bumper or something like that, but it is quite large and just didn't look right so I left it off. The Anigrand decals are OK, but a tad thick for most likings. As this kit has the guns on it, I used the anti-glare masking shape as shown in the instructions and the serial number for the second plane. Though a tad on the thick side, the decals gave no trouble when used with Solvaset. The upper wing insignia needs to have a section removed from it that equals the thickness of the wing fence. If you don't, it will look quite odd.
| FINAL CONSTRUCTION |
Actually, aside from some final touch-up, there is little that needs done. I'd forgotten to attach the exhaust so those were glued in place and the area around them masked off and sprayed with Alclad II Jet Exhaust. The main wheels were glued in place along with the outer gear doors. That was pretty well it. I didn't put a clear coat on it, though you could if you wished.
| CONCLUSIONS |
 It is
difficult not to sound like a broken record on these kits. Anigrand provides the
basis for a nice model and it is up to the builder to overcome the inevitable
molding glitches on the way to finishing it. Were this injection molded styrene,
it would be very much like a Matchbox kit with large panel lines and basic
appointments. But it is resin so requires a bit more in the way of modeling work
to get to a similar level.
It is
difficult not to sound like a broken record on these kits. Anigrand provides the
basis for a nice model and it is up to the builder to overcome the inevitable
molding glitches on the way to finishing it. Were this injection molded styrene,
it would be very much like a Matchbox kit with large panel lines and basic
appointments. But it is resin so requires a bit more in the way of modeling work
to get to a similar level.
I'm a major booster of Anigrand and so, despite the additional work needed to make things nice, I'm going to recommend these to those who revel in prototypes and are looking for a very cool 'whiffer'. They really are not all that difficult once you have built one or two and ones like this make for an excellent first resin kit.
June 2006
#1422 in a series
Copyright ModelingMadness.com. All rights reserved. No reproduction in part or in whole without express permission.
If you would like your product reviewed fairly and fairly quickly, please contact the editor or see other details in the Note to Contributors.