Valom 1/72 Lockheed XFV-1 | KIT #: | 7207 |
| PRICE: | $32.98 MSRP |
| DECALS: | One option |
| REVIEWER: | Scott Van Aken |
| NOTES: | Short run with PE fret and vac canopies |
 Realizing that it would not always be possible to have an aircraft carrier in with shipping convoys, the US Navy started looking for options. Vertical take off and landing seemed to be a viable option and in 1948, the Navy put forth specifications for a ship-based fighter that could land and take off from a pad on a cargo ship. Lockheed and Convair took the bait with Convair producing the XFY-1 'Pogo', while Lockheed worked on the XFV-1. Both were to be powered by the T-40 Turboprop and contra-rotating props.
It was this engine that would be part of the downfall of the projects, for the initial versions were incapable of prolonged high power output. This basically meant that it couldn't pull the aircraft from the vertical. This was a major problem for the XFY-1 as its design was such that it had to take off vertically. Lockheed's aircraft, however, was able to be rigged with large fixed landing gear so at least flight testing could get underway while awaiting a higher powered engine. The first flight of the XFV-1 was in mid 1954 and several dozen test flights were made in this configuration. This included vertical transitions while airborne so the project was feasible. Meanwhile the lone high power XT-40 was supplied to Convair who began testing, though engine problems were still rampant. Eventually it was becoming clear that engine development was going to be prolonged and coupled with the realization that the average pilot would have problems with vertical landing, especially on a moving ship, the program was terminated while the second prototype was still under construction.
Your editor can remember seeing either this aircraft or the semi-complete second prototype in a white and orange scheme up against hangars at ALF Imperial Beach in the mid-1980s, though it soon disappeared from there, hopefully to a museum where it can be restored.
For a look at what comes in the box, please visit this preview.
 Most short run kits are quite deceptive. You see a sprue of plastic and a small container with photo etch and/or resin parts. You think "this will be easy". You will be wrong. What you don't see is all the preparation of parts, the requirement to figure out where some of these bits go and the need to make some adjustments during the build sequence. All of this can vary from near scratch-building to just a bit more than needed for a major company's product.
So, where does this latest kit from Valom fit?
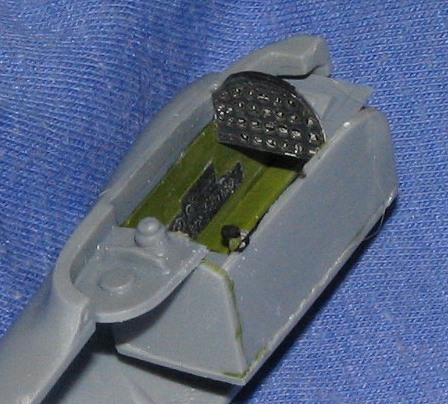
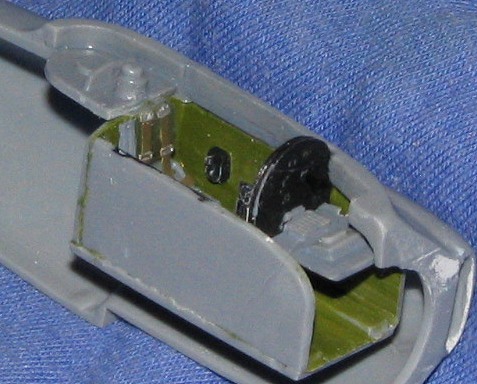
Follow along and you'll see. First thing I did was to start looking for subassemblies. Not a lot of them on this kit, but some are there. I glued together the wing tanks, and the outer spinner halves. Then I started assembling the interior bits. There are basically three smaller assemblies for the cockpit; the instrument panel section, the main tub and the 'bits in back'.
For the cockpit tub, I glued on the seat support and then the seat. The control stick looks rather short and fat, but perhaps it was like that. It was glued on. So were the rather small rudder pedals. They were glued as shown in the instructions. The interior and sidewalls were painted Interior green with black details. Seat was dark grey with an olive seat back. Head rest was left off until just before attaching the canopy.
The instrument panel section was broken in my kit so I had to glue on the missing part for behind the panel. I painted the back of the acetate piece white and let it dry. It turned out I did the wrong side so I used Polly Scale paint and decal remover. It took off the acrylic white paint without harming the acetate instruments. I painted the instrument panel matte black and when dry, brushed on clear Vallejo acrylic on the back, then put the instruments in place. Then I painted the back of the instruments after it had dried. This was then glued to the backing plate, which was glued to a smaller section that juts forward.
Back at the tub, I glued on the side panels. Then it was time to match these things up. If you glue the back section to the tub, there is no way you'll get the fuselage halves to fit as the tub actually fits somewhat under this part. What I did was to glue the back section to the fuselage half and then let it dry. It is dropped down about 1/8 inch from the top lip. In the front, the fuselage is too narrow to allow the instrument panel to fit. I cut small grooves in the side of the fuselage so that this part would fit. The plastic is very thick in this area so that isn't a problem.
As I mentioned, the tub fits under the edge of the cockpit opening. You'll find little grooves in there to which the tub supposedly fits. Well, it does fit....sort of....with help from regular cement and super glue. B ut I'm getting a bit ahead of myself. Before gluing the cockpit halves or the tub, I glued on the forward side engine intakes. Make sure you get the right one on the right side. If you do, you'll find the fit to be excellent. I also had to glue the exhaust shield to one of the fuselage halves before gluing them together. Fitting the instrument section required a bit of trimming and getting it all this in there was a bit of a challenge, but eventually, all the bits came into place as I'd taped the fuselage halves together to make sure it would fit. Once I was satisfied that I'd have no major surprises, I glued the fuselage and clamped the halves together to dry.
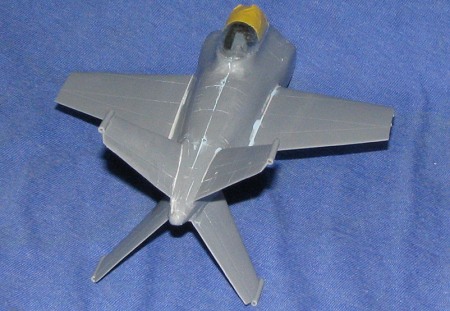
Next thing was to glue on the wings. These are butt joins and will fit on either side. No matter which side you put them on, there will be gaps. I filled these gaps first with Apoxie-Sculpt epoxy putty. Using a toothpick. I crammed the filler into the gaps and then smoothed off the surface with a wet finger. Then I attached the little 'bullets' to the fins and when dry, glued on the fins. Aligning these is a snap. On two of my fins, the forward lower point had broken off. Using more of the Apoxie-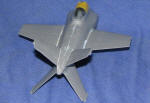 Sculpt, I made new sections and filled the tiny gaps on the tail fins. Once that was sanded down, I used standard filler to take care of a few glitches. On gaps as large as what were on the main wings, an epoxy filler or super glue is the best as it won't shrink later, leaving you with a sink area.
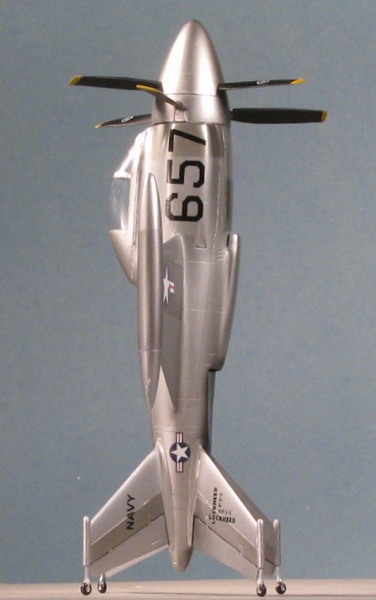
With that done, I drilled out the bottom of the fin tip bullets so that I could fit the little castoring wheels in place. I had decided to do the plane as it would have been had it been powered by the uprated engine. I know it didn't fly like that, but that landing gear that is offered just looks terrible. I'd much rather have it proudly sitting on its tail.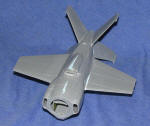
Next, I glued on the head rest and cut out one of the canopies. Thankfully, this is an easy attachment as it is a flat surface. I simply sanded the canopy down until it was flat and the right size. Then, using super glue, attached it in place. With the large nose opening to vent the fumes, fogging the canopy isn't a major problem. Though two canopies are provided, the frame work is very indistinct, sort of like Anigrand kits. Masking the canopy was not at all easy and I'd suggest to Valom that they enhance the framework on their vac canopies to make masking a bit easier for us.
With the canopy masked, I decided to go ahead and begin with the painting process. I stuffed the opening in the front with a couple of pieces of masking tape and, grabbing the tip tanks, headed for the paint shop.
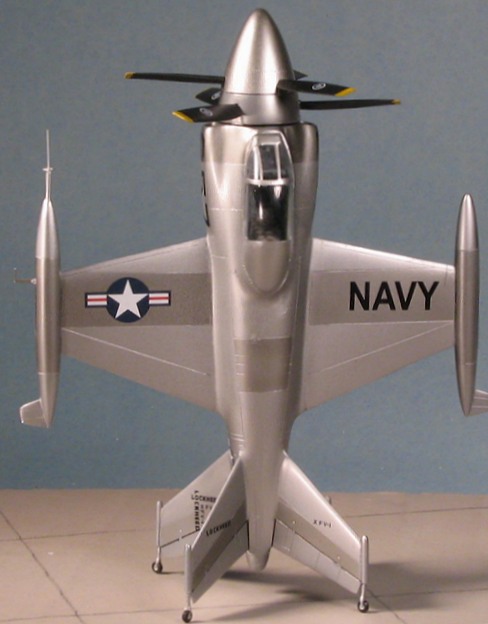
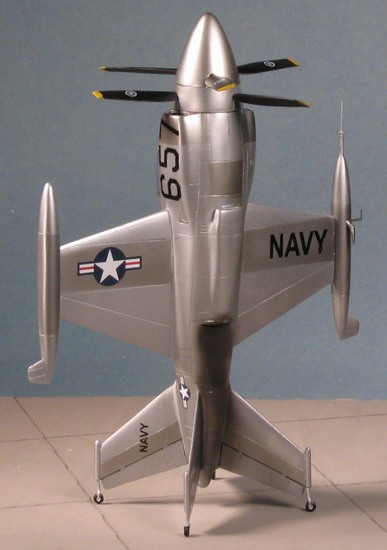 To paraphrase Henry Ford, you can have it in any color as long as it is unpainted. Means breaking out the Alclad II and for this kit I used three shades; Aluminum, Dark Aluminum, Polished Aluminum, and Jet Exhaust. No primer was put down and the paint was sprayed directly on the bare plastic and filler. I used multiple light coats to get this done. The basic airframe and lower spinner section were done in Aluminum. I then did a bunch of masking and painted various panels in Dark Aluminum. The Jet Exhaust was left for the exhaust region, and is really a bit overdone as I doubt things would have gotten quite that stained, but it is a model and so things like that are OK. The airframe itself was painted in one day; the left tip tank took a couple as I needed to add bits to it. I painted the upper spinner with Polished Aluminum over its standard Aluminum base coat.
Decals. Well, I fought urges to do a 'what if' and stuck with the markings that come in the kit. The kit decals are excellent. They are opaque, well printed and super thin. I did have a bit of problems with the under wing 'NAVY' tearing when I tried to move it around. Guess I needed more water under it. I used Microscale's setting solution and it worked perfectly.
Oh yes, for those wondering why I didn't paint the tip of the spinner and the ends of the tip tanks in red, I have to say that I think that it just doesn't look right. The few photos I've seen don't always show the same shade for the spinner tip as for the tanks and many of the images in color appear to have been colorized. For that reason, I left things in shades of metal.
While all that was drying out, I decided to build up the prop assembly. There is a backing plate that fits onto the front of the fuselage. This is too large and so a bit of sanding on it and some carving on the front fuselage finally got it to where it was a snug fit. I enlarged the holes in the prop backing plates with a #42 drill bit so the shaft would fit. Then it was threaded through the top backing plate. The props had already been painted black with yellow tips. These are pitched differently so don't get them confused.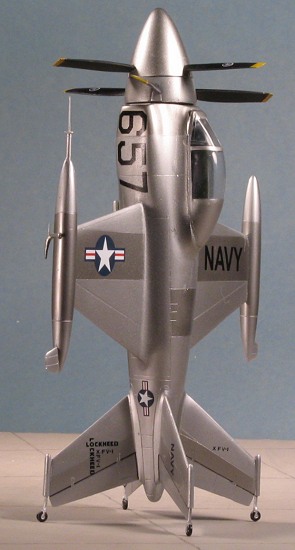 To help out, the backing plates have little 'tables' with the correct pitch and so you simply glue the proper blade to the backing plate, and then glue the spinner portion. It all works very well. I let those dry and then threaded the back blade assembly onto the shaft, followed by the fuselage plug and the little holding piece. This was glued with a touch of superglue and then hit with accelerator. End result is a pair of blades that rotate.
Back at the main airframe, I inserted the little castor wheels. Fit was perfect as they were snug. I could have left them un-cemented, but would have lost one for sure. I used the last one to level things up before cementing it in place. The left tank has a long probe on the tip (which I broke off) and also gets what looks like a fuel dump, and an additional pitot tube. I replaced the broken tip with stretched sprue and attached the plastic fuel dump as well as the etched pitot and a small circular gizmo that fits over the tip. The bits on the ends were painted Aluminum, masked and the interior pieces done in Dark Aluminum.
The tanks were then butt glued (the little attachment nibs on the wings are too far apart to match the very small holes in the tanks). I glued the prop assembly to the nose and then did some detail work with an artist's pen. The entire airframe was given a coat of Metallizer Sealer, as this seems to have less effect on the sheen than does Future or any other clear acrylic. It also helps to seal in the decals. I then removed the masking from the canopy and the kit was done.
This is by far the best Valom kit I have built. It fits together fairly well without all the fiddling and fussing of earlier kits. It is also a very interesting subject and that adds a lot to it. Having options for all the different landing gear arrays means that a modeler could do at least three variants of this one aircraft as it went through testing. As nice as the model is, I have a couple of things to comment on. One is that the juxtaposition of the interior bits seems rather odd. The instrument panel is way forward of the seat and rudder pedals. I've run into this situation on the other kits I have built so it seems endemic to the line. The other is the lack of definition on the vac canopy frames. Either they need to be more pronounced, or Valom needs to farm out its vac canopies.
I have to say, that if you are wanting to do a short run kit and are undecided as to which one to do, I'd have to recommend this one. It doesn't have any resin to fuss with, the P.E. is minimal, and it does offer one of the easiest vac canopies to trim that I've done in a long time. It is a kit that I really can highly recommend for those who want to stretch their skills a bit.
June 2005
#1366 in a series
Copyright ModelingMadness.com. All rights reserved. No
reproduction in part or in whole without express permission from the editor.
A big thank you to Valom for supplying the review kit.
If you would like your product reviewed fairly and fairly quickly, please contact the editor or see other details in the Note to Contributors.
Back to the Main Page
Back to the Review Index Page
2022