
| KIT #: | AA-2049 |
| PRICE: | $49.00 |
| DECALS: | One option |
| REVIEWER: | Scott Van Aken |
| NOTES: | Resin with vacuformed canopy |
| HISTORY |
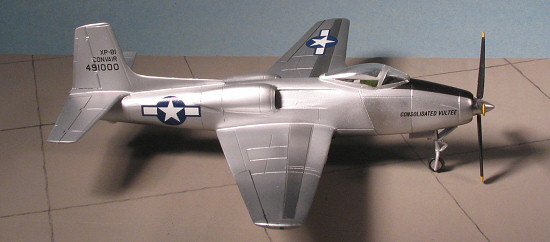
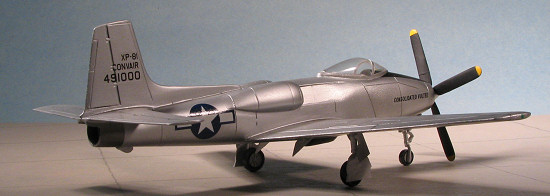 In 1943, USAAF issued a specification for a long-range jet powered fighter which could be flight across the Pacific to escort bombers to Japan. Consolidated Vultee Aircraft (Convair) responded with the new design which was powered by a combination of the turboprop and jet engine units, while Navy was also working on the same theory with the Curtiss XF15C-1 and the Ryan FR-1. The configuration was a nose mounted turboprop engine used for cruising flight to solve high fuel consumption problem, and a tail mounted jet engine used for high speed combat. In 1944, two prototypes were ordered and designated XP-81. First flight was on February 1945; the performance from the under-powered turboprop engine was disappointing. After Guam and Saipan islands were captured, the need for a long-range fighter had been eliminated. The XP-81 development was slowing down and the entire program was terminated in 1947.
| THE KIT |
Molded in their usual buff resin, this one is typical with slightly large engraved panel lines and a few molding glitches. In addition to a few air bubbles on the fuselage, one wing tip houses a very large one just under the surface, so much care will be needed to prevent opening this up during sanding. A few air bubble 'notches are also found on the wing edges and on the underside as well. 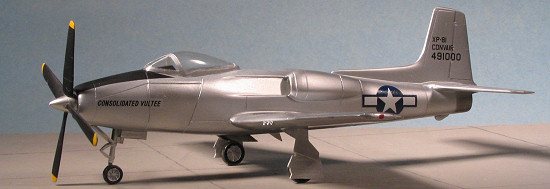 The one wing I mentioned has a curious section with different colored resin, almost as if there was a patch. I also found some resin residue inside the intakes and exhaust of the fuselage. These will have to be cleaned out and is a good reason why one should have a battery powered motor drill for resin kits.
The above just shows that with very short run resin kits, the overall quality of the end product isn't totally constant from one kit to the next. Each of these are basically hand made and mold life is often as few as a hundred or even less. This is why one can't be too harsh about these things. They are generally expected and I have to tell you, Anigrand is one of the better companies. I've bought some resin kits that to build them will be barely a step above scratch-building!
 The smaller bits are all in superb shape without any short shot areas, air bubbles or other mold glitches. I can also report that, unlike the XP-58, the spinner is drilled for four blades! The rest of the kit is typical Anigrand with detailed wheel wells, a nice seat and control stick for the cockpit, and hopefully enough room in the nose for weight as this one will be a tail-sitter without it.
We are given the usual Anigrand instruction sheet with short history, photo, exploded view and parts list on one side. The other is a nicely drawn three view with the color information and painting instructions. Decals are nicely done and it seems to me that part of these are for another kit, but no matter as all the XP-81 stuff is there. As with so many prototypes, it is in unpainted metal so you need to have your metallic painting skills well honed.
| CONSTRUCTION |
Though it may look exotic, the kit itself is pretty straight-forward. Like all of these kits, the first step is to take care of molding glitches. The pin-holes can be filled with Mr. Surfacer or superglue. The chunks can be replaced with bits of plastic card and the larger holes filled with epoxy putty. I used A-poxie Sculpt as it works very well and is easy to mix being a thick paste. These are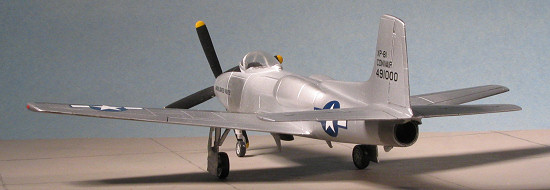 sanded down and any repeat processes then done. I found the intakes needed to be cleaned up quite a bit so that was done at this time. I then filled the nose of the fuselage as much as I could as this one would be a tail sitter without some weight.
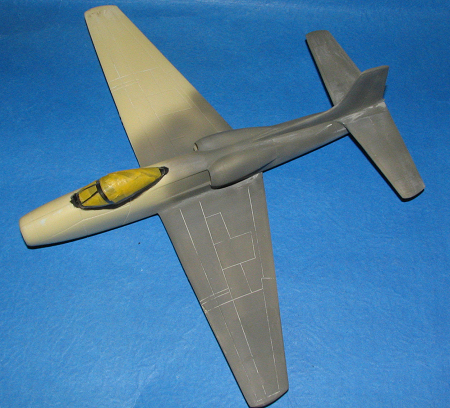
The fuselage halves were cemented together after sanding down the mating surfaces to remove any irregularities. I then glued on the fin and found it a bit narrower than the fillet on the fuselage. More filler for this and the fuselage seam. After a few sessions to get thing smoothed out, the tail planes were glued on. Fit is quite good, but it pointed out a need for more filler on the trailing edge of the fuselage tail plane root. This was not easy to fix, but it was finally done. Though this only takes a paragraph, it actually took me about 2 weeks to get to this stage. These kits are well done and simple to construct, but take a relatively long time for me to build.
 Next were the wings, these have alignment pins to fit into slots in the fuselage. I enlarged the fuselage slots a bit after dry fitting showed a bit of misalignment. The wings were then glued on and any filler needed was applied; mostly to the underside. I then glued in the seat after painting the interior. Nothing else goes in there and the seat seems a bit short to me. The lone vac canopy was carefully cut out and after painting the inner canopy area black, the canopy was carefully masked using thin strips of tape and attached using white glue. The main gear legs were then installed. I had to drill out the holes a bit more to get some depth to them. I also noted that the gear were not mirror images of each other. It meant that on one leg, the retraction strut fit on the front and the other on the back. Both should be on the same side, but the design of the strut won't allow it. I also noticed that the exploded view shows the wheels to the outside while the painting and marking diagram shows them to the inside. They fit to the inside. The nose gear was just stuck in the hole until after painting.
| COLORS & MARKINGS |
 I then primed the model using Alclad II primer and some experimental stuff I was given. The experimental stuff wasn't bad, but didn't have the stick on resin of the Alclad II. I then sanded it down with some 2000 grit sandpaper to take of a bit of the roughness. Once that was done, I sprayed on some Alclad II Aluminum. I did many light coats to be sure to get good c
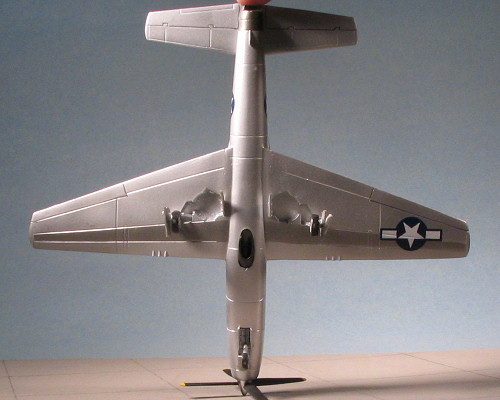 overage. Sections were masked for some Dark Aluminum and some Polished Aluminum. I even brush painted a few bits with Humbrol Aluminum just to see how it would look. The nose was then masked for the black anti-glare panel. The instructions called for the wheel wells to be painted Interior Green. They probably meant Chromate Green, but I left them in aluminum. Most prototypes were to have a very short life and so anti-corrosion agents were not considered to be very important and usually not used. The few photos I found of the XP-81 did not indicate a greater darkness in these areas. Makes it easier to be lazy!
I did notice that one wing tip did not seem to want to dry. I'm not sure just what the problem was as I used the same paint and mixtures as for the rest of the aircraft and didn't put it on too thick. I'd noticed the primer also wasn't fully dry in that area even after three days. The paint itself took two weeks before it wasn't tacky and then was easily pulled up with tape, unlike the rest of the plane. I can only think that perhaps the resin in that section wasn't properly mixed or hadn't fully cured and was 'outgassing'. It is still a bit sticky after nearly six weeks.
The decals were then put on and they worked like a champ. They snuggled right down and those that were being difficult succumbed to Solvaset. Of course, you can see the clear carrier, but that is a problem with all decals and metal finishes.
| CONSTRUCTION CONTINUES |
The wheels were glued on, the gear doors cut and glued in place with no trouble. The exhaust were glued in place and the last thing was the prop. I drilled out the holes in the spinner a bit to get a good fit and then glued the blades in place. The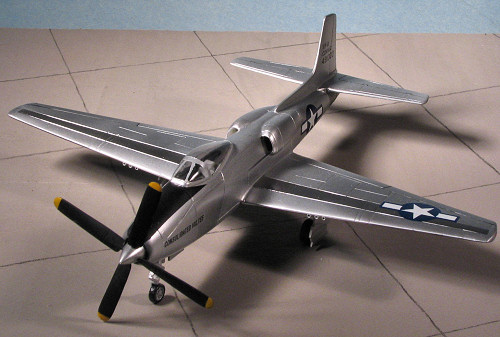 prop was then glued onto the nose section and left to dry.
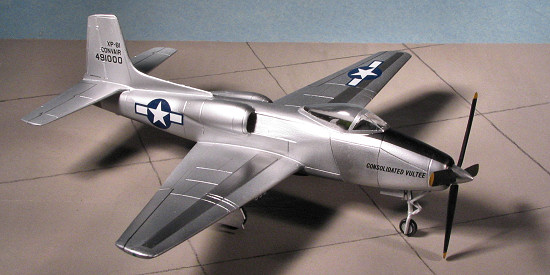
Imagine my surprise when I noticed that the blades were too long. Either that or the nose gear was installed too deeply, but I'll blame the blades. As this was done the night before publication, there wasn't time to trim the blades and repaint before pictures were taken. Heck, I couldn't even loosen the superglue to repose the prop!. You are now warned that you may well have to trim some too-long prop blades.
| CONCLUSIONS |
Despite the small glitch with the blades and my usual glacial building pace when doing resin kits, this one is a beauty. It is a very nice look airframe and adds so much to one's collection. For sure you won't see the plastic guys doing this one and its ease of construction makes it a great first resin kit for anyone.
April 2006
#1407 in a series
Copyright ModelingMadness.com. All rights reserved. No
reproduction in part or in whole without express permission from the editor.
If you would like your product reviewed fairly and fairly quickly, please
contact the editor or see other details in the Note to Contributors.