|
KIT: |
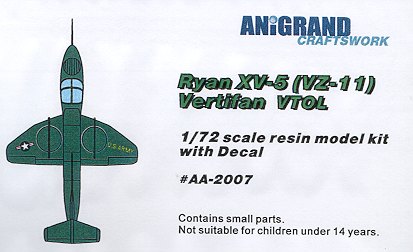
Anigrand 1/72 Ryan XV-5 (VZ-11) |
|
KIT # |
AA-2007 |
|
PRICE: |
$37.00 MSRP |
|
DECALS: |
One option |
|
REVIEWER: |
Scott Van Aken |
|
NOTES: |
Resin kit |
|
HISTORY |
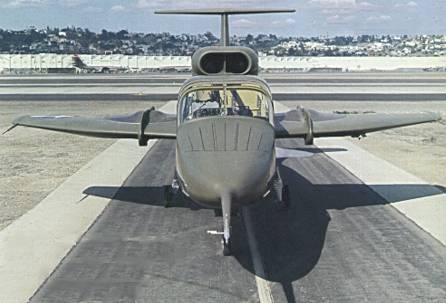
After two years of research, in November 1961, General Electric won a US Army contract to develop its fan-in-wing concept, the XV-5A. Design, construction and flight testing of the aircraft was sub-contracted to Ryan, but GE retained responsibility for the propulsion system and its integration into the aircraft. The XV-5 was 44 ft long with a 30 ft wingspan. In the inboard portion of each wing a 5 ft diameter fan provided vertical lift. A smaller fan in the nose in front of the two person cockpit give pitch control and additional lift. The fans, providing a total vertical thrust of 16,000 lb, were driven by the exhaust gases of two 2,650 lb thrust GE J85-GE-5 turbojets.
 With a 7,000 lb empty
weight, and a 12,200 lb gross weight, the Vertifan had 31% excess power.
The wing fans rotated in opposite directions and were covered by hinged
doors, while the nose fan was covered by louvers. The wing fans, which
differentially affected roll, exhausted into louvered vanes that could
vector the thrust fore, aft or laterally, also controlling yaw. A thrust
spoiler allowed the engines to throttle to full power before the fans
were started. Two aircraft were built; the first one flew from 25 May
1964 until it crashed the following April, killing the pilot during a
transition attempt. First hover was in June 1964, and first transition in
November 1964. The second aircraft flew until it crashed in October 1966
(also killing the pilot), but was rebuilt as the XV-5B. This had a wider
landing gear, had an improved cockpit, and removed the thrust spoiler. It
began flying on 24 June 1968. The drawbacks of the Vertifan were the
large volume and weight occupied by the lift system, slow control
response, and the narrow transition corridor.
With a 7,000 lb empty
weight, and a 12,200 lb gross weight, the Vertifan had 31% excess power.
The wing fans rotated in opposite directions and were covered by hinged
doors, while the nose fan was covered by louvers. The wing fans, which
differentially affected roll, exhausted into louvered vanes that could
vector the thrust fore, aft or laterally, also controlling yaw. A thrust
spoiler allowed the engines to throttle to full power before the fans
were started. Two aircraft were built; the first one flew from 25 May
1964 until it crashed the following April, killing the pilot during a
transition attempt. First hover was in June 1964, and first transition in
November 1964. The second aircraft flew until it crashed in October 1966
(also killing the pilot), but was rebuilt as the XV-5B. This had a wider
landing gear, had an improved cockpit, and removed the thrust spoiler. It
began flying on 24 June 1968. The drawbacks of the Vertifan were the
large volume and weight occupied by the lift system, slow control
response, and the narrow transition corridor.
|
THE KIT |
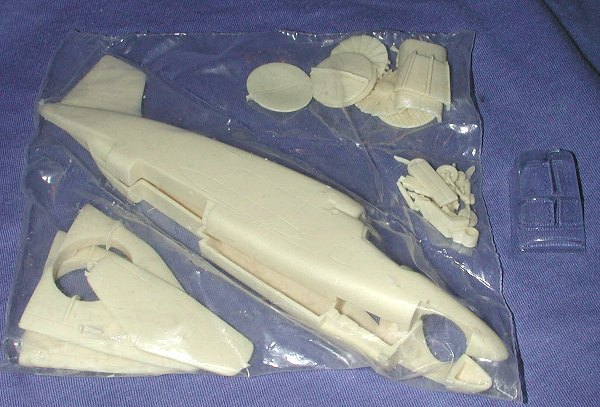
As with all Anigrand kits, this one comes packaged in a very sturdy box to help keep all the bits in good shape. Inside, there is a plastic bag with parts segregated into several compartments. This is to prevent the really heavy parts from damaging the more fragile ones during shipment. I decided to keep everything in the bag until it was time to start construction. I've found that this is the best way to keep from losing things. In this kit, the vac canopy was just inserted in the box.
Unlike most prototype kits, this one has a major option; that of having the engine louvers open or closed. To open the louvers, one will have to cut them from the 'closed' position parts that are provided. For the lower wing outlet fan louvers and upper nose inlet louver, this means cutting a LOT of small slivers of resin from the kit part. The upper wing ones are only two cuts so simple enough. However, one also needs to realize that unless the engines were running, most of these louvers were closed. Like 99% of all builders of this kit, I'll be keeping these items in the closed position! On the plus side of having them closed, the builder will probably not have to install the fans as they can't be seen.
Returning to the kit itself, the detailing is quite good and this kit has only a few air bubbles to have to take care of. I'd like to think this is a trend, but I think it is probably more luck than anything else. The builder will have to supply a few bits such as the nose test probe and a couple of landing gear struts out of stretched sprue. Again, the gear is resin and may well deform under the weight of the kit in a year or so. Since the gear is fixed, replacing it with styrene or metal rod shouldn't be too difficult for the more advanced modelers.
Another area where a bit of extra attention needs to
be paid is the wings and perhaps the stabilizer. These are both butt
joins. I would recommend drilling holes in the wing ends and inserting
some pins to help form a more solid join. Same with the T tail, but
you'll have to be very careful not to drill through what is a pretty thin
piece. I should also mention that this kit represents the initial design
of the XV-5. Like all prototype aircraft, it went through a few changes,
including adding a 'bullet' fairing to the horizontal stabilizer.
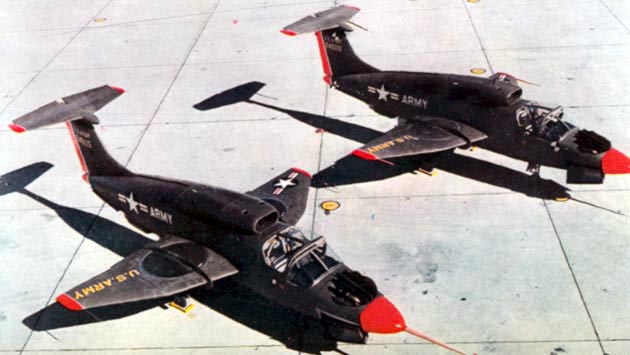
Instructions are a single sheet of paper with a history and exploded view of the kit on one side and a very nice three view on the other side. Decals are provided for the one aircraft and are well printed, if a tad on the thick side. If you decide to modify the kit by installing a bullet fairing on the stab, then you need to add some International Orange to the nose, tail and wing tips as shown in the main image. The second image shows the aircraft as kitted. Note that the interior seems to be Yellow Zinc Chromate primer. You can also see that the upper fan covers are a darker shade than the rest of the airframe.
|
CONCLUSIONS |
Many thanks to DMC Models for the review kit.
UPDATE: Nostalgic Plastic is now the US Importer for Anigrand. Please contact them for more information.
If you would like your product reviewed fairly and quickly by a site that has nearly 250,000 visitors a month, please contact me or see other details in the Note to Contributors.