Takom 1/35 Skoda 30.5cm M1916 Siege Howitzer
| KIT #: | 2011 |
| PRICE: | $36.95 MSRP |
| DECALS: | None |
| REVIEWER: | Scott Van Aken |
| NOTES: |
| HISTORY |
The Škoda 30.5 cm Mörser M. 11 was a siege howitzer produced by Škoda Works and used by the Austro-Hungarian Army during World War I and by Germany in World War I & II.
Development began in 1906, when a development contract
was placed by the Austro-Hungarian high
 command with Skoda-Werke in Pilsen to
develop a weapon capable of penetrating the concrete fortresses being built in
Belgium and Italy. Development work continued until 1909, when the first
prototype was finished and, in 1910, fired secretly in Hungary.
command with Skoda-Werke in Pilsen to
develop a weapon capable of penetrating the concrete fortresses being built in
Belgium and Italy. Development work continued until 1909, when the first
prototype was finished and, in 1910, fired secretly in Hungary.
The weapon was able to penetrate 2 m (6 ft 7 in) of reinforced concrete with its special armour piercing shell, which weighed 384 kg (847 lb). There were a few technical problems with the first piece, but, after few reconstructions in 1911, the upgraded piece made another round of testing in Felixdorf and in the mountains of Tyrol. After that, Moritz von Auffenberg, the Minister of War, placed an order for 24 of the new weapons.
In 1916, the M. 11 design was upgraded and the new M. 11/16 was produced - the difference was mainly that the firing platform had been modified to allow for a traverse of 360 degrees. Also in 1916, a new model was released, the M. 16, which had longer barrel (L/12) and longer range 12,300 metres (13,500 yd). This last improvement is the subject of this kit, which was used extensively by the Germans in WWII.
| THE KIT |
I
have a fondness for artillery of all sorts and when I saw this kit at the LHS, I
picked it up. While it seems a bit pricey, I have heard a lot of nice things
about Takom so brought it home. The kit consists of three s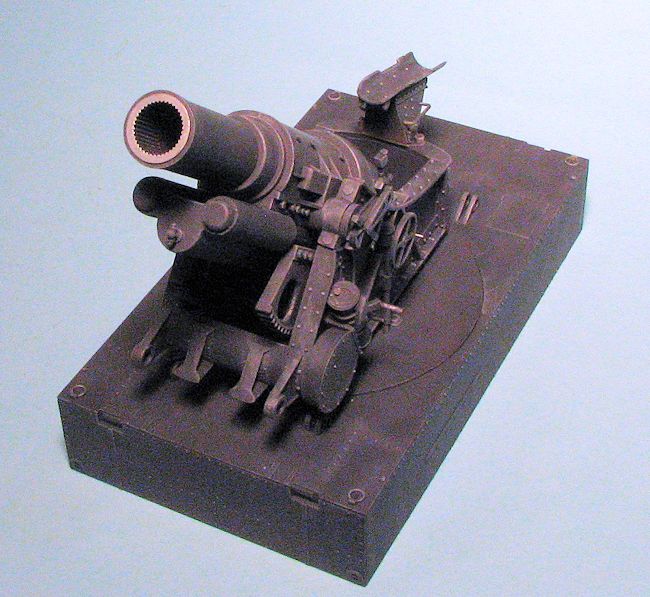 prues, all in a tan
plastic. One of the sprues seems to be mostly for the base of the gun while
another contains pieces that include shells and the cart used to transport them
up to the gun. There are no metal parts and though the instructions provide a
guide to using photo etch, none is included.
prues, all in a tan
plastic. One of the sprues seems to be mostly for the base of the gun while
another contains pieces that include shells and the cart used to transport them
up to the gun. There are no metal parts and though the instructions provide a
guide to using photo etch, none is included.
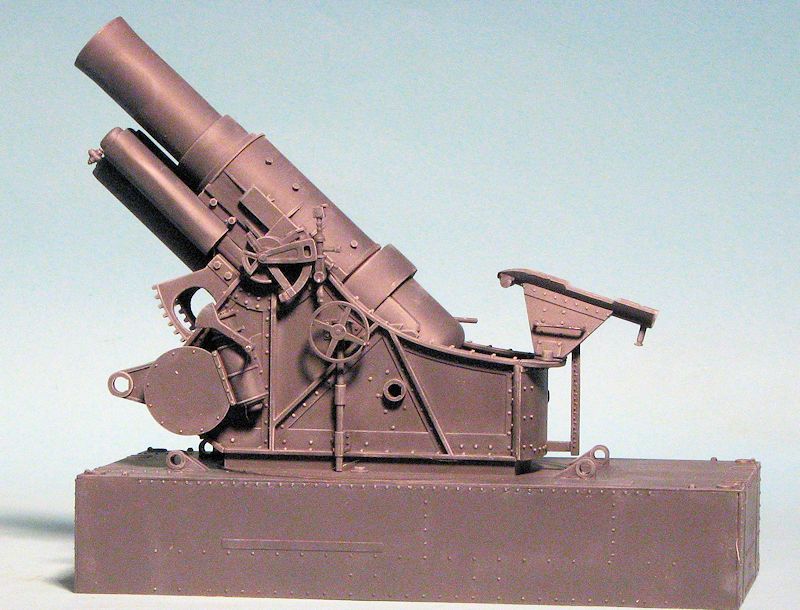
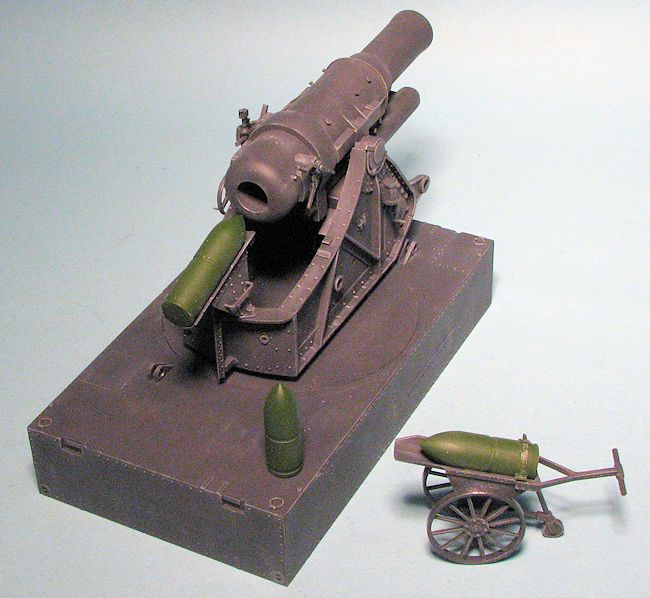
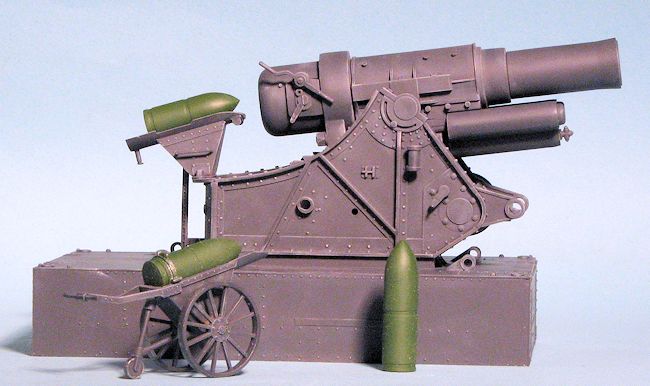
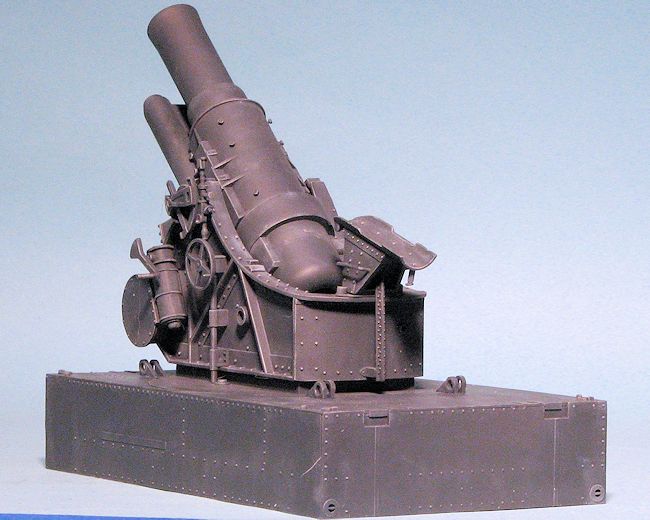
The actual length of the three piece barrel when complete looks to be about 4 inches with the base itself measuring a bit over 5 inches so this is not a huge model, even in 1/35 (which I guess is about right for a mortar). The base allows the gun to swivel 360 degrees while it can be elevated as well. As mentioned, the kit comes with a pair of shells along with a wheeled had cart on which the shell is moved to the gun. Mounted on the back of the gun's mount is a trough that would be used to slide the shell into the breech.
Instructions are in booklet form and have 18 well drawn construction steps. There is a painting guide that really is not needed as everything is the same basic color; either panzer grey or panzer yellow.
| CONSTRUCTION |
Unlike many of the kits I obtain, I was anxious to build this one so I got right to it and immediately started building out of sequence! I first decided to get rid of a sprue and so built up the base. One has to be careful when assembling this as there is only a thin lip on which to mount the vertical pieces. I also mounted the small hoisting attachments with the detail on the outside. This means you need to mix parts A3 and A4 to get this effect.
 Meanwhile, I glued the barrel sections together. The
joins look like they need filler and such to smooth out, which I did, but it did
not have to be done as those will disappear into the body of the gun when it is
complete. One many of the parts, the sprue attachment point is on the gluing
surface. While many like this, I'm not a big fan as I usually end up slightly
oversanding the attachment area, leaving a gap that needs filled when the parts
are joined.
Meanwhile, I glued the barrel sections together. The
joins look like they need filler and such to smooth out, which I did, but it did
not have to be done as those will disappear into the body of the gun when it is
complete. One many of the parts, the sprue attachment point is on the gluing
surface. While many like this, I'm not a big fan as I usually end up slightly
oversanding the attachment area, leaving a gap that needs filled when the parts
are joined.
An area that will require some patience and careful planning is on the gun body parts B20 and B21. There are small stubs that need to be installed into various indentations on these parts. They are very tiny and fortunately, you get a lot of spares as many will disappear when removing them from the sprues. I also had a few issues with the fit of the parts on the recoil section. The instructions show fitting the recoil section onto the lower gun assembly and then gluing on the large elevation gears. If you do this, you will have some difficulty getting the elevation gears in place. I recommend installing the gear pieces first and then the recoil assembly, doing this all about the same time. There are also some ejector pin marks on the outside of the gear assembly that will be tricky to remove.
 With those done, the two large gun side braces were
built up. There are a few bits to attach to the outside of these before mating
them with the gun. Pay particular attention to the alignment of parts C20 and
C23 so you can get them properly in place. The drawings give some information,
particularly on the bolt pattern on C 20 when it is in place.
With those done, the two large gun side braces were
built up. There are a few bits to attach to the outside of these before mating
them with the gun. Pay particular attention to the alignment of parts C20 and
C23 so you can get them properly in place. The drawings give some information,
particularly on the bolt pattern on C 20 when it is in place.
With that done, the gun mount sections will need to be built up. This was a rather straight-forward process, with the left side having all the various controls and the sight to glue in place. I then glued one side to the turntable and when that was completely dry, I assembled the lower gear assembly, stuck the polycap on one end and installed that into one mount. Be sure the teeth on both gears are properly cleaned up as any burr from the sprue gate will case things to jam. This was followed by gluing on the other gun mount and slipping the gun and gear assembly in place before the cement dried. I added a bit more glue to the mounts and let the whole thing dry.
| COLORS AND MARKINGS |
Then it seemed like a good time to start painting. It
was during this process that I realized I had made a bit of a goof. You see, I
thought that painting the gun pretty much complete would be a good idea, making
for 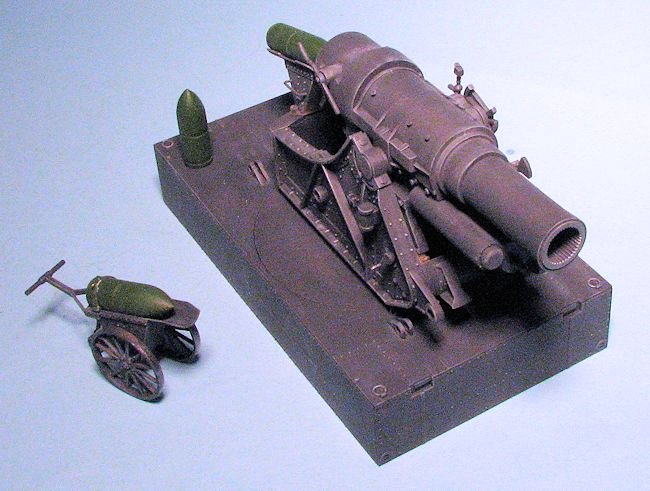 stronger glue attachments and all. But I forgot that in something like this,
getting paint everywhere would be difficult. That turned out to be quite true as
every time I thought I had everything covered, I found areas I missed. Not a
major issue, but one that prolonged the painting process. Next time I build
something like this, I'll keep that in mind.
stronger glue attachments and all. But I forgot that in something like this,
getting paint everywhere would be difficult. That turned out to be quite true as
every time I thought I had everything covered, I found areas I missed. Not a
major issue, but one that prolonged the painting process. Next time I build
something like this, I'll keep that in mind.
I used Tamiya XF-63 German grey for the scheme and during this time, I also assembled the shell trough that fits on the back and the shell cart along with the three shells that came with the kit. The trough was painted, the mating surfaces scraped and it was installed along with some additional touch-up. The cart was also painted German grey, though the shells were painted FS 34102 green. There are quite a few images to be found on this gun if one searches diligently and just about all of them looked to be dark grey. Some of them had the breech area in steel, but most had it in dark grey. I then dry-brushed the whole thing with Vallejo sky grey acrylics to bring out detail. Were I good at weathering, I'd add rust, but I'm not.
Other than attaching the gun to the platform, there is
no real final assembly other than laying a shell in the receiver one in the
cart.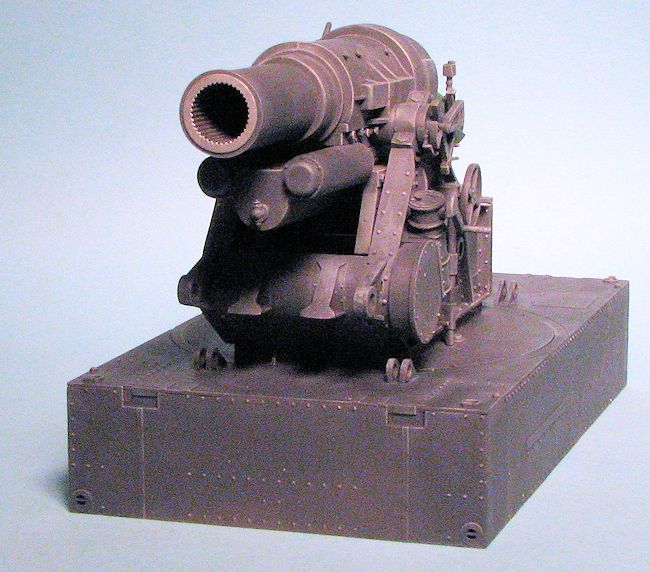
| CONCLUSIONS |
First I should mention that this kit took slightly less than a week from snipping the first part from the sprue until it was done. For me, that is light speed. The engineering is excellent, the fit of the parts is great, and were it not from the usual need to clean up mold seams and such, this build would have gone a lot faster. The end result is a great looking model of an interesting subject. I would very much build another Takom kit if they did something that interested me.
| REFERENCES |
http://en.wikipedia.org/wiki/Skoda_305_mm_Model_1911
Thanks to me for snagging
for the review kit. If you would like your product reviewed fairly and fairly quickly, please
contact
the editor or see other details in the
Note to
Contributors.