CGM 1/35 US 37mm anti-tank gun
| KIT #: | 002 |
| PRICE: | $39.95 MSRP |
| DECALS: | none |
| REVIEWER: | Scott Van Aken |
| NOTES: | Resin with photoetched parts |
| HISTORY |
To say that the US was woefully unprepared for a major European war when war did break out in 1939 is a bit of an understatement. Though not so badly off as before WWII, the United States was 'lucky' in that it had several years to catch up before it entered hostilities. Not only was it not ready for war, but the equipment it was using was either inadequate, or non-existent. In one area this was especially true for anti-tank guns.
I should be somewhat fair about this. Prior to WWII, it was quite possible to penetrate tank armor with heavy machine guns, such as the .50 Cal that the US Army had available to it. So there really was felt to be no concern to get a decent gun into production. It was US observers in the Spanish Civil War that saw how effective the German 37mm Pak 36 gun was against Spanish tanks,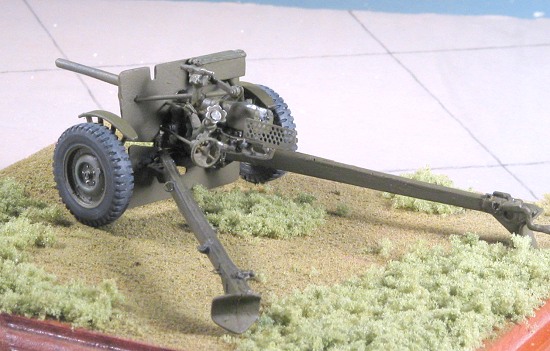 and so it was decided to develop such a gun in the US.
Not surprisingly, the resultant gun was based on a Pak 36 that the US bought for evaluation in 1937. A development order was given and the result was the T3 Gun on the T1 Gun Carriage. 1938 trials showed many deficiencies and so several alternative designs were provided, the T10 Gun and T5 Carriage being approved for production as the 37mm M3 Gun and M4 Carriage.
The gun was built and issued to units. When the US entered the war in 1941/42, 37mm was no longer sufficient to penetrate the thicker armor of German tanks. While the Allies had moved forward with larger guns, the US had no such motivation and entered the war with an obsolescent gun. This was proven during US operations in Tunisia during 1942/43 where 37mm shells were unable to penetrate Panzer III and IV armor unless the ranges were very short. Few crews stuck around their guns at such ranges.
Though outclassed as an anti-tank gun, its light weight was perfect for some campaigns in the Italian mountains where it could be grunted around by its crew. In the Pacific, it was very effective as both an anti-tank and general support gun. Here the Japanese never did produce a well armored (or effective) tank so the 37mm was used right up to the end of the Pacific War. It was very effective against hardened points such as pill boxes and other defenses when using high explosive or canister ammunition.
By the end of the war, towed anti-tank guns were a thing of the past as the much more maneuverable GMC M10, M36 and M18s were much preferred.
| THE KIT |
Pleasevisit the preview to see what comes in the box.
| CONSTRUCTION |
 The first thing I did was to take all the parts and clean them up as best that I could. This meant removing flash and pour stubs, being quite careful not to remove some bits that looked like stubs! The The next was to fill in as many of the air bubbles as I could, most of these being on the lower shield. I used Mr Surfacer 1000 for this and used several applications.
Once I had all the bits somewhat cleaned up, I started looking at the photos given. Frankly, they are not that helpful at all for someone who has never built a model of artillery. This isn't helped by the soft detailing of the resin itself and the need to do a lot of preparatory cleaning that may well have removed some of the detail there.
However, I had just built the Italeri 105mm howitzer so had some idea of how a gun should look. Starting with the axle housing, and referring to both the Italeri kit and the Osprey book on US Anti-Tank guns, I was able to slowly piece together the kit. I built up the gun and its recoil mechanism as much as I could and the gun started to come together. I found that the the gun barrel was not well defined and so took a scribing took and scraped away at the areas around the barrel to give things some definition. Many of the mounting points were extremely vague and I'm sure I screwed up a lot of these bits during construction. In fact, I got stymied by the elevation and azimuth control section. The part supplied wasn't really like what was shown in the Osprey book. With the kit about 2/3rds done, I just walked away from it for a bit.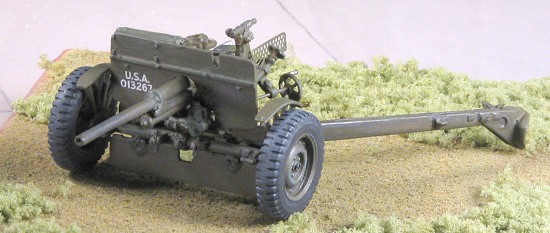
A couple of weeks later, I was ready to start anew. The part that befuddled me for so long was attached in something that looked normal and I was back on a roll. This kit requires braces and control rods to be manufactured. I used both .060 Contrail rod and stretched sprue for the various control rods and shield braces. I have a battery powered motor tool that was very helpful in trimming down parts for a proper fit. One section had a huge glob of resin attached that required a lot of grinding to remove.
During all this, I had to heat up and straighten the trailing arms as they were warped. The small etched fret contains rings, plates, hooks and other tiny parts. Thanks to the poor handwriting of the kit maker, I was not always able to figure out what part went where (that is what much of the photo instruction sheet was for), but the Osprey book was a huge help. I had bits l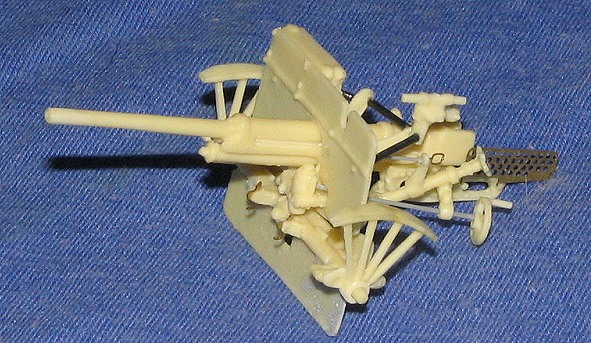 eft as I'm not sure they actually go with this kit. I also drilled out most of the mounting points for some of the small pieces.
As you can see from the image of the unpainted body of the piece, the detail is rather soft. You can also see some of the P.E. bits and the various sections of grey stretched sprue and black rod needed for various parts. Were it not for the reference, I'd not have known about the little grab handle and rod (the oval brass bit and stretched sprue) that are near the elevating wheel. I also had to use a razor saw to slice open the hook attachments on the front for the apron as the apron was missing from the photos of the reference gun and those slots were full of resin. Once I had most of the bits and pieces installed on either the main body of the gun or the trailing arms, it was time for paint.
| COLORS & MARKINGS |
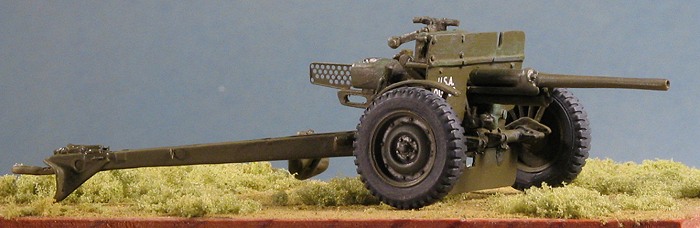
 No masking needed on stuff like this, just an overall Olive Drab, and for that, I used Testor's Model Master enamels with a bit of green included. It took a couple of spray sessions to get everything covered. For this I chose Archer Dry Transfer set AR35019W which is a bunch of white serials in two sizes, one of which would be small enough for this field piece.
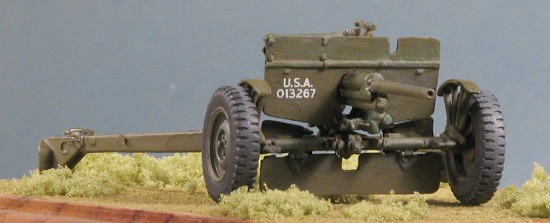
Now, there are two ways to do these things. One is to get a piece of clear decal film, draw a straight line on it, and then apply the dry transfers to it, basically giving one a water slide decal. The other is to apply the dry transfers directly to the paint. Benefit of this is that there is no possibility of silvering. This is the way I chose and after about 10 minutes of piecing together the serial number (totally fictitious), I was done. You may tell me that most photos you see of this gun show no serial. And in combat, I'm sure it was overpainted. But in the US, where soldiers had to learn to use these things, and were a lot of the war equipment was used, serials were quite present.
| FINAL CONSTRUCTION |
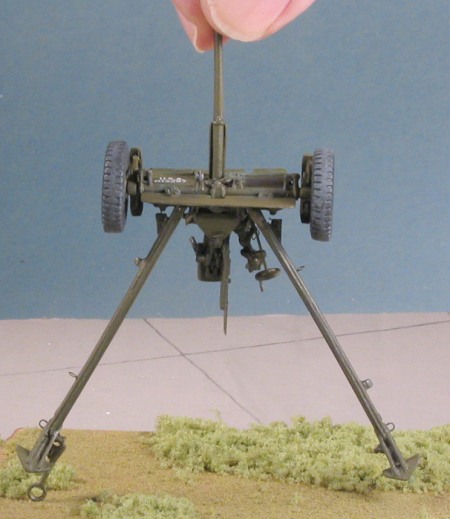
After the usual wash and drybrushing (I used light green and light grey for this), there was little actual assembly left to do. I glued on the main wheels first as I wanted to have things as level as I could. Then, because I wasn't sure if I was going to have this as part of a towed scene with a jeep or not, I attached the trailing arms with white glue and made sure that things were as level as I could get them. Naturally, they weren't. Guess the only thing to do with these guns is to glue them to the base! I should point out, that since this kit was based on a museum model, it is missing things. There are no shoulder guard guide, no grab handles on the rear (I used some tow line guides that were on the generic etched fret that came with the kit), and no rammers that normally fit to the sides of the trails. These are the kinds of detail parts that are normally missing from museum pieces
| CONCLUSIONS |
With every kit that I manage to turn into a model without making a real hash of it, I'm pleased with the results. I can say that about this one. It does look very much like what it is supposed to be. However, I do have to qualify this one. It isn't a kit for 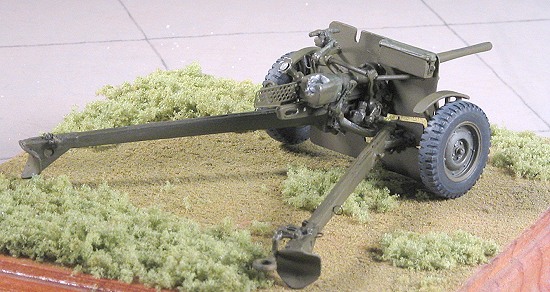 beginners or even for experienced modelers who have not build much armor. The instructions are a joke in that photos are not what is needed with a kit like this. Clear drawings are what a modeler wants. I had to guess my way through a lot of this during the build. I was also less than thrilled with the quality of the castings. The detail is soft and many of the parts had glitches such as air bubbles, globs of resin covering details, or misaligned molds.
Now I do realize that not all resin kits are made equal. There are excellent kits, good kits and so on. While I'd not list this one in the poor category, my experience with it will definitely put it on the low side of average. Am I being too rough on things? Perhaps. I'm not upset that this cost $40 as one expects to pay premium prices for resin kits. I did manage to finish it to a level that isn't bad and will look nice in my artillery collection. Were it not for the Osprey book on US Anti-Tank weapons, I would never have been able to complete the kit. While it is true that most modelers do have reference resources, it shouldn't be a requirement to properly build any kit, regardless of its origin or material.
That all being said, I cannot recommend this to any but the experienced armor modeler and those who are willing to go the extra mile to buy references and deal with all the additional work just to produce an average result.
June 2005
#1369 in a series
| REFERENCES |
US Anti-Tank Artillery; 1941-45, by Steven Zaloga, Osprey, 2005
If you would like your product reviewed fairly and fairly quickly, please contact the editor or see other details in the