| KIT #: | 346 |
| PRICE: | $9.98 SRP |
| DECALS: | several options |
| REVIEWER: | Scott Van Aken |
| NOTES: | Can be built with tracks or as a railway vehicle |
| BACKGROUND |
For a brief historical background and a look at what comes in the box, please visit the preview. This is the first 1/72 scale armor kit I've done in well over 20 years since I did a couple of ESCI vehicles, and that was when ESCI was still a going concern. Many of these kits have been previewed, but for whatever reason, I'd not given one a try. However, this all changed a couple of weeks ago when I built a Tamiya 1/48 Stug III ausf B. I thoroughly enjoyed the experience, as much because my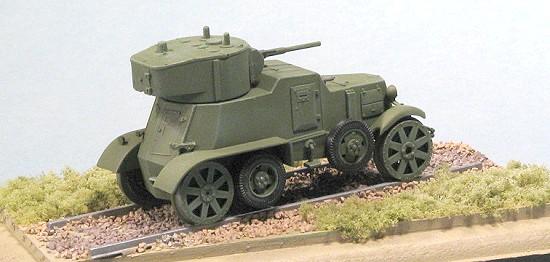 ignorance of the subject did not have me agonizing of the usual minutiae that often comes with knowing a lot about a subject.
It reminds me much of a conversation I had with a shop owner the other day. I was wondering why a certain company would go through all the work of releasing a Tiger I in 1/48 when Tamiya had such a nice one. His explanation was that the Tamiya kit had a lot of parts already molded in place whereas this particular kit had them and their various mounts and stuff separate. Made it 'more accurate'. Made it more likely to be covered with glue blobs was my retort and we then went on to discuss the merits of simplified kits over those with a zillion bits. He is an armor freak. I'm not. A lot can be said when it comes to aircraft, cars or whatever our passion is in this hobby. Small scale generally means fewer fiddly bits and this generally means a more relaxed build. This turned out to be much of what this build was about, despite the usual self-induced situations that often arise.
| CONSTRUCTION |
Though I've previewed a number of UM's products and sent many off to be built by others, I've not done one myself. Since I have a preference for wheeled vehicles, this particular one seemed like a good opportunity to give UM's kits a try.
The first thing I noticed is that the images in the instructions are larger than the actual kit parts. This isn't going to be an easy kit for the fumble-fingers out there and while I'm not exactly of the 'sausage finger' crowd, I did find tweezers helpful!
 I looked over the instructions to see just how I was going to tackle this one. As you know, I like to do subassemblies that will be the same color. In this regard, most of the chassis and engine were to be black while the rest of the vehicle is in the ever-popular Soviet Green.
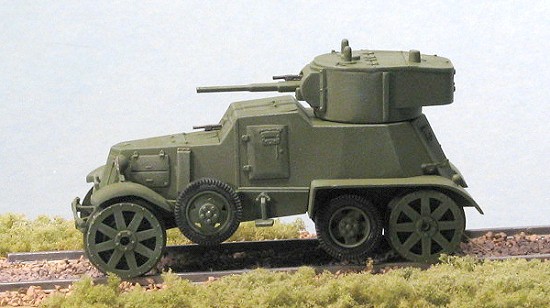
To this end, I decided to first build up the body of the vehicle. After cutting the parts off the sprue, I cleaned up the attachment points as some of these will be visible. First went in the 'grille'. It fits a bit loosely into the front, but I first glued the upper portion to get a good fit. Next, I removed the doors and other 'openings' from the sprue. These are flat bits that are just glued onto a smooth body section. The instructions provide a very nicely done set of drawings that are paramount to properly placing these bits. I also found that many of them had large ejector towers on the back that had to be cut off and sanded or scraped smooth. Once those were in place, the armored windscreen was installed from within. Then the rear section was glued in place. Both parts fit quite well.
Next bits to be assembled were the lower body section and the fenders. The fenders just sort of butt join onto the front of this part. Then it was first glued to the back part of the body and then the front when the parts were aligned.
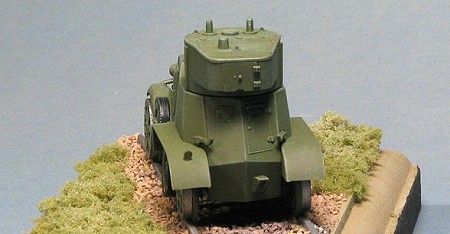
I then moved on to the turret. The first part to glue on is the rear access hatch. The opening on the turret section has to be enlarged to get this part to fit. I also found that the sprue attachment point for the hatch butted against the hinges, so great care is needed to remove this part. Then the top of the turret is glued on. This had to be slightly trimmed around the edges to 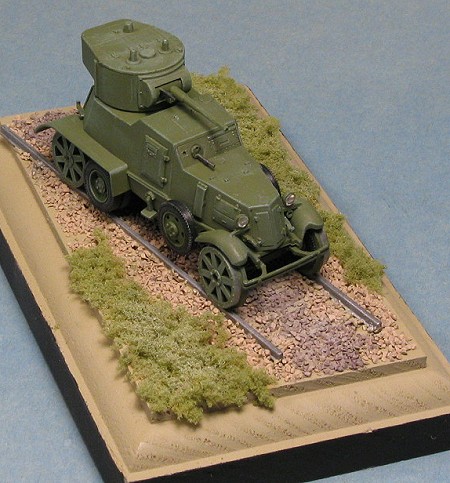 keep from being too large. I simply sanded a tad to get it down to size. For the front section, the actual gun mount piece fits inside the opening. You have to drill out the hole for the machine gun, but I left that and the attachment of the gun until later. This front piece fits well.
So far, I'm finding the fit of the parts to be quite good.
Next I had to tackle the suspension bits. First off, the two engine halves were glued together. A sink area is quite prominent in the oil pan so this was filled and sanded down. Next, the engine was glued to the chassis. The chassis requires a bit of care to remove as it has a number of sprue attachment points. Next, I started removing suspension bits. The front suspension has a plate attached to it. Unfortunately, this plate has a large ejector hole and so I mounted it backwards to hide this problem.
Then I returned to the body and started adding more parts. This included the rear fenders (one of which needed filler to take care of some molding flaws), the rear light, some tiny hooks for the front and rear, the windscreen machine gun and the headlights. These need to be cut down considerably to fit in between the body and the fender. The instructions tells you how much to trim. There are also a set of steps to glue in place.
On the chassis, the front bumper was glued in place after being repaired. The plastic used is quite soft so you need to be extremely careful when removing or trimming parts. I also broke one of the small machine guns. The one that is coaxial with the main gun needs the mounting hole drilled out. I also drilled out the cannon barrel and glued these to the turret.
After all this dried, I decided to do some painting.
| COLORS & MARKINGS |
 Nice thing about military vehicles is that one rarely has to do any masking. Really speeds things up. I first painted several of the chassis/suspension parts a very dark grey while still on the sprue. These parts would need repainted once removed and cleaned up. The rest of the model is to be in Humbrol 115. At least that is what the instructions state. Not having any of this paint, I checked a conversion chart and it converted over to US Olive Drab. Well, none of the paintings or photos I've seen of preserved Soviet military vehicles showed them in this brownish shade. They all tended towards the green.
For this job, I looked at what I had already to go and decided to mix a few shades. Basically, I mixed some Testors Wood, and British Dark Green, but it was too brown. I added some FS 34097 and it came up a shade that I liked. This was sprayed over the entire body, wheels and other bits that needed this shade.
| FINAL BITS |
Once the paint was on it and dried, it was time to continue doing the suspension pieces and other underbody stuff. On the body itself, I glued the transmission piece in place. Then the front suspension had the spindles glued on. These have short shafts on them for the front wheels. Fit is fairly good, but one has to be so careful because of the soft plastic. All of the 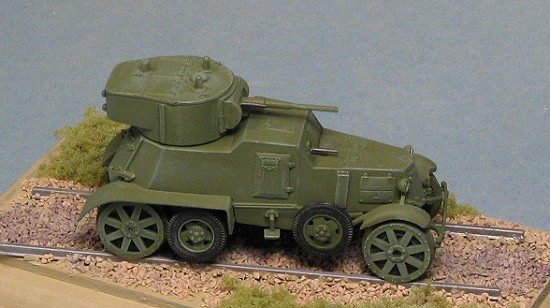 wheels had to have the centers drilled out a bit more to fit over the spindle stubs. The tires just press into place as frankly, there isn't any way to really glue them on.
The rear suspension gave me the most trouble. The rear gear case assemblies are supposed to have short bits that you later trim back a bit to fit into the holes in the rear spring sections. However, this is not obvious and on one, I cut these off thinking they were part of the sprue. Be warned that this isn't the case. I also broke the short drive shaft that fits between the two rear gears, again, due to the soft plastic. Counting the spindles (these are the longer ones) there are 10 parts to this area and it is quite easy to get things misaligned so I had to be quite careful. With these bits glued together, I set them aside to dry.
The front axle assembly was glued in place on the chassis and the brace glued on as well. I took the opportunity on this one to attach the main wheels. The small hub caps were somewhat difficult to get into place. I later realized that I should have attached the railroad wheels over the tires before attaching them as it was much more difficult to press them on when I had to worry about breaking the axle during the process. I also glued the turret on in the neutral position.
| PROBLEMS AND THE BASE |
 Even after getting the wheels on, I came to realize that I should have trimmed back the spindle attachment points as the kit was too wide to fit onto the track that is supplied. Hmmm...... Well, I came up with a solution that is not elegant, but works. First, I cut the track section right up against the inner rail attachment plates. I had originally thought to insert small sections of Evergreen strip to widen the rails. However, I discovered that by merely turning around the cut off piece, I now had the proper width! I am a genius.
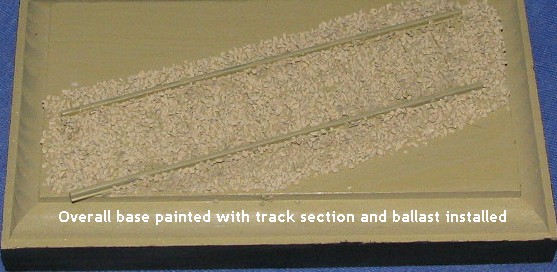 Next, I had to find an appropriate base. Some time ago, I bought some dirt cheap Chinese pine 'plaques' from Hobby Lobby. I think they were 50 cents each. A rectangular one was selected and I grabbed some handy tan paint. Slathering it on the upper surface, I put the track sections into the still wet paint at a bit of an angle. I applied more paint to hold the track to the surface. This worked beautifully.
Since I have a model railroading past, I had some gravel to put between the rails. This was applied while the paint was still wet. Some went on the outside as well. Actually, were I smart, I'd have waited for all to dry before applying the ballast as it was too much. But at least I didn't have to fill in the spaces between the cut ties! Another application of paint allowed some 'weeds' to be applied outside the rail section. I then painted the rails with Steel and even though I could easily add more detail, for this kit, that would be sufficient. Pleased with what I'd done, I set it all aside to completely dry. Later I'll spray some matte clear over it to help hold the stuff down even more. I also painted the edge of the base in matte black. Some additional 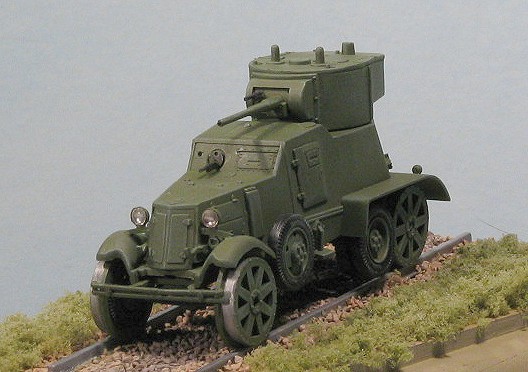 detail was made by taking a black wash and running it down the middle of the rails. Every well used train track I've seen has the center section properly dirtied up from stuff leaking out of the engine or other cars. The rails were painted steel and I should have rusted up more of it, but it turned out OK as it was.
With that out of the way, I returned to the kit itself and added a few details. This meant the exhaust and the spare wheels, which were glued in place. Before I cut and attached the headlights, I drilled them out to accept some M.V. Model Railroad lenses. I used #LS 29, which is 2.9 mm in diameter, though I guess I could have used some 3 mm in diameter, but I didn't have any at the time. These were placed in a drop of superglue and left to dry.
I also did some additional painting and touch up. The railroad wheels had their surfaces painted steel as this would have had the paint worn off. The exhaust was given some Rust-All and I then did some dry brushing. First with a lighter green and then with some aluminum to show wear. I'm not really good at heavy weathering so left it light. I did not soot up the gun as most of these vehicles were used before the war and would not have seen any combat.
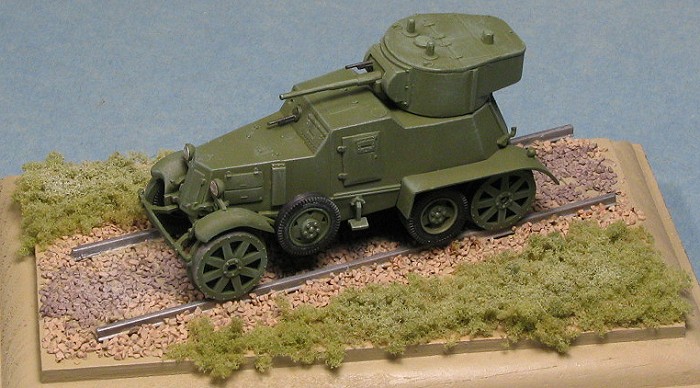
The last thing I did was to glue the vehicle to the rails. I did this for several reasons. One is that on the track, any tendency for a '3-wheel stance' can be masked. Another is that one will really have to struggle to peek under the chassis. Finally, it is just a lot easier to carry the thing by the base and I don't have to worry about some nimrod picking up the base and having the vehicle tumble to its doom. Oh yes, for those wondering how large this thing is, the base is 6 inches by 3 inches.
| CONCLUSIONS |
In case you haven't guessed, I found this to be a really fun project. Building everything including the base took from Sunday to Wednesday. Not quite a week-end project, but awfully close to it. The fit was pretty good, I had little trouble getting things in place and was able to overcome some of the situations caused by the soft plastic. I do have to say that the model is rather fragile and really won't hold up to a lot of handling. I'm sure that some of their tracked vehicles are more sturdy, but their wheeled ones really need to have everything glued tight. I really liked the separate tires as it eliminates one of the painting situations that many of us find rather frustrating. This kit was a really good value for the money as it not only provides an interesting subject, but you won't walk out of the room screaming during construction.
October 2005
#1384 in a series
Copyright ModelingMadness.com. All rights reserved.
If you would like your product reviewed fairly and fairly quickly, please contact the editor or see other details in the Note to Contributors.