Masterbox 1/72 British Armored car, Austin Mk IV
|
KIT #: |
MB 72008 |
|
PRICE: |
$ |
|
DECALS: |
At least eight options |
|
REVIEWER: |
Scott Van Aken |
|
NOTES: |
|
 The Austin Armoured Car was a British armoured car produced during the
First World War. The vehicle is best known for its employment by the Russian
Army in the First World War and by different forces in the Russian Civil War.
The Austin Armoured Car was a British armoured car produced during the
First World War. The vehicle is best known for its employment by the Russian
Army in the First World War and by different forces in the Russian Civil War.
In addition to the British-built Austins, a few dozens of vehicles were
manufactured in Russia in 1918-20. These are usually referred to as
Austin-Putilov
or - if fitted with a Kégresse halftrack chassis -
Austin-Kégresse.
This is a
pretty neat kit for the smaller scale modeler. There are two sprues and the
detailing is quite good. I did find flash on the turrets and there are some huge
ejector pin marks on the inside of the turret halves, but those will be
invisible when the kit is done.
The chassis has lower engine and transmission detail with a separate
exhaust/muffler. One adds the suspension bits to this chassis as well as the
body floor. The upper body is mostly one piece to which one adds the
'windscreen' armor and frontal armor.
 One has two options when it comes to the turrets.
One is armed with a Hotchkiss, but the other, with the Vickers, has quite long shields to add to either side of
the guns. The other has the shorter shields molded in place and these pieces are
the ones with a lot of flash. Two of the markings options have the longer
shields. Another options is in regard to wheels. You can have either wooden
spoke wheels or steel wheels.
One has two options when it comes to the turrets.
One is armed with a Hotchkiss, but the other, with the Vickers, has quite long shields to add to either side of
the guns. The other has the shorter shields molded in place and these pieces are
the ones with a lot of flash. Two of the markings options have the longer
shields. Another options is in regard to wheels. You can have either wooden
spoke wheels or steel wheels.
Instructions
are nicely done without any painting reference information. All of that is
provided on the back of the box where there are eight markings options. Here
there are either Vallejo or Lifecolor paint references, but no actual color
names, just the paint numbers. There are four British, one Australian, one
Japanese and two Russian vehicles. All are in a base color of some sort of drab,
but there are variations. FOr the most part, only one side of the vehicle is
shown with some having front views. I find the limited color information to be
unsatisfactory, requiring those who don't want to use these paints (or cannot
get them locally) to do extra research. The markings diagram show all spoked
wheel vehicles so one wonders why the instructions even provide a wheel option.
This is another of those sort of quirky kits that I like so I decided to give it
a go. The first thing you'll notice is that none of the parts on the sprue are
numbered so you'll be constantly referring to the sprue diagram. As sometimes
happens, I lost the first part that is to be glued to the lower chassis. This
is, I 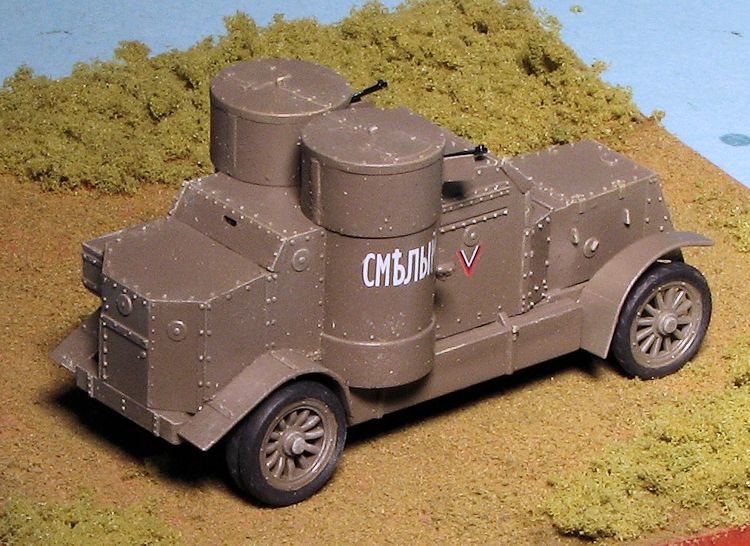 think, the flywheel and it is too long to fit in the space for which it is
designed. It was during the initial fit that it went flying from my tweezers. If
I don't find it before the kit is done, it is a simple matter to insert just
about any semi-thick disk of the appropriate diameter. The instructions are also
less than helpful in the placement of many parts.
think, the flywheel and it is too long to fit in the space for which it is
designed. It was during the initial fit that it went flying from my tweezers. If
I don't find it before the kit is done, it is a simple matter to insert just
about any semi-thick disk of the appropriate diameter. The instructions are also
less than helpful in the placement of many parts.
I next installed the muffler/exhaust and then went to attach the lower side
panels which include the front leaf springs. Note that the back of each leaf
spring fits into a tiny notch on the underside of the chassis. Also remove the
ejector pin marks from the inside of each of the two pieces or they won't fit
flush. There are a pair of towing hooks to install next. No positive location so
they were glued where it looked about right according to later drawings.
The rear end is three pieces, a central hub and drive shaft with two side
pieces. There is no positive locator in terms of getting these items properly
aligned. Note that on the rear leaf springs are two stubs. These fit into
corresponding indents in each of the axle sides. Be sure to clean up the flash
from the springs. Much fiddling has to been done to ensure these are not too
crooked when they dry.
The front axle and steering rod were next. Naturally, I broke the steering rod
thanks to the thinness of the plastic. Attaching the front fenders requires some
looking at the five view drawings to figure out just where they go. Align the
inner fender brace in the front with the attachment area on the chassis. Contest
modelers will want to remove the ejector pin mark from the inside. In step 7
there is a long item that looks like a pair of planks strapped together. This
fits on the lower right side of the chassis. It seems like it doesn't fit well.
Only glue the rear part of this just outside the rear springs. If you glue the
front, you won't get the body to fit. Another option is to wait until the body
is in place before attaching this piece as one of the brackets fits on the lower
body exterior. The next step would have you add the wheels, but I'll wait until
later for that. I did add the radiator at this juncture.
Moving to the armored body, there are several parts to attach to this piece.
Ensure that all the attachment areas are properly cleaned up and test fit. Note
that in step 10, the parts A3 and A15 are actually parts C3 and C15. I left off
the side lights and steps until after all the big bits were assembled to k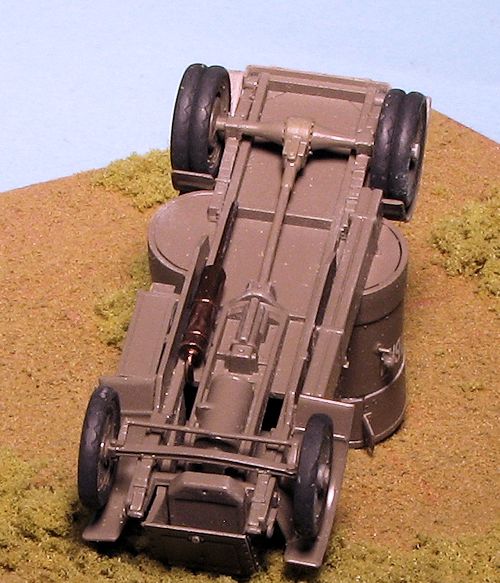 eep
from knocking those off during construction. It was at this time that I attached
the body to the chassis. It is a tight fit and the chassis kept popping out of
the body so I clamped it in place. I also cleaned up the wheels and assembled
the rear dualies. While that was drying, I assembled the two left side
containers and attached them. Again, you are not given really good placement
information so have to look at the drawings to determine just where these bits
are attached.
eep
from knocking those off during construction. It was at this time that I attached
the body to the chassis. It is a tight fit and the chassis kept popping out of
the body so I clamped it in place. I also cleaned up the wheels and assembled
the rear dualies. While that was drying, I assembled the two left side
containers and attached them. Again, you are not given really good placement
information so have to look at the drawings to determine just where these bits
are attached.
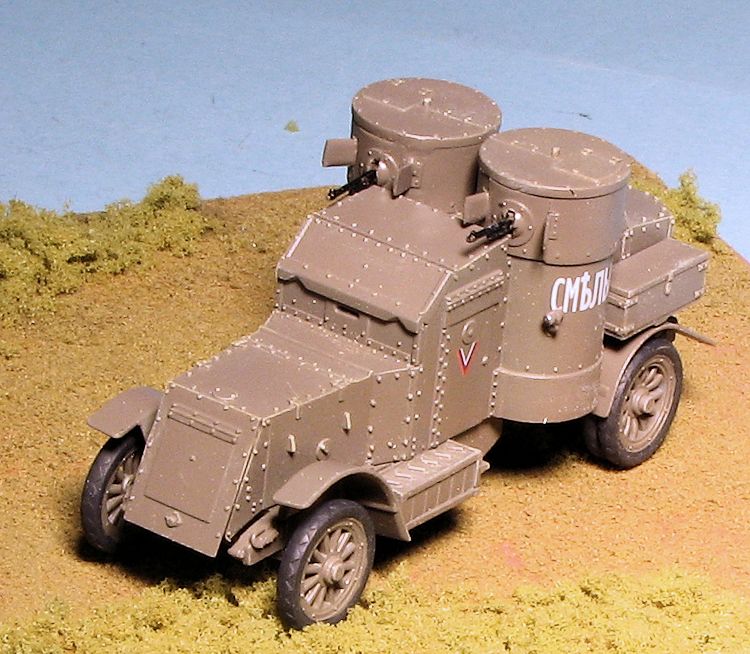
The last major assembly are the turrets. You are provided with two options. One
is a set that use the Hotchkiss guns and are shown for the majority of the
markings options. The other set is used for the Vickers guns. These turrets have
fewer parts and will probably be easier to assemble. I built the Hotchkiss
turrets and these were by far the worst fitting parts of this kit.
The first step in either turret is to clean up the major amounts of flash around
the machine gun side protectors. On the Hotchkiss turrets, these are smaller and
molded onto the turret sides. There is a good chance that you'll break off at
least one of these side protectors as the are very thinly mounted.
I built the first turret by gluing the side parts together than attaching those
to the base plate. Then there is the front machine gun plate to attach. There
are no positive locators so I had to remove the base plate several times until
things lined up. The gun was then inserted and the top glued on. This took
forever and the fit is poor. For the second turret, I first attached the front
machine gun plate to the base piece and once that was lined up, then I attached
the side pieces, installed the gun and then the top. This worked a lot better,
but was still fiddly.
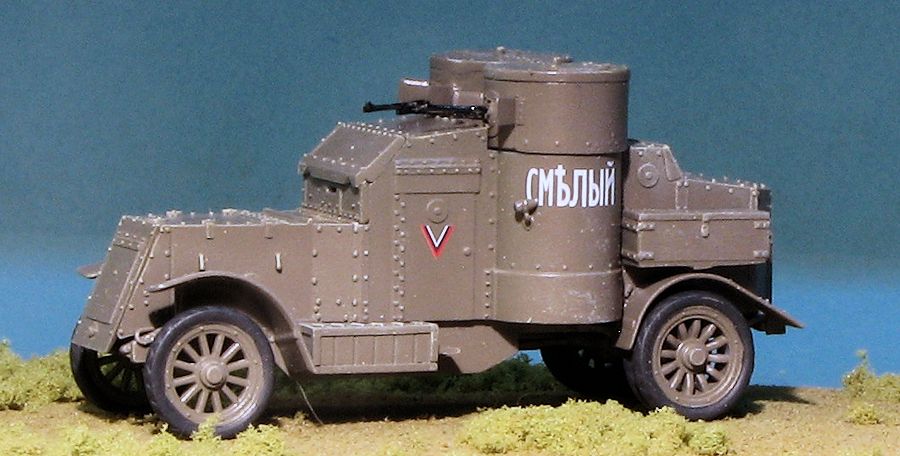
Since I did not have any of the paints listed in the painting guide, I asked
around to see what would be appropriate. PC-10 seemed to be the one mentioned
more often and I had some of that by Mr.Kit. It is almost the same shade as RLM
02 green grey and I wanted something more brown. So I used Mr.Kit PC 12 which is
a bit lighter than I'd like, but seems to be a pretty good shade. This is an
acrylic paint and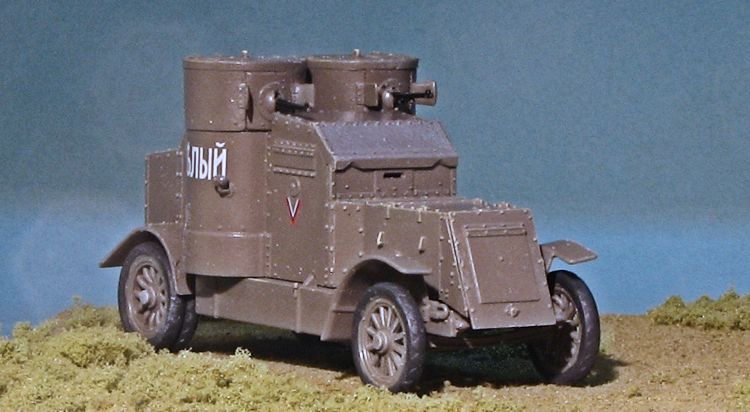 I sprayed everything with it. It dried well and is a semi-gloss, so I should
have no issues when it comes to applying markings. When painting the tires, I
noticed that while the rim/tire area was well delineated, it was rather shallow,
making brush painting a bit more challenging. I know it is not prototypical, but
I would like to see every model maker make this area a bit deeper to make brush
painting easier.
I sprayed everything with it. It dried well and is a semi-gloss, so I should
have no issues when it comes to applying markings. When painting the tires, I
noticed that while the rim/tire area was well delineated, it was rather shallow,
making brush painting a bit more challenging. I know it is not prototypical, but
I would like to see every model maker make this area a bit deeper to make brush
painting easier.
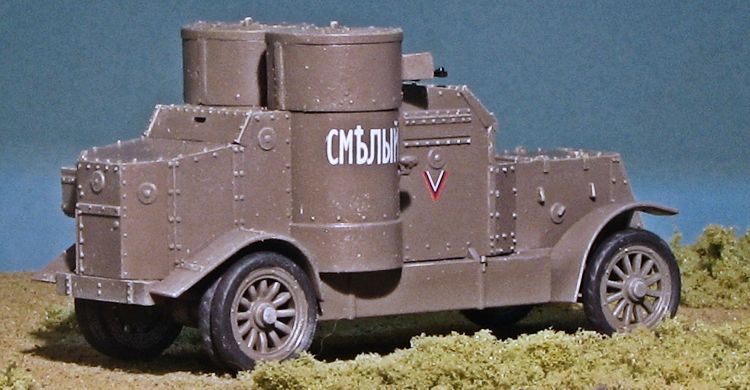
I then glued on the wheels and applied the decals. Not much too these. I picked
one of several Russian options that had slogans written on the side. The decals
are actually very good and a bit of Microsol was all it took. I then did a
little bit of detail painting and added on the lights and the foot step. These
were then painted and I did some dry brushing using a lighter brown. The wheels
were glued on and naturally, not all of them touch the ground so a tad bit of
sanding was done to level things out.
The finished kit is actually quite nice and despite
the, at times, rather vague assembly instructions, the finished model turned out
well. It is rather fiddly and some of the small parts require quite a bit of
dexterity to attach (like the side lights). Regardless, the kit built fairly
quickly and is a nice addition to any small scale military vehicle collection. I
never did find that flywheel piece.
https://en.wikipedia.org/wiki/Austin_Armoured_Car
September 2015 Thanks to
www.dragonmodelsusa.com for the
preview kit. Get yours at your favorite retailer.
If you would like your product reviewed fairly and fairly quickly, please contact the editor
or see other details in the
Note to
Contributors.
Back to the Main Page
Back to the Review
Index Page