Siga Models 1/72 BRDM-1
| KIT #: | 72-MO5 |
| PRICE: | $ |
| DECALS: | At least two options |
| REVIEWER: | Scott Van Aken |
| NOTES: | New mold kit |
| HISTORY |
"The BRDM-1 amphibious scout car first appeared in the Spring of 1959 and was designed by VK Rubtsov of the Dedkov OKB who later designed the BRDM-2. The first prototype was completed in February 1956 and went to the Black Sea area for official government trials. It was accepted for service with the Soviet Army the following year and production began late in 1957. The BRDM Model 1957 has an open roof and the BRDM-1 Model 1958 has a closed roof with twin hatches, this being the standard production model. Total production of the BRDM-1 is believed to have amounted to around 10 000 vehicles.
The hull of the BRDM-1 is made of all-welded steel with the engine at the front and the crew compartment at the rear. The driver is seated at the front of the vehicle on the left with the commander to his right. Both are provided with a hatch to their front that is hinged at the top and opens forwards, and a windscreen with a wiper blade. The hatch cover has a vision block for when the 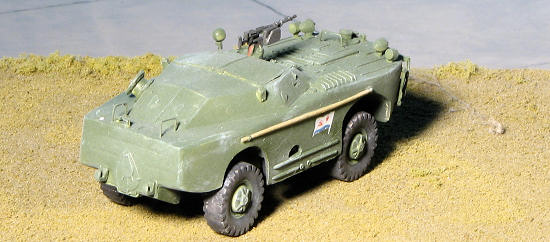 hatch is closed. A vision slit protected by a vision block is provided to the left of the driver and right of the commander. There are two firing ports in each side of the hull and two large hatches in the forward part of the roof that open to the rear. The rear of the crew compartment slopes at an angle of about 30° and is fitted with a two-piece hatch that opens either side of the superstructure. There is a firing port in each hatch.
On either side of the vehicle, between the front and rear wheels, are two belly wheels which are lowered by the driver and give the BR DM-1 improved cross-country performance and also allow it to cross ditches. The BRDM-1 is fully amphibious, being propelled in the water by a single water-jet at the rear of the hull. Before entering (tie water a trim board, which is stowed folded under the nose of the vehicle when not | in use, is erected at the front of the hull. Standard equipment includes a system that allows the driver to adjust the tyre pressures to suit the type of ground being crossed. The vehicle is not fitted with an NBC system and when introduced was not fitted with any night vision equipment. A white light searchlight mounted on the left side of the hull is operated by the driver. A communications reel and wire is mounted on the left side of the superstructure towards the rear.
The vehicle is normally armed with a 7.62 mm SGMB machine gun pintle-mounted on the forward part of the roof, which has a limited traverse of 45" left and right and can be elevated from -6 to +23.5°. Some vehicles are fitted with a 12,7mm DShKM heavy machine gun mounted at the forward part of the roof with a 7.62 mm SGMB machine gun mounted at the rear.
Specifications:
Crew: 5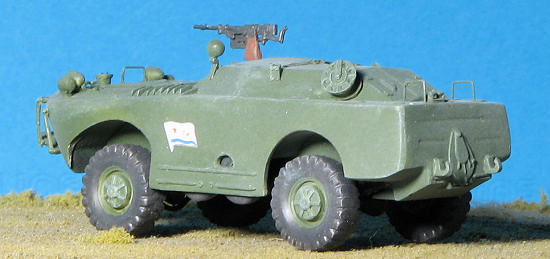 Configuration: 4x4
Unloaded weight: 5500 kg
Length: 5.7 m
Width: 2.25 m
Height: 1.9 m
Max speed: (road) 80 km/h (water) 9 km/h
Engine: GAZ-40P 6-cylinder in-line petrol, water-cooled, developing 90 hp at 3400 rpm
Main armament: 1 x 7.62 mm MG
Ammunition: 1250
Ready to launch missiles: n/a
Armour (max): 10 mm
Status: Production complete, in service with Afghanistan, Albania, Bulgaria, CIS, Congo, Cuba, Guinea, Mozambique, Sudan and Zambia. In many of these countries it is now in the second line units or held in reserve."
For those of you who think that I'm all of a sudden well versed in Russian/Soviet military equipment, I must confess that the above information was courtesy of a lengthy internet search!
| THE KIT |
According to the side of the box, this and other military vehicles from SIGA are made by a partner company, Ace of Kiev, and reboxed with different decals by SIGA. The now common whitish-grey plastic is about what you'd expect from low pressure 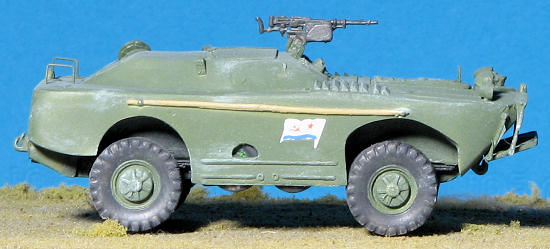 injection molding. The detailing is soft and the parts generally have flash and sprue stubs that continue onto the part. This means a lot of clean up. Thankfully, the plastic is rather soft itself so is easy to cut.
Construction seems pretty straight-forward with most of the 76 parts being confined to the little hand holds, lights, vents and other items that seem to be stuck onto military vehicles. It appears that the upper hatches can be built in the open position, however, with no interior that would seem to be a bit pointless unless you are into scratch-building.
The instructions are quite good, breaking construction down into three major and two sub assemblies. The small decal sheet is well printed and thin, offering markings for seven different vehicles from the Soviet Union, Poland, East Germany, and Egypt. All except the Egyptian BDRM-1 are in khaki-green with the latter being in a sand color. A plus are several color photos of the actual vehicle on the side of the box. They should come in very handy during construction.
| CONSTRUCTION |
This is a kit I started probably eight to ten years ago. I got pretty far along in building the hull, but the constant trimming and filling and sanding really got to me after a while. Yes, it is a bit of a pig to build. The majority of the time spent on it is dedicated to cleaning up the parts, and when it comes to very small ones it can be quite tedious. However, this was how these early Ace kits were. Fit has also proved to be problematical. So much so, that it sat, unloved and unworked on from about 2000 until recently. Every time I went to do something I got bogged down.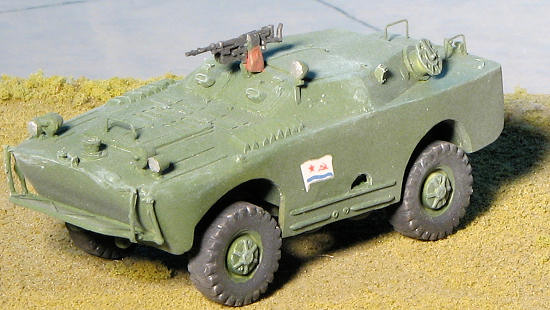
Now, in 2011, I figured that this thing would be finished one way or another. In fact, I was hoping that I'd be able to complete it in a week's time. Let's see how it goes.
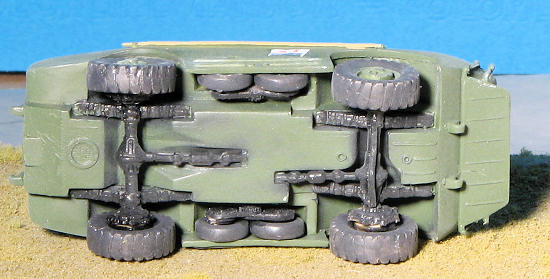
Grabbing a fresh blade for my scalpel, I went to work. First I sanded off the remaining filler from way back when and then cut off the already glued together differentials. The instructions are somewhat vague on just how these parts fit, but I managed to glue them onto the already in place springs. Naturally, these springs were at slightly different heights so I glued the differentials so they'd appear straight with one side actually not glued to the spring at all. Attaching the drive shafts was next and again, alignment is problematical in having them actually go from the transfer case in the hull to the differential cases.
Letting those dry, I went to work cleaning up the hubs for the big main wheels. There are three pieces that fit into each other for each hub. Each piece required major clean up before gluing. These were eventually cobbled together enough to be able to attach them to the back of the wheel. If these wheels were designed to rotate, it would take a real craftsman to allow that.
 Back at the top, I started attaching the various bits and pieces to the hull. Most were vaguely shaped like the parts shown in the instructions. They sort of fit where designed, but the truth is that the kit parts and those shown in the instructions are not the same and it would take major work to get the bits to properly match up. The lights, for instance, were so covered in blobs of plastic that I might as well have been working from a block of styrene by the time I got them ready to install. There are sections that need to be made from wire and I used .005 inch stainless steel for these. They need to be .009 inches so are a bit thin.
The front ramp section is supposed to be nearly flush with the front of the hull. However, the actuating arms are far too long to allow that to be properly done. Shortening these arms would eliminate one of the attachment ends so this feature was installed to match the ends of the attachment arms. And the list goes on with every other bit to be installed. This includes the gun whose assembly is rather vague as is the mount attachment point. Finally, I had things pretty much done and decided to paint it.
| COLORS & MARKINGS |
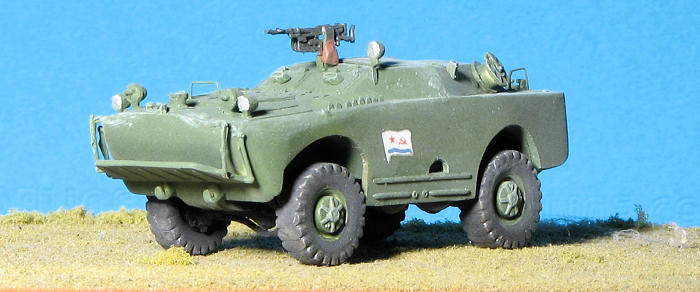
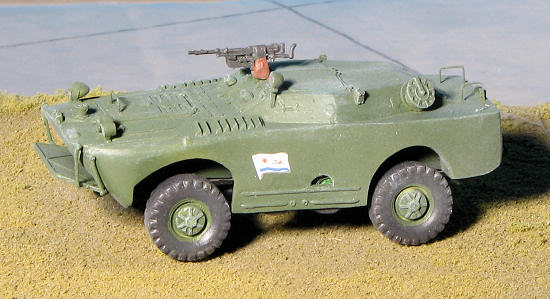
I used French WWII khaki green as it was a good match for the box art. The running gear was painted black as was the back of the wheels. I used the upper surface color for the outer wheel hubs and weathered black for the tires. I did have to do some major brush painting to take care of overspray, but wasn't really concerned about all that. This is, after all, a kit of doom production. For markings, I applied the Navy decals. These are translucent and easily torn so the one on the front was not attached as it got trashed. A coat of matte clear was applied.
| FINAL CONSTRUCTION |
 Final construction consisted of attaching the wheels. Imagine my total lack of surprise when I found that the chassis pieces are too far to the rear, despite following the instructions precisely. This meant that the wheels did not fit into the center of the well. Not only that, but the attachment points for the wheels are tiny in comparison to the wheels so getting everything square is nearly impossible. But get them on I did. The one component I had little trouble with were the smaller auxiliary wheels that are designed to keep this thing from being high centered.
The kit was then dry brushed with light green and white to bring out what detail hadn't already been sanded away. It was done and I did break off the tail light prior to photographing it, the part itself disappearing into that place where missing parts go.
| CONCLUSIONS |
There is no way I could possibly recommend this to the average or even above average modeler. It provides a basis for scratch-building, but I'm not sure why one would want to. I'd like to think there is a better kit of this out there as this one is surely one of those that provides many many hours of (frustrating) building for not much of a result. May 2011 My thanks to the now defunct Siga Models for the review kit. Thanks to If you would like your product reviewed fairly and quickly, please contactme or see other details in the