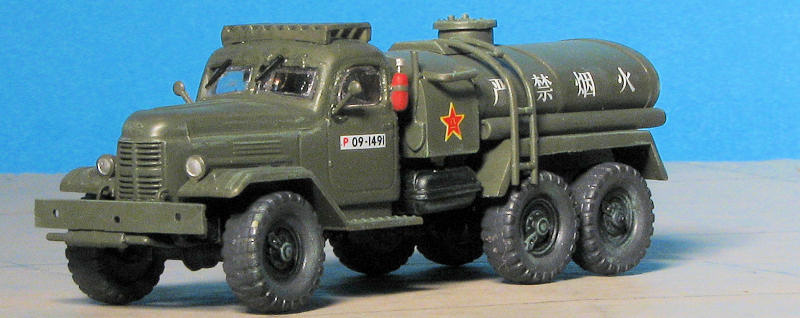
Trumpeter 1/72 Jiefang CA-30 Fuel Truck
| KIT #: | 01104 |
| PRICE: | $3.95 on sale at GreatModels |
| DECALS: | One option |
| REVIEWER: | Scott Van Aken |
| NOTES: |
| HISTORY |
 Throughout the 1950s, the Soviet Army helped China to build up their heavy industries. As part of this plan, China established theFirst Automobile Works (FAW) in Changchun.Soon after, in July 1956 they introduced the Jiefang CA-10 4x2 army truck, a copy of theZIS-150. A couple of years later, they introduced the Jiefang CA-30 6x6 army truck. The CA-30, like the ZIL-157, had great cross-country capabilities; and was available in a variety of configurations, including: Cargo/transport, tractor-trailer, shelter, etc... Both the CA-30 and CA-10 were used extensively by the Chinese People's Liberation Army up until the 1990s, when they were largely phased out of service. Today, only a few of them remain in service.
| THE KIT |
Molded on four sprues of which three are an olive green plastic and one is clear, the kit has the cab section of the truck separate. Clear parts are nicely done though a bit on the thick side for the scale. However, few will find this a problem and it sure beats no clear bits as on some or acetate as on others.
 The overall molding of the parts is actually quite good with only a little bit of flash on some of the pieces. This particular kit is dated 2001 so it is one of their first kits in this scale. Suspension pieces are nicely molded and will fit on the well done chassis frame that includes a lower engine section. the various drive shafts on this all wheel drive vehicle are designed to not be glued in place for some odd reason, though perhaps it will make construction of this a bit easier. There are three metal axles (not shown) that have knurled ends which fit into the wheels. It seems to me that getting everything flat might be the biggest challenge tobuilding this one so perhaps one would want to fit the wheels early; at least temporarily.
Cab interior detailing is minimal with their being a tub with molded in seat into which one glues the gear shift levers and the steering wheel assembly. The fuel tank is large and well molded, fitting atop the chassis along with the cab assembly in the last construction step. There are other bits that fit on this such as a fire extinguisher and a grating section that fits atop the cab.
Kit instructions are fairly well done with nice, clear drawings and paint references that are in Gunze and Tamiya paints. The lone markings option is the box art truck in Olive Drab. The decals are not the best looking in the world, but perhaps they will work OK. One never knows until one tries.
| CONSTRUCTION |
For this one, I basically went with the instructions; at least for a little while. This meant assembling the chassis first. The parts all fit fairly well, but I had a lot of difficulty keeping things level and had to trim a few pieces . It is helpful to install the metal axles while gluing in the various suspension bits. This gives a visual clue as to how well the alignment is going. I fear that even with all that, mine will not be square.
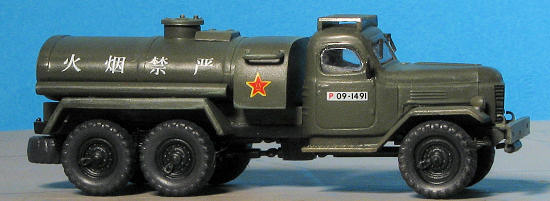
 While this was going on, I started assembling the fuel tank itself. I did find that quite a bit of filler was needed on the back as it is somewhat concave. The ladder is in halves and good luck getting the rungs to look good. If building for a contest, I'd replace them with rod.
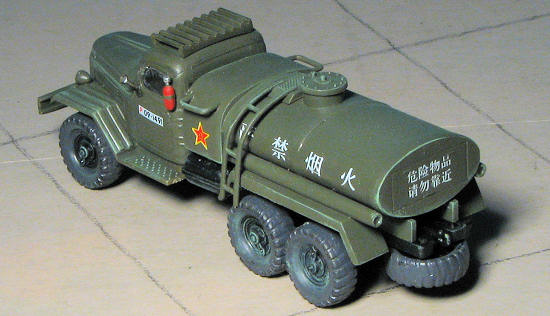
Back at the chassis, installing the drive will take a bit of careful planning. The instructions suggest not gluing the many shafts, transfer box and differentials and that is good advice. Beware that the shafts to the aft differential have to go under the one just in front of it. I managed to get all mine installed without breaking anything and I'm rather pleased about that. I then added the fuel tank, various air bottles, hooks and front bumper. Still no wheels as those need to be painted prior to installation.
The interior is a single piece with no instruments. There are just three shafts to glue in with one holding the steering wheel.
| COLORS & MARKINGS |
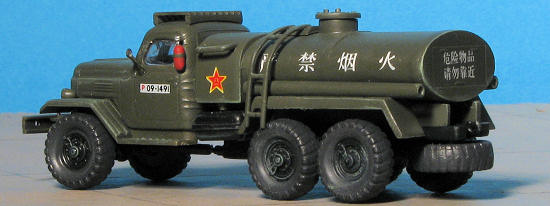 At this stage, I decided to start adding paint. The entire chassis was painted black using Testors Racing Lacquers. This shade was also used for the interior. The rest of the parts were painted a dark green using an acrylic shade I mixed for a previous truck kit. It is important to be sure to paint the cab section before installing the clear bits. Those can then be roughly masked off for later spraying of the forward fender/floor section.
| FINAL CONSTRUCTION |
Once the initial painting was done, I glued on some of the smaller bits like the headlights, cab roof grating and the fire extinguisher. Attaching some of these smaller parts first mak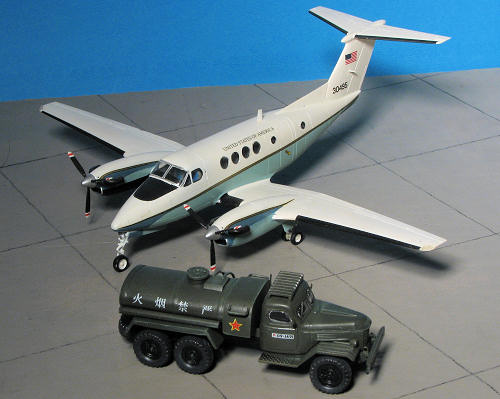 es it easier to sand or scrape the seams. I then installed the clear bits in the cab. Trumpeter provides acetate windscreens along with the plastic ones. While the side and back windows fit fine, the plastic windscreen does not, which is why the acetate replacements. I used the plastic ones anyway as my abilities with acetate clear bits is less than good. Yes, I did get a glue smudge on the right side window. Dang!
The cab was then glued to the front fender piece, which in turn was cemented to the chassis. I had painted the tires and wheels so started pressing those on the axles. Note that these are handed. Much to my dismay, I found that I'd cemented the rear axle mounting posts a bit off so the rear wheels don't point straight. The tank was then glued on the chassis. At this time, I decided to add the decals. They are actually quite opaque, though there was some issue with silvering on the side markings. These are also handed so follow the instruction sheet when applying them. I used both Solvaset and Mr. Mark Softener on them.
The last plastic bits (basically the side view mirrors and the windscreen wipers) were glued in place, I then did some detail painting and a bit of dry brushing after matte coating the decals.
| CONCLUSIONS |
 This probably is not everyone's cup of tea, but I found the kit went together well, does require a bit of planning and makes into a very nice model of something most people don't build. This makes fuel truck #2 in 1/72 for me and it is a pleasant diversion from the usual for most of us. It also doesn't take up very much room on the shelves. Something important for those who don't have a ton of display space available. I have to say that I liked the metal axles and will undoubtedly build more from Trumpeter when the opportunity arises.
| REFERENCES |
http://en.wikipedia.org/wiki/Jiefang_CA-30 October 2010 Check out www.greatmodels.com for deals like this on many kits and accessories
If you would like your product reviewed fairly and fairly quickly, please contact the editor or see other details in the Note to Contributors.