| KIT #: | 82912 |
| PRICE: | $40.99 SRP |
| DECALS: | One options |
| REVIEWER: | Scott Van Aken |
| NOTES: | New tool kit |
| HISTORY |
A draisine primarily refers to a light auxiliary rail vehicle, driven by service personnel, equipped to transport crew and material necessary for the maintenance of railway infrastructure.
Later, the name draisine came to be applied only to versions used on rails and was extended to similar vehicles, even when not human-powered. Because of their low weight and small size, they can be put on and taken off the rails at any place, allowing 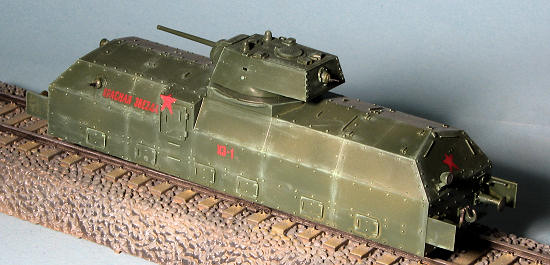 trains to pass.
The military usage of draisines concerned, first of all, armoured draisines. They were light armoured rail motor vehicles, intended for reconnaissance, scouting, track patrolling and other auxiliary combat tasks, usually belonging to armoured trains. Early vehicles of this kind were built in Russia during World War I. Later, often armoured cars were used as armoured draisines, after exchanging their wheels to railroad ones, or fitting them with additional retractable railroad rollers. Some countries however manufactured purposely built armoured draisines between the wars, like the USSR and Czechoslovakia. Peculiar vehicles were Polish armoured draisines - they were tanks or tankettes fitted with special rail chassis, able to be used on rails or on the ground, leaving the rail chassis on the rails. Some countries developed rail-cum-track armoured draisines, with retractable tracks railroad wheels - they were not widely used, however. Different armoured draisines were used during the Second World War, starting from the invasion of Poland carried out by Nazi Germany.
| THE KIT |
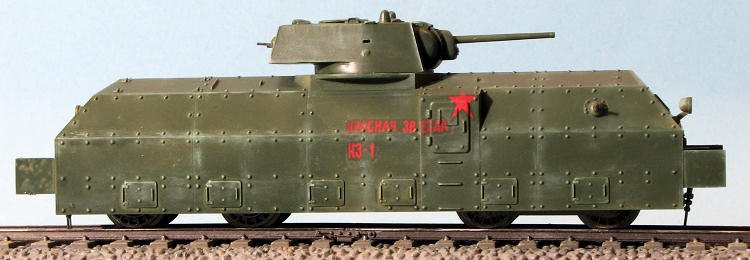
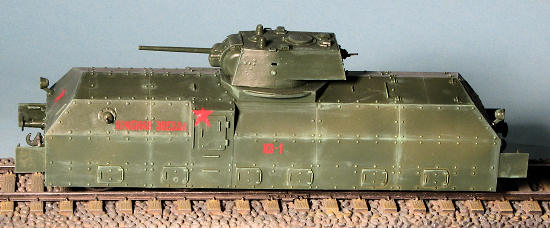
While I am not sure if this actually fits into the category of a draisine, that is what is on the box. This is an armored train car that has the 76mm KV-1 tank turret on top of it. It is neither small nor light and rides on two four wheel bogies. It is not self powered that I can see.
The kit molding is superb. Hobby Boss has earned a reputation for good moldings and this one is no different. There are sprues for the rail and roadbed, two for the bogies and other duplicate items, and one for the bottom of the car and turret bits. The car 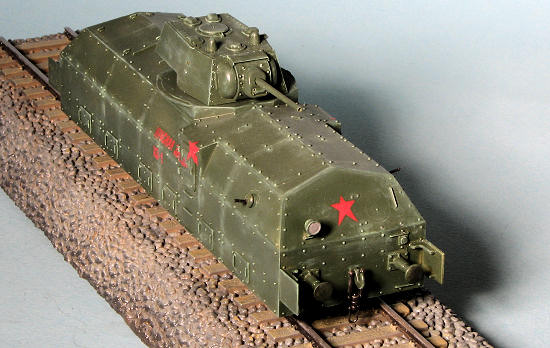 body is separate and there is an additional 'end of base' piece.
First the base. It is comprised of two major pieces that sort of snap fit together. These have a nicely detailed pebble roadbed, but the ends do not match up with the adjoining piece. Few will probably notice and I can see this sprue, with its separate rails being used for other kits needing a rail roadbed.
The bogies have plastic axles that should be more than adequate. Each of the wheels has a center section and a tie rod that links each pair on either side. These bogies will simply twist fit into the bottom of the body. This will need to be done before gluing the bottom onto the body of the car as this large section is depressed well into the body, making attaching the bogies later an impossibility.
The gun turret is well detailed and should look the part when attached. There is a real lack of outside bits and pieces, these being pretty well limited to lights, bumpers and connectors.
Markings are for the lone box art vehicle, which can be painted in winter whitewash or overall Soviet green. If painting the vehicle white, you will need to come up with something for snow to cover the base's pebbles. The instructions are typical of many new Chinese kits in that no color info is supplied during construction. The construction sequences are well drawn and should pose no problems. A full color painting guide is included and markings are for the single vehicle shown on the box art. I have had fairly good results with Hobby Boss decals so these should prove to be no issue.
| CONSTRUCTION |
This kit can be built in four subassemblies to be joined together at the end. There are the bogies and lower chassis, the body, the gun turret and the track/roadbed.
Most of these can be pretty well built up before painting other than perhaps the roadbed section as there will need to be some separate painting of the ties, the rails and the roadbed itself. But I did assemble the four bed sections. These fit pretty well, though 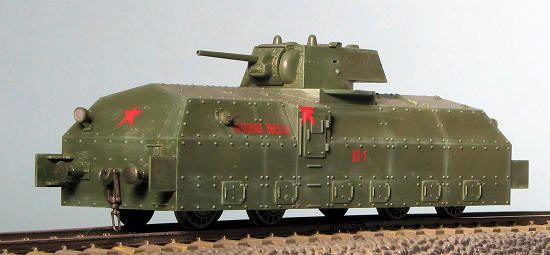 I found that I had to use superglue on the 'wings' where the bed slopes down to not have a piece jut out from the surroundings. I also did not snap together the pieces for fear of breaking one of the mounts.
I also started on the bogies by gluing the axle supports into each one. I found out that the axles will easily slip through them later so left those and the wheels off. The wheels have center sections. These fit so tightly that I did not need to glue them. The wheels were left on the sprue to ease painting.
This meant moving on to the body. Just about all the small pieces can be attached to this piece in one go if one wishes. I noticed that the bumpers each had different ends with one side being rounded and the other flat so pay attention. I left off the machine guns and the attachment chain until later.
At the turret, the upper and lower sections were glued together. This had the worst seam of any of the parts I encountered. A bit of filler was needed, followed by sanding to smooth down the join on the base of the turret. I also glued one side of the gun mount on first and let it dry before attaching the gun and the second side. The barrel is a rather loose fit and that was glued on prior to attaching the mount.
| COLORS AND MARKINGS |
 For painting, I prepainted the rails and the wheels and the connecting chains steel. The bogies and the chassis were painted black. For the body and the turret, I used Testors Soviet Armor Green. This latter shade was also used for the machine guns, which I had left off for fear of breaking them. For the roadbed, it got a coat of medium-dark grey with the ties brush painted a bit of a lighter shade. To be honest, painting the base will be, for me, the biggest challenge as I am seriously not good at doing things like this.
Nonetheless, for the base I first sprayed on some Engine Grey, shooting from the bottom up. When dry, shooting from the top down, I used Light Sea Grey. These paints were chosen as they were already mixed from earlier projects and seemed to work OK. The ties were dry brushed with Humbrol 94, which is a tan. It turned out OK, though nothing like what many other reviewers can accomplish.
| FINAL BITS |
At this point, with everything painted, or close to it, I did the final pieces. First, I attached the turret to the body. Then the bogies were built up. I basically glued everything together as that seemed to be the best way to do things. The areas on the wheels that hit the rails were painted with Metallizer Steel, a lighter shade than the Alclad II version. Then these were installed in the lower body section.
 Back at the base, the rails were sanded on the top and bottom to get rid of the seams. If you do not, then you will not be able to slide the rails into the notches on each tie as it is a very tight fit. The upper sections were then sanded and those were also brush painted with Humbrol Aluminum. The tie connectors were then glued on. These take a bit to get in place, but eventually they will snap in place and then they can be glued.
I then installed the decals. These worked just great and Mr Mark Softer did a job on them. One slogan decal has to be cut before installation. Though the side stars look like they were not put on right, the instructions show the upper point on the top of the opening like that. Looking at the painting guide, the green I used looked a bit dark so I drybrushed all of the upper surfaces with Vallejo Sky Green. I rather like the results, though it may not be to your tastes. The chassis was simply pressed into the body. Looking at the pics, perhaps I should have pressed the 'front' a bit more, but that can be fixed later.
It was then time for touch up painting on various bits before the final pieces were glued in place. I then glued it to the rails. For those who are shy on space, you can build this one with just one section of track and it will fit. Then the last bits were attached; those being the three guns and the two coupling chains. The final task was to tone things down a bit with a clear matte coat.
| CONCLUSIONS |
I found this to be another trouble free build from Hobby Boss. The more of their newer kits I build, the more I like them. This one is the type of military subject that appeals to me and I would be pleased to see others in this same vein. It is a kit that I can quite easily recommend to you.
| REFERENCES |
http://en.wikipedia.org/wiki/Draisine
May 2012
Thanks to Squadron Products for the preview kit. Get yours at your local retailer.
If you would like your product reviewed fairly and fairly quickly, please contact the editor or see other details in the