Tamiya 1/48 JS-2 model 1944
| KIT #: | 32571 |
| PRICE: | $38.00 SRP |
| DECALS: | Four options |
| REVIEWER: | Scott Van Aken |
| NOTES: |
| HISTORY |
FirsThe IS Tank (IS in Cyrillic "ИС", meaning the Joseph Stalin or Iosif Stalin in Cyrillic "Ио́сиф Ста́лин") was a series of heavy tanks developed as a successor to the KV-series by the Soviet Union during World War II. It was named after Soviet leader Joseph Stalin. The heavy tank was designed with thick armour to counter the German 88 mm guns, and carried a main gun that was capable of defeating the German Tiger and Panther tanks. It was mainly a breakthrough tank, firing a heavy high-explosive shell that was useful against entrenchments and bunkers. The IS-2 was put into service in April 1944, and was used as a spearhead in the Battle of Berlin by the Red Army in the final stage of the Battle of Berlin.
 Early IS-2s can be identified by the 'stepped' front hull casting with its small, opening driver's visor. The early tanks lacked gun tube travel locks or anti-aircraft machine guns, and had narrow mantlets. According to Steven Zaloga, the IS-2[ and Tiger I could knock each other out in normal combat distances below 1000 m. At longer ranges the performance of each respective tank against each other was dependent on the crew and combat situation.
Later on, with the aforementioned late-1944 modernization, the stepped hull front was replaced with a single plate of 120 mm thickness angled at 60 degrees. Some sources called it IS-2m, but it is distinct from the official Soviet designation IS-2M for a 1950s modernization. Other minor upgrades included the addition of a travel lock on the hull rear, wider mantlet, and, on very late models, an antiaircraft machine gun.
In the mid-1950s, the remaining IS-2 tanks (mostly model 1944 variants) were upgraded to keep them battle-worthy, producing the IS-2M, which introduced fittings such as external fuel tanks on the rear hull (the basic IS-2 had these only on the hull sides), stowage bins on both sides of the hull, and protective skirting along the top edges of the tracks.
| THE KIT |
 earthquakes. Whatever the case, this feature certainly does add some heft to the completed model. In this case, there are four cylindrical weights to be trapped in plastic caps and cemented to the chassis floor.
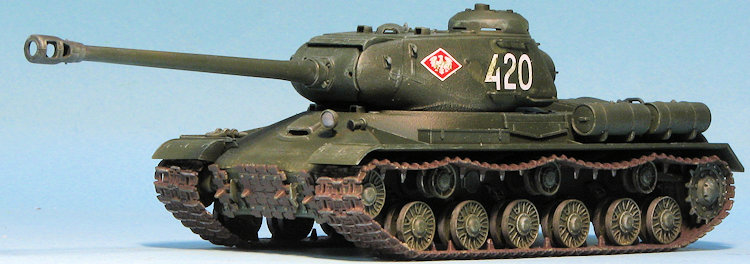 Instructions are well drawn with 14 construction steps and list of parts not used. All paint information is with Tamiya colors. Four markings options are provided, all in olive green. I should mention that the paint color recommended is from their spray paint line. The box art tank requires the white bands to e painted by the modeler. Another Soviet option has thinner bands and both are from Berlin in 1945. For those not wanting to paint white bands, a Czech tank from Prague in May 1945 and a Polish tank from Germany in April 1945 are also included. The decal sheet is very nicely done and Tamiya has chosen semi-colorful options.
 | CONSTRUCTION |
Those who have built Tamiya kits are aware that the company is probably the best in the world when it comes to engineering their kits. Parts actually fit well and they make every effort to ensure that one does not place something on the wrong side.
In this case, I followed the instructions pretty closely as AFVs are not my 'bread and butter', though I do enjoy doing them until they become tedious. By that, I mean that if I have to glue six pieces to make a box rather than have the part molded in one or two pieces, that is, to me, tedious.
My initial work was not assembly but painting. I figured it would be better for me to paint the tracks while still on the sprues. For this I used Trackbase's Track Color acrylic. This stuff is quite thick and is best brush painted as every attempt I have made to thin it for airbrushing has resulted in something so thin t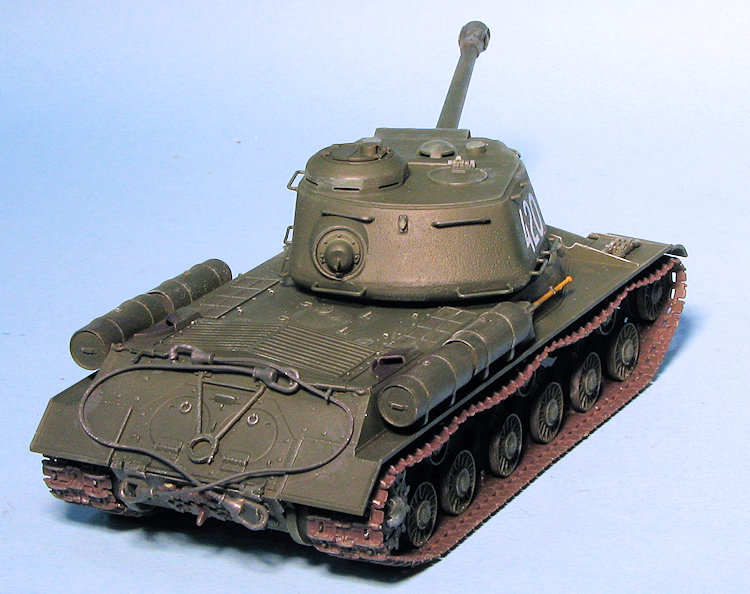 hat even four or five coats doesn't work. Anything thicker and it wouldn't go through the airbrush.
Once that was done (and it still took a couple of coats), I started by assembling the lower hull. Tamiya provides four of their cylindrical weights and some end caps to allow these to be glued to the inside of the hull. It adds the heft that Tamiya seems to like in these kits, but if you don't want it, you can leave them out. Next were all the suspension arms. There are a considerable number of them, but Tamiya has them keyed to where it is near impossible to goof things up. I then started cleaning up and assembling the road wheels, return rollers and the drive sprocket. This took a bit and once done, they were cemented in place. The drive sprocket has a polycap inside so that can be rotated once installed. This will make it easier to place the track. I skipped installing the track as I wanted to paint everything first.
During all this, I also started working on attaching bits to the upper hull. Apparently the tank was built with the headlight and horn on either the right or left side so one needs to open the appropriate holes depending on the tank being modeled. I also built up the tow ropes. Tamiya provides a section of pretty stiff string to use for this and one glues the ends on then winds it around the aft end. Those were set aside until I finished building up the upper hull. I also assembled the fuel tanks, which took a bit of time as the seams had to be dealt with.
The kit can be built in three subassemblies, which is good as one really needs to paint each one separately before attaching them all together and then doing touch up. The turret contains the majority of the small fiddly bits in the form of hand holds and lifting brackets. These took a while. I also had to figure a way to rough up the mating surfaces between the upper and lower turret half. The fit here was not the best and I had some steps to deal with, hence the need to attend to these. I'm not sure how it will look until it is painted, but I simply brushed on some glue and then tapped on the seams with the bristles of a toothbrush. At least is won't be smooth. The gun barrel is held in the mantlet by a pair of poly caps so it can be raised and lowered. Those more into the subject will want to invest in an aluminum barrel.
| COLORS & MARKINGS |
After attaching all the appropriate bits to the three subassemblies, I painted them with Tamiya XF-13, JA green after discussing the shade with the LHS owner, who is a big armor fan. It looks pretty good as it isn't as bright as the Soviet armor green I have in the paint rack. Once all the components were painted, I returned to the workbench. Before attaching the tracks, I 'painted' the surface of the road wheels and 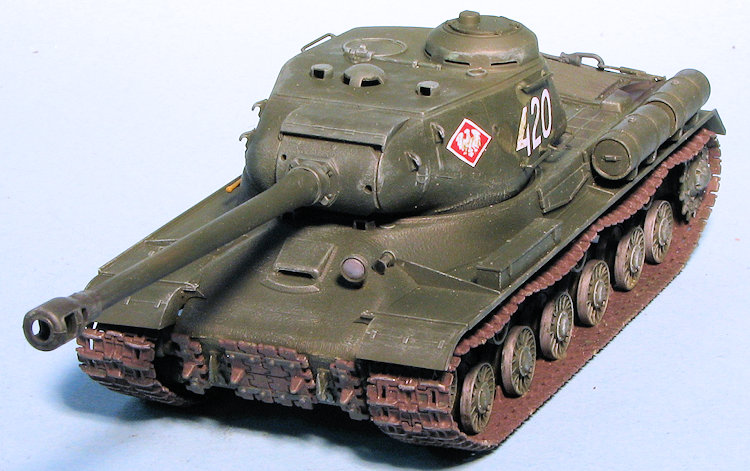 return rollers with a silver Prismacolor pencil. Then the parts were drybrushed with white, even knowing that some of that would be covered by touch up painting.
I then started attaching the tracks. As nicely engineered as these are, they are still a tad tricky to get assembled. I basically attached the upper track along with a pair of those that wrap around and let these dry before tackling the rest. It seemed to work fairly well. Once dry, I enhanced the hold with a bit of superglue under the road wheels and the return rollers. Meanwhile, I glued the fuel drums to the upper hull. A few more bits were added on, including the command hatch halves and the already painted spare tracks on the front and back of the hull. I am terrible at painting small figures so decided to cement these closed. After painting these additional bits, I went back to the tracks and used that silver pencil on the treads. Then the upper and lower hull halves were glued together.
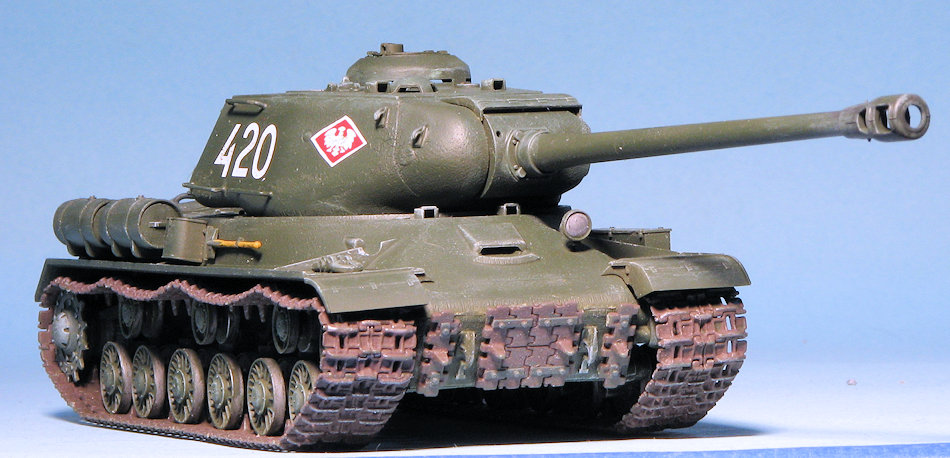
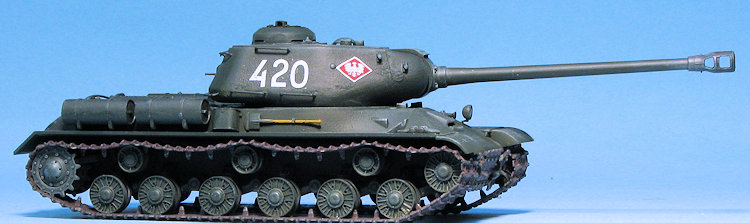
One thing I discovered is that Vallejo's Bronze Green is the same shade as the Tamiya XF-13 so painting additionally added bits was really quite easy. The last items to be added were the tow cables. I'm not all that great at doing these and while I do wish these had been molded in plastic in their entirety, I can und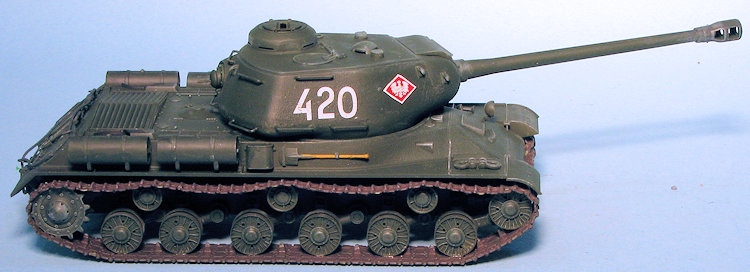 erstand why they were not. I ended up using some super glue to hold the cables to the back of the tank. These were then brush painted with the Vallejo before I did a bit more dry brushing. Just about the last step was to add the decals. Though the kit offers markings for the Polish 4th Heavy Tank Regiment, I wanted something a tad bit different so used markings from a sheet by Toro decals of Poland. This had markings for this unit, but with a slightly different number and a bit differently painted unit badge. I decided to put these directly on the turret without using a gloss coat. Not the best move as it took multiple applications of setting solution to get rid of the silvering.
Some clear matte was brushed over the decals, a bit of pastels used around the exhaust and gun barrel, the turret attached and that was it for this kid.
| CONCLUSIONS |
I have pretty much enjoyed every one of the few Tamiya 1/48 military vehicle kits I've built. They are well engineered and have enough detail to make most modelers happy without being too fiddly. Compared with some of the other kits I've done in this scale, the IS-2 is actually quite large. Though not at all comparable with the nicely weathered armor models done by dedicated builders, it provides a satisfying result even for an AFV tyro such as myself.
| REFERENCES |
https://en.wikipedia.org/wiki/IS_tank_family#IS-2
January 2016 Copyright ModelingMadness.com Thanks to your editor for the review kit. If you would like your product reviewed fairly and fairly quickly, please contactthe editor or see other details in the