Tamiya 1/48 US 2.5 ton 6x6 Airfield Fuel Truck
| KIT #: | 32579 |
| PRICE: | $37.00 SRP |
| DECALS: | Two options |
| REVIEWER: | Scott Van Aken |
| NOTES: |
| HISTORY |
ThеGMC CCKW is a 2.5 ton 6X6 U.S. Army cargo truck that saw service in World War II and the Korean War, often referred to as a "Deuce and a Half" or "Jimmy". The CCKW came in many variants, based on the open or closed cab, and Long Wheel Base (LWB 353) or Short Wheel Base (SWB 352).
 Built to 812,262 copies, CCKWs were employed in large numbers for the Red Ball Express, an enormous convoy system created by Allied forces to supply their forces moving through Europe following the breakout from the D-Day beaches in Normandy, from August 25 to November 16, 1944, when the port facilities at Antwerp were opened. At its peak the Red Ball operated 5,958 vehicles, and carried about 12,500 tons of supplies a day.
The basic chassis was used for a number of other vehicle types, including a dump truck, fuel truck, bomb truck, fire engine, surgical van, flatbed and a number of other uses. These trucks were widely used post war and well into the 1950s and even later by Allied nations.
| THE KIT |
If memory serves, Tamiya previously did a standard truck version of this kit and so is able to use some previous sprues along with new ones to produce this version. with the simple addition of new sprues and leaving out others, a fuel truck was developed.
 Now the process is not a simple as you might think. For instance, the cargo truck was a canvas topped version while this one has a steel cab. Also though the chassis is the same, everything that fits atop it in the rear is new, and those two features alone are enough for two new and nicely done sprues. \
To backtrack a bit, the kit comes with a single piece chassis frame that has a lower engine piece molded into it. The six wheel drive drive-train attached to hefty leaf springs and then to the chassis. The rear tires and wheels are the proper design and fit snugly together. Front wheels have inserts for the inner part of the wheel. Clear bits fit into the doors, which can be posed open.
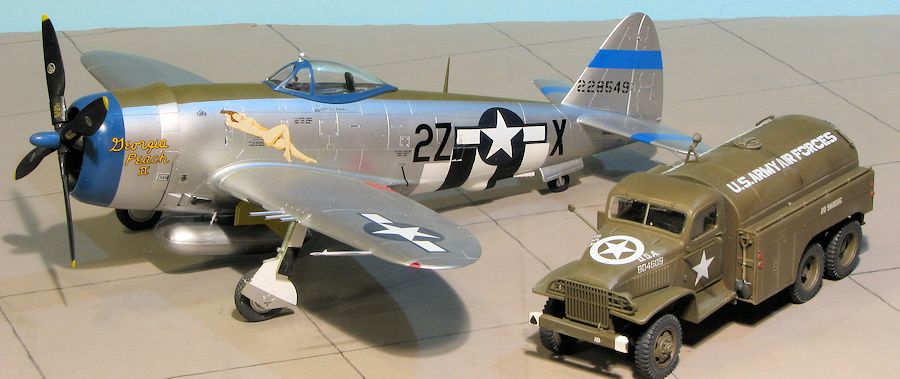
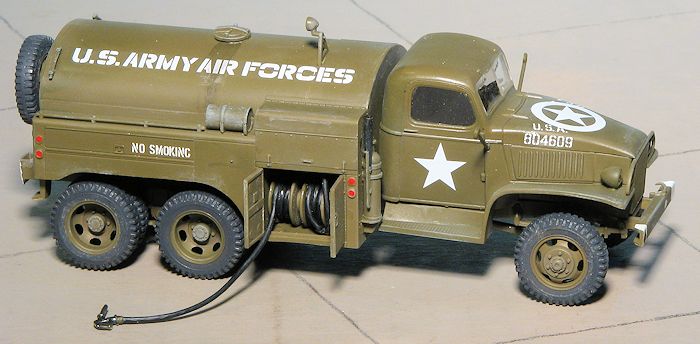
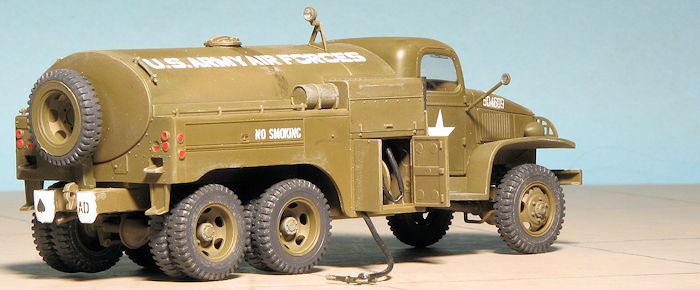
The interior is nicely done with a bench seat, steering column and shifter. The upper cab piece holds the instrument panel and windscreen. There is an extension piece for the back to complete the cab assembly. Tamiya includes a long length of tubing and wire for the fuel lines. One cuts the lines to length, inserts the wire and then wraps this around the two hose reels. Now if one doesn't want to do all that, then the option is there to have the reel access doors closed, but it would be a shame to hide all that. There are a pair of figures included. One is in fatigues holding the fuel nozzle. The other is complete with helmet and leaning on one of the reel access doors. Not sure if this figure would be dressed like this back at a base in England or not, but it is provided.
Markings are included for two similar overall olive drab trucks. It is pretty obvious that these are meant for the European theater and probably for an English base. I would think that if operating in the Pacific or on the Continent that they would not have the 'US Army Air Forces' logo on them, but I could be mistaken so check references.
| CONSTRUCTION |
I started this one by first painting just about everything with Olive Drab, using Pollyscale paint. This, I thought, would save me some time later, though I did need to repaint areas on most pieces after removing them from the sprue or cleaning up mold lines.
Gluing started with the chassis. I attached all of the suspension bits and the exhaust as well as the bumpers. What I did not do ws attach the wheels. This turned out to be a bit of a mistake as it resulted in not having them all touch the ground in the final build. I should have at least tacked them on to ensure everything was aligned, but I figured that Tamiya would have taken that into consideration when engineering the kit. Not so, apparently. At this time, I painted the exhaust with Valljo Tinny Tin.
Next, I painted the tires while on the sprue. These were later removed, the seams sanded down and the tires repainted. I used Floquil Weathered Black for this. I'll be sad when this bottle is gone as Testors has terminated the Floquil brand and all its very nice colors. Meanwhile, the tank section and the interior were slowly built up. Before going too far on the tank section, one has to thread wire into tubing for the hose and then glue and wrap the hose around the included reels. This is not difficult, but the thinness of the 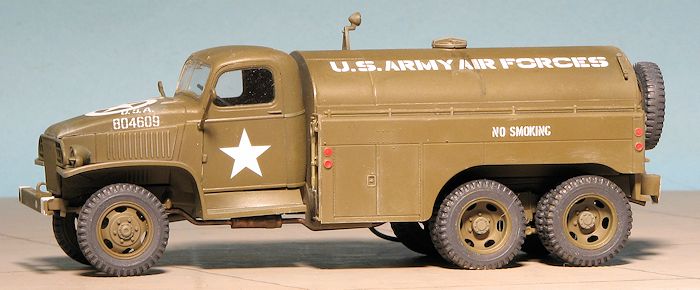 tubing means it will be difficult to maintain its circular profile.
Back in the front, the seat was painted Vallejo British Uniform Brown, the steering wheel and shifters were installed and the decal glued on the dash. This and the radiator were cemented into the upper cab section. This was followed by the cab back and the side pieces. I then attached the fenders. During all this, I thought I had everything in place, but in the end it turned out that the interior was not pushed up high enough so several steps later, I discovered it would not sit flush on the chassis. Even pushing and prying was useless, so builder beware.
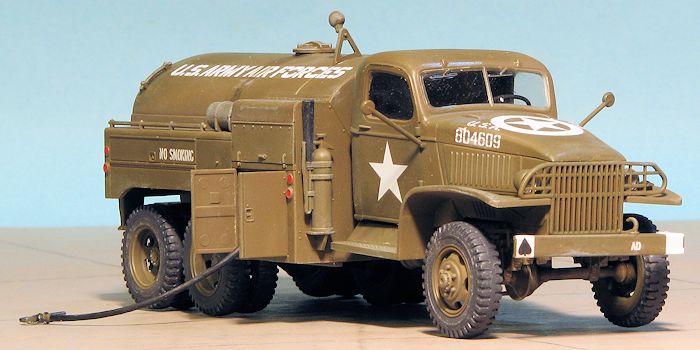
For the windscreen, this was masked and then installed. Side windows were glued into the separate doors first and then masked once in place. All the light housings were glued on, though these did not have the lenses installed. That and gluing on the grille would wait until after decaling so they would be fogged up by the clear matte.
Meanwhile, the rest of the tank was assembled sans reel doors and the lens on the upper light. I then attached it and the cab section to the chassis and this is where I discovered the glitch in the cab section. Some time during all of this one of the bumper tow hooks disappeared and I've still not found it. I then 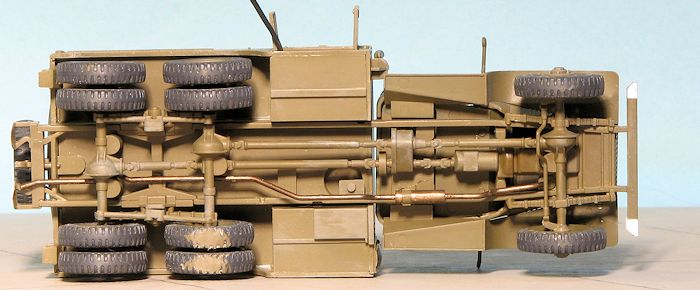 glued on all the wheels and had the truck given a clear gloss in preparation for the decals.
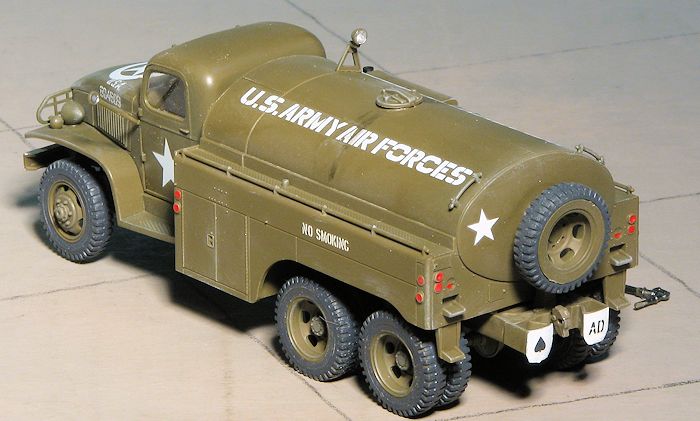
I found the Tamiya decals to be quite nice and thin. They are not totally opaque, but since the are going onto a solid color, it is not apparent. The bumpers have white decals for them that differ in size in the front depending on the markings option you choose. Were I to build this kit again, I would paint these white areas. After several days (yes I am slow), all the decals were on. They responded well to Solvaset. A coat of clear matte was applied and I started adding the last bits.
This meant the clear light lenses, the grille and the doors around the fuel hoses. The second fuel nozzle was attached, a bunch of detail painting was done and the masking was removed from the windows. I then dry brushed the entire vehicle using a light grey to help bring out some details. I also used some AK Interactive 'Kerosene' wash to stain the area around the upper tank filler section. I really suck at weathering, but figured I'd give this a try to see how it looks.
| CONCLUSIONS |
I do not build much in the way of military vehicles, but I like wheeled ones and enjoy doing a 1/48 version from time to time. The kit is very nice and aside from my lack of caution in the areas mentioned, turned out very well. This sort of thing is perfect for the airfield diorama fan and those who just like 1/48 trucks.
| REFERENCES |
http://en.wikipedia.org/wiki/GMC_CCKW
 July 2014
Thanks to me for the review kit. Thanks to www.ak-interactive.com for the weathering wash.
If you would like your product reviewed fairly and fairly quickly, please contactthe editor or see other details in the